• Hi Guest !

    Welcome to the 500Eboard forum.

    Since its founding in late 2008, 500Eboard has become the leading resource on the Internet for all things related to the Mercedes-Benz 500E and E500. In recent years, we have also expanded to include the 400E and E420 models, which are directly related to the 500E/E500.

    We invite you to browse and take advantage of the information and resources here on the site. If you find helpful information, please register for full membership, and you'll find even more resources available. Feel free to ask questions, and make liberal use of the "Search" function to find answers.

    We hope you will become an active contributor to the community!

    Sincerely,
    500Eboard Management

PWNER - gerryvz

Yesterday, Travis Pastrana was in my little town, filming a car jump across the downtown area where folks park their boats called "Ego Alley" just a few yards from the edge of the US Naval Academy. This is for Hoonigan Productions' upcoming film.


Last edited:
Well, now that I tore down and cleaned up my Romanian AK-M last week, I've sort of been bitten by the "gunsmithing" bug in this age of resurgent COVID, and again less leaving the house. So I decided to tear into some of my other guns.

This one is a Remington Model 550-1 .22 caliber, semi-automatic rifle. It was my grandfather's, and was manufactured (via the date code stamped on the barrel) in November, 1950. It was one of the first guns I ever got, when I was in grade school, and was one of the guns that I had hung above my bed as a young teenager, in the gun rack that I made in wood-shop in the 7th grade junior high school.

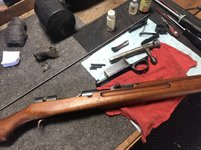
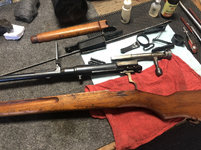
Completely tore down the gun yesterday. Wasn't in horrible condition for a 70-year-old gun, just very very slight/modest surface corrosion, and a fair bit of powder residue on the inside of the receiver. Some soaking and cleaning up with chlorinated brake cleaner (man, is that stuff great, or what ?!?) and she'll be going back together later today, lightly oiled and ready to use for another 70 years. Not worth selling, as it's probably worth $250-300 at the most (common gun made from the 1940s through the 1970s), but a nice, simple, "starter" gun as a step up from a BB gun for a young man, or for some target plinking.

6B2E6DC1-71A7-428D-A252-AB824B03BB0E.jpeg 27E682C5-E962-4DFA-A224-9F1849B182D6.jpeg 25C8FE9B-DC4F-4DC7-929E-EC8787F53DCF.jpeg F0037064-6661-4BAE-A046-1D9A72C8C183.jpeg 94621544-6C1F-4509-A84F-F597DCCD36E4.jpeg

The notable thing about this model is that it can handle all types of .22 rounds .... .22 shorts, .22 longs, and .22 long rifle (which is the most common round). So quite versatile. They don't make .22s like this anymore.
 
Well, now that I tore down and cleaned up my Romanian AK-M last week, I've sort of been bitten by the "gunsmithing" bug in this age of resurgent COVID, and again less leaving the house. So I decided to tear into some of my other guns.

This one is a Remington Model 550-1 .22 caliber, semi-automatic rifle. It was my grandfather's, and was manufactured (via the date code stamped on the barrel) in November, 1950. It was one of the first guns I ever got, when I was in grade school, and was one of the guns that I had hung above my bed as a young teenager, in the gun rack that I made in wood-shop in the 7th grade junior high school.

Completely tore down the gun yesterday. Wasn't in horrible condition for a 70-year-old gun, just very very slight/modest surface corrosion, and a fair bit of powder residue on the inside of the receiver. Some soaking and cleaning up with chlorinated brake cleaner (man, is that stuff great, or what ?!?) and she'll be going back together later today, lightly oiled and ready to use for another 70 years. Not worth selling, as it's probably worth $250-300 at the most (common gun made from the 1940s through the 1970s), but a nice, simple, "starter" gun as a step up from a BB gun for a young man, or for some target plinking.

View attachment 118470 View attachment 118471 View attachment 118472 View attachment 118473 View attachment 118474

The notable thing about this model is that it can handle all types of .22 rounds .... .22 shorts, .22 longs, and .22 long rifle (which is the most common round). So quite versatile. They don't make .22s like this anymore.

A family piece should not be sold, ever, especially like these types of rifles, she’s a beaut. Both of my nieces already want my Makarov and Sig to be handed down to them, and have stared to bicker over which one they want.
 
Just got this link via an e-mail from MB Classic today.


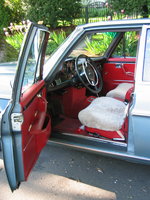
The cover car looks VERY SUSPICIOUSLY like my old 300SEL 6.3 -- gray-blue metallic (DB906) exterior over a red leather interior. I guess I'll see for sure when I get the magazine in a couple of weeks in the mail. Only one or two of these cars were made in this color combination, so they are exceedingly rare. Originally my former car was the demo 6.3 for the MB San Francisco dealership (Van Ness), before being shipped up to Don Rasmussen Co. Mercedes in Portland, and sold to the original owner with a few thousand miles on the odometer.

From the front turn signals, this is very definitely a 1968 or 1969 model (mine was a 1969). The 15-inch "bundt" wheels are incorrect for the car, as they were not introduced until late in 1970, and are typically found on 1971 and 1972 6.3 models. However, they can be forgiven, because the up-sized 15" diameter affords a lot better choices of rubber than the stock 14" steel wheels with hub caps, found on the early 6.3s.

D612542-Mercedes-Benz-Classic-Magazine-22020-Soundtrack-of-300-SEL-63-for-all-readers-and-fans.jpg
 

Attachments

  • IMG_0011.JPG
    IMG_0011.JPG
    732.7 KB · Views: 25
  • DSCF0012.jpg
    DSCF0012.jpg
    76.4 KB · Views: 24
  • IMG_0010.JPG
    IMG_0010.JPG
    1.2 MB · Views: 34
  • IMG_0550.JPG
    IMG_0550.JPG
    1.4 MB · Views: 36
A family piece should not be sold, ever, especially like these types of rifles, she’s a beaut. Both of my nieces already want my Makarov and Sig to be handed down to them, and have stared to bicker over which one they want.
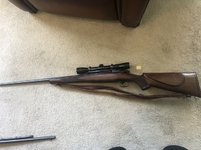
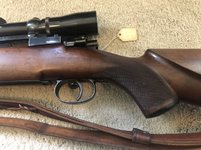
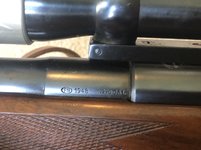
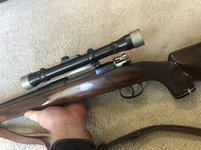
Hey Vookster, I agree wholeheartedly. I went down into the archives today and dredged up a couple more "family pieces" -- a pair of .270 FN (Belgian) Mausers that were owned by my grandfather. The date on one of them is 1948 ... not bad for 72 years old!! One has a custom-made Sukalle barrel; my grandfather made and checkered both rifles' stocks. Excellent weapons for deer, or antifa rioters who attempt an incursion onto my property if and when the civil war begins. Both are accurate past 1,000 yards once zero'd in, and 500-600 yards is no difficulty at all.
86DEF432-AB86-4ED5-87DE-E7333C6FBB4C.jpeg E9229A20-52A1-4612-BAAA-4E63C220936E.jpeg 81862974-2857-40CB-A38F-45F45C2D8735.jpeg D6386A7D-39C4-4241-9516-44AA6A58D233.jpeg AB4CE391-0B76-484B-89E5-7AD261A62B13.jpeg E25DC7D0-0A7F-46B9-873E-06B8AB62B59C.jpeg FEC6B40C-0C73-47A6-A105-B43192179E6D.jpeg 0BA67B16-A22C-441A-81AC-1688B168BDCB.jpeg

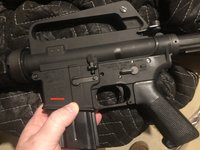
For more close-in defense, if the antifa "peaceful protestors" break the defensive perimeter, is this Vietnam-era Colt XM-177 E2. This was used in Vietnam by US special forces, and is the immediate and direct predecessor to the current M4 used by the US military. Note the selectable fire on the receiver. Unlike the current M4, which can't be owned by civilians, the XM-177 is a fully ATF-legal NFA Class 3 firearm. I obscured the serial number in the photo for obvious reasons.
IMG_3937.jpg 67D132AB-8C06-4C71-95A9-C7A292BB3DF0.jpeg IMG_3936.jpg
 
Last edited:
Yesterday, Travis Pastrana was in my little town, filming a car jump across the downtown area where folks park their boats called "Ego Alley" just a few yards from the edge of the US Naval Academy. This is for Hoonigan Productions' upcoming film.


Following up on this, Hoonigan folks released the video of the jump, officially, yesterday.

It's called "Gymkhana 11: "Ultimate Hometown Shred"


Some nice views of my little town I live in, and its environs. Extended cut coming in 2021.

Enjoy!
 
Congrats gerryvz and best wishes on your wedding Dec 16th 2020!
Thank you !!

On Friday I took my E500 back down to King George, Virginia, which is about 75-80 miles due southwest of me, to the Big Dog Outfitters to pick up the firearms I'd left with the gunsmith there to get worked over. Took the E500 again, and it was a glorious round trip. More or less a solid shakedown cruise for the car after all of the work I'd done with it over the spring and summer.

Screen Shot 2020-12-13 at 11.40.06 AM.jpg

Everything is operating very very well. ZERO check engine lights or other running issues.

This morning (Sunday) I picked up our midshipman at the US Naval Academy front gate at 0810, and drove him up to Dulles Airport in the E500 so he could catch a flight home to Ohio for his Christmas break. It was a wonderful trip on US-50 west to the Washington DC Beltway (I-495 North) with very little traffic that early on the Beltway. Dropped him at Dulles departures, and hot-footed it back toward Annapolis.

A Porsche Cayenne Turbo wanted to play keep-up with me as I got off of the VA-267 Dulles Airport Road back onto the DC Beltway, and onto the bridge back into the relative safety of Maryland (where one can turn their radar detector back on), hitting some early morning speeds of 100-105 MPH on the bridge and beyond, until the I-270 "Y". The Cayenne turned off on I-270 toward Frederick, MD and I kept going on the Beltway headed east. Pretty much a record time for me, from Dulles back to my driveway in literally only 40 minutes.

Screen Shot 2020-12-13 at 11.36.42 AM.jpg

The E500 was as sure-footed as ever, eating up the miles and enjoying the workout.
 
Last edited:
After I got home this morning, I broke out another "oldie" in my Arsenal -- a World War 2 vintage Japanese Arisaka Type 38 battle rifle.

I got this rifle back in 1999 from my next-door neighbor in my first house in the Hollywood District in Northeast Portland. Chuck was a World War 2 veteran of the Pacific, and he and his wife Vera were our neighbors with whom we shared a driveway. We got to know them well and they were like grandparents to my ex-wife and I, before we moved about 25 blocks away into the Governor Chamberlain House in 2000, where we lived until moving to Texas in 2008 (these photos from 2006). Chuck brought this rifle home from the war in the Pacific as a battle trophy.

He put the rifle away in a closet, and never really looked at it much over the years. One night, after a long discussion about World War 2, he brought the rifle over and gave it to me because he knew of my interest in World War 2 history, and firearms. Sadly, Chuck died a couple of years later.

The Type 38 Arisaka was the main battle rifle used by Japanese troops during World War 2. It is a Mauser-style bolt-action rifle, caliber 6.5 x 50mm.

Anyway, I have had the rifle for the past 20 years, and never did much with it. It had never been maintained, and needed to be cleaned up and lubricated. After having gone over the rest of my Arsenal over the past month or so, it was time to tackle this rifle. It had considerable surface rust, particularly on the end of the barrel, the trigger, the butt plate, parts of the bolt, and a few small spots on the receiver.

380E257A-7F85-4015-82DA-BF87EA7C65B6.jpeg 442091AA-EA36-4687-B41C-F31FCE01ECB5.jpeg A92ED1D6-3CE3-46F5-AA71-ECED89367847.jpeg 4E8A9D33-9B1E-483E-8289-2E244EA29D04.jpeg B07032B8-D3BA-4BD5-97D7-8F1213BFD162.jpeg

The good thing is that the rifle is a numbers-matching gun, and is all complete including the cleaning rod.

By "all complete" I also mean that it bears the chrysanthemum, which is the marking that indicates that the rifle is the property of Emperor Hirohito. Most Type 38s had the chrysanthemum ground off when the Japanese surrendered in late 1945, but rifles that were captured in the field (during and after battles) were often sent home and of course, the flower was retained on the top of the receiver.

This example has the flower, as you can see below.

84197155-1479-413B-8CE8-E3BF5839D79E.jpeg

I'm enjoying taking it apart and cleaning every part. It still has lubrication from 1944 in it, quite gummy, but usable. I was finally able to get the bolt operable, and I am looking forward to bringing the gun back to operating condition. It will be a little difficult to get ammunition, but it is still made and I will shoot it in the future.

I have not yet deciphered the markings yet, but will do this in the near future. This will tell me the year it was made, the factory and location where it was made, the serial number, and of course if it was ever re-worked or re-fitted by Japanese government arsenals perhaps in the couple of decades before World War 2.

The Type 38 is not a rare weapon, as many were made, nor is it particularly valuable. However, it is valuable to me because it is an authentic, battle-used Japanese rifle, complete with all markings and equipment, and it was owned by my former neighbor, who picked it up as a young soldier and brought it home.

Cheers,
Gerry
 
A little more detail as I researched the Arisaka. It is a fully numbers-matching gun, verified on five different parts. The serial number and makers mark show it was made between October, 1939 and May, 1940 by the Kokura Arsenal.

The Type 38 went out of production in late 1940, in favor of the Type 99. So, mine is a very late production model.

It is missing the dust cover that fits atop the receiver. Many Japanese troops removed these dust covers and threw them away because they rattled loudly when the bolt was cycled, which could give away a soldier’s position (sort of like the “ping” of a US M-1 Garand when it emptied its clip). So many of these rifles do not have the dust covers. You can easily get originals or reproductions on eBay and other places, if desired.
 
Today I finished the dis-assembly, cleaning, repair, restoration, and re-assembly of the Arisaka Type 38. There was significant rust on the butt-plate, one of the two rifle sling loops, the cleaning rod, end of the barrel and bore, top of the bolt, both the trigger and trigger guard, and the receiver.

I was able to restore it and make everything almost like new again, and also was able to preserve most all of the original bluing from when the rifle was manufactured.

A couple of views of the butt-plate, right after I re-installed it. This butt-plate was COVERED with rust, but cleaned up nicely. I should have gotten a before and then after photo. It is night and day.
IMG_4026.JPG IMG_4024.JPG


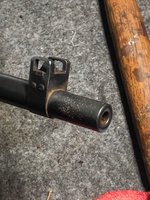
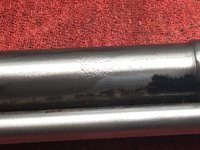
Here is the end of the barrel. This was the very WORST part of the gun, and as you can see it is heavily pitted from corrosion. The first couple of inches of the barrel, and bore and front sight, were COVERED in a thick layer of rust and corrosion. This is likely because the rifle was handled from the muzzle, and thus had human sweat and oil on it. It took some doing to get all of the rust removed, but it turned out pretty nicely, save for the pitting, which I can't do anything about. You can see here in these views the job at about 90% done.
IMG_4031.JPG IMG_4030.JPG IMG_4029.JPG IMG_4028.JPGIMG_4027.JPG


A wire bore brush, along with about 15 patches, and bore cleaner and then brake cleaner, made good and short work of the dirty barrel and rusty bore. Thank goodness for red-can brake cleaner !!

The gun, almost at the complete point of disassembly (I did remove the trigger and sear assembly from the receiver).
IMG_4023.JPG

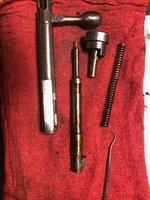
Here are a few views of the Arisaka's bolt, before and after disassembly. Note the heavy, gunky grease in the spring and on the firing pin. This was so gunky that when cycled, the gun would only give a "weak" click for dry-firing. After everything was de-greased, and re-assembled with new lubrication, the firing pin gave a very loud and snappy "click" when the trigger was pulled. Night and day difference. It's what 75-year-old lubrication does. Imagine what 35 or 30-year-old lubricants do in your E500Es too !!!

You can see the number "564" on the bolt, which is the last three digits of the rifle's serial number found on the left side of the receiver. This is how one knows it's a numbers-matching gun. Just like an E500E, LoL !!!
IMG_4032.JPG IMG_4033.JPG IMG_4035.JPG IMG_4036.JPG


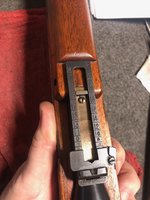
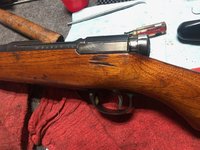
And, after everything was CAREFULLY put back together and lubricated, and I oiled the stock and "furniture" on it, here are some final views of the gun. It is now quite beautiful and I am proud to own this 80-year-old battle rifle. I cannot wait to shoot it next year !!
IMG_4037.JPG IMG_4041.JPG IMG_4040.JPG IMG_4039.JPG IMG_4038.JPG
 
Just got this link via an e-mail from MB Classic today.


The cover car looks VERY SUSPICIOUSLY like my old 300SEL 6.3 -- gray-blue metallic (DB906) exterior over a red leather interior. I guess I'll see for sure when I get the magazine in a couple of weeks in the mail. Only one or two of these cars were made in this color combination, so they are exceedingly rare. Originally my former car was the demo 6.3 for the MB San Francisco dealership (Van Ness), before being shipped up to Don Rasmussen Co. Mercedes in Portland, and sold to the original owner with a few thousand miles on the odometer.

From the front turn signals, this is very definitely a 1968 or 1969 model (mine was a 1969). The 15-inch "bundt" wheels are incorrect for the car, as they were not introduced until late in 1970, and are typically found on 1971 and 1972 6.3 models. However, they can be forgiven, because the up-sized 15" diameter affords a lot better choices of rubber than the stock 14" steel wheels with hub caps, found on the early 6.3s.

View attachment 119094
You've driven that car. :)
 
*** NOTE: If you are offended by guns, firearms, and the Second Amendment, please DO NOT read this post. ***


This afternoon I had an enjoyable 90 minutes or so out in the shop. This was to field-strip and maintain/lubricate my 1914 model Luger, made in 1917 at the Erfurt Arsenal in Germany. This is a 7.65 caliber Luger, often called ".30 caliber Luger," which was the original caliber that the Luger was designed in the 1890s to use.

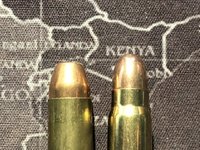
This cartridge was later enlarged to 9 x 19 mm, for the Luger, and this is the "classic" 9mm cartridge that is still produced to this day, and is commonly found in many police and US military sidearms. The 9mm Luger round is also called the "9mm Parabellum" -- para bellum literally the Latin words meaning "For War."

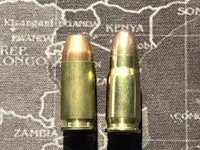
Here you can see a standard 9mm Parabellum round on the left, and a .30 Luger round on the right. Observe that the .30 Luger is "necked down" toward the top of the brass cartridge, and that the bullet is considerably smaller in diameter.
466129C4-7EAA-4A98-A4E2-6CA71AF16D8F.jpeg B388E8B2-6AF1-466E-B570-9F2E6F871DF8.jpeg

This particular .30 Luger ammunition is difficult to get, and only a couple of companies make it. Of course, many billions of regular 9mm Parabellum rounds are made every year.

This Luger I own, which I inherited from my grandfather, is a World War 1 model, and it has Germany military stamps struck into it, meaning that it was accepted by the German Imperial Army (Kaiser Wilhelm's army) as a service weapon.

So, let's get a little bit into stripping it down, for maintenance. I'm going to go slightly beyond just a basic "field strip" here, and show you a few other items. However, I am NOT going to remove the safety lever, the magazine release button, or a few other items associated with the rear toggle mechanism.

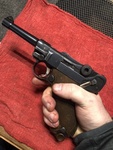
First, here's a photo of the Luger, immediately before commencing disassembly. Before you begin, you need to triple-check that the pistol is not loaded, both by removing and visually inspecting the magazine to ensure that contains no bullets; and also to cycle the pistol's toggle upward and back, to expose the firing chamber. You want to make sure there are no bullets in the chamber, or in the magazine. As mentioned, do both of these checks three times to make sure.
A8DB7209-10DA-4B8A-A9C1-98AE2C675892.jpeg

The first step is to release the magazine, and remove it from the pistol's grip. Note that this is a single-stack magazine, and only holds eight rounds. Typical for the era.
B65713AC-F4CF-4B80-A02E-A3B17F6A83F6.jpeg

Next, let's take a look at a couple of items on the gun. First, the takedown lever, which is just above and forward of the trigger. The takedown lever is rotated downward to release the pistol's slide, for disassembly. We will do that in a minute.
D203E548-1DFD-46C0-9493-7184918C3B0F.jpeg

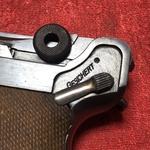
Next, here is the pistol's safety lever. Notice the word "GESICHERT" that is exposed when the lever is rotated downward. This is the German word for "Secured" ... or basically, translated into English gun terms, "Safe."
7BA525F1-7995-4210-9516-8F61FB36930C.jpeg

The next step is to flip the takedown lever 90 degrees downward.
3F24E915-84DE-4411-BA88-844B0C284B45.jpeg

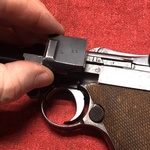
Flipping the lever downward releases the trigger plate, which is lifted off of the side of the pistol.
185CD9B6-35DE-402B-84BE-7358B15DDCE4.jpeg

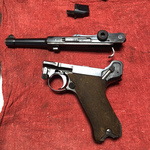
From there, you turn the pistol so that its muzzle is pointing upward, and you then move the slide and barrel assembly upward (forward) to remove it from the handle and trigger assembly. Note that the toggle hook, which hangs down in the photo below, must clear the toggle and action as you slide it forward.
EDBAFBE2-E385-48E0-9B68-B184DC330E07.jpeg

Next, you press the trigger assembly to the side, and out of the lower assembly, with your fingers from the right side of the gun to the left. It should come right out.
24A42626-782A-403D-9DA9-D15DEF073733.jpeg

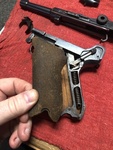
Then it is time to remove the wooden handle grips. Each grip is held onto the gun's frame by a single flat-blade screw at the bottom of the grip. After removing the screw, then carefully lift each grip off of the pistol's frame.
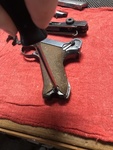
1A0CD258-3222-4523-9017-55498DA0168E.jpeg AA957A20-6153-475C-869E-367092AC31C3.jpeg

You will then see the pistol's toggle spring exposed inside the handle and frame. This is an important element of the gun's design, and is pretty much only found on the Luger.
8F9CCBB9-779C-4F5A-A4FC-C175EAD23A80.jpeg


The next step is to release the bolt and toggle assembly from the upper slide and receiver. This is done by pressing out the large pin at the rear of the upper slide. It presses out from the right side, and should easly press out with your finger. Note that the left side of the pin has a lip, which fits into a machined hole in the left side of the upper slide for re-assembly.
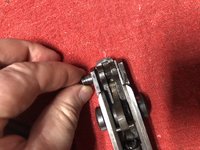
E58C085C-1764-4445-816B-BADD4852D7B7.jpeg

This is what the gun looks like, almost totally disassembled.
4BCC8894-DEE3-49EA-9485-9AC0FB86A12E.jpeg

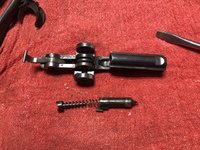
Next, take a look at the bolt assembly. The firing pin is held inside the bolt by spring tension, and a small screw with a tang that is rotated 90 degrees to retain the spring. Rotating this screw with a flat-blade screwdriver releases it and the spring, and you can then pull out the screw/spring/firing pin assembly for inspection.
295F80B2-E19D-4588-9924-BF311DE5F432.jpeg 3C7BDF53-8159-47C7-A533-7A99A7FB7496.jpeg

Here is the spring/firing pin assembly. It looks to be in good condition, fortunately. The second photo is a close-up of the firing pin.
9D744E40-3992-430F-9806-4A639D7C84CD.jpeg 931ACC21-EA5B-4C79-81CE-354DE7A74192.jpeg

The next photo is everything disassembled, and ready for a wipedown, lubrication, and re-assembly.
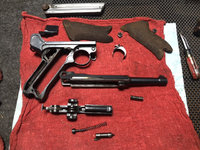
6BA11FCF-47AA-4A16-A276-72E70DFA4FC6.jpeg

Most of the way through re-assembly, with the slide and receiver mechanism back on the pistol. The second photo is a close-up of the toggle hook, where it latches into the bracket that is attached to the toggle spring in the handle.
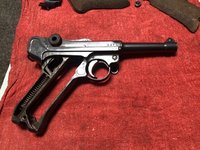
37241385-713E-4735-AC29-FE0055C4A288.jpeg 77E53801-2EBC-498A-97E8-F183AA3FD3E6.jpeg

And here is the pistol, totally lubricated, re-assembled, and ready for use. This weapon is eminently controllable, falls naturally in the hand, and is one of the most easy to aim and fire handguns ever made. The Luger is an excellent example of German innovation and engineering, and was ahead of its time. The Luger was one of the very first semi-automatic pistols ever made.
81E2169A-4A83-46B9-8500-8C9369E7BB4F.jpeg

Cheers,
Gerry
 
Last edited:
Yes, the Luger is a very antiquated design, and basically has been since the 1911 and the Browning Hi-Power came out.

I enjoy the Walther P-38, which was basically the replacement for the Luger. It is about as much of a jump from the Luger as the W124 was from the W123 in terms of technology and reliability. The P-38 still had a single stack magazine and limited capacity, however.

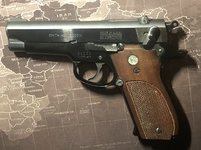
My favorite is the Smith & Wesson Model 39, which was developed after the war for the US military to replace the 1911, but never did. The Model 39 was basically a re-designed P-38. I love the fact that it has a de-cocking safety, exactly like the P-38.

The Model 39 is also the VERY FIRST US-designed “double-action” handgun. Colt 1911 handguns are only single-action, and must be racked back (or the hammer pulled back) before the first shot.

S&W later made the Model 39-2, and then the Model 59. And later on, more evolutionary variants that are even produced today.

Here is my original Model 39. It is in A+ condition, and everything is mint. Again, a single-stack, 8-round magazine.

8BD40E54-7E78-481A-8370-0C271D413EE0.jpegB67CB95A-3651-4701-9649-A2A8C3CDFFD4.jpeg4696752B-3447-4365-A16F-DD022976C758.jpeg6B41FE60-8010-436E-8F73-C6192C53A2A7.jpegB939C191-BF94-42AA-95A0-AC2EE52B8A60.jpeg


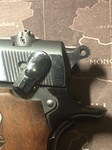
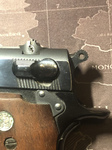
Note the two positions of the de-cocking safety, which literally blocks the hammer from being able to fire:

De-cocked and on safe:

C6C16880-5987-40F8-A81C-A9260C6A06DB.jpeg

Firing position:
366D70FA-FB5F-4953-9010-846479DBB57C.jpeg
 
Never been a fan of a 1911 when compared to a double action handgun. Not to mention never been a huge fan of the .45. Much prefer 9mm, .40 S&W or hot load 10mm.

Yeah the initial pull of a double action is hard(er), but it’s IMHO less awkward than racking back a slide or cocking a hammer when under duress.

Not unlike a revolver IMHO.

For a plastic gun, IMHO hard to beat a Glock overall. I’m too much of a cheap bastard to buy Sigs. The Glock 19 (medium frame) is perfect for concealed carry, which is what I used in Texas. Glock 17 (full frame) — home defense.
 
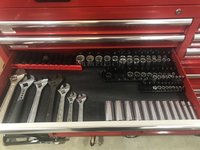
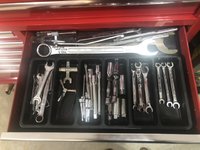
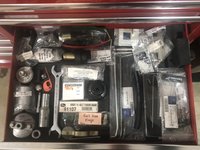
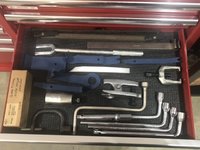
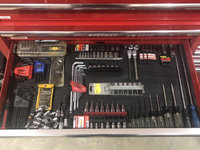
I was out kicking around in the shop tonight. Finished the arrangement of my hand tools some weeks ago, and was putting some tools away from my recent maintenance and disassembly work on my arsenal.

Here is how I have arranged things in the cabinet I got for my birthday in September. This isn’t every drawer, but covers many of them.

Ratchets & extensions:
8B67AC31-AC5D-4C88-8094-1657AE58CBFB.jpeg

Sockets (metric):
5B83E4AB-99DC-4A42-850C-AB75173BA801.jpeg

Sockets (Standard) & crescent wrenches:
465DDA63-7F35-4844-ABE9-2D55F744A2F0.jpeg

Wrenches (metric
F3476F16-DB31-4A62-8C14-69B71FE0D1B8.jpeg

More wrenches (metric):
28035616-2C41-4FC6-B3E8-6E26797DEA00.jpeg

Misc wrenches (metric):
428C162A-5BEC-4D3D-B76A-30EA91DE23A0.jpeg

Misc. wrenches, nut-drivers & tools:
21A9A9A8-C60D-42DA-87C2-EBEED296C805.jpeg

MB special tools (drawer 1):
8B4A49F1-FB87-4517-9F31-10B724AEF857.jpeg

MB special tools (drawer 2):
F22EA8C5-FBA0-4CE4-9A1E-47C08F5E8B54.jpeg

Measurement tools:
C4E4FA1A-45C1-4FEA-A32F-2D784BBADAE0.jpeg

EZ-out, Dremel & cutting tools:
8C139314-743A-4AF9-9F75-0EE22495B74D.jpeg

Allen & Torx keys:
3B08D89A-F985-4107-9E1D-5EF2952EAB89.jpeg

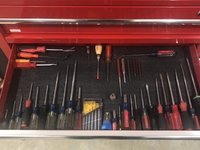
Screwdrivers:
F6ABDA1F-DE2B-43B1-88BD-653E9A1713C3.jpeg

Pliers (one-half of full-width drawer):
4457366C-EFF7-4A2D-AF1C-C92E8AF072B5.jpeg

Pliers (second half of full-width drawer):
9A084CAA-F235-441E-9075-C9D3712CCC28.jpeg
 
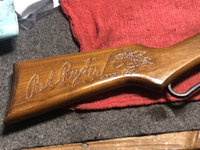
Well, last up in the arsenal refirb is one of my most meaningful guns: the Daisy Red Ryder carbine BB gun that my folks gave me for Christmas, 1978, when I was 11 years old. I've had this gun ever since. It sat out on one of my workbenches in my Texas garage for a couple of years, and yes, the humidity did its work on the gun in a few places. The close-ups are far worse than the overall rust on the gun.

It still fires like the day I opened it up. My Dad built a wooden-framed target with a canvas flap in our back-yard, and I used it quite a bit for shooting. I also had a target set up in our back-yard in Houston, and my son and I used to do some target shooting when he was young.

I'll clean it up, take it apart, and put it back together again. The barrel is painted metal, rather than blued metal that is typical with "real" guns. So, I need to figure out what I want to do in terms of stripping and repainting it, or if I want to leave it as-is and just remove the rust and touch up the areas with rust patina. I'm leaning toward stripping and repainting, simply because this is not a collector gun ... if it was, I'd never consider repainting it !!

Anyway, here are some photos, as the gun now stands.

2FFD0632-5FB0-4679-A89B-E1ABAE020EE7.jpeg EC3E07EF-2458-4E93-BBE2-46AB2F4831E7.jpeg 826E4423-07F0-44F5-B0E5-765B7E8BC86B.jpeg 6C7ADA26-C720-43D5-9D72-282B06A18972.jpeg 226804C4-153C-41B9-BBA1-8F68B9719992.jpeg 741F3D7E-B686-461A-A922-B14F830EEF74.jpeg 81710454-5464-48EA-B010-B7982B59AC10.jpeg
 
@gerryvz, Was your name “Ralphy” back then?

Kid, You’ll shoot your eye out!:)
You watch and wait. My Red Ryder is going to be like new in the coming days and weeks !!

I think it is shooting a little weakly, so I’m going to have to overhaul the internals to re-seal it. It used a rubbery plastic seal along with a piece of felt, though Daisy now offers them also in a synthetic o-ring material. The spare parts are still available from Daisy and other vendors.

To do this, I’ll oil the internal felt o-ring and piston seal with Ballistol. Ballistol was developed by the German Imperial Army just before World War 1 for lubricating it’s firearms, and is still quite excellent to this day. It was also designed by the Germans to take care of wood and leather in addition to lubricating firearms.

338040CE-F94A-4211-83F9-006F68141AD7.jpeg

You can buy Ballistol on Amazon.

Daisy in the late 1980s began neutering the Red Ryder BB guns, making them less powerful and putting warning stickers all over them. Because, greedy lawyers sued. Foetunately, mine is a late 1970s model.

I’m going to do some “before” and “after” tests on soda and soup cans in my backyard. And maybe sting a couple of squirrels’ pelts when Laura isn’t looking. :sniper:
 
Started disassembly of the Daisy Red Ryder BB gun today.

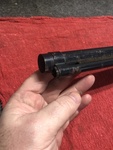
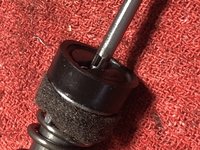
Here is the end of the barrel and BB loading hole, which Daisy calls the "shot tube". The shot tube simply screws off and out of the end of the barrel.
A7A99A50-88D8-48C5-AE5E-BF7436E8749D.jpeg B1537D91-5D57-49D1-B2CC-51283694DD9F.jpeg


Here is the shot tube, on the bench. The second photo shows what the end of the barrel looks like, along with the front sight. Note that the barrel of the gun is not really a barrel at all -- it is a large diameter tube that serves as the reservoir for up to 650 BBs. The "barrel" in the classic sense of the word ... meaning the "muzzle" where the BB is shot from, is actually the round end of the shot tube, as shown above.
6599FE76-6570-4CD5-A863-055787AEA5A3.jpeg 07C0710B-A670-4EE7-A331-1D3A11603E17.jpeg


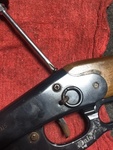
The next step in disassembly is the removal of the two screws that hold the gun's stock, to the receiver. One is on the side of the receiver, and one is on the top of the receiver just forward of the stock itself. On my gun, both are Philips head screws.
0303F6E1-E824-4385-B7D9-9A40DCD4FAF0.jpeg CB839A78-959C-471F-8319-F58EFF78433F.jpeg


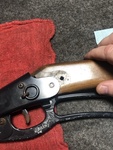
Carefully slide the stock out of the receiver. The embedded spring in the end of the stock is actually the trigger spring.
90369A28-88DA-48C5-B3B3-0A374B03C96C.jpeg 2B7A97AB-52D7-41AE-99D8-D4B2797B3211.jpeg


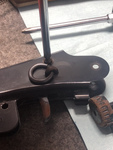
Next, remove the Philips head screw and washer that serve as the pivot point for the cocking lever. Then remove the cocking lever from the receiver.
2FC534C9-5826-4C1F-B6A0-E5723B0F25FC.jpeg


From there, remove the final Philips head screw and washer, that serve as the pivot point for the trigger and attach it to the sear.
785AB9F6-BB78-48C2-8E3A-B6D081D7560E.jpeg


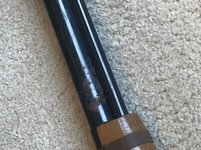
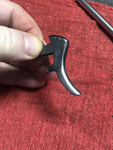
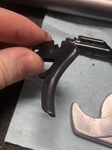
Removing the trigger from the receiver, you can see that the finger portion of it has some surface rust.
6C3B4B4E-AE35-401D-8261-957A4EE74C89.jpeg


A couple of minutes with a wire wheel made short work of the surface rust. I will apply gun "bluing" fluid to return the trigger to factory, as-new condition.
9FE35EC0-F9E8-4273-A53A-3C27858C6959.jpeg


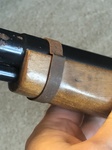
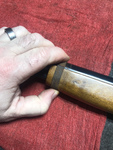
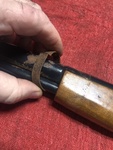
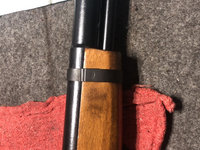
Then, I removed the metal band from the wooden "forearm," by sliding it forward toward the end of the barrel.
5B6C6EB9-A0CB-4C0A-AA44-F2E850D1817C.jpeg 784F0DBC-0321-497F-B578-FDB45F1F6D5E.jpeg 242CA7EB-73A9-44A1-A5EA-6038FCF5A638.jpeg


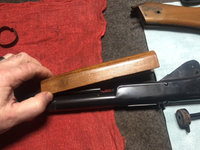
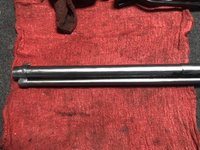
There is one Philips head wood screw that attaches the underside of the forearm to the barrel. Remove this screw, and then lift the forearm off of the barrel, as shown below.
B06E7BA3-8149-4332-B879-4A94118778EB.jpeg


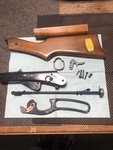
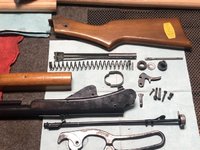
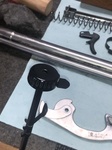
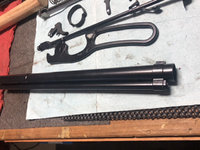
And, here is the Red Ryder about 90% disassembled. I still need to remove the plunger assembly and plunger spring from inside the receiver. This is going to take a special tool, that I'll need to create, to do this. I hope to do this in the next couple of days. But, basically, you see most of the assembly of the Red Ryder BB gun as disassembled.
082F7340-DBC2-45EC-B049-6C585C0D9DD4.jpeg
 
Finalized BB gun disassembly today, and started restoration.

First, I had to make my own special tool, to release the main spring pressure so that I could pull the spring retainer out and remove the pressure spring assembly from the barrel.

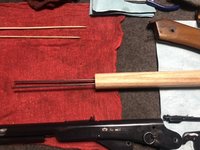
To make the tool, I got a 3-foot length of 1/8” steel rod from Home Depot, and cut two 8.5” pieces from it with a hacksaw. Then I drilled two 1/8” holes into the end of a 10” length of 1 1/8” oak dowel.

The holes were 1” deep. I hammered the lengths of metal Rod into the holes. The two holes had to be 5/8” apart to space them correctly to press down on opposite sides of the spring, to compress it.

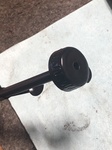
Here is the tool:
B134C5A0-70B9-42E5-8094-88BE73CF6219.jpeg D5049263-B08A-4906-9C25-42C8D6812062.jpeg

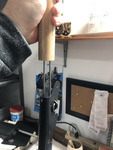
The next step was to use the tool to press down onto the spring. This releases the spring’s pressure on the retaining piece, which resides in a vertical slot in the barrel.
6DCE4D64-4881-4A36-9262-EBCBFC618D62.jpeg

Here I am removing the retaining plate with a pair of needle-nose pliers, while the spring is compressed.
21B63876-8D4C-4D9E-B0A0-5A8E9B938C24.jpeg

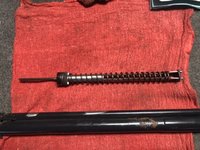
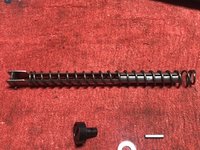
Then, with the spring releases and the retainer pulled out, the spring assembly can be pulled out the back of the barrel, as shown. Here’s what it looks like.
85B88F25-7183-4AA1-8B96-52CFDF0F7FC4.jpeg 3C1E9701-F975-444E-9E7F-3D71F4B71A5E.jpeg

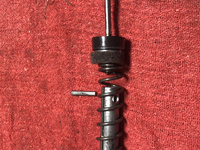
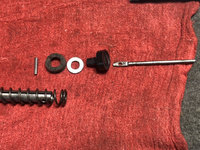
Once the spring assembly is removed, you can compress it by hand on the top of the work bench, and pull the retaining pin. This allows you to remove all of the parts attached to it.
BAED55E6-495F-4DC3-A1DF-BBEAD7B1C920.jpeg 495395A1-CA97-43F3-A513-72135AF20A0F.jpeg FE8EB3E4-4679-49B4-A501-28FB6C43EF0B.jpeg

With this step done, the Red Ryder is totally disassembled.
DAB43766-3765-494B-B99E-BC6E312C9E69.jpeg

From there, the restoration begins. I began removing the paint from the cocking lever and the barrel assembly with my wire wheel.
68963BD4-0799-4F3A-A238-47F0D1C3AB1B.jpeg 4032AAFF-0380-4C33-A513-464FBCAA9426.jpeg 6475B34D-7838-41F3-BD95-5522359FFE8F.jpeg C71CF6AD-7972-4009-8459-79D1BFD70B43.jpeg

Once the paint and rust spots are removed, I will repaint the barrel and cocking lever with special Krylon spray paint.

The trigger and spring retainer will be re-blued, as they came with a blued — rather than painted — surface.
 
Last edited:
Today I re-blued several parts of the Red Ryder BB gun, and began repainting others.

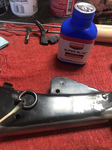
Here, I am applying blueing fluid to the trigger, forearm band, pressure spring retainer,
nd to the heads of the screws that hold the stock and trigger to the receiver.

B2B93105-96EA-44DD-86F8-9E387B7A5D01.jpeg 6DBB6572-4AB4-4B4F-88FC-CEE1FF0E3965.jpeg 049A723D-00DF-493B-9194-1DCC632DF97C.jpeg F22ADF54-1CA0-46B3-8306-A8849D42F719.jpeg 2CC5AF94-8C74-4D0A-8892-18B5ED00A390.jpeg

Next, I masked off the white plastic retainer I set into the cocking lever, using small pieces of masking tape and an X-acto knife, as shown below. This is so that the white retainer doesn’t get painted.
7FE6F7AB-45F5-4100-AB23-6C53480AA2B3.jpeg B3AB4640-A1EB-40B1-BD10-A74F7175B1CF.jpeg 2FC720CF-EF9A-407F-875F-DAA394E3B141.jpeg


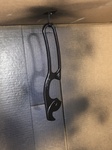
Then, I created a miniature paint booth out of a cardboard box and a hook, and I painted the cocking lever and the end of the shot tube (muzzle).

Before paint:
7C12E387-6607-448C-A778-94C24B315D13.jpeg


After one coat of paint:
5EB57C1E-671C-46EB-B842-5D4D25AC5FCB.jpeg

Painting the cocking lever:
2DF47C04-555B-484E-895E-73D2785F86B2.jpeg 3935567B-4E49-41DB-9E17-647B9EC7C113.jpeg


Three coats of paint later:
09249947-EC2D-4B1E-8712-08D4A529E203.jpeg 07B1A3DC-5F18-4DE7-A03D-9CE85B06893E.jpeg 457A92B3-ACF4-440F-9492-43CA7911BBF2.jpeg
5EB57C1E-671C-46EB-B842-5D4D25AC5FCB.jpeg
 
Trigger as removed from gun:
[500Eboard] 6C3B4B4E-AE35-401D-8261-957A4EE74C89.jpg

Trigger with rust removed (with a wire wheel):
[500Eboard] 9FE35EC0-F9E8-4273-A53A-3C27858C6959.jpg

Trigger in the process of being re-blued:
[500Eboard] B2B93105-96EA-44DD-86F8-9E387B7A5D01.jpg

Trigger after five applications of cold-blueing fluid:
IMG_4232.jpg
 
You're a man with many interests, skills and talent! Nice collection!
Thank you for the compliment. Don't know about the "skills" and "talent" part of it, but you are 110% correct on the "many interests" part ! I can't wait until I retire, so I can enjoy doing this kind of hand-work more more often. COVID has really re-kindled my interest and passion for gun-smithing.
 
Finished up the Daisy Red Ryder BB gun refurbishment today.

Last night, I applied the second coat of paint to the receiver and barrel, and let it dry overnight. Early this morning, I applied the third coat of black semi-gloss paint. Then I touched up a couple of areas where the paint was thin, on each end of the gun. Here's what the receiver and barrel looked like, after the third coat of paint dried this morning.
5BE37AF7-B521-404E-B873-6DAA0DDF7501.jpeg 6AF79A24-6D61-4962-87F2-9A390073F754.jpeg DC2140B5-4B06-418C-8D79-7D06054955A9.jpeg

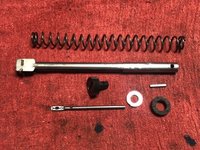
From there, it was time to begin re-assembly. The first part to re-assemble was the pressure spring and piston assembly. Here are the assembled parts.
AD536949-1F35-496C-8D83-8914E318C85A.jpeg

To re-assemble, you insert the spring onto the piston rod, so it looks like this:
83081646-A115-4B77-9A2C-6CAB39CBF6F3.jpeg D672F854-43E7-41D9-8DB7-491BB97E0FD7.jpeg

Then, you insert the air tube into the end of the piston seal, so that the holes in each line up. The spring retaining pin will go through both of these holes as the final re-assembly step.
D4B38882-7A20-4094-A2E3-7537A5D659C9.jpeg

After installing the felt oil pad and the steel washer onto the end of the black rubber piston seal, I was able to compress the spring by hand, down far enough to insert the spring retaining pin through the piston rod. Here's what everything looks like, immediately after re-assembly.
3AEE273E-96C9-4EFC-A806-F6F366177F54.jpeg 630D3B97-591C-4B23-AEDE-51421C77FFB1.jpeg

Then, I installed the wooden forearm grip, and screwed in the Philips head screw into the lower part of the barrel.
F458F764-38C1-4DA1-91CE-6D65B36F3404.jpeg

The next step is to slip the steel band over the end of the barrel, and down onto the front part of the wooden forearm. It's a slip fit. Sure looks nice after five coats of cold blueing fluid !!
16A8E7CE-D2AF-4BA4-8A64-AB9A105B6D69.jpeg 965F2ECB-0BA4-40C4-A01A-C8C987A33004.jpeg 0500DF71-22B9-4642-AB29-6D105414AC53.jpeg C12A6A74-8F10-4221-A537-DF4C3DD9F3C7.jpeg

After that, I installed the pressure spring and plunger assembly down into the barrel, but inserting it through the back of the receiver. You can see it fully inserted in the photo below.
C4F45480-7883-4CA7-B898-6366195EB390.jpeg

Then I had to break out my self-made two-pronged plunger spring compressor tool, to push down on the spring down in the barrel. This would allow me to insert the spring retainer just behind the gun's rear sight. Before I did that, I made a slight adjustment to the compressor tool, though. Using a pair of needle-nose pliers, I very slightly bent the ends of each of the rods slightly inward. This allowed a slightly better grip on the spring as I pushed down to compress the plunger spring. You can see a couple of views of the slightly modified tool below.
72EE04A0-8046-4ED3-AB54-AEF139CF3C6B.jpeg 84385F4C-2563-4124-AF27-DE92C3E090DE.jpeg

Compressing the spring was easy, and after two tries, I was able to insert the spring retainer down into the top of the receiver.
FC9036EA-A1B9-4F2B-B4E4-58DFA3BC3560.jpeg

From there, I began to install the cocking lever, which was attached by one short nut and bolt....
C1F95DA1-0D77-4051-88B4-C9D978668A6C.jpeg 6FFB9CD5-4865-42EA-B808-DA1F94BF4BFD.jpeg C78575B7-E796-4B91-8A1C-256A53921573.jpeg

And then the trigger and sear, which was also attached by a long nut and bolt....
5D3D2610-C2C7-4765-A9C1-2AC50A4E1C06.jpeg

And the last step was to attach the wooden stock with the vertical wood screw through the back of the receiver, and the one long horizontal through bolt in the back of the receiver.

That was it, and here are a few views of the final job! A test-shooting with about 30 BBs confirmed that all is well, and the gun is ready to sting the pelts of whatever wayward squirrels and groundhogs dare grace my back-yard !!!
44144F57-57AD-4C2F-B080-9B7769EE3C6E.jpeg D5A95688-D591-4697-A12C-D0106E37AB17.jpeg C50616FF-0CB9-416B-B564-795FF1BDF024.jpeg 544DFB07-0624-4127-9BDE-83AEB7FCFF2B.jpeg 25FDDC44-4ACC-492F-8187-6815D6038764.jpeg 269A6FA0-A973-41C4-B5FF-D19BBEE1E732.jpeg
 
Last edited:
Well, I think I'm ready for the civil war, at least from an armament perspective. Of course, the BB gun should be enough to cow any snowflake Antifa members who try to break into my house when they start over-running the community. But if not, I’m ready for them.

Now that I've literally run out of guns to refurbish, clean and maintain, I have to look for my next COVID project. @liviu165 won't let me sleep until I complete the 560SEC rear suspension replacement and refurb, so I guess that has to be next on the docket. That, and perhaps the debut of the 126board.com. Another project that @liviu165 is shaming me about. :lolol:
We'll need to give you a new nickname, Rambo500!
 
Now that I've literally run out of guns to refurbish, clean and maintain, I have to look for my next COVID project. @liviu165 won't let me sleep until I complete the 560SEC rear suspension replacement and refurb, so I guess that has to be next on the docket. That, and perhaps the debut of the 126board.com. Another project that @liviu165 is shaming me about. :lolol:
Don't worry (for now), I haven't been any better either. I took the rest of my vacation in the last 2 weeks of the year and I was supposed (by my schedule) to be ready with the SEC by Christmas, but relaxing was better so I dragged my feet with the car repairs. I need to put it together, finish the differential reseal writeup, add few words about the prop shaft (asked about by @GRAEME JOHNSON) and then focus on that patent request.

I knew up front that your suspension replacement will take longer than you thought. That is not a hard project, but is a long one. Provided that you are done with your 500 repairs for a while, my suggestion would be to start the 126board first, then the SEC project (assuming the new site startup will not take a very long time). Therefore, at the time you work on your SEC suspension project you can update your thread live on the new 126 site with your progress and also see how the new site functions. This way you can shoot two birds with one shot (assuming you don't have to shoot anybody else in the meantime :LOL: ).
 
With some more driving in recent days, I've now got more than 1,000 miles (1,600 km) on the "re-done" top-end of the M119 engine in the E500. No leaks from anywhere, fortunately.

Even the small transmission fluid leak was taken care of through the replacement of the transmission overload protection switch.

It's NIIIICE to have a drip-free garage floor when I pull the car out.

I hope the HOW-TO that I did inspires many of you (individual jobs or big jobs) to do this needed work on your cars, particularly the front crankshaft seal replacement, and the camshaft seal replacement. If your car has much more than 100-125,000 miles on it, it's a pretty strong bet that you will be developing leaks from these seals.
Gerry, with your in-depth How-To's gives me that push to do it where otherwise I'd be "too chicken". Thank you and others who have shared their time, wisdom and experience to those of us trying to get there. My hats off to all of you.
 
With some more driving in recent days, I've now got more than 1,000 miles (1,600 km) on the "re-done" top-end of the M119 engine in the E500. No leaks from anywhere, fortunately.
Great update! That must be a great feeling to feel the engine running strong because of your own hands.
 
I have been spending the early part of this afternoon in my basement, going through ALL of the approximately 20 bins of parts, and two six-deck shelving units in my basement. This is much of my stash of parts.

I am finding many parts of which I have far too many extras. A lot of things like bulb-out relays, combination relays, and so forth. Things I have six, and eight, and 10 spares of. I have FOUR spare E500E ETAs (all with good wiring date codes). Seeing as I just put a rebuilt one into my car, I probably only need ONE spare ETA, not the three extras beyond that, that I have. 6-7 MAFs ... I probably only need 1-2 spare MAFs. I think I now have FOUR spares of each CAN computer. I probably only need 1-2 spares.

I am going to be putting some new parts up for sale. Perhaps I'll make some combinations of relays together so as to make things more attractive for folks.

It's becoming apparent that I need to start culling my hoard of some parts, and I will do this as I have a better mental inventory of what I have, and start putting some parts up for sale.

Sigh.
 
You are going about this the wrong way, Gerry. Instead of turning loose "excess" spares, you need to buy another 036, maybe two. Right, @JC220 ?

BTW - before letting go any electronic modules/MAFs, you may want to test some in your car first, to verify they are good. Would be a bummer to think your 2 spares are good and then find out later they are not, and you sold all the others. MAF's in particular need a few hundred miles installed in the car after passing a basic test in the driveway viewing HHT-Win data at different RPM's. Don't ask how I know.

:jono:
 
I will test all relays in my cars before putting them up for sale. The MAFs and ETAs I will also do this with. The ETAs are pretty simple to test for basic functionality, by plugging into the plug and listening for the right sounds, and seeing if things move as they shoud.

MAFs will be more involved to test. It's one reason why I have so many spares. I have a couple of spare MAFs for my M104 as well, but I'll hang onto those as spares.
 
Back in the spring of 2019, I parked my 560SEC in my driveway and covered it with a good weatherproof cover. There were several issues that I had been working on, including:
  • A cracked rear windscreen, a victim of the painters in Houston who had removed it to paint the car and had cracked it. I had obtained a used rear windscreen, with tint on it, which is in my garage and I needed to remove the tint and prepare for installation;
  • A non-working passenger-side seatbelt presenter. I had worked extensively on this, testing and replacing every component ad nauseum, diagnosing it, and finally came to the conclusion that the wiring had evidently been damaged (pinched) at the front door, where the door sill passes over the wiring bundle. I believe this was also probably a casualty of the body shop that did the painting on the car, when they removed and replaced the door sill plate.
  • An ABS light, which quite suddenly came on in the spring of 2019. I think this is because of a faulty component in the system -- either a wheel sensor which has iron particles on it (I will clean these sensors off -- I once had this issue many years ago on my E500), or less but somewhat likely, a faulty wheel sensor or even the pump (which I have a spare of; and is shared with my G-wagen).
All of these issues collectively caused me to park the car and decide to work on it at a later time. I also had gotten fairly far into the rear subframe replacement, but never finished that either.

In any case, I needed to move the car in the driveway today, as we are having several cubic yards of pea gravel delivered by dump truck, for a backyard project, and I needed the space on the driveway for the gravel. The last time I'd driven the car was in April or May of 2019.

So, I decided to start the car, so I could move it. I had about two weeks ago put 5 gallons of fresh Shell Super 93 gas into the tank (the tank had 2-3 gallons of old gas in it), as I had anticipated that I would be starting up the car and working on it this summer. The car had been on a battery maintainer all of this time, through all seasons, so the battery was in fine condition.

After a couple of times turning the key to fire the fuel pumps, I then cranked the car for about 5 seconds. Didn't catch. Then I cranked it again for 2-3 seconds, and it caught. I could feel and hear the engine coming to life, and then it settled right down into a lopey idle. I immediately smelled gas inside the car (through the vents), so I went around to the engine (hood was up) and I saw that it was spraying fuel out of one of the fuel hoses, onto the top of the intake manifold. This was from a temporary fuel line repair that I made several years ago with new fuel line and a couple of ring clamps, in anticipation of replacing that fuel line with a brand new factory line that I have in my parts stock. I had replaced the other line about 10 years ago when I pulled the heads off of the engine.

I tightened up the clamps, and that immediately stopped the fuel leak. I let the engine warm up, and then took it for a very short drive of about 1 block from my house, and turned around. All was well. Pulled it into the driveway, let it continue to warm up, and then took it out for about a 2-3 mile loop near my house. Again, all was well.

ABS light was on, and I had no ABS, and I felt a very slight amount of play in the steering wheel (likely an idler arm bushing or other steering component), but everything else felt normal with the car. So I have some diagnosis and moderate repairs to do, but the SEC is alive and kicking !!
 
Back in the spring of 2019, I parked my 560SEC in my driveway and covered it with a good weatherproof cover.
I was wondering what happened to your SEC, I noticed you haven't mentioned it lately. I remember that rear subframe project you started, can't even remember how far back that was.
 

Who has viewed this thread (Total: 9) View details

Back
Top