Rear Crankshaft Main Bearing Seal: Service and Repair
Replacement:

Preparation
- Transmission removed.
- Driveplate removed.
Overview
- Remove radial seal (16), refer to step 1 below.
- Lubricate sealing lip of radial seal (15) with oil.
- Using insertion tool, special tool 117 589 00 43 00 install radial seal (16) refer to steps 3 to 6 below.
- Install riven plates (20).
- Check for at rear of engine when running.
Procedure
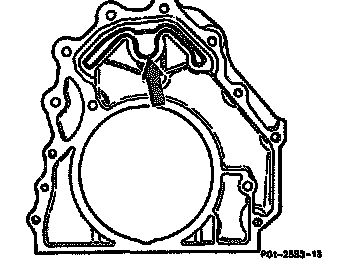
NOTE:
- The end cover guides the engine oil from the main oil gallery (arrow) to the two oil passages for the oil supply of the cylinder heads and is sealed with a sealing compound.
- For this reason, the radial seal should be replaced if possible without removing the end cover.
- a leak exists at the rear, first of all clean engine and spray dried surrounding area with Mercedes-Benz white contrast spray, Part No. 000 989 03 69.
- Support engine, run and determine leakage point.
- The running surface for the rear radial seal on the crankshaft is hardened and ground without a spiral.

1. Pry out radial seal with a screwdriver.
CAUTION:
- Do not damage crankshaft and mounting hole for the radial seal.
- Use clean cloth as a base.

Legend
Position of sealing lip
A = radial seal. standard psition
B = radial seal, repair positing
2. Examine running surface on crankshaft.
- If running surface has grooves, install repair size radial seal (16) with sealing lip offset 1.75 mm to inside, and maintain offset repair position of radial seal.
3. Bolt inner part of special tool 117 589 00 43 00 to crankshaft.
4. Coat radial seal between dust lip and sealing lip with engine oil.
CAUTION:
- Do not use grease.
- Grease prevents the sealing lip of the radial seal transporting back the engine Oil.
5. Push radial seal onto inner part of special tool 117 589 00 43 00.

6. Press radial sea] into the end cover With the insertion toot 117 689 00 43 00.
NOTE: The dust lip must not touch the crankshaft otherwise leaks will occur as a result of the pumping effect.
7. Check rear of engine for legs with engine running.