• Hi Guest !

    Welcome to the 500Eboard forum.

    Since its founding in late 2008, 500Eboard has become the leading resource on the Internet for all things related to the Mercedes-Benz 500E and E500. In recent years, we have also expanded to include the 400E and E420 models, which are directly related to the 500E/E500.

    We invite you to browse and take advantage of the information and resources here on the site. If you find helpful information, please register for full membership, and you'll find even more resources available. Feel free to ask questions, and make liberal use of the "Search" function to find answers.

    We hope you will become an active contributor to the community!

    Sincerely,
    500Eboard Management

OWNER bclifton (300D)

@bclifton,
Brian, Your doing a bang up job tackling that sunroof. I have to fix mine. Ever since a small roller fell out in my lap one day, I haven’t used it in years. My intent is to fix it when my headliner is out for replacement.

If you haven’t seen it @JC220 has an extensive thread on rebuilding a 124 sunroof. I don’t know if it will help or not but there is a lot of narrative and pics. He did a thorough job of explaining his work.

I intend to use both his and now your threads when I get to it. Keep up the good work and take lots of pics.

Good Luck with it!

Take Care
 
Was your tunk seal review not glowing? If they are removing reviews they don't like... that's not cool.

Great work on the sunroof, btw!
Yeah - that was a bit concerning. It seems to use a 3rd party review integration, judge.me. But they might give power to the site owner to hide reviews. There could be other hidden reviews too.

Here's what I wrote which I thought was fair:
1715618968637.png

RE: the sunroof, thanks! I'll 100% try to capture a more detailed step-by-step guide when it's go time. I'm not sure how much is different for the later model cars (ex: the E500E) but a lot of it should still be applicable. I'll try to do the same and capture the steps for retrofitting the plastic trunk liner too when it's time.
 
Last edited:
Got a few small updates - something always broken 😂

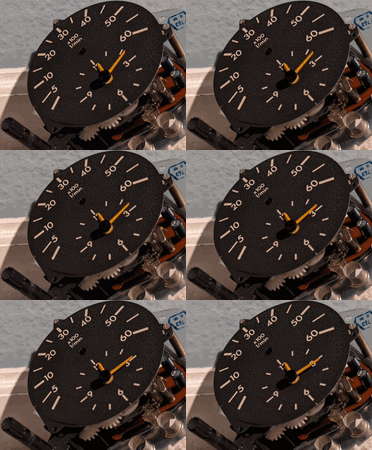
The clock stopped working in the car - it just went completely dead. I did some research and it's pretty common. There are two problems that can happen:
  1. The capacitors can stop working. They might show visible ballooning, leaking, etc.
  2. There might be an interrupt to ground.
I pulled the cluster, pulled the tach/clock panel and swapped a spare tach/clock unit in as a temp. The capacitors used are 100uF 16V and I bought a pack of 20 from West Florida Components for 25 cents each 🙂 Disassembling down to the core components is fairly easy - you have to take the clock hands off and then take 3 screws off the back. I took the tach dial off - but you don't need to do this. If you do, you just need to make sure the min/max are set right when you put it back on. The last step to get the clock out is to get a soldering iron out and desolder the ground on the back of the tach/clock.

By pure coincidence, restoration pros Woods & Barclay posted a video showing this procedure which demonstrate the above steps in way better detail 🙂 (Skip to 21:12 if it doesn't jump there)

I'm not the best with a soldering iron - but what I did works and that's the important part. Bonus time lapse showing the clock running off a 9v battery for a few mins

PXL_20240521_074308234.jpgclocklapse.gif


For the grounding, the negative simply goes out the back to the grounding point. That point is soldered to the metal frame which carries the ground to the center panel of the instrument cluster. Here's a great pic courtesy of Jeremy5848 on the fruit parts site. Make sure you have the screws nice and tight so that everything is grounded 🙂 I think my cluster might not have a tight ground at the moment which could also be why the glow plug light doesn't always show (usually does, but it's intermittent; glowplug wire doesn't have a negative output).

1716281368398.png

Just need to reinstall this and we'll be back in business 😀
 
Last edited:
Besides the clock repair, I ordered both of the sunroof transport bridge arms. 124-780-05-12 for the left and 124-780-06-12 for the right. When I ordered, the person said there were only 3 in stock 😱 If you're looking to repair your sunroof, I'd order a set while you can!
PXL_20240521_082938903.jpg

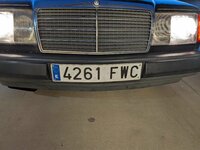
One other part I just got in is a front euro-spec license plate holder (124-885-10-23). Took a while to find this - but found it pretty easy searching eBay for "w124 number plate holder". I order a fairly recent used Euro plate from Spain - no personalization here, just some random person's old plate 😂 That should be here soon.

1716282678933.png

When it comes time to mount this - I'm not exactly sure how to get the front license plate holder out. It seems like newer W124 (which have a temp sensor on the license plate holder) have screws which you can remove. But being this is a 1987, the temp sensor is mounted on the left side bumper. I'm guessing you can just use a plastic wedge and leverage the front license plate holder out. I found a clue on Bens Whirled - but figured I'd share here first in case anyone knew offhand 🙂

Last noteworthy thing - I got a parts car from some local folks for $1000... it's a 1989 300SE that was t-boned. Engine fires right up, goes into gear nicely too. I'll be parting this out, so let me know if there's any W126 specific parts or shared parts that you need. The seller said the fuel pumps / filter / accumulator are new. It'll take a while to inspect / process / clean everything - but at least this time I have a title and won't have to saw it to bits 😂
PXL_20240517_190711387.jpgPXL_20240517_192158651.jpg
 
Last edited:
Nice work, Brian! The 1987 front bumper impact strip, and license plate holder, use the press-in attachment. I forget if you can just pry the early style off without removing the impact strip, but that Ben's Whirled post seems to confirm this may work ok. Hopefully the holes line up for the Euro plate bracket. Remember you need super-short screws for installing the new bracket, so it won't push the impact strip away from the bumper. Or... can you swap over the press-pins to the Euro bracket? Hmmm.

The ambient temp sensor was also relocated to the license plate area to improve accuracy, you can make this change at the same time if desired - but it may require installing a new sensor with longer wire to reach the middle of the bumper. Or, cut/splice the wire. Or, source a good used one from a junkyard car.

:banana2:
 
Got a few small updates - something always broken 😂

The clock stopped working in the car - it just went completely dead. I did some research and it's pretty common. There are two problems that can happen:
  1. The capacitors can stop working. They might show visible ballooning, leaking, etc.
  2. There might be an interrupt to ground.
I pulled the cluster, pulled the tach/clock panel and swapped a spare tach/clock unit in as a temp. The capacitors used are 100uF 16V and I bought a pack of 20 from West Florida Components for 25 cents each 🙂 Disassembling down to the core components is fairly easy - you have to take the clock hands off and then take 3 screws off the back. I took the tach dial off - but you don't need to do this. If you do, you just need to make sure the min/max are set right when you put it back on. The last step to get the clock out is to get a soldering iron out and desolder the ground on the back of the tach/clock.

By pure coincidence, restoration pros Woods & Barclay posted a video showing this procedure which demonstrate the above steps in way better detail 🙂 (Skip to 21:12 if it doesn't jump there)

I'm not the best with a soldering iron - but what I did works and that's the important part. Bonus time lapse showing the clock running off a 9v battery for a few mins

View attachment 191229View attachment 191230
Awesome!!! So was the issue with the clock the 16V 100uF capacitors? Or was it the grounding?
 
Awesome!!! So was the issue with the clock the 16V 100uF capacitors? Or was it the grounding?
Great question - I'm not exactly sure. I believe the tach needs to be grounded too, but it was working fine. When I hooked a battery up to the unit with the old capacitors, it did move. But I didn't watch it for an extended amount of time.

I suspect the capacitors were on the way out- I didn't test them (you can check resistance, some other tests). And I think the grounding in my cluster needs to be addressed for sure - it's sketchy at best. I'll pull the cluster later this week and fix it once and for all 🙂
 
You can also get a fancier VOM that will perform a capacitance test, handy for seeing if old caps were in spec or not. I have an old Fluke 12 that does this.

:nos:
 
Quick update - got the euro license plate installed 🙂

The clue I had found was dead on - you just need a nice plastic pry tool. For newer W124, this is not really an issue as you likely have screws holding this in place. At least that's the case when I encounter newer W124 at the junkyard. I used one of my favorite tools a MB issue plastic pry wedge, part number 115-589-03-59-00. Probably one of the best tools I own 😀

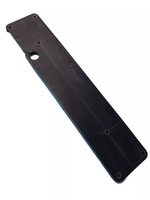
Here's what the 1987 North America front license plate holder looks like removed (124-880-02-05). I broke two studs not being careful enough (doh)
PXL_20240603_165344857.MP_optimized.jpg

I'll keep this one just in case I want to revert back... but I have a feeling the newer style (124-885-08-23, I believe) will be needed. This is because the new screws I put in to hold the euro license plate holder are bigger than the studs on the holder. For lack of better terms, trying to use the old one is like throwing a hot dog down a hallway 🤣

The euro license plate holder (124-885-10-23) bolted right up - I used two screws with part number 202-990-01-21 to secure the holder via two middle holes to the bumper. Then, I used four of these same screws to go through the euro plate, through the corner hole, and through the bumper. I don't think the plate or the holder is going anywhere! And good call. @gsxr - I might move the temp sensor as the one inside the bumper is wildly inaccurate. Will look to see if temp sensor is still available new.

Here's what the whole setup looks like! It looks great, IMO. Super happy about this

PXL_20240603_025638832_optimized.jpgPXL_20240603_025647907.MP_optimized.jpg

In one of the pics above, you can see a sneak preview of what I'll be installing soon. I have a new in box driver's side seat adjustment module (124-820-85-10; mine has some issues) and then also a new latch assembly (124-720-09-35). The latch specifically is going to be a PITA to install... but it should fix the problem I have with my driver's door not shutting all the way unless you give it some gusto.

For what I had tried so far... I adjusted the striker, replaced the door check strap with a new MB part (126-720-05-16). The door latch is the last piece of the puzzle. The currently installed latch is a bit lazy - it moves slow and the spring doesn't seem to be well tensioned anymore. I lubricated the crap out of it and that helped - but I think it's just reached the end of its life.
 
Last edited:
  • I got 16 INA hydraulic lifters in- saturated in oil 😂 They look great!
Brian, the INA lifters you sourced from UK... did the box say made in Germany, or made in Romania?

These are back in stock now, available from FCP at $13 each. Previous COO was Germany, now made in Romania:


:jono:
 
Brian, the INA lifters you sourced from UK... did the box say made in Germany, or made in Romania?

These are back in stock now, available from FCP at $13 each. Previous COO was Germany, now made in Romania:


:jono:
Woah - that's a great price! Hopefully it's comparable quality 🤞

The ones I purchased a while back are made in Germany

1717482693150.png


I still need to (at some point) need to look at rebuilding the #20 head that I have. I did secure ALL the parts needed, it's just a matter of finding a machine shop and working with them to get everything sorted (cleaned, leveled, etc) and assembled. I'm not sure if they typically do the assembly themselves - but I'm OK with that as I'm lacking a lot of the specialized tools 😂
 
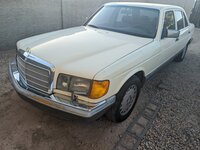
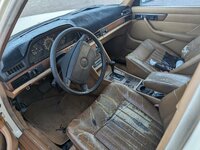
Because I don't already have enough on my plate - I got a new project car 😂
1987 Mercedes-Benz 300SDL
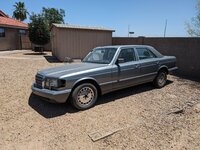
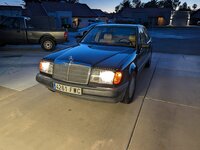
cars-1987-300sdl-1.jpg300sdl-inside.jpg

It's definitely in rough shape - but it runs and drives. 341k miles - transmission seems to shift pretty good and was rebuilt only 20k miles ago.
Project page can be found here (includes Carfax, options, and what work I've done so far). It's keeping me busy - it'll slowly get restored back into great shape again, just like the 300D was.

One of the scarier projects I tackled was replacing the round instrument cluster connector. The one the car came with had the half moon part broken off and the person didn't line the pins up properly which meant the instrument cluster had whack readings and the AC wasn't working either.
300sdl-instrument-cluster.jpg

I lined it up with the cluster properly (made sure all the instruments were reporting right- ex: parking brake, bright headlamps, etc), pushed the connector in as far as it would go, and then carefully pried the back of the connector off. This way, the pins would stay attached to the cluster and they could be swapped over one at a time. This worked great! AC and instruments are working as they should now.

I'll keep this thread about the W124 though! Unless people wanted to hear more about this old 126 🙂

With the 300D (W124), I've been troubleshooting the AC. The blower is always working great, sometimes it blows nice and cold - and other times, it's just warm. This is definitely a problem when it's over 110F outside here in Arizona! I've been going through the Automatic Climate Control service manual for the 124.

The aux fan (M4; used for cooling the condenser coils) is working great- it runs at low speed. That was a problem before and I had repaired by replacing the ballast resistor (R15; behind the left headlamp). When I did an evacuate/recover and refilled / put in compressor oil, the compressor oil had a UV dye in it. I used a scorpion flashlight and looked at all the AC components under the hood - no leaks there.

With the car running and the air blowing cold, I noticed the clutch engaged on the compressor. When I turn the AC off, I can see the clutch disengage. When the problem happens (AC on, warm air blowing), I noticed the clutch is NOT engaged.

The pressure switch (S32) I believe has two modes - 15 bar means aux fan OFF. 20 bar means aux fan should be operating low speed. Near here are two spade connections sticking up (S31/1). I took the connectors off there and jumped them together as the service manual says this should control the refrigerant compressor (2 bar OFF / 2.6 bar ON). This didn't seem to make a difference so I put it back.

One of the next steps (I'm browsing steps in job 83-605) is to troubleshoot the KLIMA module (N6). If you pull the module, you can jump pins 5 and 7 and that should turn on the compressor. Unfortunately, it's hard to see the pins - I'll have to get a mirror and check this out. But that was what I was going to check out next to try and find a root cause.

I did go through a thread by @gerryvz (click here to check it out) and saw his root cause was 1. Problem with aux fan and 2. Junk between the electromagnetic plate (remedied with floss). A lot of folks had issues with the base module - which is not applicable for my car (seems specific to V8).

I might try to clean my unit in a similar fashion (floss it out!). Another test I can do is just to manually connect voltage to the pins on the compressor. I need to look at the wiring - but there are either two wires or one wire and unit is grounded. That should manually engage the clutch (which should visibly pull itself in) and would rule out the coil being bad.

Always fun things happening over here 😂 Besides the AC, this car is running beautifully.
 
Congrats on the new albatross project, Brian! Maybe start an OWNER thread for the SDL over on 126board? :jono:

The pressure switch with pigtails is only for the auxiliary electric fan. Green switch is on at 20 bar, off at 16 bar, which means the fan almost never runs. Later models upgraded to the Red switch, on/off at 16/12 bar respectively. If you have the early switch, next time the system is open upgrade this to the late switch so the fan runs more often (improves performance at low rpm's).

The switch next to it is a low/high pressure safety, it prevents the compressor from running if the pressure is too low (system discharged) or if pressure is too high (plugged condenser, etc). You can temporarily bypass this if you are certain the pressures are normal, below ~350psi on the high side. Sounds like you already tried this.

Your car has the KLIMA in control of the compressor, and of course the KLIMA is NLA. The original is an 001- part number which has a 10-second delay after starting the engine before it engages the compressor. The new / improved / superceded KLIMA is 003- and eliminates the delay. This functionality was integrated into the BM/GM module on the M119 cars with LH-SFI.

The KLIMA (or, BM/GM) compares engine speed to compressor speed. If it determines there's a mismatch, it thinks the compressor is jammed and disengages the clutch. This stores a code on the BM/GM but for the KLIMA, you're just guessing if that is what is causing the compressor clutch to disengage. I think if this occurs, the compressor will not re-engage until after the engine is shut off. If your tach in the cluster ever drops out intermittently, this will also cause the KLIMA to disengage the compressor clutch.

:klink3:
 
Finally have some closure about the trunk seal that I shared back in post 235. e500e owners should be fine - this would only affect the older W124 (1986/early 1987) like this 300D.

@Mbzclassicparts never responded to me and the review I wrote is still hidden from their website.

About the problem
The older cars came with a glue-in seal that goes around the trunk lid. The part delivered was the press-in style. This doesn't work for my car because my plastic trunk liner is different. I think EPC calls this black plastic part a "brace"... it's basically the plastic lid part with the 2 red stickers on it that goes over the trunk latch. Mid-1987 and newer have a plastic trunk liner which is held in place with square rivets similar to the R129 and there's enough space for the press-in seal to fit UNDER the plastic. The older ones like mine have the plastic edges from the trunk liner snap over the metal lip of the trunk. If you put the rubber seal under the plastic trunk liner, the trunk liner can no longer snap into place and it flops around.

How I solved it
The final solution looks like this.
1719388328422.png

I only cut the LOWER part of the seal - specifically on both sides where the plastic trunk liner starts. The main gasket portion is not cut. It's hard to see in the picture above- but with this done, you can go from being snapped in place over the metal to being pressed in the gap where the glue in seal used to be. I'll likely hit this with some 3M adhesive spray to make sure it doesn't move, but it surprisingly snaps in nice and tight.

Here's a few close ups which I hope convey the idea.

Here's what things look like with NO seal. Notice there's a large gap or "canal" under the plastic.
The plastic at this point is snapped over the lip on the trunk lid and not riveted like newer models.
1719389145696.png

Here's where I did the clever thing. I cut the bottom part of the seal and then it transitions from being pressed over a metal lip to being tucked into that "canal" where the prior seal was glued in place. The outer visible portion of the seal is not cut - so it's not entirely noticeable. If you look closely, you can see the "snaps" on the plastic that make an audible snap sound after they wrap around the metal lip of the trunk lid.
1719390577275.png

And here's the final product. The cut is made at the part where the plastic starts.
1719388775278.png

I have both versions of the plastic trunk liner (this one and the one with rivets), but I didn't want to drill holes in the car to add rivets. This solution seems to be minimal and the trunk closes and seals very nicely.

Took a while to type this up in a way that makes sense... But if this helps one person, I did my job! 🙂
 
Last edited:
A few small updates

1. AC problem
I think the speed sensor on the compressor is the root cause for AC having problems. I ruled out the KLIMA relay after testing.

Basically, the compressor clutch will disengage after some time and then compressor stops and car gets warm. Turning climate control on and off has no effect - but turning car off and turning back on will restart the process and re-engage the compressor clutch.

I talked to my friend Bud and have an appointment at his shop next week to have the compressor replaced. We'll do the other items too (pressure switch, receiver drier if needed, etc) while in there.

2. Door latch adjustment
This is one that had been driving me nuts. Basically, the drivers door only won't always fully close when you slam the door. It'll catch on the latch and be open about a centimeter. I replaced the door check strap a while back and I finally got a chance to replace the latch assembly (both new in the box genuine Mercedes-Benz parts).

Replacing the latch assembly seemed to help - but not a lot. I think the root cause is the striker position. I spent a good hour with a ratchet loaded with the Torx T40 bit trying to adjust the striker and it's incredibly hard to get right. You can do micro adjustments by loosening the bolts - but sometimes turning the bolt to tighten (after the adjustment) will move the striker itself. Just a frustrating process. I got the door into a much better place - it doesn't require a lot of force to close. It's still not right... but it's "good enough" (for now).

3. Speedometer problem
I've noticed my speedometer is off. This is one I could use some help on!

I've documented some of the work done on my cluster in previous posts. The plastic gears for the odometer and trip counter are in great shape - but I did have to pop the needle off to replace that. I had a local shop calibrate it after I put the needle back on and at low speeds it seems just fine. But if you get up to 80 MPH and check Google Maps, it'll show the actual speed via GPS at 70 MPH. 95 on speedometer seems to be roughly 80MPH via GPS. The car doesn't go much fast than that 😂

I have a bunch of spare clusters and took everything apart tonight. I got the Mercedes-Benz reference manual out too. This 124.133 chassis should be having a 2.65 ratio for the rear differential and that should be what the speedometer is matched to. The 400E/E420 and E500E both have electronic speedometers but this still has the spinning cable that gets threaded on the back. I think the cable is directly connected to the transmission but I'm not sure. Here's a view from the back.
1721721517628.png


My understanding is that there is a "K" constant and that is supposed to represent how many revolutions of that cable are needed to reach one kilometer. Since my cluster is in miles, I'm guessing the number is larger to account for miles.

Cluster in my car
The cluster in the car doesn't have any K value noted. The metal "counter" piece itself (behind the faceplate) is marked 67127 085 6. I did notice someone wrote in sharpie "W. 980" on the plastic. I'm not sure if that's what the shop thought the K constant was when they calibrated?
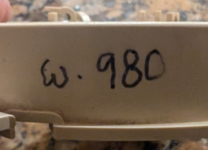
1721721823138.png

Spare cluster 1
Looking at the other clusters in the shed, there's one I pulled from a 1987 300D in Tucson last year.
This one actually has the stickers with the K values.
1721721913689.png
12V K= 1015
109/17/19

When you look at the metal backing, it has the number 67127 085 8.

I put this in the cluster and the speedometer was pretty accurate. I'd say always matching within 3 MPH of GPS via Google Maps.
However, the trip plastic numbering gears are broken in this one. When the spinning cable turns the unit, it turns a worm gear on the side. As the worm gear (white) spins, this will spin the gear attached to the odometer (green).
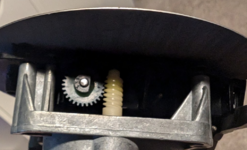
1721722419849.png

On the other side of the unit, there is a gear connecting the roll of numbers on the odometer and the roll of numbers on the trip. I know it's been debated, but I believe teeth on this gear (or the ones going between each tens position) can break if you push the mileage reset when the worm gear is spinning. I was thinking maybe this was broken.
1721722619272.png

I dug in more and I was wrong with that theory (at least for this case). I pulled the green gear on the side out and wound it by hand.

There is a metal rod (connected to the horseshoe reset button) which is putting tension on lever connected to a roll of gears for the trip (one gear for each 10's place). When you push the reset button, this pushes the rod down, which then pushes the lever down which lifts the gears up. That allows them all to freely spin back to 0.

This is super hard to describe - here's the best picture I can share. Basically, the red arrow is pointing to the roll of gears which are on each 10's place. The lever that lifts this roll (disengaging the teeth) is the yellow line. You can also see the spring in the middle which provides tension to the speedometer needle.
1721728157081.png

When the reset button is not being pushed, there is still some amount of tension being placed on this lever. It's just enough that the teeth are making contact with the roll of numbers.

Here's a picture where you can see the metal rod that is attached to the horseshoe piece. You can see the spring it's attached to and you'll also notice the rod broke out of the plastic. The spring attached is no longer providing tension to pull the lever down (which engages the teeth) and the gears no longer turn.
1721726462223.png

The plastic part needs to be replaced in this case. That whole assembly is delicate.

Spare cluster 2
Just for fun, I took a look at a few other clusters. Another 1987 300D cluster I got on eBay for parts was marked:
12V K=1015
109/13/19

On the metal backing, it has the numbers 67127 085 6 which actually match mine.

European cluster
This is one I got from Lithuania earlier this year and I verified it's accurate - it's in kilometers of course. This one is marked:
109/16/67
K=630 12V

The metal backing for this one is numbered 67127 058 9. If you do the km / miles conversion, 630 * 1.609344 is close to the 1015. K=1015 is definitely the correct value for miles.

Other notes
All of the US clusters have the same hall effect sensor - part number 007-542-29-17. The euro cluster didn't have the sensor at all- just a black cover plate. I believe this sensor is getting resistance readings from the wheel speed sensors used for ABS. For sure, I know the hall effect sensor is also used for cruise control. I remember seeing some interesting cases in the tech manuals where the sensor value can be taken into account - one I think was with the radio (raise volume slightly at higher speed).

I don't know much about this part or how to test it. I could try to buy a replacement or swap the sensor (it pulls out from the metal backing).

Next steps
I'm curious if folks here have any resources they can point me at? Sometimes the more you learn, the more questions present themself.

Is the K constant configurable? What does the shop do when a calibration takes place? For sure, the correct K value for my car is 1015.

The speedometer needle itself is attached to a shaft which is spring loaded. Before giving up and bringing it to the shop, I did my best to try and tension this to match - but it's very tricky. The cluster itself has no markings so I'm curious if the shop had to do their own research (I gave them the year/make/model) and they thought it was supposed to be K=980 (what somebody wrote on the plastic) and they calibrated it wrong. If that is the case, I should be able to take it back in and let them know it's supposed to be K=1015.

Another option - I could take the labeled unit (K=1015) which has accurate speedometer, pop the needle off, put my good plastic gears, put the needle back on, and bring to the shop for calibration.

There's always a mystery waiting to be solved 😂
 
Last edited:
3. Speedometer problem
I've noticed my speedometer is off. This is one I could use some help on!

Spare cluster 1
Looking at the other clusters in the shed, there's one I pulled from a 1987 300D in Tucson last year.
This one actually has the stickers with the K values.
I put this in the cluster and the speedometer was pretty accurate. I'd say always matching within 3 MPH of GPS via Google Maps.
Yep, someone put the wrong speedo in the car... sound like you have a good one now. The speedo from a 124.128 is also plug+play with 140mph top speed, although the shift points will be slightly different. You can also use the 160mph speedo from any gasser with 2.65 gears, again shift points will be wrong, but if you get one from a car with ASR you could use the ASR warning light for a custom high-temp or low-oil-pressure warning, or something along those lines. That was on my list of upgrades, someday, for my 87.


Other notes

All of the US clusters have the same hall effect sensor - part number 007-542-29-17. The euro cluster didn't have the sensor at all- just a black cover plate. I believe this sensor is getting resistance readings from the wheel speed sensors used for ABS. For sure, I know the hall effect sensor is also used for cruise control. I remember seeing some interesting cases in the tech manuals where the sensor value can be taken into account - one I think was with the radio (raise volume slightly at higher speed).

I don't know much about this part or how to test it. I could try to buy a replacement or swap the sensor (it pulls out from the metal backing).
The Hall effect sensor is generating a vehicle speed signal from the speedometer, and this signal is used for the Becker volume control, LCD temp display (1988-up), and cruise control (I think). The ABS wheel speed sensors are, AFAIK, totally isolated to the ABS circuit. It's odd the Euro cluster had no Hall sensor - perhaps that model did not have optional cruise control?


Next steps

Is the K constant configurable? What does the shop do when a calibration takes place? For sure, the correct K value for my car is 1015.
It is not configurable, AFAIK. I do not know what controls this - are there different size gears / different tooth count? I think shops use the number to confirm accurate needle placement when pressing the needle back onto the center shaft, and spinning the input cable to a reference of X rpm. (?)


The speedometer needle itself is attached to a shaft which is spring loaded. Before giving up and bringing it to the shop, I did my best to try and tension this to match - but it's very tricky. The cluster itself has no markings so I'm curious if the shop had to do their own research (I gave them the year/make/model) and they thought it was supposed to be K=980 (what somebody wrote on the plastic) and they calibrated it wrong. If that is the case, I should be able to take it back in and let them know it's supposed to be K=1015.
I do not know if a shop can take a K=980 speedo and make it into a K=1015 speedo. I'd love to know if this is possible or not.


Another option - I could take the labeled unit (K=1015) which has accurate speedometer, pop the needle off, put my good plastic gears, put the needle back on, and bring to the shop for calibration.
Yup! Or just use any other, newer, nicer, K=1015 speedo from a donor car with minimal sun exposure and not a ton of miles.


:nos:
 
Thanks for helping confirm, Dave! 🙂 I was thinking that too... that you can't change the K number. Since the unit I had was unmarked, I am thinking it was from another 124 (300E / 260E / 300E 2.8 / etc).

Here's what I did to remedy things w/ the cluster
  • Took apart the cluster
  • Used the back portion (the metal part with the needle sticking outward) from the known good 300D. This is the one that had accurate speedometer
  • I took my good plastic numbers (the odometer/trip meter numbers itself) and put this onto that back portion

Since I had to take the speedometer needle off, I replaced all the needles on the cluster. I've had a mint 300E cluster that I had been saving for this- with ultra orange needles. It was from a car with only 80k miles and always garage kept. I swapped those needles over and everything is pretty damn accurate!

Speedometer is dead on. Engine temp is a bit low - I'll need to recalibrate that (ex: push the needle up until the upper limit goes a bit higher). Fuel level is a bit low too - the yellow fuel light comes on when dropping below quarter tank. I'm not sure exactly where it is supposed to be pointing when the yellow light comes on. This would be a similar calibration - push the needle up (towards full) to move it just a hair that direction.

Since those are both on the same instrument panel, I can likely pull the cluster and just hook that one instrument panel up and verify it manually with no cluster installed (observe gauge value, turn off car, move needle to where it needs to be, turn back on, etc).

Here's how it looks! Really happy with how this turned out 😍
31691.png

Besides this, the only other thing that was having a problem was the AC compressor which I mentioned earlier. Because I'm not really equipped to handle AC service, I brought this to my friend Bud's shop, MB Motors. They put in a brand new Denso compressor, did the evac/refill refrigerant, and replaced the pressure switch and receiver drier. While they were in there, Bud noticed the boost cable was torn and replaced it.
1724806741316.png1724806707778.png

I think this is the cable that goes from the turbo to the wastegate actuator. Really glad to have a 2nd set of eyes! This is the first time I've had someone besides me do a major job on the car. Air conditioning is blowing nice and cold 🙂🎉

Pretty light on W124 updates - but I have been going hard on the W126 (1987 300SDL). Lots of great updates for those interested in my owner's thread on 126board! 😀
 
Fuel level is a bit low too - the yellow fuel light comes on when dropping below quarter tank. I'm not sure exactly where it is supposed to be pointing when the yellow light comes on. This would be a similar calibration - push the needle up (towards full) to move it just a hair that direction.
The yellow reserve light will come on after the needle hits the "R" line (empty). Not before. Usually you'll drive a number of miles with the needle at "R" and eventually the reserve light illuminates. There are separate triggers, it's a switch for the light, and a resistive sensor for the gauge/level.

:klink3:
 
Hey there folks! Hope everybody has been doing great 😀

The W124 has just been a dream lately. Added about 600 miles recently with a trip up north with the family to Flagstaff, Arizona last week. The Phoenix area weather has been miserable... in the 100's and 110's Fahrenheit (~40's in C). Escaping to an area that is in the 40's in the morning (~7C) and high temps of 70 (~20C) was super refreshing. Plus - all the trees. Pine trees everywhere 😍 Flagstaff is fairly close to the Grand Canyon, so we stopped there too.

PXL_20241008_181008789.jpgPXL_20241009_193257228.jpgPXL_20241009_201944465.jpg

It was funny driving up into the mountains - the speed limit is 75 most of the way and people are just flying by. The 300D with its 143 horsepower, not so much. Part of that challenge was driving uphill from an elevation of roughly ~1000 feet (~305 meters) up to an elevation of 7000 feet (~2,133 meters). We spent some time in the "truck lane" (the slower traffic right lane, where all the big rigs are) as the car started to really heat up. I was able to keep the engine temp roughly 105 - 110C going about 55MPH behind the truckers - and that worked great. Once the ground leveled out the engine temp came right back down to ~85C.

The car was super comfortable. For longer trips, it can be challenging not having cup holders - but the glove box door folds down and it has two indents which work pretty nicely. When you're doing easy highway driving, that can hold two drinks as long as you're not swerving. The trunk fit luggage for four easily with room to spare. Best of all, we got an average of 25 MPG for the whole trip.

There was only one snag along the way - we rolled the windows down going into the Grand Canyon national park and one of them would not go back up. The weather outside was beautiful but also the AC was getting too warm. The condenser struggles to keep up when you're idling for a LONG time (resulting in warmer air). Happens in busy drive-thrus and for our case... as you near the entry point for GC national park, you might have to wait in queue for an hour (or more) for your car to get to the checkpoint where you pay- LOTS of people visiting. I'll have to look and see if there are any reasonable electric fan upgrades - our car only has the single fan.

Back to the problem - when going to put the windows up, the rear left window would not go up all the way. Since it can go down and partially up, I don't think it's a broken cable. Might be a bad motor. Unfortunately, the rear window regulator/motor assemblies are now NLA 😭 I was able to find a NOS genuine MB regulator/motor on eBay (124-730-03-46) for a reasonable price ($150) - that should be here in a few days. But during the trip, there's no replacement - just put a garbage bag over it while it's in the parking lot to keep the squirrels and condensation out 🤣
1728972172746.png

It was a great trip and this is a super capable car. I'm curious if the E500E has the same problems going uphill (RE: overheating). The car got a lot of positive attention. We stayed at a cool place off the highway called Little America and several guests came up and took pics of the car. Starting it up in the mornings was a bit of a challenge, given how cold it was - but engine comes to operating temp fairly quick.

It's been great reading threads from other folks here - wish I had more to contribute. This thing has just been super reliable and fun. Suspension is nice and tight and the ride is great after all of the fixes captured here. I think everyone here understands and appreciates that the W124 in general is a super special platform 🙂

I have had some challenges with the W126 (1987 300SDL - posted on 126board.com). After taking apart the intake / rebuilding injectors / etc I finally got the car through emissions, got the title, and was able to finally get new keys for the car. I'll try to do an update there on 126board soon.
 
Last edited:
It was a great trip and this is a super capable car. I'm curious if the E500E has the same problems going uphill (RE: overheating). The car got a lot of positive attention. We stayed at a cool place off the highway called Little America and several guests came up and took pics of the car. Starting it up in the mornings was a bit of a challenge, given how cold it was - but engine comes to operating temp fairly quick.
What a special trip!

My 500E has a temp needle that climbs to close to 100C when going uphill at 20 mph (San Francisco style "uphill") for about 1/2 - 1 mile (several blocks) after getting off the highway. Once I get into my garage and blip the throttle for a scant few seconds, like at 2500-3000 rpm, to get the water moving and the mechanical fan turning, the car cools right down.

Personally I think if the engine fan speed were completely divorced from the engine speed, this would be better. See here: E500E Electric Fan conversion thread | M119 Engine. Happy reading.
 
It was funny driving up into the mountains - the speed limit is 75 most of the way and people are just flying by. The 300D with its 143 horsepower, not so much. Part of that challenge was driving uphill from an elevation of roughly ~1000 feet (~305 meters) up to an elevation of 7000 feet (~2,133 meters).
Brian, the 300D should FLY up mountains at 75mph thanks to the torque, and the turbo makes up for the elevation. I used to live in Sacramento and drive over the hill to Reno at times (>7000' peak at Donner). Have you tested the car 0-60mph on level ground with a stopwatch (or "app")? Sounds like power output may not be 100%.


We spent some time in the "truck lane" (the slower traffic right lane, where all the big rigs are) as the car started to really heat up. I was able to keep the engine temp roughly 105 - 110C going about 55MPH behind the truckers - and that worked great. Once the ground leveled out the engine temp came right back down to ~85C.
This isn't normal either. I chased high temps for a couple of years after I bought my first '87. Once the cooling system was sorted out, I couldn't get it over an indicated 95°C even climbing an extended grade at 75mph.


The car was super comfortable. For longer trips, it can be challenging not having cup holders - but the glove box door folds down and it has two indents which work pretty nicely. When you're doing easy highway driving, that can hold two drinks as long as you're not swerving. The trunk fit luggage for four easily with room to spare. Best of all, we got an average of 25 MPG for the whole trip.
25mpg ain't bad, but I'd have expected a bit more... upper 20's is more normal (low 30's is possible with good fuel).


The condenser struggles to keep up when you're idling for a LONG time (resulting in warmer air).
You replaced all the vac pods, correct? If so, the recirc function should be blocking warm air. Next question - is the system still R-12, or was it converted to R-134a? The conversions do NOT cool well, especially at idle RPM.


I'll have to look and see if there are any reasonable electric fan upgrades - our car only has the single fan.
Read the long thread on this forum about using a W204 fan with PWM controller. That's the only option I would consider if you want to go electric (along with a 150A alternator to feed the beast). [Edit - it's the link Jlaa posted above. Everything you need to know is in there.]


Back to the problem - when going to put the windows up, the rear left window would not go up all the way. Since it can go down and partially up, I don't think it's a broken cable. Might be a bad motor. Unfortunately, the rear window regulator/motor assemblies are now NLA 😭 I was able to find a NOS genuine MB regulator/motor on eBay (124-730-03-46) for a reasonable price ($150) - that should be here in a few days.
Nice score on the OE part! The Magneti-Marelli aftermarket regulators are still available and are, IMO, perfectly cromulent.


It was a great trip and this is a super capable car. I'm curious if the E500E has the same problems going uphill (RE: overheating).
Yes and no... temps will go up towards 100C but generally should not exceed that, if the cooling system is 100%. Maybe 105C tops. Not higher. Anything above that, something is wrong (same applies to both E500E and 300D).


Starting it up in the mornings was a bit of a challenge, given how cold it was - but engine comes to operating temp fairly quick.
If you haven't done the afterglow conversion, add that to your upgrade list. Relatively cheap and it works wonders in cooler ambients. Get a used OE relay with circuit breaker, not the aftermarket ones with the strip fuse. Need to swap in the 2-pin temp sensor plus a new wire to make this work correctly.

:jono:
 
This isn't normal either. I chased high temps for a couple of years after I bought my first '87. Once the cooling system was sorted out, I couldn't get it over an indicated 95°C even climbing an extended grade at 75mph.
This is something I am still working through with my N/A OM603. Recently replaced Radiator, Water pump, Fan Clutch, Thermostat. Still chasing a bit of a temperature creep on mine. Going to try a swap out to an 85* thermostat vs. the 95* thermostat currently in there. Also, random, but vacuum filling for coolant systems is a game changer. Such a simple process vs. trying to bleed things down.

Brian, sounds like you had a great trip! I remember that climb up to Flagstaff and enjoying the right trucker lane as well.
 
Thanks for the replies all 🙂

Brian, the 300D should FLY up mountains at 75mph thanks to the torque, and the turbo makes up for the elevation. I used to live in Sacramento and drive over the hill to Reno at times (>7000' peak at Donner). Have you tested the car 0-60mph on level ground with a stopwatch (or "app")? Sounds like power output may not be 100%.

This isn't normal either. I chased high temps for a couple of years after I bought my first '87. Once the cooling system was sorted out, I couldn't get it over an indicated 95°C even climbing an extended grade at 75mph.

25mpg ain't bad, but I'd have expected a bit more... upper 20's is more normal (low 30's is possible with good fuel).
You could be onto something, Dave - I know the boost cable was broken. Car seems pretty zippy, but maybe something is off. I'll try the stopwatch on my phone and do a few 0-60's 😀

It is super hot here in Arizona- outside was over 100F when I was making that 6000+ foot climb in elevation. When I got the car, I did a thorough radiator flush and replaced the thermostat with a new MB part. I think the AC being would be contributing to high temps also.

Riding in the truck lane isn't all that bad though 🙂 We got some great views on the way up via I-17 and some REALLY nice views on the way back via SR 89 through Sedona which we took to SR 179 and finally back to I-17. This is a drive I highly recommend doing if you have the chance!

I was super impressed with 25MPG - I couldn't imagine getting low 30's... good to know it's possible! Fuel injectors could probably use a rebuild - that might be a good first step.

The thoughts about the electric fan were to just replace the dinky plastic aux fan in front of the condenser with either a new unit or an upgraded unit. Might be hard to find something aftermarket that operates on the same voltages. There's not any squeaking or signs of bad bearings, it's just a weak unit. I know the W126 has a dual aux fan and some W124 may have that too. But that might require a different ballast resistor. Going FULL electric - not sure that makes sense (yet!). It's only really noticeable (ex: gets a little warm) in extreme idle scenarios.

Unfortunately, the NOS rear left regulator that came in has a non-working motor 😭 You can plug the two pins (green + black) right into the window switch without installing and the motor doesn't even make a noise. The old motor I have works great - turns out the root cause was a metal piece came loose and the white slider piece got over-extended (which is why it closes, just not all the way). There's a gray clip near the slider which broke that's supposed to hold the metal plate down. I'll have to take a picture - it's definitely repairable... but leaning towards a new Magneti-Marelli if only to have a new motor (current motor is from 1991!). I opened a return and the seller is off to a bad start - they're asking for paperwork from a mechanic to prove it's broken (I AM THE MECHANIC 🤣)
 
Last edited:
You replaced all the vac pods, correct? If so, the recirc function should be blocking warm air. Next question - is the system still R-12, or was it converted to R-134a? The conversions do NOT cool well, especially at idle RPM.

If you haven't done the afterglow conversion, add that to your upgrade list. Relatively cheap and it works wonders in cooler ambients. Get a used OE relay with circuit breaker, not the aftermarket ones with the strip fuse. Need to swap in the 2-pin temp sensor plus a new wire to make this work correctly.

:jono:
It's a R-134a conversion - definitely weak compared to the original R-12 🙁

The afterglow conversion is a fantastic idea! 😀 Will absolutely look into that. For non-diesel folks, there are some cool features on the OM603 engine. It has a block heater of course and the fuel going to the injection pump is routed through a heat exchanger (w/ coolant) that helps keep the fuel a good temperature. I think gasoline engines typically have a fuel chiller so that was something I noticed right away. The afterglow upgrade would help keep the combustion chamber nice and toasty until the engine comes to temp - as it'll keep the glowplugs active after crank. I think the current stock system will (in position 2) activate the glowplugs for up to 30 seconds or until car is cranked (whichever comes first).
 
Hey folks - been a while since an update!

Car is running beautifully. Only have a few small complaints - probably the biggest is: I really need to get a body shop to help line up the drivers door. There's some air noise coming in at higher speeds. I've tried adjusting striker, replaced the door check strap, and replaced the latch assembly itself. Outside the car, it seems to line up with the body. I think this is something a trained expert would be able to sort out pretty quickly. I have the patience to try these adjustments, but I'm just too clumsy to make any tangible progress 🤣

One small complaint I tried to fix led me down a pretty interesting rabbit hole with locksmithing.

The lock cylinder for the front doors are spring loaded. For example, on the left (US driver's side) door, when you turn the key right (to lock) or left (to unlock), it'll use spring force to rotate the key back into the upright position. My spring broke. I tried to repair this using a spring from a W126 door lock that I had laying around and long story short, the cylinder popped out of the door lock assembly. Given that this part is bigtime NLA, I just about crapped my pants. I collected all the tumblers, a ball bearing, etc that fell out and went into the house to figure it all out.

I've already keyed the center console boxes (see post 10) and I've also rekeyed the trunk lock (see post 221) using a workshop trunk lock. Luckily, MB still sells the ignition cylinder that works for W124 and 1990/1991 W126 (part number 126-460-02-04). But they don't sell the door locks.

To take the door lock apart, you start by removing a drift pin that holds the end (see pic below). You can use a punch and knock the pin through (hole is below the L in the below pic) and this end piece will come off the lock assembly. It's worth noting that this piece (whatever its called) is different between left and right. The cylinder has a different shape and this ending piece will only slide onto the respective cylinder.
1731914689809.png

At this point with the end removed, you can put a key in, turn it 90 degrees, and push the cylinder out. In my case, additional pieces fell out (LOL) and I had to disassemble further. For cars with the alarm system (like mine), the door locks have two drift pins holding the two halves in place. You can drill those pins out and the halves come apart.

NOTE: When you put it back together, I don't even know where to get drift pins. I tapped the holes to be M3 and then used a grub screw to secure the halves back together. Here's a pic of two lock assemblies... one with a grub screw (top) and one with standard drift pin (bottom). There is one on each side.
1731914384772.png


Once it's open, it's pretty easy to see how it all works (see pic below). For the 1986-1989 cars, there's a spring at the end and a metal "sleeve" that goes around the cylinder (not pictured). The sleeve has a hole for a ball bearing to reduce friction when turning, which is a bit ridiculous 🤣 1990 and newer cars have a different parts - the inside is basically all one piece.
1731914591258.png

At this point, I put my unit back together and was good to go. But I also realized that I don't have all of the tumblers. I have a box with a ton of used tumblers with parts numbered from 11 until 15 and so far, this has worked for me when rekeying the center console boxes. But this lock had halves and also numbers 1 - 5. I did a lot of searching and learning which I hope to share with you here 🙂

Basically, the keys in our cars are 4 track. This means if you look at the key on one given side, it has two "tracks" - the left and the right. When you flip it over, it has two more different tracks. Older cars like the W123 are 2 tracks - there are only two sides which are identical if you flip the key over.

The format for our keys is called HU39. This is used for W124, W126, W201, and I think it's also used in W140 and R129. Each car has a key ID and that is not associated with the VIN. For example, given a VIN, you can't guess the key ID. It's something that has to be looked up in a database (I don't know where). Access to that database is controlled (only allowed for licensed locksmiths, etc).

After finding this info, I was able to work with a locksmith to get a proper rekeying kit. It was $150 and it includes 25 of each tumbler. Here's a pic along with some of my lock cylinder stash.
PXL_20241112_165931404.jpg

There are 3 main types of tumbler (also called wafers):
  • Left tumblers
  • Right tumblers (same as left but flipped over)
  • Tumbler halves
These tumblers are nice and thick, unlike the ones I had collected over the years. All the tumblers I collected are a mixed bag: some are pristine (ex: from passenger door) and some are worn down like crazy (basically worthless).

Comparing the above rekey kit by ASP (Auto Security Products), Mercedes-Benz does seem to have some differences though. I started to notice this after collecting even more locks and taking them apart.
  • Left tumblers are numbered 11 - 15. but also can be numbered 31 - 35.
  • Right tumblers are numbered 1 - 5, but can also be numbered 21 - 25 OR 16 - 20
  • Tumbler halves are usually always 1 - 5, but can also be numbered 21 - 25
Here's a picture of my home grown kit
1731916156069.png

What came next was really interesting and fun. I figured there had to be a way to take the lock apart without drilling the drift pins - so I did some searching. Big shout out to @khomer2 for his post on Benz World earlier this year (see his post here)! Basically, he shared there's a great lockpick tool available for our type of lock (HU39) called a Lishi. There are Lishi tools for every kind of lock (house ones like kwikset, schlage, etc and automotive ones). With patience and practice, you can pick any of these locks with the tool.

I ordered two of these HU39 Lishi tools (I don't think they're made new anymore; wanted a backup) and figured it all out. You have to put constant tension using the lever part and then you move the four arms to pick. It definitely takes patience and it's extremely difficult unless you clamp the lock down. In order to get a full 90 degree turn, you need to pick the lock twice.
1731916619129.png

Pretty excited about this, I got a bunch of door locks from the junkyard, picked them, and took all the parts out. Because these aren't made anymore, it's great to have all the spare parts in case the lock breaks or gets sticky. At this point, given a key, I can make the lock. Even just taking an existing lock apart is worthwhile - because you can clean the parts and replace the tumblers with brand new ones. When reassembling, you can use lots of gleitpaste on each tumbler and then on the cylinder itself.

I'll stop writing for now - but super happy to answer any questions 🙂

I'm just a hobbyist but I can help you with keyed components for a reasonable price. Like if you need to rekey your door locks or the console box lock and put brand new tumblers in there (just need the part itself and the key). I am also building an inventory of door locks - so I have spare ones I can key for you (given a key). Or even if you have a door lock and you want me to pick it / take the tumblers out so that you can rekey it yourself. Just let me know.

I've also taken apart the ignition cylinders - I found a way to disassemble/reassemble these and I know how to rekey those too. I'm still working on a way to put it back together (need to find correct size drift pins). I'm going to be helping some of my W126 friends with rekeying their older style ignition cylinders (ones for the screw cap ignition/steering lock).
PXL_20241103_061209490.MP.jpg
 
Last edited:
Car is running beautifully. Only have a few small complaints - probably the biggest is: I really need to get a body shop to help line up the drivers door. There's some air noise coming in at higher speeds. I've tried adjusting striker, replaced the door check strap, and replaced the latch assembly itself. Outside the car, it seems to line up with the body. I think this is something a trained expert would be able to sort out pretty quickly. I have the patience to try these adjustments, but I'm just too clumsy to make any tangible progress 🤣
Brian, are you certain the air noise is from door alignment? If the rubber seal is good and making contact evenly around the chassis opening, there's a possibility the air noise is coming from the felt channel for the window glass. I've had to replace several of these to cure an air noise problem. To test, apply painter's tape around the outside perimeter of the glass, sealing the glass to the metal door frame, and test drive.


One small complaint I tried to fix led me down a pretty interesting rabbit hole with locksmithing.
That was an incredible rabbit hole. Wow. Thanks for sharing all the info!!

:yourock: :wahoo:
 
Got a few updates here

I went to start the 300D up a few weeks ago and noticed a horrible belt squeal. Goes away with a little throttle - horrible sounding at idle. Fortunately, the belt tensioning is pretty straightforward on the OM603. There's a 13mm nut on a bolt which goes through a black plastic lever (right on the front of the engine - can't miss it). You can loosen/remove that nut, put a socket extension in the lever mechanism and push it counter clockwise just enough to push the bolt out, relieving the spring tension. I did this and noticed the spring didn't really react. Sure enough, the spring had broken.
spring.png

Unfortunately, this is NLA from Mercedes-Benz. I was lucky enough to find a few NOS on eBay in Germany and ordered them. The spring itself is part number 601-993-27-10-64. While doing this, I also replaced the shock absorber (604-200-02-14) that helps dampen movement of the belt tensioner. Since I had to order parts, I ordered new nuts and bolts for everything.

There has been an ongoing oil leak which I haven't fully identified yet. Today, I got some paper towels and started wiping down the underside of the car to try and narrow it down. There's a TON of oil build up / muck all around the turbo. Specifically, where the rubber accordion hose from the air flow meter plugs into the turbo and air intake pipe.

1737701169829.png1737701423747.png

These pictures aren't the best - but if you're familiar with the OM603, the camera is under but in front of the car facing towards the back of the car. You can see the circular turbo and then the cat behind it that goes to the exhaust. I wiped off as much as I could (since car was not raised, it's a bit difficult to reach everything) in the hopes that the leak becomes a bit more obvious.

Back in post 267 (August - ~4 months ago), I shared my friend Bud had found the boost cable was broken and it was leaking oil. I was thinking maybe that was the cause - but there are still fresh oil drippings. It's gotta be something else. Will continue digging!

Setting the W124 aside for a moment. I'd just like to share another Mercedes-Benz related update - as there aren't many folks I can vent car problems to 🤣

I have shared before that we have a 2013 GL550 (X166). It's been a pretty good car overall - we've had it for 6 years. I've replaced AIRMATIC parts myself, fixed the 3rd row seat motor, fixed a lot of problems. But there have been some massively expensive repairs w/ the engine... I am NOT a fan of the M278 / M157 engine. We've had the oil leaks from the cam position sensor which go back to the ECU, we've had to reseal the valve covers and timing covers multiple times. There's been leaking from the thermostat housing (entire part is plastic; has to be replaced), all kinds of stupid problems. Any time folks need to take off the plastic hoses, the shop will buy new ones because they are brittle and will break as you remove them.
PXL_20241106_184646262.jpg
It's a beautiful car - massage seats, heated/cooled seats. 420 horsepower, so it's quick. The above picture is a good one - as that's after the fuel pump died out and we had to get it towed in 🤣 We are at 168k miles - which I don't think is a ton for a Mercedes-Benz.

We did ~$9k in repairs in the past 6-8 months and I thought the car was finally back into pristine shape. But last week we got a check engine light. I plugged in my Autel unit and got P029900: boost pressure of turbocharger 1 is too low. We brought it back to Mercedes-Benz of Chandler to get it checked out. The lines to the turbo had been replaced on a prior repair, maybe it came loose. The car seemingly runs and drives OK.

Today, the tech walked me through the issue and it's bad. Basically, the diaphragm in the driver wastegate is shot completely. The passenger side wastegate is leaking badly, it won't hold vacuum for long. And then the vacuum pump itself (driven off the cam) is fluctuating the pressure which is bad. The tech shared that these turbos are not serviceable - you can't take them apart and rebuild (need to replace the turbo). And the turbos themselves are built into the exhaust manifold of the car - which makes this an engine out job 😭

I'm not sure what we're going to do next. I'm very grateful to have the W124 as my daily driver. No matter how bad things get, I can usually figure it out. When I get stuck, folks here (big shout out to @gsxr) have helped and have got me sorted. Things are overall pretty easy to figure out and the internet has a wealth of information. Some jobs on the X166 have been OK and I can do them (ex: replacing all AIRMATIC components, including compressor). But the engine ones - these are just horrible. I cannot service the M278 myself unfortunately - I don't have the tools, time, or talent. And there are has to be major design flaws w/ the M278 given we maintain this better than by the book (ex: oil change every 5k miles, etc) and yet it's collapsing at 168k miles.

The car does run and drive - so I think the next step would be looking at trade it value at a dealership. I'll get a low offer - this thing would just be off to auction... where some dude will probably buy it, clear the codes, and toss it on Craigslist for $15k 🤮

Thanks for listening! Still enjoy coming here and reading everyone's posts 🙂
 
Last edited:
...last week we got a check engine light. I plugged in my Autel unit and got P029900: boost pressure of turbocharger 1 is too low. We brought it back to Mercedes-Benz of Chandler to get it checked out. ... Today, the tech walked me through the issue and it's bad. Basically, the diaphragm in the driver wastegate is shot completely. The passenger side wastegate is leaking badly, it won't hold vacuum for long. And then the vacuum pump itself (driven off the cam) is fluctuating the pressure which is bad. The tech shared that these turbos are not serviceable - you can't take them apart and rebuild (need to replace the turbo). And the turbos themselves are built into the exhaust manifold of the car - which makes this an engine out job 😭

I'm not sure what we're going to do next. I'm very grateful to have the W124 as my daily driver. ... I cannot service the M278 myself unfortunately - I don't have the tools, time, or talent. And there are has to be major design flaws w/ the M278 given we maintain this better than by the book (ex: oil change every 5k miles, etc) and yet it's collapsing at 168k miles.
@jhodg5ck - any advice for Brian, per the M278 turbo issue above? I know you'll probably say to unload it, lol... just wondering if there's an affordable option for the turbo replacement.

:runexe:
 
@bclifton,
Brian, Sorry for your troubles w/ the GL550. It looks like Mercedes has gone the way of the 50s & 60s US car manufacturers who made cars with short lifespans that self destructed or rusted out.

It has been brought up somewhere else in this forum that the M278/M157 550 is a real piece of crap and costly to maintain. I remember that @sheward commented on the S550 having the same types of engine problems but at much lower mileage.

The other thread the brought up this engine was “How many cars are two many” in fact there’s a video in post #30 highlighting some of the problems.

So getting your GL550 to 168K miles is quite an accomplishment but in light of the turbos it’s a good decision to get rid of it.
 
Last edited:
Maybe the new tech means the days of multiple 100K miles engines is over?
I definitely don't have confidence after this experience. Maybe naturally aspirated would do better

As an example of what I shared earlier about the turbos not being serviceable - these are all one piece:
1737741197214.png

The engine out and labor to replace turbos / vacuum pump is 30 hours of book time. The remanufactured turbo assemblies are $3k a piece and they'd only give me $250 for each core. Vacuum pump is ~$650 to replace.

Overall, the best rate we could get on the job would be in the $13k-$14k range... so yeah, we'll be looking for a new car.

@gerryvz that LX looks amazing - I've always loved Toyota and Lexus, legendary reliability (overall at least; there might be specific exceptions).
Definitely out of our price range though 😢

I am looking at some of the newer GLCs (2020 and newer) which have the M274 engine. That might fit the bill and have a reasonable cost. Kinda sucks that it might be another disposable car though - something best sold before it hits 200k miles or before it gets to the 12 year old mark.
 
The wastegate shown in the photos above appears to be removable! There MUST be an aftermarket solution... if so, the engine may not need to come out, and you'd only need to replace wastegates & vacuum pump.

I'd seriously investigate this route. The dealer won't do this, of course, in order to warranty the repair they will only offer Mercedes-sanctioned replacement parts (entire manifold + turbo + wastegate assembly). You're out of warranty and don't care about this.

I mean, oh yeah, the X166 is toast - I'll give you five grand for that turd. :jono: :LOL: :D
 
I have shared before that we have a 2013 GL550 (X166). It's been a pretty good car overall - we've had it for 6 years. I've replaced AIRMATIC parts myself, fixed the 3rd row seat motor, fixed a lot of problems. But there have been some massively expensive repairs w/ the engine... I am NOT a fan of the M278 / M157 engine. We've had the oil leaks from the cam position sensor which go back to the ECU, we've had to reseal the valve covers and timing covers multiple times. There's been leaking from the thermostat housing (entire part is plastic; has to be replaced), all kinds of stupid problems. Any time folks need to take off the plastic hoses, the shop will buy new ones because they are brittle and will break as you remove them.
I have a 17 GLS 550 with the M278. Just replaced the cam magnets and sensors as Brian mentions above. 1 magnet was leaking all sensors were tight. Benz now sells pigtails to separate the harness from the sensor to act as a telltale to the eventual failing sensor/magnet. Oil wicking through the harness is BS. You would think Benz would improve the quality of the part vice using a band-aid fix. WTF. Paid $360 for Benz parts. The job was easy but should not be required maintenance for these engines.

GLS 550.jpgM278 cam magnets and sensors.jpg

Agree plastic hose fittings are trash. Plan on replacement when any work in the area is accomplished.

The wastegate shown in the photos above appears to be removable! There MUST be an aftermarket solution... if so, the engine may not need to come out, and you'd only need to replace wastegates & vacuum pump.
Haven't looked into turbo's yet...yikes!
 
Last edited:
@bclifton, it is terrible to see how blatantly MB is pawning of the cost of poor design on its customers. Stories like yours made me swear a while ago to only lease new cars. Who can stomach those type of repair bills for their daily driver?! Crazy….

Really hope you can find a viable repair alternative to the path the dealer suggested! But then what’s next? It’s so difficult to time the right jump-off points for cars before repair bills explode. Maybe indeed time for a different car 😕
 
Thanks for the support all 🙂 And yeah - this situation does suck. I am happy to report that we've already found a solution.

We traded in the GL for not a lot of money. 12 years old and 168k miles - even if it was perfect, private party sale would be $10k-$12k tops. Dealership trade in would be $7k - $8k. Being that it's basically mechanically totaled, we got a lot less than that. I feel too embarrassed to say exactly how little - but it's around the $5k that @gsxr joked about 🤣😭

We did consider trying to buy aftermarket parts, fixing, and selling. Or parting the car out. But I'm already having my butt kicked doing all the work on this W124, my W126, and then my old Ford Ranger. If I fixed, the next buyer is going to run into an issue. While it feels like a big loss (and it is), there is also a peace of mind - we're officially done with the GL.

We traded it in against a 2020 GLC300 4MATIC with 46k miles. A hair over $20k out the door after trade in. Immaculate shape, well optioned. I pulled a VMI and it's been well serviced. A car that is ready to be driven and won't need any attention for a while. When it does require attention, maintenance costs will be more comparable with a C class than an S class (which the GL was). No AIRMATIC, massage seats, etc to break.

@cole67 your GLS is a beauty. I really did love our car and we had a LOT of great road trips in it. It wasn't a complete wash. I hope you can have some great times with your car too - and if you're willing to explore DIY options (like replacing wastegate actuators yourself), it might make sense to keep going. This was my wife's daily - so I couldn't have it out of commission for long when I did the work myself. Which is why I'd bring to a shop that I have a good relationship with
 
Last edited:
We've all been there Brian. Glad to hear you've moved on and agree less stuff should equate to cheaper repairs. Good luck with your new ride.

Mine is also the wife's and we both enjoy the road trip comfort. Love the Designo-Brown (954A) interior. Daily for her also but she'll be retiring soon. As TimL put it I'll have to figure out whether to "jump-off" or go for the long haul.
 
Dang. Near $5k I might have gambled on buying that from you and trying to replace the wastegates! Are private sales really down to $12k on these?

:yayo:
 
It is pretty pathetic how little (even in decent operating condition) these expensive-when-new models go for used. This is not just endemic to MBs, by the way. Any European luxury car has this issue -- Range/Land Rovers are even worse price eroders than MB. There can be bargains had, but past 100K miles it takes someone with some chops and gumption to own and repair them. I don't see this situation changing.

Indeed, the majority of the time it's just easier to wring your hands of the situation (which Brian did) and just move on to something newer and more reliable. For not much more outlay than fully making these turbo/wastegate repairs, he gets a much newer vehicle with 1/4 of the miles. And even if he had made the repairs, the GL would still have other issues waiting in the wings, large and small.
 
In case anyone is interested, I have a fairly popular site for the R129 which you can find here:

I used to be crazy about the 129 (still am!) 🙂 My site hasn't been updated in a while- one of these days I'll get to it... But wow - you have a lot of files and content that I'll be browsing through! 😍
Wow, I just happened to take a peek at some of the “owners” threads to see what non- E500E cars might be mentioned and happened to click on yours purely by chance.

I want to thank you for your site which I used for reference a heck of a lot when I was looking for my R129.

Even last month, I posted a link to it on my R129 Meet-up WhatsApp group to help someone out:

This link has pdf manuals for all years:


Wonderful, cheers

That's an excellent link👍


If you decide to update, expand or improve it, I’d be wiling to help out.

It’s a small world 😀
 
Brian, I found some interesting documents on the M278 (posted here). MB changed from Silitec cylinders to iron liners (with different pistons) as of approximately March 2015 production. The iron liners aren't immune to the scoring problem but it seems they may offer a substantial improvement in longevity / reliability.

The internets also mention an "oil pump dump valve" thingy. The valve is controlled by the ECU, and allegedly this switches to reduced oil pressure to increase efficiency / fuel economy, under certain operating conditions. Problem is, reduced oil pressure+volume also reduces piston cooling and could be the root cause of the cylinder scoring. Supposedly you can just disconnect the stupid thing (unplug electrical connector) and have full / normal oil pressure all the time. Only helps if the cylinder walls are still good though.

:detective:
 
The internets also mention an "oil pump dump valve" thingy. The valve is controlled by the ECU, and allegedly this switches to reduced oil pressure to increase efficiency / fuel economy, under certain operating conditions. Problem is, reduced oil pressure+volume also reduces piston cooling and could be the root cause of the cylinder scoring. Supposedly you can just disconnect the stupid thing (unplug electrical connector) and have full / normal oil pressure all the time. Only helps if the cylinder walls are still good though.

I've read up on this Dave and have been on the fence on unplugging the "stupid thing". Where do they come up with this crap? All in an effort to save fuel.... Haven't scoped my cylinders yet and probably won't unless I have some reason to take a looksy.
 

Who has viewed this thread (Total: 3) View details

Who has watched this thread (Total: 6) View details

Back
Top