• Hi Guest !

    Welcome to the 500Eboard forum.

    Since its founding in late 2008, 500Eboard has become the leading resource on the Internet for all things related to the Mercedes-Benz 500E and E500. In recent years, we have also expanded to include the 400E and E420 models, which are directly related to the 500E/E500.

    We invite you to browse and take advantage of the information and resources here on the site. If you find helpful information, please register for full membership, and you'll find even more resources available. Feel free to ask questions, and make liberal use of the "Search" function to find answers.

    We hope you will become an active contributor to the community!

    Sincerely,
    500Eboard Management

OWNER bclifton (300D)

Hey there folks - been a while since an update 🙂

Over the weekend, I did the sway bar bushings. This was a piece of cake job - took maybe 2 hours tops, taking my time and enjoying the weather. The car had a box of parts when I bought it which included the inner bushings (Meyle part). I ordered the outers from AutohausAZ (Lemforder) because I was having trouble finding the OEM part numbers. The best numbers I could find are:
  • 124-323-49-85 (outer, the skinnier ones)
  • 124-323-56-85 (inner, the bigger ones)
It seems that the outers are still available as a Mercedes-Benz part number and I should have gotten those.
The inner ones seem to be NLA. I did find a "close" part number, but I'm not sure if it fits. 124-323-45-85

When working with the 13mm bolts to loosen the bushings, the inners you have to counter hold - the outers you don't. When you put the bar back on, both have a torque spec of 20nm.

I captured a video of the process. It was fun and wow- my old ones were shot bigtime. Shrunk, cracked, falling apart. You can see how it looks in the video

I just got two sets of control arm bushings in. I'm going to remove both front control arms next and then replace those and the ball joints. Will need to get comfortable with the spring compressor! You can see the sad state of the control arm bushings in the video - the leaky steering gear box made them swell up and fall apart.

I've kept the part number listing (a few posts above) for the OM603 #20 head up to date. I've gotten most of the parts in at this point... just waiting for the valve stem seals and the spring retainers. Trying to source some of these parts is crazy - the project feels like it's moving in slow motion. Once those final bits come in, I'll do another video showing all the parts and then it's off to a machine shop (need to find one in Phoenix area).
 
Last edited:
I just got two sets of control arm bushings in. I'm going to remove both front control arms next and then replace those and the ball joints. Will need to get comfortable with the spring compressor! You can see the sad state of the control arm bushings in the video - the leaky steering gear box made them swell up and fall apart.
ohhhhhh … did you get a Klan internal compressor or a KlanKlone? @RicardoD and I just used, for the first time, a $35 KlanKlone that I bought off ebay. It actually worked really well and felt more idiot proof than the external pair ones I have used in the past for Mcpherson strut stuff.

Not sure if I should admit this but we used the impact with the KlanKlone, in 3 sec bursts, carefully, just to speed things up. Doing it by hand would have taken forever.
I think I got a KlanKlone - here's the link to what I purchased (except mine was $82 shipped! 😱):

In case the listing gets taken down, here are some pics:
1701851989763.png1701852034761.png

I tried giving this a go when doing the front struts... but I was having a super hard time getting the plates (the smaller ones are used for W124) between the coils. With the wheel off, I guess I could just "uncompress" the spring a bit by undoing the bolt on top of the strut mount. Then it should fit without an issue. The FSM says to just put the plates in though 🤷 Any tips are super appreciated! I just want to stay safe 😂
 
I think I got a KlanKlone - here's the link to what I purchased (except mine was $82 shipped! 😱):

In case the listing gets taken down, here are some pics:
View attachment 180069View attachment 180070

I tried giving this a go when doing the front struts... but I was having a super hard time getting the plates (the smaller ones are used for W124) between the coils. With the wheel off, I guess I could just "uncompress" the spring a bit by undoing the bolt on top of the strut mount. Then it should fit without an issue. The FSM says to just put the plates in though 🤷 Any tips are super appreciated! I just want to stay safe 😂
Yes! I bought the same KlanKlone in the same blue case …. My circle plates were zinc coated but otherwise the same. I used it in my w210 which is v similar to the 124. You are on the right track - I removed the shock before using the KlanKlone.

IMG_2030.jpegIMG_2031.jpegIMG_2032.jpegIMG_2033.jpegIMG_2034.jpegIMG_2035.jpeg
 
Last edited:
I was amazed at how tall my 86 300E front springs were compared to the Eibach lowering springs that I installed. If I remember correctly standing on the concrete they were at least 18” to 20”. The Eibachs were more like 12” to 14”. I wish I had pictures but I was way before the digital cameras came out.

At the time I changed my springs I had the outside spring compressor that I had previously used to change the front springs on my 72 Lincoln Continental MK III. The Ford manual had a weird way of R&R the springs. When I did the 300E I never even knew or thought about using tha Klan Style compressor.

All I remember was those stock springs were a real hand grenade when compressed with the outside spring compressor that I used at the time. I even had to go and buy some mini vice grip pliers because the compressor kept slipping/sliding around the 300E springs.:banger:

In retrospect I think I was lucky to survive with all my parts intact but back then I was a lot younger and dumber.:jono:

Edit: One thing I forgot to mention was after I installed the Eibach Springs. When the car front was lifted off the ground the springs were so short that they could be moved/rattled by hand in the perches.
 
Last edited:
Brian, as you may have noticed, the OE sway bar bushings have a Teflon liner, while most aftermarket do not. The OE are preferred for reduced noise (no rubber squeaking).

Some bushings have gone NLA recently, but I was able to find some additional oddball part numbers that may be of use. A smaller diameter bushing can be made to fit, takes some lube and muscle, but should work fine. The RENNtech 32mm front sway bar was able to accept a 30mm OE bushing (!) so there's some wiggle room.

:banana1:
 
Cars with 036 front struts have less extension, making the spring compression job a bit different / more difficult vs "standard" struts. This is because you have to compress more coils, and compress further, to remove with the reduced space. And, the rebound limit springs will pull the LCA upward as the spring is compressed, adding to the fun. Standard 124's are a relative piece of cake.

🍰
 
I have some saved searches on eBay for the genuine spring compressor and one finally returned a hit - I'm happy to report the seller accepted an offer I made on a some genuine and semi-genuine parts 🙂

Here's what I got for $800 USD:

Included in this set Only (6 items):
1 - Miller # 9150 (Long Stroke)(Front)
1 - Miller # 9151 (Short Stroke)(Rear)
1 Set - Miller # 9152 (120 mm Plates)
1 Set - Mercedes # W 202 589 14 63 00 (140mm Plates) (Klann # KL-0025-1201 & KL-0025-1202)

These compressors are to be used with hand tools ONLY as they have a replaceable shear pin to prevent torque overloading. This set of tools will remove and install coil springs by fitting inside the spring. This set is in new condition with cosmetic wear from shelf sitting.

Gedore / Klann made all of these tools for Mercedes and Miller.


Coil springs within these diameters:

•Small plates 95-120mm (3.74”-4.72”),

•Large plates 120-140mm (4.72”-5.51”)

Working range:

•Short cylinder stroke is 110-287mm (4.3”-11.3”)

•Long cylinder stroke is 110-317mm (4.3”-12.5”)


This set should service coil springs on: Mercedes Benz Chassis #’s : 107, 114, 116, 123, 124, 126, 129, 140, 170, 201, 202, 203, 208, 210, 211,

Ford, Chrysler, GM, Honda, Acura, etc. as well as other vehicles that require and compressor inside the springs.


Additional manufacturers part #’s:


• Short Cylinder (Rear spring compressor):

- Mercedes # 202 589 02 31 00

- Gedore / Klann # KL-0025-200

- Miller # 9151


• Long Cylinder (Front spring compressor):

- Mercedes # 202 589 01 31 00

- Gedore/ Klann # KL -0025-100

- Miller # 9150


• 120mm Plate Set (Klann size #1):

- Mercedes # 202 589 13 63 00

- Gedore/ Klann # KL-0025-11

- Miller # 9152


• 140mm Plate Set (Klann size #2):

- Mercedes # 202 589 14 63 00

- Gedore/ Klann # KL-0025-12


• Set of 5 Shear pins for Spring Compressors:

- Mercedes # 202 589 01 31 05

- Gedore/ Klann # KL-0025-101


• Set- Long cylinder, Plates sets #1 &#2:

- Gedore/ Klann # KL-0025-1K


• Set- Short cylinder, Plates sets #1 &#2:

- Gedore/ Klann # KL-0025-2
1702053635134.png1702053655870.png1702053677317.png1702053700078.png1702053727881.png
1702053762637.png1702053784469.png1702053801661.png1702053784469.png1702053820604.png
 
While talking about tools - I had shared earlier, I pulled the valve stem seals on the #20 head that's being rebuilt. I pulled them using a set of pliers like an animal 😂 Turns out, there is an amazing tool for this 🙂

I subscribe on YouTube to a super talented mechanic named Tasos Moschatos and saw a nice tool he had. He makes some great videos - highly recommend checking them out. Lots to learn! I asked him for more info and was able to find the tool:

It's a reasonable price, I got the tool within 2 days of ordering, and it looks to be great quality. Wish I had this before! But have it for any future projects now. You can see a demo of how to use this here:
 
While talking about tools - I had shared earlier, I pulled the valve stem seals on the #20 head that's being rebuilt. I pulled them using a set of pliers like an animal 😂 Turns out, there is an amazing tool for this 🙂
There's also fancy Hazel pliers! Not cheap from Mercedes anymore, maybe less buying Hazet aftermarket?


valve_seal_pliers1.jpg
 
Exciting update - got the windshield replaced on the 300D!

The old one appears to have been original; it has the sticker in the bottom right with the assembly number and such. Also didn't have a "window" for the VIN# (older cars had VIN on the A pillar before it moved to the left side dash).

This is part number 124-670-33-01-64 that I got back in June. At the time, there were only 10 left after I bought this in the world... but I think production may have done another run. This glass is Pilkington and is very nice.
PXL_20231209_153003067.jpg

Buying the windshield first caused a bit of a problem. Nobody I called would touch this - they have company policies against installing customer parts. Places were saying they could get me an aftermarket part, etc... but that's silly given this thing is in great shape. I found a super talented guy locally Wilber (DG Auto Glass) who had worked on old Benz's a ton when he was first getting started. He and a helper came over on Saturday and knocked it out for $300.

I've thought about pulling windshields - as some in the junkyard are in great shape. But seeing everything they had to do- wow. I would never attempt this. It was a lot of work. I'm not exactly sure how you'd remove one without breaking it. They had to chisel out a part of the glue with a super thin blade, almost like a putty knife. Then, they could get a rope through (dispensed in a tool suction cupped on the inside of the windshield) and kind of "floss" those glue points. The rope broke several times. The whole job was ~3.5 hours and a good 2.5 of them were removing the old windshield.

To get at the windshield, you need to take off several moldings.
  1. Put the hood 90 degrees; there are two moldings, one on each side of the windshield wiper motor assembly. Carefully pry these up and set them aside.
  2. The two long "arch" moldings (one on each side) on the outside A pillar. You can carefully pry these up starting in the front bottom and work your way towards the back of the car.
  3. The top center molding (goes along the top of the windshield). You can carefully pry this up starting on the edge and set aside
  4. Then there are the bigger parts you need to remove. The cowling / drains, the windshield wiper motor. I kept a bottle of 303 handy and cleaned those up after they came off.

After removing the moldings, you can see all the clips (that the moldings snap into) and some of them may be "broken". They're each secured in place by rivets - and if they are "broken" the rivet likely broke loose and you'll find the clip attached to the molding. In my case, 2 of the A pillar clips (202-988-28-78) had broken rivets. 2 of the top molding clips (124-988-98-78) had broken rivets. One of the bottom clips (124-988-21-78) was bent up and rivet was broken.

I ordered some of the rivets (910001 003101) ahead of time and had those ready so the clips could be reattached. I also replaced the clips that broke off as mine were in questionable shape - especially after you pry them off the molding. I heard that some of the clips are NLA (looking up now, seems only 124-988-98-78 is NLA) so I went to the junkyard ahead of time and drilled out all the rivets from a junked 1993 400E- getting a full set of all the clips for $5.

The molding also has an interesting clip / shim / clamp that is only on top of the roof (201-698-01-60). The older original ones have a green plastic triangle with notches and then a white triangular part with 3 "fingers" that go into the notches. Newer replacement parts have a red plastic part. With these, you basically seat them into the channel the molding goes over and you squeeze the two sides of the part together. It'll move the "fingers" over the notches until the perfect width is achieved and the clip ends up being centered perfectly. I had a bag of 10 ready to go- but only needed to use 2.

Picture from eBay seller autoparts_jp for reference:
1702272494777.png

The clips were the only thing I was scared about and having them all on hand was a huge relief for the installer. They got everything fixed quick and applied the primer/glue/etc and had the new one in place quickly.
PXL_20231209_173623171.MP.jpg PXL_20231211_012058988.jpg

What a difference 😲

The old one had so many small "micro chips" over the years causing it to look "hazy" in some places. There were a few bigger chips including a big one on the drivers side. The new windshield is crystal clear. It's like putting on glasses after you have vision problems - you can see everything again.

Super happy to have had this done - plus it frees up a LOT of room in the shed. The box the windshield was in when they shipped to the dealer was MASSIVE. More room for working on parts and storing old Benz parts 🙂

  • The windshield I purchased from Mercedes-Benz of Chandler for $500 in June
  • The rivets (bag of 15) and the top clamps (bag of 10) were $100. The rivets are ~$3.50 each 😱
  • Windshield clip set was $5 from Pull N Save in Mesa, AZ
  • Install was $300

Total price was $905 (including taxes, tip, etc) which isn't too bad in my opinion. I've had newer cars with the rain sensor cost more out of pocket
 
Last edited:
Great writeup, Brian!

I am surprised it took so long (2.5 hours!) to remove the old glass. I watched an installer R&R a couple of my windshields at least twice, if not 3+ times, and IIRC the total time start to finish was under 2 hours? I had removed internal & external trims before they arrived, because I don't trust installers. Naturally, I got zero discount for doing part of their job. :rolleyes: I'm almost positive they used an L-shaped razor knife to cut the old urethane adhesive, not the rope method. This was all 10-20 years ago and my memory is foggy. I'll pay more attention next time. Back in 2006 the total cost was $225 installed (this included the aftermarket glass).

The [multi-color plastic] roof trim clips often have the metal piece break, requiring replacement of the clips. The rear clip is different than the rest, the metal insert is black instead of silver, and appears to have extra grippers vs the silvers. The colors indicate various different dimensions, you should replace the existing color combo with the same colors. There are 3 variations of each (silver/main and black/rear-only). Photos below from W124performance.com:

:jono:


roof_trim_clips1.jpg roof_trim_clips2.jpg roof_trim_clips3.jpg roof_trim_clips4.jpg roof_trim_clips5.jpg roof_trim_clips6.jpg
 
Last edited:
This weekend's update!

1. I finally got all of the parts in for the head rebuild. Not in a rush to get this done - but happy to have everything 🙂
I'll put together a video soon showing all the part numbers I have in detail along with next steps

2. I got the proper spring compressor and MB plates in after finding someone selling a unit on eBay. Pictures and comparison to my old "KlannKlone" kit can be found here:

I also got some of the Molykote lubricant that @gsxr recommended - will oil the compressor up before and after use.

Next up is going to be taking off the front control arms and then removing/replacing the control arm bushings and ball joints on both sides. That'll be a fun one to show the old parts... my left control arm bushings are big and fat from the steering gear box leaking for years onto them. The ones that stayed dry and disintegrating... and the ball joints (the boot / grease) are just gone completely; lots of slop.

3. Just now, I finished removing the ancient purple tint from the car (was on rear window and rear side windows). I'm guessing this is 10 years old or more by how crispy it is. I tried a lot of different techniques and wanted to share my findings.

For the rear side windows, I tried a somewhat popular trick. I cut the edges off a garbage bag so that I'd have two big square pieces of plastic. Got the windows covered in soapy water and tried to adhere the garbage bag to it. Some people do this with newspaper and a cleaner with ammonia. I let this soak for a good 3 hours and then came back with a heat gun. I heated up the glass from the OUTSIDE (don't want to further damage the film) and used a razor. This worked pretty well! It came off mostly in one piece and was drama free.

PXL_20231222_233212439.jpgPXL_20231222_233941797.jpgPXL_20231222_233944691.jpg

After it's removed, of course you'll want to scrape the glass with a razor and get adhesive that was left behind. There was a lot! Then you can do the smaller fixed triangles. I was able to remove all the pieces from the side windows in ~30 minutes.

For the giant rear window, I tried to do this technique too. I carefully removed the third brake light and hid it inside the house (cleaned up with 303 later). I put the garbage bags on and it didn't really stay very well. If you want to use this technique, I think you'd really need to tape the bag onto the headliner.

I've removed tint on about 4 different cars I've had and this went pretty similarly. It really sucked basically. The water and heat did not seem to help here. I threw the garbage bag out and just got to work with soapy water and a razor blade. It's a humbling experience for sure.

The only real tip I have is to make yourself comfortable. Put on a good comfortable outfit, get some music going, take breaks and have cold beverages nearby. Be SUPER careful with the defroster lines - you want to avoid scraping those if possible. I probably won't use defrost, but we'll see if I blow a fuse if the button gets pushed 😂

PXL_20231223_071816623.jpgPXL_20231223_085619374.jpg1703370400362.png

The full process for the giant rear window took 3.5 hours 😱 (4 hours total for removal). But it's a great chance to clean off that parcel tray and to clean the glass properly. I'm not a fan of tint personally - so this was a nice touch. Much more light inside the car and more stock looking! 🙂

To everybody reading this who celebrates it, hope you have a merry Christmas! 🎅🌲
Hopefully some more updates before the new year - but if not, hope everyone has a safe New Year too! 🎉
 
Last edited:
The removal of the tint couldn't have come at a better time 😂

We did a secret santa in my family and the person who had me was actually able to get a Wackeldackel from Germany 😍

Got this little guy propped in the back window for everyone to see 🤣
wd1.jpg

wd2.gif
 
Whew - long and full day. I got a chance to put the spring compressor into action and it worked great! Thanks again to those recommending the Klann / Miller / genuine one. The plates go in nice and easy - then you rotate them around the spring until the bottom plate is on bottom / top plate is on top. I went with an 8 coil gap, tightened up, and then loosened the strut mount to have enough clearance to remove the spring.

The job I took on today is on the front left- I got the spring out, released the tension, and then took out the lower control arm. Getting the ball joint out from the spindle was a PITA. I bent the dust shield, couldn't get it out. I have captured video for most of the steps (including these hard learned lessons); I look forward to sharing that once I finish the job completely. But what I finally did: you need to unscrew the nut from the rotor so the rotor can flop loose. This gives the ball joint enough clearance as it pushes up against the dust shield (which pushes against the rotor) and it will finally come out.

What I'm doing: taking out both front control arms and replacing the bushings (there are 4 on each side) and the ball joints. I already had the parts and while there is a complete control arm with bushings and ball joint, I could only find the part in stock for one side. Here's how the ball joint looks though - the car had been having some sway when going fast and it looks like the nub that sticks up ground off metal creating an massive oval. The boot had long disintegrated - there was the clip that was supposed to hold on the boot (not pictured).
1704005388556.png

Getting the ball joint out with a press is pretty easy - got that taken care of with the tool I bought a while back. The real highlight of today was removing the control arm bushings. I did find a pretty effective way to do it, though.


PXL_20231230_235226340.jpgPXL_20231231_044727928.jpg

Basically, I did the control arm bushing removal using a torch (yellow, map gas) and a set of channel locks. You can hold the control arm and heat up one side on the metal, heat it up for a while. Then, you can (with the channel locks) bite one side down on the middle of the bushing (where the bolt goes through) and clamp down the other side on the outer edge of the bushing. Grip this hard and start to turn it. You'll have to hit it with the torch a few times... and you'll have to pull it as you turn it, but it'll eventually slide out. The first one took me a good 30 minutes to get out (tried all kinds of horrible things like setting the rubber on fire and using a screwdriver to chisel/pry, etc). Then I tried this process and it came out like butter. The other 3 took about 5 minutes each

Hopefully some more happy updates after tomorrow! I got the control arm all cleaned up with brake parts cleaner and it's ready to have the new ball joint (thanks @Alphasud40 - finally getting to this) pressed in. I have the control arm bushings in the freezer and also have the rubber lubricant handy. We'll see how pushing them in goes. If that goes well, then it'll be the reverse of all the steps today - and then onto the other side 🙂

Shout out to my wife for letting me use the garage overnight with everything still a gigantic mess in there 😀 Doing this job in the family garage on jack stands
 
Last edited:
Here's how the ball joint looks though - the car had been having some sway when going fast and it looks like the nub that sticks up ground off metal creating an massive oval.
Most of that oval is the factory design, although there may be some additional abnormal wear. See photo #12 here.


I got the control arm all cleaned up with brake parts cleaner and it's ready to have the new ball joint (thanks @Alphasud40 - finally getting to this) pressed in.
Due to the oval travel, it is critical the ball joint is installed in the proper orientation... there is less play in one direction vs the other. The ball joint has a mark to line up with the LCA, see the FSM procedure. If the BJ is not installed properly, it will have reduced lifespan and may fail in a relatively short time.


I have the control arm bushings in the freezer and also have the rubber lubricant handy. We'll see how pushing them in goes. If that goes well, then it'll be the reverse of all the steps today - and then onto the other side 🙂
You probably know this, but each of the rubber bushings has a specific location and orientation. Use the photos at this link to verify you are putting each in the proper position.


Shout out to my wife for letting me use the garage overnight with everything still a gigantic mess in there 😀 Doing this job in the family garage on jack stands
That's a keeper right there!


:wahoo:
 
@gsxr I did NOT know about the orientation - thanks!

Unfortunately this job is not going well. I'm thinking about trying to find an entire assembled unit. I can get the bushings pushed in, but then they need to be pushed in all the way. I don't have a bushing press, so I put both sides in for one part and then put the original bolt through. I used the bolt and nut to compress

Every time it seems to go in at an angle and the metal gets stuck. I'll upload a pic here in a few mins.
 
Here's a good picture of what keeps happening. At this point, these bushings are not usable. I've bent the metal and I've pulled them out. I definitely must be missing something. I had put the bushings into the freezer overnight and then put MB rubber lubricant over the rubber endings. Then I stepped on top of the control arm to press the bushing partially in place. I did that on both sides and then put the bolt/nut on and tightened up
1704049295324.png

Definitely pulled an arm muscle trying to force this together 😅 
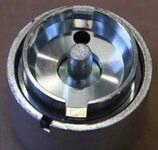
Lots of learning happening with this job. Going to take a break now, look for already assembled units on AutohausAZ and then think about life for a bit 😂🥲😭

In the FSM, I could not find this procedure (nor the ball joint, but at least for that one I have a tool). Any tips there are appreciated. Will look for videos too.
 
I believe there is a special press tool that is required for this operation. Should be plenty of threads out there about folks who have done it.

As far as I know, there is no procedure for servicing the front LCAs on a W124. Basically I believe they just expect you to replace the entire LCA, which has new bushings and BJ as you know.

We do have a HOW-TO on this site from our member @Duh_Vinci (if I remember correctly) about replacing the front LCA ball-joint, at least for the cars with the "early" LCAs with the replaceable BJs.

You can find that BJ replacement HOW-TO here:


I know that member @liviu165 has done the front LCA bushing replacement on a W126, so he may be able to assist with this process. There is a HOW-TO over at the 126board about what he did:

 
One last update - going to start cleaning stuff up a bit and let the wife know she'll have to street park for a bit 😱

Got the parts ordered. Should have done this in the first place - removing the bushings and ball joint is a pain in the ass. And then yep- I'm sure you need a special tool or proper shop equipment to install.

FCP Euro had both parts in stock - got those ordered. Both sides come with new control arm bushings and a new ball joint.
- 124-330-30-07 Left
- 124-330-31-07 Right

1704050743237.png

@gerryvz I did find some threads on the fruit parts website - including some posts from @gsxr who recommended just buying the entire assembly 😂 Most of the discussion was on how to remove the old ones... wasn't fortunate enough to find any relating to pushing them in (other than freezing makes it easier- and using MB rubber lubricant)

I know that member @liviu165 has done the front LCA bushing replacement on a W126, so he may be able to assist with this process. There is a HOW-TO over at the 126board about what he did:

Wow - this is a great write up! Thanks Roy 🙂 Reading through it now
 
It looks like the aftermarket units are made in places like Turkey, Poland and Taiwan.

:scratchchin:

I think I would continue on your quest to try to press in new bushings to your existing arms, and replace the BJs as well. Hopefully some others here have experience they can lend to your dilemma.

I do have the very last pair of FACTORY MB front LCAs that were in the US, which allow the larger brakes/wheels, made for MB by TRW. My price is $5,000 for the pair, shipped, though.

 
Here's a good picture of what keeps happening. At this point, these bushings are not usable. I've bent the metal and I've pulled them out. I definitely must be missing something. I had put the bushings into the freezer overnight and then put MB rubber lubricant over the rubber endings. Then I stepped on top of the control arm to press the bushing partially in place. I did that on both sides and then put the bolt/nut on and tightened up
The bushings must be pressed in / pulled into place using a special tool that presses on the OUTER shell of the bushing only. Not the center! The factory tool is really nifty, it simultaneously presses the bushings in and also flares the center tube. It ain't cheap though, currently ~$900 at Naperville. The center tube pre-tensions the bushings to ease installation into the chassis cavity. You can also use a lug bolt to press/flare the center tube.

Edit: Jon Siggson at MBCC said that the above nifty tool, p/n 201-589-06-33-00, is now NLA.


In the FSM, I could not find this procedure (nor the ball joint, but at least for that one I have a tool). Any tips there are appreciated. Will look for videos too.
FSM procedure for the bushings (33-0526) and also balljoint (33-0440):


Last edited:
Aah, interesting. What subgroup are those procedures located in, in the FSM? I didn't see them in the front suspension/axle subgroup.

This is the proper tool for doing this job. It works for both the 126 and the 124, among others. Again, read the thread that @liviu165 did as for the tool he had custom made for this job, over at the 126board.

stm_0062.jpg
 
Aah, interesting. What subgroup are those procedures located in, in the FSM? I didn't see them in the front suspension/axle subgroup.
It's in Group 33, but buried towards the bottom, and the balljoint is non-intuitively located in the "Knuckle" section. :rolleyes:


This is the proper tool for doing this job. It works for both the 126 and the 124, among others. Again, read the thread that @liviu165 did as for the tool he had custom made for this job, over at the 126board.
Anyone have a link to a vendor that sells an appropriate W124 tool, for future reference? A quick search turned up mostly tools for newer chassis, or rear axle tools, etc.

:gsxrepc:
 
LOLOLZ: "I have used the pirate part bushings and found they last less than 10 months. This time i used the original part by Meyle."

Buried at the bottom of page 17 and top of pg 18, that shows pressing the 124-style bushing at the OUTER shell, which is correct.

How is that guy still alive with 10 attached fingers??

1704069787563.png 1704069804099.png
 
@bclifton,
I did this job on my old 86-300E. What I did with the bushings was to take them to a front end shop that has the tools to press in the bushings. They made easy work of it and it didn’t cost much but that was about 30 years ago.

My suggestion is to look around for a shop near you and ask them if they can do it for you. Just make sure the bushings are oriented correctly.

It’s worth a try.
 
The only vendor I know of who used to carry the tool is Samstag Sales, but it’s NLA through them.

The Sir Tools part number for this press tool is M 0062, FYI.

$280 at autotoolworld.com
D'oh. I wonder if it's NLA everywhere, or if some vendors might still have one on the shelf. It's mind boggling that there's no demand for this tool, there are a ton of 80's cars still on the road that need bushings. Maybe people just replace the entire LCA?

1704071376623.png

1704071392876.png
 
LOLOLZ: "I have used the pirate part bushings and found they last less than 10 months. This time i used the original part by Meyle."

Buried at the bottom of page 17 and top of pg 18, that shows pressing the 124-style bushing at the OUTER shell, which is correct.

How is that guy still alive with 10 attached fingers??

View attachment 181317 View attachment 181318
@gsxr,
Don’t laugh Dave that’s what I used on my 300E but I put 2 clamps on opposite sides and used small vice grips to keep the clamps from sliding around the spring.

In my 1st attempt to lower the car I cut off about one ring and put them back in with the same clamps. I hated the ride so I removed them again and installed Eibachs.

The Eibachs were so short I hardly needed the clamps. In fact you could jack up the car and the springs could be rattled in the perches.:jono:

Note that I was a lot younger and dumber back then but it worked.:banger:

Note I used these same clamps previously to R&R the front springs on my 72 Lincoln Continental MKIV.
 
D'oh. I wonder if it's NLA everywhere, or if some vendors might still have one on the shelf. It's mind boggling that there's no demand for this tool, there are a ton of 80's cars still on the road that need bushings. Maybe people just replace the entire LCA?
Everything considered (how hard tools are to find, difficulty in finding DIY documentation), I don't feel nearly as bad as I did on the garage floor when I threw in the towel 😂 Definitely I had missed section 33 (front axle) when thumbing through the FSM and getting ready for this job (thanks for sharing, Dave!). If I saw that, I would have probably stopped and just ordered both control arms then.

One of my friends at Mercedes-Benz of Chandler said that they have the tool and should be able to help... but service department won't be open for a few more days and at this point, I've already ordered the complete arms. I do wish there were good German made parts available - but honestly, even shoddy parts are better than what I've been dealing with. I'm doing the video editing right now for the project so far and everything was just in horrible condition.

I'll keep the LCA and see if the folks at MB of Chandler can help me push the other set of bushings I have in. In the meantime, I can install a ball joint. Then, I'd at least have one LCA as a backup. When the right side comes off too, I can press in the ball joint on that and keep as a spare.

Thanks everyone who has replied here 🙂 Good to know your limits - whether those are skills you have/lack or limits for how many tools you're willing to buy 🤣


UPDATE: video is now live 🙂
 
Last edited:
Our member @liviu165 has documented the creation of this bushing press over on the 126board. He specified all of the parts required, which includes three pieces that have to be custom-machined. I have ordered all of the required hardware (totaling around $50) and will talk to a local machine shop about fabricating the three needed pieces for me in the coming days.

I know there are also "online" machine shops that one can upload specs to, and they will fab/CNC the parts and ship them to you. That is an option for anyone who is interested in making one of these press tools for themselves.

Here are Roy's specs for the parts that need to be created by a machine shop.
2.3.JPG


Separately, the following parts need to be ordered from Grainger:
  1. Part 4FHF6 -- 5/8"x18 threaded rod, 3 foot length (cut down to 1 foot)
  2. Part 31JL56 -- 5/8" heavy steel washer, 10 pack (need one)
  3. Part 41LN46 -- 5/8" nut, 10 pack (need two)
And from Amazon:

 
Last edited:
Found the 126 thread (link below). Are the tool dimensions identical for the 124 bushings, which are similar but not the same as 126?

:linkhier:

Also found photos of the OE/dealer tool:
 

Attachments

  • LCA_tool_02.jpg
    LCA_tool_02.jpg
    125.5 KB · Views: 5
  • LCA_tool_03.jpg
    LCA_tool_03.jpg
    141.8 KB · Views: 5
  • LCA_tool_05.jpg
    LCA_tool_05.jpg
    134.3 KB · Views: 5
  • LCA_tool_04.jpg
    LCA_tool_04.jpg
    99.8 KB · Views: 5
  • LCA_tool_06.jpg
    LCA_tool_06.jpg
    107.7 KB · Views: 5
  • LCA_tool_07.jpg
    LCA_tool_07.jpg
    107.3 KB · Views: 5
  • LCA_tool_08.jpg
    LCA_tool_08.jpg
    101.3 KB · Views: 5
A few hours after placing the order (above, post 178) for the two complete control arm assemblies, I didn't want to wait the original 3-5 days shipping and risk delaying the project another week (usually, only have weekends for wrenching). I put in another order in Dec 31st with FCP Euro w/ 1 day shipping and got the parts in today 🙂

FCP Euro has a weird system where I couldn't cancel the original order (even minutes after you place it?) - it seems like they prefer to handle things w/ returns. Since the MB parts are NLA, I'll just keep the second set that I ordered as spares.

After the family went to sleep today, I went back out to the garage and got the left control arm put in. Plopped the steering knuckle on the ball joint, put the strut back in, re-attached the sway bar bushing, and put the brakes back together. With the brakes, you only really need to undo the 5mm hex on the rotor to help give enough clearance when pulling the spindle / steering knuckle up off the ball joint. When I do the other side, I'll leave the calipers on. The important thing is to make sure you don't stretch your flexible brake line.

Got everything bolted up and torqued down, just need to put the spring back in, tighten up the strut mount, and spray the rotor with brake parts cleaner after touching it... and then do the other side 🤣
1704351295569.png

The bolts that go through the control arm bushings are important for the alignment. I did not tighten those all the way - just got them snug. FSM says you want the wheels on the ground before you tighten it and that it affects alignment. When control arms on both sides are replaced, I have one more project to do before we can take the car in for an alignment. Unless the alignment is REALLY off and not safe to drive 🙂

I have the parts ready to go for replacing the tie rods, the drag link, and the steering damper. I'm not sure how difficult the idler arm bushing is... but I have the kit for replacing that too. Then, this car should have nice and tight steering again! 😁
 
Last edited:
FCP Euro has a weird system where I couldn't cancel the original order (even minutes after you place it?) - it seems like they prefer to handle things w/ returns. Since the MB parts are NLA, I'll just keep the second set that I ordered as spares.
Cool! The Lemforders are made in Taiwan, correct?


The bolts that go through the control arm bushings are important for the alignment. I did not tighten those all the way - just got them snug. FSM says you want the wheels on the ground before you tighten it and that it affects alignment. When control arms on both sides are replaced, I have one more project to do before we can take the car in for an alignment. Unless the alignment is REALLY off and not safe to drive 🙂
100% correct... don't tighten the LCA bolts with the wheels in the air. When these eccentric bolts are removed/replaced, especially when not turned to the original position (with the old LCA's), the toe can be significantly affected. Use a tape measure to check toe across tire treads, if it's way out, do a rough adjustment to buy time before the alignment.


I have the parts ready to go for replacing the tie rods, the drag link, and the steering damper. I'm not sure how difficult the idler arm bushing is... but I have the kit for replacing that too. Then, this car should have nice and tight steering again! 😁
The idler arm bushings should R&R easily, but sometimes the difficulty is the bolt may hit the exhaust when pressed upward. Might need to push out the top bushing to allow more angle on the bolt for removal. I haven't done a 6-cyl car in a long time so I forget details.


:banana1:
 
Dave, on my E320 with M104 the exhaust pipes prevent the long bolt from being extracted. Just remove fan shroud, two motor mount bolts from cross member and jack up the engine a couple of inches. This gives you adequate clearance.
Here’s a tip to drive the bushings out: plumbing dept. in any hardware store sells a short length threaded pipe that fits perfectly in the idler arm tube. Use as a drift. Piece of cake.


Regards,

Peter
 
Damn - I am absolutely beat. But it's all done!

I got both new lower control arms installed. I did run into one snag - I always try to do things by the book. And one of the last steps when torquing down is to torque the sway bar bushing to the lower control arm to 20 nm. This was fine on the left side, but on the right side the top stud sheared when tightening. I had to hacksaw the rest of the stud, drill it out, put a bolt through there and secure in place with a nut. I feel pretty good about how I solved it - I don't see any issues with it holding up. Will share a video soon which makes it easier to visualize

After everything was back together, I lowered the car back on the ground, torqued the lug bolts to 80 ft/lb, torqued the strut mount bolt down to 60nm, and put the car up on ramps. When it's on the ramps, I went ahead and tightened up the 4 bolts going through the lower control arm bushings. Since the car needs an alignment, I just tightened it up by hand (counter holding, 22mm bolt and nut) and got it as tight as I could by hand. The plan is to take it in for an alignment and it should be able to be torqued down properly then 🙂

Next up (before alignment) - going to try and knock out both tie rods, drag link, and steering damper. I noticed there's still a little play when getting up to speed on the highway (80 mph). When going lower speeds and moving the steering wheel fast, the car is VERY responsive. New struts, control arm bushings, and ball joints really make a massive difference! 😁
 
And here we go 🙂 YouTube video showing the process - including a demo of the wackeldackel at the end 😂


Those other parts coming up soon (after some rest!). Thanks for the tip w/ the idler arm bushing, @geraniumtr! 🙂 For the 300D, it seems like there's a decent amount of clearance under there once you take the heat shield off- but I remember (from doing the engine mount) the exhaust might be in the way. Will definitely try both this and the drifting out. Or maybe it's completely shot and it'll just fall out 😂
 
Last edited:
My rhinos were about 15 years old and yes, they slid quite a bit. I bought race ramps with the long access ramp up that can be removed for access. Much easier and safer than getting out the lift or sliding, cracking rhinos.

The cost of race ramps is quite a bit more than new Rhino ramps but i like them better for safety and convenience over the Rhino.
 

Who has viewed this thread (Total: 3) View details

Who has watched this thread (Total: 6) View details

Back
Top