• Hi Guest !

    Welcome to the 500Eboard forum.

    Since its founding in late 2008, 500Eboard has become the leading resource on the Internet for all things related to the Mercedes-Benz 500E and E500. In recent years, we have also expanded to include the 400E and E420 models, which are directly related to the 500E/E500.

    We invite you to browse and take advantage of the information and resources here on the site. If you find helpful information, please register for full membership, and you'll find even more resources available. Feel free to ask questions, and make liberal use of the "Search" function to find answers.

    We hope you will become an active contributor to the community!

    Sincerely,
    500Eboard Management

OWNER bclifton (300D)

There is a thread that is updated upon occasion that details availability of the W124 vacuum pods, divided up into the early and later cars. A couple or three pods are still avaialble new from either factory or aftermarket sources, but availability is dwindling by the year. There may be a few members with spare pods they have hoarded, that could be available for sale.


And also more information in a Wiki entry on the topic.
 
Finally got my R129 SL sorted (new hydraulics as shared in last post, new pump, new canvas and plastic windows for rear part of the soft top). New high quality plastic bits via classictrimparts.com. I did order some plastic trim from OctoClassic but it was the wrong color and completely shit quality. The rear view mirror clamshell broke when trying to install and they don't stand behind their stuff. Basically flushed $283 down the toilet. As they make W124 parts too, I would avoid them personally.

Just a few more small things left on the SL and then it'll be ready to sell. Until then, back to the 300D 🙂

This past month, I've been having fuse# 6 blow multiple times. The items on that circuit are:
  • horn
  • temp sensor display
  • turn signal
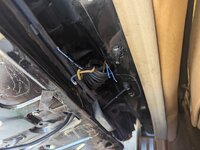
I unplugged the wires to the two horns, the temp sensor display (behind the cluster), and temp sensor (under the fuses) one at a time and it still blew. Two months ago, I replaced the turn signal stalk with a new unit (which looks like it just went NLA! 😱124-540-10-45). There was a mystery wire dangling off this stalk which I never found where it went- a single round plug. After searching a bit, I found that's for the wagons (rear wiper); shouldn't be a problem.

Next, I unplugged 1) the cruise control stalk and 2) the turn signal stalk and put everything else back. So far, so good. With the turn signal stalk unplugged, the headlamps won't turn on. I plugged that back in (basically only cruise control stalk unplugged at this point) and went for a 30 min drive - it's held up and horn/temp sensor/turn signals all work perfect. My cruise control doesn't work anyways (buying a rebuilt amplifier by ProgRama - it's on the way), so I'm going to leave it unplugged for now.

The timeline (when this problem started) does match up though. My original cruise control stalk was part# 124-545-09-24 and because it was broken, I replaced it with one I found in the junkyard (124-540-05-44) last month. After replacing the cruise control stalk is when I started noticing timing issues with the turn signals (almost like a quick double blink sometimes). Not long after noticing that, when taking it out for more than a few minutes I ran into issues where fuse# 6 would blow (fuse would never last longer than 10 mins; most of the time blowing immediately). Turn signal now seems back to regular and no blown fuse. Hope this fixes it 😂🤞

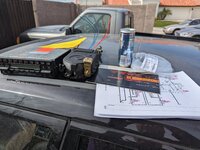
On a happier note, I got a new Becker 754 radio (w/ Bluetooth) from Becker Auto Sound in NJ along with a new Hirschmann antenna. I used the wiring diagram from the W126 electrical guide since that's all I had handy and it seemed to match (attached). It's always refreshing getting rid of the rats nest in these old cars and putting everything back like it should be


PXL_20230219_183632097.jpgPXL_20230219_211146062.jpg 1676875968439.png

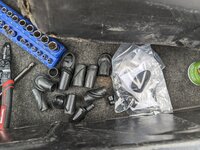
This was a pretty drama free install, minus the antenna. I saw somewhere that the antenna grommets are back in stock, so I ordered some (124-827-08-98 and 124-827-07-98). Those didn't fit - but I had a bag from years ago with generic versions of all the Mercedes grommets; I found a close fit. First picture shows all the grommets; 2nd one (looks W126 style) is the only one that fit.

PXL_20230219_200606695.jpgPXL_20230219_200503656.jpg

Rounding off (pun intended if you keep reading) the entire experience, the last thing that happened was trying to adjust the door striker. The driver's door has always gotten caught unless you really give it some gusto. I loosened the two 5mm allen bolts and moved it around, thought it was a good fit... but on test driving there was some noise and the door stuck out just a hair. On re-adjusting, one bolt loosened up just fine - but the other one got stripped (completely round). Will be drilling that bolt out tomorrow and hitting the junkyard to get a replacement
 

Attachments

Last edited:
New high quality plastic bits via classictrimparts.com. I did order some plastic trim from OctoClassic but it was the wrong color and completely shit quality. The rear view mirror clamshell broke when trying to install and they dont stand behind their stuff. Basically flushed $283 down the toilet. As they make W124 parts too, I would avoid them personally.
That is a bummer about Octoclassic. Apparently their 3D printed items are not very robust. But it's worse that they don't stand behind their products. 😟


This was a pretty drama free install, minus the antenna. I saw somewhere that the antenna grommets are back in stock, so I ordered some (124-827-08-98 and 124-827-07-98). Those didnt fit...
Those grommets didn't fit because they are meant for 1988-up sedans with the angled antenna. Early sedans have a vertical antenna with different (smaller) grommets, which are also available again. 124-827-05-98 upper, 124-827-06-98 lower fits early sedans with vertical antennas.
 
Hey there folks! It's been a while since an update - but making slow and steady progress with the 300D.

Last time I posted here, I was drilling out the bolts for the front left (driver's) door striker. Happy to have that sorted 🙂 I broke the first drill bit drilling it out (😂) and once I got it out with a 2nd bit, it fell down the B pillar channel. Got a magnet, took off the B pillar trim, and got the parts without any real drama. The newer (1990 and newer?) bolts for the door striker are Torx (T30? I forget) instead of hex which definitely lets you get a better grip. I might replace all of the bolts just to avoid this in the future.
IMG_20230220_145403_01.jpg1681105737616.png

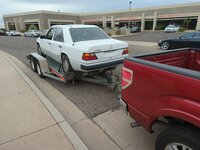
One thing I stumbled upon was a 1992 300E parts car 🙂 I got it for relatively cheap ($1,300), it's a 1 owner with clean title, and it runs and drives! It was in a front end collision and sat on Craigslist for a while before I scooped it up. Got a U-Haul trailer for $70, backed it on up, and brought it home. It's a white exterior but it's got the same Palomino interior that I have (but much better shape!)

PXL_20230315_000349109.jpgIMG_20230314_171209_01.jpg


Lots of great parts here! I swapped over all the easy stuff... sun visors in great shape, door panels, molding around the doors. I swapped the wheels since they're painted (silver) and in great shape - versus my peeling chrome wheels. The door panels made a big visual difference - these were in nice shape

PXL_20230402_230453907.jpg

I was hoping to swap the seats - mine aren't bad, but they're MB-Tex (parts car is leather) and are showing some pink. I did a bunch of research and tried fitting them... but there's not an easy way to swap things, unfortunately.

The back bench is different between 1987 and 1992 due to the seat belts:
PXL_20230318_004308192.jpg PXL_20230318_005344791.jpg

  • (LEFT) The 1987 has seat belts bolt to the back and go outwards (towards the front) and upwards and the back portion of the bench has holes (in the armrest) for tucking away the seat belt buckles.
  • (RIGHT) The 1992 seat belts bolt to the bottom of the car (going straight up and down) and pass through a slit in the bench.

If I had more free time or really wanted to go for it - all of the seats could have been swapped. Each problem can be worked around. But the headrests in the rear are different too and those are a bit of a PITA to swap over (remove parcel shelf / speaker grills / etc). And then the front seats aren't in that great of shape (maybe a 6 out of 10). I think the front seats (at least the driver's seat) would require taking the seats apart and swapping the seat coverings (leather) and keeping the 1987 frame. Totally possible - but ultimately, I've been there, done that before - it's a lot of work. I'm happy enough with the MB-Tex given there are dyes available to fix the pink.

Huge kudos to @gsxr for answering questions and providing help while I was troubleshooting that 🙂
 
Last edited:
Besides the parts car, I've gotten some great work done

1. I traced the problem I was having with fuse# 6 (horn, turn signal, and temp display) and found the root cause. The retrofit I did for the steering wheel involved making a wire for the horn and connecting that from the squib to the horn pad itself. That is what was shorting. Instead of trying to make the guts from a 1994 steering wheel work, I pulled a 1992 steering wheel from the junkyard for $8 (leather was damaged) and put those internals into my wheel. That worked perfectly 🙂

2. I have been having other electrical gremlins- definitely seems the alternator is underpowered. This still had the stock 70A unit which seems to be severely underpowered. Every once in a while when a lot of equipment is one (AC, headlamps, radio, etc), the radio will just "turn off". No fuse blown. I've also noticed at idle the headlamps being a little weak. I got a rebuilt unit from AutohausAZ and that seems to have helped. My brushes for the voltage regulator were down to about 5-8mm.
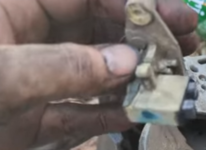
1681107622112.png

Props to @gsxr again for TONS of information on alternators. I haven't found any Benzes locally at the junkyards that have the 143A or 150A unit... but I'm keeping my eyes open. @gsxr has compiled a ton of information in this thread:

And then you can also find pics, notes, and more about the fitment for the alternator on his site here:

I captured video showing the alternator replacement on my 300D, the parts car, and showing the wheels I swapped over here:


3. I got lucky with another car at the junkyard. A 1987 300E (beautiful 199 blue/black with velour seats) had came in and I grabbed the rear bumper for $60. Mine had a massive crack in it and other damage. This was a super easy swap over and it makes a visible difference 🙂
Before:
1681108065473.png

After:
PXL_20230403_041505928.jpg

4. I finally replaced the passenger motor mount. I hadn't inspected it, but the entire car has been shaking at idle. Like really bad! I got the car up on ramps, took off the bottom bolt, and then jacked the engine up (under the oil pan, using thick plywood). It was really hard to reach the top bolt... with a stubby, it wasn't going anywhere and you can't reach it from the top (the turbo is right over it).

I dug deep into the memory bank and remembered a post by @gerryvz for the M104 where he pulled off the whole mount attachment. I gave that a go (the part outlined in red):
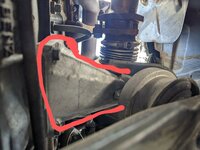
PXL_20230408_185755220~2.jpg

This had four 13mm bolts which were a piece of cake to remove. The whole assembly easily came out and then it was just a matter of using a 17mm stubby and a hammer to get the top bolt loose. With that loose, you can see the new mount versus the old one. This thing was smashed!
PXL_20230408_193221100.jpg

Putting it back literally was the reverse of the steps. I was scared I wouldn't be able to line up the four bolts properly... but if you take your time it'll be just fine. Make sure everything is lined up, put the bolts in, hand fasten them loosely one at time, jiggle the assembly around a bit, secure more, etc. Before you tighten anything down, you'll want to have the bottom bolt threaded too.

Putting this in was literally like receiving a new car. No more shaking, car is a complete joy to drive. I am in love with the W124 😍

5. The last problem - I'm sure a lot of cars have a problem with and I'm not completely through it yet, but I think I have it nailed.

I've been having fuse H (front right window and rear left window) blow on me ever since I got the car. Using an extra car battery I had on hand, I manually powered the motor for front right window and it was sluggish. I replaced this scissor style window regulator and motor with one from the parts car, making extra sure to clean the parts and being generous when slathering on the MB Gleitpaste. This got the window working nice and smooth but the fuse still blew.

Moved onto the rear left window and even with the motor disconnected the fuse would blow. This was a hard one. I printed the wiring diagrams for the power windows and didn't find anything. Just using my hands to physically follow the wires, I looked to the door hinge and found a suspect. I had to take off the rubber accordion cover to inspect, but the braided hose which has the 4 wires in it had a piece of copper popping out of it. I got a razor and peeled back the braiding and sure enough, these wires were raw copper and touching each other.

Here's a pic after I cut it - but it was basically missing the insulation on all four wires for a 2 - 3mm segment. I did a shitty fix (butt splices) and put it back together and now the fuse isn't blowing and front right window works great. I pulled a full harness from the parts car that I'll be using and doing a much nicer splice (or solder) in the B pillar... that one was also starting to crack in this area too. The motor in my case for the cable driven regulator is dead. Providing 12 volts it just makes a click sound. I'll look at swapping this when I replace the harness and we'll be back in business 🙂
PXL_20230408_233949665.jpg

Those are all the good updates!

I'm getting ready to do the dashboard and will take some time off work to do that. While typing up this summary, Igor at Restored In USA emailed the tracking number and all of the restored wood (shifter, console box, climate control, ashtray, and all the dash pieces) are on the way. I have a glove box with the wood. It'll be great to finally get those in and then get the dash ready for install.

I ordered a bunch of rubber vacuum connector pieces (Y one 201-805-01-22, the U one 117-078-05-81, and the 90 degree elbow one 201-805-01-03). I was able to get one of the vacuum pods (124-800-03-75) but the others I'll have to hit the junkyards if mine are in bad shape. Lots of great information on these forums of course! (Link here for latest vacuum pod availability). Any recommendations here are appreciated and I'll order those "while you're there" parts.

One part I'm trying to locate now (on the door- holding down the wires) as lots of plastic breaks when you look at it:
1681110057215.png
 
Last edited:
Small - but super happy update 🙂

Just got all the refinished wood back from Igor in San Diego. Total refinishing price was $575 for 8 pieces.

Here's how it turned out:
PXL_20230413_034644158.jpgPXL_20230413_034655617.jpg

And then here is some if it installed on the dash. I'll be booking some time off work to get this knocked out before the Phoenix summer fully kicks in! This is a newer dash with the wood- so I got that refinished. I also had to source a glove box which had the wood (which I think was only for like 1990 and 1991?) in palomino - but I found one! The glove box with wood was ~$150 on eBay - which is more than the dash was at the junkyard (~$100 total) 😂

PXL_20230413_041350679.jpgPXL_20230413_041353104.jpgPXL_20230413_042454441.jpg

All the small parts I ordered from MB of Naperville came in - got those and all the hardware from when I pulled the dash ready. Will give everything a clean and set it aside. Next big update will be pulling the old dash and then checking out vacuum lines / connectors / pods 🙂
 
Made some good progress towards the dash replacement 🙂

First up - I got my 1994 SL320 pulled over in the side yard. Got everything out of it, put a sun screen on, and then put a nice R129 specific car cover over it. I had listed this for sale after fixing a ton of stuff (including replacing all the top hydraulics) but didn't get any bites. It's a great car - just doesn't fit the whole family. Going to keep it for now 🙂
PXL_20230422_203505761.jpg

With the SL parked in the side, I can finally garage park the 300D. I pulled it in, put all the windows down, and disconnected the battery. I got the replacement dash I pulled a while back all cleaned up and it looks amazing. I pulled the vents, speakers, etc and then gave it a good cleaning so that it's ready to swap in
PXL_20230422_082049326.jpg

And then I got to work on the 300D. It took about 2 hours of taking my time, organizing as you go. But I got the old dash pulled. For the removal, I didn't bother taking the A pillars out. But when it's time to swap in the new one, I might need to. I'd really prefer not to though! Not sure if anyone has done that and had advice.
PXL_20230423_005743989.jpg

With this out, I got to cleaning things a bit. I got the bags of brand new MB vacuum connectors and started swapping all the connectors (the Y, the U, and the elbows). At that point, I got the hand vacuum pump out and started testing the lines going into the vacuum distribution block.

1987 Mercedes-Benz 300D with VIN WDBEB33D4HA313198

NumberColorFunctionStatusPart numberPart statusLocation
1RedRecirculation pod stage 1BAD124-800-04-75 (left)
124-800-11-75 (right)
✅ Can use the #30 pod here
remove the rod / use existing rod
PARTS PURCHASED 23 April
Left here
no pic of right
2Green / BlueRecirculation pod stage 2Slow leak124-800-04-75 (left)
124-800-11-75 (right)
✅ Can use the #30 pod here
remove the rod / use existing rod
PARTS PURCHASED 23 April
Left here
no pic of right
3Red / YellowFootwell podBAD2x
124-800-01-75
PARTS PURCHASED 23 AprilPXL_20230423_212418299.jpg
4Red / BlackDash center vent podBAD124-800-02-75Email sent 23 April with order details
Performance Analysis ACD-2010
PARTS PURCHASED 24 April
Picture 1
Picture 2
5Red / WhiteDefrost vent pod stage 1BAD124-800-00-75✅ Can use the #30 pod here
remove the rod / use existing rod
PARTS PURCHASED 23 April
near the right recirculation pod
6GreenDiverter podBAD124-800-03-75✅ Have new part on hand
(they are still available)
Picture here
7Red / BlueDefrost pod stage 2BAD124-800-26-75??✅ Can use the #30 pod here
remove the rod / use existing rod
PARTS PURCHASED 23 April
near the right recirculation pod

Color/function in chart via FCP Euro blog post and then I'm also collecting info from @gsxr's website and other posts here - editing this post as I find out more. Also checked info against the wiki page here.

Besides the leaking vacuum pods, I did noticed the center door was flopping around. It has two "hinges" (one on each side) and it's supposed to move up/down when the center pod is actuated. Mine was loose, like it just fell through.

It's kind of late now - but tomorrow I'll pick this back up. I need to finish mapping each of these to part numbers and then figure out if the Performance Analysis ACD-2010 diaphragms can be used for some of these. Going off the notes here, I should be able to 4 (1 defrost, 1 center vent, 2 for the main air / recirc flap left+right pods).

I did pull the SRS passenger airbag out of the parts car so I can reach in and test each line that it has. Lines 2 - 6 seemed to hold vacuum without an issue. I'd need to pull the dash to get them... and then the center area under the diverter pod is definitely interesting. Before ordering anything, I will can pull the dash here and snag all the pods. It's also possible the vacuum lines themselves are leaking - I'll be sure to check that too.

There are also some junk yard cars I can check out if I feel like pulling a 3rd dashboard 😂
 
Last edited:
The footwell pod is located behind the climate control. There was a VIN break at A289309, early cars used two round pods (124-800-01-75), later cars have a single white rectangle/flat pod (124-800-09-75). The late style (rectangle) is NLA but almost *never* fails. The early style round pods are still available new. Check which type your car has. Since yours has failed, it's possible you need the early/round pods.

Also, 2 of the 7 vacuum lines go to a pair of pods in parallel (main air / recirculation flap, #1 and #2). If either line won't hold vacuum, it means at least one of the pods has a failed diaphragm. What you have listed as "Stage 1 or 2" is referred to in the FSM as either "Small Lift" or "Large Lift", which becomes apparent when you bench test a pod. To achieve full opening / travel, vacuum must be applied to both ports simultaneously.

Note the ACD-2010 kit only repairs the "small lift" portion of the dual-chamber pods. Typically, that is the section which fails. The "large lift" portion cannot be repaired, the pod must be replaced if this fails. There are detailed photos on my website showing the travel distance cut in half with the ACD-2020 kit. Note the FSM descriptions for each in section M (pg 33) of the manual below:


:matrix:
 
EPC diagram is below with part numbers for the 124.133 chassis. Note that some numbers changed as of 1990 model year, in addition to the footwell pod VIN break, which is why your part numbers above don't match (some 400E/500E numbers will be different, i.e. what you found in the WIki).

And, as noted above, there is not 1 part number for vacuum line 1 and vac line 2... there are two part numbers which are connected to both ports.

1682259145919.png
 
Besides the leaking vacuum pods, I did noticed the center door was flopping around. It has two hinges (one on each side) and its supposed to move up/down when the center pod is actuated. Mine was loose, like it just fell through.
Forgot to mention - you need to figure out what is wrong, and fix it, if you want the center vent flap to work normally. The flap bends and the "hinge" is just a nub on each corner that plugs into a hole in the side plastic frame. Hopefully nothing is broken!
 
Very ambitious of you to tackle this job. I have a big box full of pods and with others help I may be able to contribute to some pod needs. I'll post up what I have when I can. I'll need help determining what I have as some don't have numbers. I have taken some pictures.

Thanks in advance for documenting the work.
 
It's my pleasure to document this as I go! I know this is "just a message board", but I do feel like you all are right here tackling this with me too 🙂

Thanks for massive amount of info, Dave! 🥰

Note the FSM descriptions for each in section M (pg 33) of the manual below:
This is great! I may have already had this in the pile of documentation I've downloaded, but I definitely didn't find it. This is exactly what I needed to understand how each of the systems are working 🙂

The footwell pod is located behind the climate control. There was a VIN break at A289309, early cars used two round pods (124-800-01-75), later cars have a single white rectangle/flat pod (124-800-09-75). The late style (rectangle) is NLA but almost *never* fails. The early style round pods are still available new. Check which type your car has. Since yours has failed, its possible you need the early/round pods.
This is interesting... The VIN break being at A289309 and mine is A313198. I'll have to go out in a minute to look - but for sure, I saw one circular style pod behind the climate control (with red/yellow hose connected via a Y connector). I'll look for a second one (and take some pics) - it's great to know these are still available 🙂

Where did you get the VIN break from?
edit: I see it now in EPC:
1682279713784.png

From DM (hope it's OK to share!):

If a used pod tests good, it may fail days/weeks/months/etc after swapping. I'd only risk this with the defrost or footwell pods. You never want to pull the dash again if it can be avoided. Meaning - you probably do not want to use the parts car pods, unless there's no other choice, and then you want to rebuild them (if applicable). Best to replace with new or rebuilt
This is solid advice and I'm all about doing it right 🙂 Even though it can look scary if you haven't done this (for anyone reading): pulling the dash is honestly not that difficult. Way easier than the W126, IMO. But there are a lot of things that can go wrong; I agree about not wanting to pull the dash again. With the L and R vents, all of the retaining clips (4 on each) broke when prying and then the plastic parts of those vents (ex: the sides) broke in my hands after years of heat/UV cooking the plastic. Things can and will get bent and broken, no matter how gentle you are. I have spares for most everything (vents, etc). But as @gsxr shares, it's not a great idea to use the parts cars vacuum pods as-is (without rebuilding) because you don't 100% know the age (although the pods sometimes have date stickers when it was manufactured) or the condition.

Will continue to update the sheet above 🙂 Thanks for following along @sheward - and wow - big box full of pods 😍
 
Last edited:
The VIN break is in the EPC, however the EPC is (gasp!) not infallible. If your car has the dual round pods for the footwell flaps, that would just be more evidence. I am curious what you find.

OH, forgot to mention, definitely pull the A-pillar trims. I have no idea how you removed the dash without damaging the forward corners. And you likely can't install the replacement without damage unless you tilt it upward along the A-pillar as shown in the FSM procedure. Tip - put some orange tape or other high-vis on the cruise control stalk. When installing the dash it is frighteningly easy to accidentally damage the cruise switch (which I think is NLA - can't remember). Getting the dash to seat against the top of the heater box is often a PITA.

The first time I attempted this job it was like 8-10 hours. By about the third time, I was able to get it to ~4.5 hours start to finish. It is extremely handy to have spares available because as you said, the possibility of breaking something is pretty high.

:klink:
 
Taking interior notes for when I attempt this later this summer, no heater core replacement? Mine’s fine, but seems like a big while you’re in there for me (i’m not too familiar with their assembly/ if they have any cracks on plastic end tanks etc similar to a radiator..)
 
Taking interior notes for when I attempt this later this summer, no heater core replacement? Mine’s fine, but seems like a big while you’re in there for me (i’m not too familiar with their assembly/ if they have any cracks on plastic end tanks etc similar to a radiator..)
For reference, here's a dash removal for a pedestrian E320.

 
Taking interior notes for when I attempt this later this summer, no heater core replacement? Mine’s fine, but seems like a big while you’re in there for me (i’m not too familiar with their assembly/ if they have any cracks on plastic end tanks etc similar to a radiator..)
That's a good question. Would this be a good time to replace the heater core (002-835-56-01; about $160) and evaporator core (124-830-07-58; about $400)? I have no experience doing this on any car - I'm not sure how hard or easy it is. Worst case, I could always drive it to a shop while everything is easy to access

Are there any tests that can be done for those cores? Being in Phoenix, I honestly don't need the heater core. If that ever does fail, I can just loop the coolant hoses under the hood. But the evaporator can be a life or death situation with how hot the summers get

edit: holy s**t- I did some quick searching and yeah, this (or at least the evaporator core replacement) looks like a really bad job (even with things apart as much as they are). The prior owner did replace the expansion valve already which looks to be part of the typical job. I might get a quote - but definitely skipping on doing this myself.
 
Last edited:
I don't know how much work it is to replace the heater core. However, I've heard of almost zero heater core failures, so I'd be inclined to leave it alone. Only test I know is just to pressure test the cooling system, if it holds 1.2 bar without sprouting leaks, I'd call it good.

The evaporator is a nightmare. Don't go there unless you are forced to, kicking & screaming. If the system has been downgraded to R-134a, you might want to look into a blend (like Enviro-Safe or similar) with better performance. Ideally you'd convert back to mineral oil and R-12 but that's a ridonkulous amount of work. R-134a conversions tend to have mediocre performance at best, dunno if you'll be happy with that in Phoenix.

:seesaw:
 
I dont know how much work it is to replace the heater core. However, Ive heard of almost zero heater core failures, so Id be inclined to leave it alone. Only test I know is just to pressure test the cooling system, if it holds 1.2 bar without sprouting leaks, Id call it good.

The evaporator is a nightmare. Dont go there unless you are forced to, kicking & screaming. If the system has been downgraded to R-134a, you might want to look into a blend (like Enviro-Safe or similar) with better performance. Ideally youd convert back to mineral oil and R-12 but thats a ridonkulous amount of work. R-134a conversions tend to have mediocre performance at best, dunno if youll be happy with that in Phoenix.

:seesaw:
I think when I initially raised this question, what I really meant was the evaporator, my system was converted to R-134a at some point in the early 2000's from my understanding, theres this timelapsed video of a guy replacing it and it really makes it seem like a... while you're in there which truly is the rabbit hole that I constantly find myself in :blink:.
 
@TerryA yes! 🙂 You can take them apart and the rubber diaphragm is replaceable. The problem is that there are only a few options on the market - like ones that will fix the center pod or one half of the left/right main and defroster pods.

@gsxr helped me mastermind a solution where we should end up with all new pods (even though most are NLA) EXCEPT for the center pod, which I'm in the process of ordering the diaphragm (will order an extra just in case). This really is a best case scenario and I'm very appreciative 🙂 There is a part number 124-800-30-75 which is NLA but is available on Amazon here. I got 3 of these (Left main, right main, defroster) and upon receiving this, some customization is needed- taking it apart and making the vacuum line face the right way ("clocking it"). The rod is removable and won't be used (we can re-use the existing rods).

I put together a video last night showing where everything is at for those interested! 🙂 I tried to capture the learnings from here and tips found along the way
 
The issue I see with replacing diaphragms is that the pink pod bodies can be very brittle, and it is exceedingly easy to break the clips that hold them together. You must be VERY careful and cautious on the disassembly and re-assembly of the bodies.

This seems like a good opportunity for a third party to step in and make new pods for cars like the 201, 124, 107, 126, etc. I am sure if the demand is there, someone will indeed do this.

One request for the @gsxr .... can you definitively list which of the diaphragms should be ordered (and in what quanitities) from George Murphy, assuming that someone has ZERO pods that are in working condition?
 
That's a great point @gerryvz (RE: brittle). I was able to get the center vent pod opened without issue - so we're good there. In my case, I'm over the scary part - no more pods to take apart. But if someone had to do all of them, it's likely one may break

George sent me this PDF which has a breakdown of the pods in a W124 and how many parts needed for a full restore. I'm not sure if there have been any new developments - as the 2020 part I believe is too short, per notes by @gsxr
 
One request for the @gsxr .... can you definitively list which of the diaphragms should be ordered (and in what quanitities) from George Murphy, assuming that someone has ZERO pods that are in working condition?
If a car has all dead pods, you'd need to buy four ACD-2010 diaphragms, a new diverter pod, try the new 126- footwell pod (this would be a REALLY unusual failure), and if the large-lift section is bad on the pink pods... you also need three donor pinks to rebuild. If you can obtain any new pink pod, it may be possible to re-clock them and use the existing metal rods. New pink pod supply is dwindling rapidly so this option may be gone soon. Details on each of the six:

Lower "oval/rectangle" footwell pod (NLA from MB or aftermarket):​
No repair possible. Must source a good used pod, or try a new 126-800-14-75 pod (note: unconfirmed if the 126 pod will work or not)​
Center vent flap pod, inside airbox (NLA from MB or aftermarket):​
Rebuild with aftermarket ACD-2010 diaphragm.​
Diverter flap pod:
Still available new from MB. No repair possible otherwise.​
Defroster flap "pink" pod
Recirc/fresh air "pink" pod, left side
Recirc/fresh air "pink" pod, right side
All of the above 3 are dual-chamber "pink" pods. ONLY the small-lift portion cab be repaired with an aftermarket ACD-2010 diaphragm. If the large-lift portion has failed, discard the pod internals and source a good used pink pod, and replace the small-lift portion proactively.​


George sent me this PDF which has a breakdown of the pods in a W124 and how many parts needed for a full restore. Im not sure if there have been any new developments - as the 2020 part I believe is too short, per notes by @gsxr
Yep... the 2020 kits no workee. There's a detailed pictorial on my site, and also see post #199 at this thread with details.

:whistling2:
 
I dont know how much work it is to replace the heater core. However, Ive heard of almost zero heater core failures, so Id be inclined to leave it alone. Only test I know is just to pressure test the cooling system, if it holds 1.2 bar without sprouting leaks, Id call it good.

The evaporator is a nightmare. Dont go there unless you are forced to, kicking & screaming. If the system has been downgraded to R-134a, you might want to look into a blend (like Enviro-Safe or similar) with better performance. Ideally youd convert back to mineral oil and R-12 but thats a ridonkulous amount of work. R-134a conversions tend to have mediocre performance at best, dunno if youll be happy with that in Phoenix.

:seesaw:
My 86 W124 heater core was starting to leak. It got fixed when it was totaled.
 
One more happy update - I finally got around to putting the Lamin-X covers on. I made sure to take pictures and shared a write up here:
 
Update w/ regard to the vacuum pods

I had ordered 3 of the pods from Amazon and apparently got the last one there (this is part# 124-800-30-75). The link is dead now.
1682549013592.png

At least there was one in stock and it's on the way (due Friday). I ordered two more from eBay from this link. Those haven't shipped yet - hope there isn't a supply problem 😱

I picked up two new circular footwell pods today at MB of Scottsdale (mbpartscenter.com) 🙂 (124-800-01-75). While these may be in stock, I suspect they're running low too as the person shared they came from Germany. Installing these is similar to the diverter pods - there are 3 "feet" that are held onto the bracket with a circle clip. You can break the feet off the old one and get it free. I had to remove the side carpet panels and the center console to reach it properly.

The Performance Analysis repair kit should be here tomorrow or Friday for the center pod repair 🙂

It would be amazing to have everything knocked out this weekend as I'm back to work next week. Having to buy two more pods delayed things a bit - I won't be able to wrap up until the weekend of May 6th. The most important thing is doing it right, though!
 
Update w/ regard to the vacuum pods

I had ordered 3 of the pods from Amazon and apparently got the last one there (this is part# 124-800-30-75). The link is dead now.
View attachment 165676

At least there was one in stock and its on the way (due Friday). I ordered two more from eBay from this link. Those havent shipped yet - hope there isnt a supply problem 😱

I picked up two new circular footwell pods today at MB of Scottsdale (mbpartscenter.com) 🙂 (124-800-01-75). While these may be in stock, I suspect theyre running low too as the person shared they came from Germany. Installing these is similar to the diverter pods - there are 3 feet that are held onto the bracket with a circle clip. You can break the feet off the old one and get it free. I had to remove the side carpet panels and the center console to reach it properly.

The Performance Analysis repair kit should be here tomorrow or Friday for the center pod repair 🙂

It would be amazing to have everything knocked out this weekend as Im back to work next week. Having to buy two more pods delayed things a bit - I wont be able to wrap up until the weekend of May 6th. The most important thing is doing it right, though!
Thanks to you and the rest of this thread I also placed my order for these pods, GM kit, and a fresh set of all door lock actuators 😇
 
Oof - might be waiting a bit. I'll let everyone know how things go. This is with regards to part# 124-800-30-75
1682625192242.png

edit: shows as available at AutohausAZ (but unfortunately says "Available to order")... thanks for the heads up @asultan!
I ordered there too... will see which comes first. If AutohausAZ locates parts, I can cancel the eBay one OR just hold on to it - in case a member needs it.

In the mean time, I pulled the pods from the 1992 parts car which are good (not sure for how long) and can use those. I didn't take the dash off- pulled R main and defrost through the glovebox / airbag area.
 
Last edited:
With the vacuum pods (the pink ones, 124-800-30-75)... First - I got the single pod from the Amazon source. And second, AutohausAZ pulled through and I did get those two additional pink vacuum pods. I replaced all 3 and verified vacuum is holding for all of the pods. Tested everything out in the car and it's working great!

I do have two "backup" pods, in case something happens in the future (one "only" 15 years old; other rebuilt using the Performance Analysis 2010 kit).

While everything was apart, I did hit up a few shops about the evaporator. The topic came up earlier in this thread: while things are stripped down, does it make sense to replace the evaporator and heater core? Both shops I contacted refused to do the job. I checked with my friend Bud who owns his own shop (I didn't ask his shop) what he thought about evaporator replacement. For context, he was trained on the W124 when new and was a MB master tech before opening his own shop. He only works on Mercedes and hasn't ran into any evaporator issues with the W124, except on later models (where R134a was fit from the factory). He said not to overthink it, and that (combined with comment from @gsxr about only doing if forced, kicking & screaming) was enough for me to call the issue closed 🙂

While I was waiting for parts, I did, on a hunch, check the monovalve assembly under the hood. My diaphragm was completely blown out, which may have been contributing to warmer temps. I replaced this with a used part that I had on hand (not sure if this rubber diaphragm is available new). Having this in working order should keep coolant out of the cabin unless it's needed.
PXL_20230429_082736574.jpg


The rest of the dash install came together nicely. The car has fought me on some of the past jobs - but this was pretty drama free. It took a few hours - and I wasn't in a rush. Basically started on Saturday at noon and mostly finished by 5pm, working at a slow and steady pace with breaks. There are lots of small fitments to tackle- you just have to shift things around; be gentle until you get it to snap into place. With the new refinished wood, the car looks amazing!
PXL_20230507_042059299.jpg

There were some more things that broke along the way, which is to be expected. Both A pillars broke as I took them out... but luckily, I had spares on hand and installed those after the dash was in. The passenger front speaker blew out but I also had a spare for that too. The plastic connector used for snapping the light on the center vent into place broke and I had to splice a new one in too. And then with the climate control wood, both plastic "hinge" connectors on the top (you put them in, then kind of fold the wood down) broke. I had spares for those too.

The last major update is with the instrument cluster. While everything was apart and I was waiting for parts, I took apart my cluster. I had been having issues where the trip counter won't increment. It'll update "sometimes", but not always. I had pulled the cluster from the parts car and since it was low miles, I swapped the plastic mileage counter piece over. I matched the miles, verified the trip worked, and put the needle back on and put it together. When you take the needle off the speedometer, it needs to be calibrated. Even with my best attempts, I could only get within 10 MPH of accuracy. I ended up taking the cluster to a local shop, Dick’s Speed-O-Tach, and they got that sorted quickly for $90.

Since I do video logs, here's the latest capturing a lot of what happened here. Offers some more detailed info and a really good look at how things turned out 🙂
 
Awesome job! FYI... for testing the pods, it needs more vacuum to fully operate the pod to max travel. I usually pump to 25" of vacuum. For the final test before putting the dash back in, definitely test all pods with 20+ inches of vacuum, and verify the center vent flap fully opens (pulls downward almost vertical).

For the A-pillar trim, the trick to removal is to slide a flat screwdriver in between the trim and A-pillar, and pry directly at base (forward/front end) the metal clip. This puts all the pressure on the metal clip itself, not on the plastic. Otherwise the plastic is likely to break. Often you'll find a previous mechanic was already in there and may have damaged/broken the plastic.

:rugby:
 
@bclifton,
Thanks for the DYI video. I thought it was very informative. Congratulations on a fantastic job! :thumbsup2: That said, it’s one job I hope I never have to do.
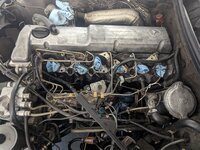
Keep up the good work.:)

Take Care
 
It wouldn't be a proper weekend without some progress on the car 😁

I got the intake manifold off - will be replacing the gasket for that and the turbo pipe. But first, wanted to tackle new glow plugs. The previous owner had a full set in the stash of parts I got so I put those in. I tested the ones I had too, just to see how they are working. I hadn't been seeing the glow plug light on the dash - usually it would show in position 2. Two of the plugs tested were in bad shape - these new ones might help improve how things fire 🙂

Video showing the process here:

I also got out the cruise control actuator, which was a pain to get out. But it's packaged up and on the way to ProgRama to be rebuilt. I have put a new cruise control stalk on, installed a rebuild amplifier, so this is the final piece to try. I got that out - but had to remove the metal hose going into the block, which let out a ton of coolant.

Will be refilling coolant and doing an oil change when this is all wrapped up 🙂 Any recommendations for either? I'm not sure if you're supposed to use G48 for coolant? and for oil, I usually use Mobile1, but this is a diesel. I'm not sure if I should try to go with a 15w 40 diesel oil?

Will be replacing a fuel line while I've got everything apart and cleaning things up a bit too. Any other recommendations?

Here's how everything is looking now
PXL_20230514_175040777.jpg
 
What was the issue with the cruise, btw? Actuator failures are really unusual.

Coolant... G-05 is fine. If you switch to G-48, try to flush out as much of the old stuff as possible, or the yellow + blue makes green.

Oil... any diesel-rated (Cx rating) is fine. Mobil-1 is fine if it has the Cx rating, like their 5W-40.

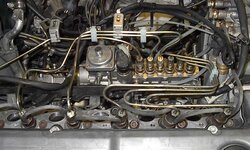
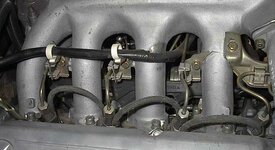
Make sure to replace all the plastic clips which separate the metal injection lines. These are important, not decorative. The ones which clip into the metal brackets push into soft foam, which may be fossilized if still present on your brackets.

inj_line_clips.jpg inj_line_clips1.jpg inj_line_clips2.jpg inj_line_clips3.jpg
 
@a777fan taking a guess here- but helping stabilize the hard lines is important because the engine has a decent amount of compression (22:1) and vibrates. The fuel lines thread to the top of the injectors and that connection can loosen over time if it's not held down with a bracket
 
What was the issue with the cruise, btw? Actuator failures are really unusual.

Coolant... G-05 is fine. If you switch to G-48, try to flush out as much of the old stuff as possible, or the yellow + blue makes green.

Oil... any diesel-rated (Cx rating) is fine. Mobil-1 is fine if it has the Cx rating, like their 5W-40.

Make sure to replace all the plastic clips which separate the metal injection lines. These are important, not decorative. The ones which clip into the metal brackets push into soft foam, which may be fossilized if still present on your brackets.

View attachment 167577 View attachment 167578 View attachment 167579 View attachment 167580
Huge thanks as always Dave! Clips ordered 😁 Those are great reference pics too. It'll be great to clean things up and put everything back together

The actuator being bad is just a guess. The stalk was questionable when I got the car (didn't click when pressed up/down/towards/away)... so I replaced that with a used part (which could be broken too). The cruise control amplifier I had rebuilt by ProgRama and that didn't fix it. It's not terribly expensive for a rebuilt part so we'll see. It looks like there's an adjustment procedure that can be done: 30-561

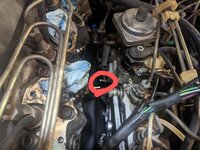
It's almost impossible to reach the actuator when the intake manifold is installed - will be interesting adjusting that. It's possible the adjustments were completely off and that caused the issue. I also noticed a ball with nothing attached to it (circled in red). Picture is standing at the front of the car facing towards the engine bay.
9Jpi7DdtElKx3rTQ5_tlc8=w1571-h1183-s-no?authuser=0.jpg

I'm looking through the docs (section 30) to figure out what that can be. Removing the intake manifold requires removing one ball/socket- cruise control requires removing one too. I marked both of those with blue tape when taking off- this didn't have any attached. Since things are attached to the other balls on this bracket, it's possible this empty ball is for other engines... M103 and M117 have the cruise control actuator mounted on the front of the engine with linkage to a similar piece.

While checking this out, I quickly swapped out the supply line going from the mechanical fuel pump going to the injectors 🙂 My friend Al refurnishes those in case anyone has an OM603 and would like to do the same - just shoot me a message!
 
Last edited:
Curious @gsxr, what do those clips do/prevent? I don’t know a darn about diesel.
Brian is correct. The metal pipes vibrate and can crack/break from fatigue. The clips hold the pipes tightly into foam buffers. Injector pressure is around 145 bar (~2000psi).

:rugby:
 
Quick heads up on the cruise control actuator - ProgRama received it and checked it out (mine was part number 002-545-86-32)

The wiring itself was damaged (wasn't sure where on the wire... maybe the soldering on pins?) and inside the unit, the person shared there are plastic gears which were in bad shape. I've never opened one before - so I searched for what does the inside even look like. Click here for an example (gallery at the bottom).

Rebuilt unit being sent over to me now for $189 shipped - saved $20 by including a spare core I had as credit. And the clips used to secure the hard fuel lines are on the way too - should have everything back together before the end of the month 🙂

Overall, I've been happy with ProgRama and the rebuilt parts they've helped me with. I've had them do throttle bodies, climate control, and cruise control components. I found out about them when junkyarding because they're always buying cores on the cash4cores website.
 
Last edited:
@bclifton,
I have hardly ever used my cruise control. I bothers me when it creeps up on other cars and I don’t like fiddling with it to dodge slower cars so I would hope that my control actuator never wears out. I’m not even sure of the actuator’s location but if it does go out for some reason I found your thread very informative.

Thanks for the info.:)
 
I have hardly ever used my cruise control. I bothers me when it creeps up on other cars and I don’t like fiddling with it to dodge slower cars so...
Cruise control comes in handy in locations with Draconian speed enforcement, like Idaho. We had cruise control on pretty much constantly, both in town and on the freeway. Helps avoid the revenue generation patrol disguised as police. :rolleyes:


I would hope that my control actuator never wears out. I’m not even sure of the actuator’s location but if it does go out for some reason I found your thread very informative.
Terry, the cruise actuator is only used on older engines with mechanical injection. Our E500E's and their 4.2L brethren have electronic fuel injection, and this functionality built into the ETA. The "ETA version" of cruise control is extremely smooth and accurate... the older mechanical setup with linkage rods, as shown on Brian's engine, is know for surging/hunting annoyingly if everything isn't *perfect*. No worries about wearing anything out, feel free to use the cruise all you want!

:jono:
 
@gsxr,
Thanks for the explanation on the CC but it’s still a PITA to use in and around SoCal due to the heavy traffic. Even on trips to Las Vegas approximately 280 miles the freeway is congested. Not much open road left.


:runexe:
 
Got the rebuilt by ProgRama cruise control actuator on Saturday and started putting things back together 🙂

Before getting TOO far, I tested the new glow plugs one at a time to make sure they all work (which they did). Put those in, bolted up the cruise control - making sure to put lots of copper paste on the bolts before torquing down. I put the intake manifold gasket in place and put two bolts in loosely to hold it there.

I ended up getting new bolts and washers for the intake manifold from local hardware store (Copper State Bolt and Nut co). The original hardware was borderline stripped and beaten down. I had to use a bolt extractor to get one of them off and the rest were harder than it needed to be. Making sure to put copper paste on these as the new bolts go in.

Now that the intake manifold and gasket are in place (very loosely), I'm going to wait for the new clips (the ones Dave pictured above) to come in! Those should be here this week. Then it'll be ready to put together the rest of the way and enjoy. I did hop in the car and turn the key to position 2 and verified that I DO finally get the glow plug dummy light (it never showed my entire ownership due to broken plugs).
1684783663202.png

Since there wasn't really much to do (waiting on clips), I did an oil change. New oil filter (601-184-01-25) and nearly 2 gallons (7.5 qts) of Mobile 1 Turbo Diesel Truck (5w 40). I was surprised the oil filter didn't include the O rings for the oil cannister or the pole that goes through the filter itself - will have to find those.

Something interesting to note for other people with the OM603 - when taking out the bracket for the cruise control actuator, there's a hard coolant line going into the block which you can remove clip / pull out for easier access to the two right hand side bolts. When you pull this hard line out, it'll spill coolant all over the floor (which is expected) but it was pink or red 🤔

Definitely going to do a coolant flush when this is all together. I have some of the MB citric acid powder (000-989-10-25-11) that you mix with water, but I don't think it's enough left to do the job (and I can't remember the ratio; it's like 1:10 or something like this?). I got a prestone flush and 2 gallons of Xerex G-05 to fill the system with. Easiest way I've found is to drain the radiator first then get a wrench and go under the car to drain the block. There might be a standard size for the nipple that you're supposed to attach a hose (for draining), but I always have just put a pan under and let it drip everywhere 😂

Will be great finally having this together to enjoy for a while (before undertaking any more big projects). I do have a ball joint extractor on the way along with a spring compressor. Member @Alphasud40 sold me some parts (new front struts, mounts, ball joints) intended for his 1986 300E which was totaled, so I'll be putting those in as the next project... but maybe in a few months! 🙂 Gotta get some more miles on this thing
 
Last edited:
Hopefully had a close call here - feeling like a complete idiot at the moment.

I got everything back together (intake, glow plugs, etc)- no trouble there. I got the car started up, put it on ramps, and drained out the remaining coolant from the radiator and the block. After that, I poured in the Prestone cleaner (basically a citric acid mixture) and filled the rest up with distilled water.

This is the part where I'm an idiot. It's been a while since I've done this - so I forgot to put the heater on max. I drove around and started noticing temp wasn't dropping. As it creeped over 100C, I pulled over (leaving the car on), opened the cap, and added more water. I really should have burped the air out of the radiator hose but I forgot to do this too. I started to hear some gurgling noises and what sounded like boiling

I ran back into the car- noticed it was at 120C and quickly put the heater on full blast. Within a matter of seconds, the temp visibly dropped down to 85C and everything was great. I think the auxiliary water pump for the heater core helped circulate the coolant and get the air out, which I hope saved my butt. From then on, it held the temp nicely between 80C and 90C. But I almost needed a change of underwear there!

I currently have the #14 head for the 603 which can have issues when overheating, which is scary. I drove around for a while; had the engine on for nearly 2 hours. I got home, and then immediately (with the car still on, thermostat still open) ran a head gasket test. I have the cone you put into the expansion tank, it tests for combustion gasses as you hand pump it. Thankfully, everything looks great - it's still nice and deep blue.

Read through the notes here::


Tomorrow, I'll drain out the radiator/block, put some water in to flush it and drain that too, and then finally fill it with G05.
But this time doing it properly 😅
 
Last edited:
Son of a bitch... from bad to worse. Not fatal yet, at least from what I can tell. But we'll see...

After the incident last night, I went and double checked the shop manual. They have a stuck open thermostat 000-589-74-63-00 (you can't run without a thermostat, or I would have done that). After seeing that, I really should have drained things, taken out the thermostat and ripped the ball bearing out of there. But I didn't do that - I drained the cleaning agent / distilled water out from the radiator and the block and then put 100% water in.

This time, I burped the radiator hose plenty, left the cap off so that any air can escape, started the car up. I put the heat on full blast. Really thought I nailed everything this time. But unfortunately, the heat never kicked on and the temp kept going up. When it got up to 120C and it was hard to think clearly at that point. I ended up putting the expansion cap on, hopping in, heat still on full blast, and drove super slow around the neighborhood

After hitting the end of the street and turning around, the temp started to drop - just like it did last night when I threw the heat on. I really think the thermostat is junk and that it got stuck. It was at 120C (or hotter; basically maxed out) on coolant temp for ~8 minutes. After the temp dropped, I opened the expansion cap, let the steam out, opened the hood to 90 degree position, and it's cooling off in the garage now.

I got video of some of this - I'll upload on YouTube soon. It might the end of the series I was doing, unfortunately. Really feeling like crap right now. I should have just left everything alone. The only reason I let out coolant was to get a better go at the bolts holding the cruise control actuator bracket and that new unit didn't fix the issue (I have a new actuator, new amplifier, and a used stalk).

Worst case scenario (let's say head is cracked), I have a few options:
- If only the head is cracked (block ok), I can buy a #22 head and put that in. This is opening up a rabbit hole that starts with new valves (I think new heads come empty) and could go as far as taking out the oil pan and replacing pistons (lots of "while you're there" things).
- I could scout out another W124. I was really starting to enjoy the diesel. Maybe another 300D... or I'm also familiar with the M104 (1993-95 E320). Then I could swap over any parts / keep this as a parts car.
- I could part out the car - sell the euro headlamps, etc and try to get some money back.

Maybe it's too early to be thinking about those - but wanted to give an update.

As for what's next, I could try this at a minimum:
- drain the full water mixture
- replace thermostat with a new unit
- fill with G05
- see how things look. Visually inspect for cracks, head gasket test again, watch for oil in coolant / coolant in oil, and other anomalies
 
Last edited:
I had my '87 300TDT out today running springtime errands - mulch, peat moss, etc. The guys at the nursery were freaking out. "What year is it?
Awesome man, awesome...

Anyway, my advice is if you like the diesel, do your best to keep it going. They're a rare bird and deserve preservation if possible.
 
I had my 87 300TDT out today running springtime errands - mulch, peat moss, etc. The guys at the nursery were freaking out. What year is it?
Awesome man, awesome...

Anyway, my advice is if you like the diesel, do your best to keep it going. Theyre a rare bird and deserve preservation if possible.
Thanks for the encouragement 🙂

I would absolutely love to either stick it out or get another 300D. These are very special cars and I enjoy trying to bring them back to glory. The E500E is a dream car- hard to justify financially for me at the moment... But maybe one day! Not very knowledgeable about the M119. The W124 overall is just a beautiful platform

I'm not exactly sure of what signs to look out for, RE: cracked head or damaged engine. Can run a head gasket combustion test again, also can keep an eye out for coolant in oil / oil in coolant. I'll get a new thermostat next and play it by ear. Maybe it's possible I got super lucky here. I'm not sure if hitting 120C is a 100% dead engine scenario or not. Engine seems to be running happily. The only noise at any time was the air bubbles (gurgling) coming from the expansion tank

Thanks again to everyone who has followed along. We'll figure out what happens eventually!
 
Thanks for the encouragement 🙂

I would absolutely love to either stick it out or get another 300D. These are very special cars and I enjoy trying to bring them back to glory. The E500E is a dream car- hard to justify financially for me at the moment... But maybe one day! Not very knowledgeable about the M119. The W124 overall is just a beautiful platform

Im not exactly sure of what signs to look out for, RE: cracked head or damaged engine. Can run a head gasket combustion test again, also can keep an eye out for coolant in oil / oil in coolant. Ill get a new thermostat next and play it by ear. Maybe its possible I got super lucky here. Im not sure if hitting 120C is a 100% dead engine scenario or not. Engine seems to be running happily. The only noise at any time was the air bubbles (gurgling) coming from the expansion tank

Thanks again to everyone who has followed along. Well figure out what happens eventually!
I had a heart stopper like this 2 years ago with my dead fan clutch and bumper to bumper traffic in nyc in the summer, touched 120 pulled over turned it off waited for traffic to subside, and when i overhauled the cooling system, everything continued to work as expected, so i would stay the course and just keep an eye on things… i came out lucky hopefully you will too.
 
I had a heart stopper like this 2 years ago with my dead fan clutch and bumper to bumper traffic in nyc in the summer, touched 120 pulled over turned it off waited for traffic to subside, and when i overhauled the cooling system, everything continued to work as expected, so i would stay the course and just keep an eye on things… i came out lucky hopefully you will too.
Wow - you escaped possible death, @asultan 🙂 Maybe there is hope! I guess I've just heard so many bad things about the #14 head and cracking.

The video just finished uploading - it shows things as they happen and me trying to think on the spot. My son wanted to be in the thumbnail 😂 Even with the worst case scenario, my family is at least super supportive about things.

Video will show here once it finishes processing:

Engine sounds OK - no crazy shaking. Not sure what symptoms to look for, though. Hoping for the best, expecting the worst.
 

Who has viewed this thread (Total: 3) View details

Who has watched this thread (Total: 6) View details

Back
Top