• Hi Guest !

    Welcome to the 500Eboard forum.

    Since its founding in late 2008, 500Eboard has become the leading resource on the Internet for all things related to the Mercedes-Benz 500E and E500. In recent years, we have also expanded to include the 400E and E420 models, which are directly related to the 500E/E500.

    We invite you to browse and take advantage of the information and resources here on the site. If you find helpful information, please register for full membership, and you'll find even more resources available. Feel free to ask questions, and make liberal use of the "Search" function to find answers.

    We hope you will become an active contributor to the community!

    Sincerely,
    500Eboard Management

Brake hoses replacement question

Kyiv

1993 400E | Azov мой кумир!
Member
I want replace my 27 year old brake hoses with Deerfield precision units tomorrow, on Saturday. Pelican parts DIY tutorial strongly recommends using 11 mm flare nut wrench to avoid destruction of the fitting and/or bending hardline. Naturally harbor freight and AutoZone near me don't have it.

My car spent 25 of its years in SoCal, so there isn't any rust. Is it reasonable to proceed without the flare nut wrench or is there a safe alternative technique, or should I postpone the job until I receive one from Amazon?

Thanks

I am doing the same thing this weekend and got the wrench set from Lowe's. $20 for the set.
 
I know i did the job without the 11mm flare nut wrench. It may be that one of my ASE flare nut wrenches was a good fit as they are 6 sided. I don't remember. I would check this but just proceed carefully if your lines are not rusty/corroded.

edit... mikeym posted at the same time. I would get the wrench if you can.

drew
 
Soak the fitting with penetrant first. If the fitting doesn't break loose fairly easily with standard wrenches, don't keep applying force... wait for the flare nut wrench, re-soak with penetrant, and try again.

Non-seized fittings will open just fine with standard wrenches.

:banana1:
 
I just checked. A SAE 7/16 flare nut wrench is a very close fit and could be used with some confidence in the absence of the correct wrench. WATCH the wrench/fastners while you apply force.

drew
 
I have, until recent years, always done the brake line replacement job with standard wrenches. I never had any issues, but also always had non-rusted fittings, and I took extra care in the loosening/tightening process.

Several years ago, I finally broke down and got a set of flare wrenches. It's a prudent thing to do.

Again, it's always best to use the correct tool for the job. It removes angst and time from the process.

You can always order an 11mm flare nut wrench via Amazon Prime, and have it in a day or two.
 
Thanks everyone. I just drove to Home Depot and there was only one set of flared nut wrenches. Luckily it contained 11 mm unit
 
I need some advice. I've started this job yesterday. Rear right fitting loosened up really easy. Rear left however, the flared nut could barely bite on it from the get-go. I've tried a total 3-4 times and with little effort it free-spins. So I've soaked the fitting generously with a penetrant around 5pm and again around 1am. This morning I fiddled with a bracket on which the fitting sits and it can spin freely under the fitting - so the fitting is not fused to it. I then made another 3 attempts with a flared nut wrench and then 3 attempts with a regular wrench. Regular wrench has a noticably better bite, but still free-spins on the fitting relatively easily. The fitting is not round yet, but I get a feeling it will quickly become if I apply strong effort. Thus far a I've been treating it like a filigree... Basically, the issue I face is not enough bite to deliver a shock to the fitting

Appreciate the advise on best way to proceed. Thanks
 
Last edited:
If you are able to apply a bit of heat (propane torch) and then apply oil as it is cooling this is known to help. The heating then cooling can allow oil to penetrate. Of course be careful where you direct heat. Tapping on the wrench with a hammer provides a sharp blow that can be more effective than steady pressure. A pair of the smallest Vise Grip pliers can be a savior when all else fails, if you can get access.

A trick I've read about but never tried is to apply something sticky to the inside of the wrench and then apply metal shavings. This should enhance the grip. There's always one...

drew
 
Drew, thanks. After posting, I kept masturbating that fitting until it was 3/4 of the way to becoming round in shape, but to no avail. I've solved the issue with a 7 inch pipe wrench, which bit on it nicely. Worked like a charm in about 5 seconds!
 
If something was soaked in penetrating oil about 2 hours ago, can a blow torch be used in it? I was able to do 3 corners, but driver front just keeps stripping and there isn't enough room for a pipe wrench. Thanks
 
If something was soaked in penetrating oil about 2 hours ago, can a blow torch be used in it? I was able to do 3 corners, but driver front just keeps stripping and there isn't enough room for a pipe wrench. Thanks

You have the right flare nut wrench for it now and still stripping?
 
Yes, with flare nut it's stripping. After 27 years these fittings became soft and ribs are crumbling to dust quickly, so the flare nut doesn't bite well. A regular wrench has a better bite, but not enough to budge the fitting - just strips it further. At the rear wheel there was enough space to use pipe wrench, but not at the front. The strut is in the way
 
As a very last resort, I've used a ViceGrip on the fitting. Make sure you clamp it as tightly as you can onto the fitting. Then apply quick, deliberate force to crack the fitting loose.
 
As a very last resort, I've used a ViceGrip on the fitting. Make sure you clamp it as tightly as you can onto the fitting. Then apply quick, deliberate force to crack the fitting loose.

Mate, could you please snap a picture or provide a link of the exact vicegrip that worked for you? You used it at the front, correct?
 
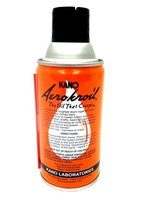
What penetrating oil are you using. Kano Aerokroil seems to be what people swear by.

At this point, patience, heat and best penetrant before you brute force it too much.

IMG_0968__91302.1426296688.1280.1280.jpg
 
What penetrating oil are you using. Kano Aerokroil seems to be what people swear by.

At this point, patience, heat and best penetrant before you brute force it too much.

View attachment 95618

I was issuing off the shelf Lucas penetrating oil - first thing I saw at AutoZone. Just returned from Walmart with Blaster penetrating oil and a blow torch. Since I'm a noobster, I need some reassurance. How many hours after using penetrating oil can a blow torch be used, so it does not ignite by any chance? Thanks
 
Last edited:
Yes you can apply heat after oil. Just be aware it may quickly burn off with a small flame and some smoke. Oil burns slowly and will not explode. Sometimes 2 or 3 re heats are required.

When there is just no access i have had some luck with a small chisel used to turn the nut.

drew
 
Liquid wrench best bang for your buck according to this video.

Results: Liquid Wrench came out on top, following by ATF/Acetone, Royal Purple, WD-40, PB Blaster, and AeroKroil

 
@RicardoD, damn it. I was quickly googling at Walmart and saw a link where Blaster came on top of liquid wrench, so I went for it 😆. Aerokroil is not sold in stores...
 
You need very small vice grips as mentioned. Just get the smallest you can from the store. And a larger pair to counter hold the brake line fitting below the bracket. (These are slotted and too much force will cause damage)

Apply penetrating fluid for as long as possible and follow with heat, counter holding the lower fitting and getting the upper small grips TIGHT on that nut. Then give it a strong sharp tug and it should break loose. Been there done this dozens of times believe me - only the small vice grips will work.

The nut will be cosmetically damaged but you can use the grips again to tighten up. Not over tight mind you!

Then bleed the brakes and before putting the wheel back on I like to thoroughly clean and dry the fittings and hold the brake pedal down hard for a full minute.

Then get out and very carefully inspect all lines with a torch and some tissue to detect the faintest of leaks. If a leak is found, tighten a little more and try again. Make sure all is good before putting the wheels back on.
 
Last edited:
@JC220, thanks! Should I be extra careful for how long I apply torch, like no more than 5-10 seconds at a time?
 
Yes. Be careful to keep major heat away from ball joints, strut, bushings etc. and do not let nuts or lines start to turn orange. Use wood, aluminum foil, or other items to keep heat from these areas if necessary. Something around 10 seconds should be adequate.

drew
 
What Drew said! Not too much just a short 5 or so second blast should do the trick. You can only use heat on this area if you intend to replace the rubber hoses. (Since the rubber hose will be forever compromised thereafter)
 
So I'm still struggling with the last fitting. These are my pliers, are they appropriate or is there a better kind of pliers? :hammerhead:
IMG_20200322_174623.jpg
 
Be VERY careful about putting a torch to ANY chemical, and do your research before you do.

The reason I say this is that common chlorinated brake cleaner, when flamed, produces deadly phosgene gas that can permanently injure or even kill you.


Phosgene gas was used in World War I in gas attacks, and was responsible for killing 85,000+ soldiers.
 
The Vise Grips look small enough however a curved jaw set will grip much better.
Yes, be careful not to breath any of the fumes you create. Step in and out of your work area and expel fumes. The last thing you want right now is to injure your respiratory system.

drew
 
This is the size of grips you want - Irwin make these

20200322_215748.jpg

This is the singe best tool I have! Seriously- it is fantastic. Gets a hell of a grip. Trust me when I say you CAN undo that nut it will just take multiple tries and brute force but it will eventually give up.
 
Last edited:
I’ve never failed doing a job like this, gently back and forth rather than brute force, with a tool just like yours...
IMO Not enough force needed to break it free to warrant heat.
 
I’ve never failed doing a job like this, gently back and forth rather than brute force, with a tool just like yours...
IMO Not enough force needed to break it free to warrant heat.

In my defense, my first DIY car maintenance was in September of 2019, so just about 6 months. I acquire tools as I go. I'm an extra noobster - haha.
2 of the corners were easy, the other two put up a fight. One of them (in the rear) I already tackled, but last one on the front is more difficult (for me) because of lack of space. I've been applying heat on the soaked fitting and it won't badge - just keeps stripping. Will buy small pliers like in the picture @JC220 posted. Hopefully they'll be it. Don't want a defeat and have to tow the car to mechanic. Only 1 hose to go

I really appreciate everyone chiming in to help me out
 
Keep at it Kiev! I always make stupid mistakes in my projects and they get less the more I do but every my last How-to I screwed up bad in a couple of areas but was able to recover. That Irwin tool is the the 5WR which is $10 on Amazon. I threw it in my car for my next purchase. I don't have a small vice grip like that.
 
Glen, thanks. What is the name of it so I can Google it? "Duramax" only spawns Chevy/diesel links :D

Hmm. No part number or other info on the tool itself. I bought it at Pep Boys auto parts. I’ll see what I can find.
 
I couldn’t find the exact same tool but search for ‘multifunction wrench’ and you’ll see similar wrenches that should work. The basic idea is that it grips harder as you pull on it.
 
Glen, thanks. What is the name of it so I can Google it? "Duramax" only spawns Chevy/diesel links :D
Looks to be this one:

crescent makes something similar iirc.
 
Problem fasteners are a part of working on cars. If everything was accessible and spun right off there would be a whole lot less repair shops. We have all been there. That Irwin brand vise grip tool has saved me many times. Everyone should have one. With it, or the tool Glen shows, you will get that fastener apart. The right tools and patience will solve nearly all problems and the tools will pay for themselves many times over.

drew
 
This is the size of grips you want - Irwin make these

View attachment 95621

This is the singe best tool I have! Seriously- it is fantastic. Gets a hell of a grip. Trust me when I say you CAN undo that nut it will just take multiple tries and brute force but it will eventually give up.

Sorry I only have dumb questions for you. I bought it this morning and so far unsuccessful. Do you use another pliers to tighten 5WR's jaws on the nut, or just use you hand's clamping force?
 
Sorry I only have dumb questions for you. I bought it this morning and so far unsuccessful. Do you use another pliers to tighten 5WR's jaws on the nut, or just use you hand's clamping force?

Fair question! I tighten little by little and test for how tight I can possibly get them closed. I use as much force as I can with my hands. But yes you could hook a wrench or similar on there and tighten even harder.

It sounds like you are against a solid enemy there. Do you have a dremel or similar? I wonder could you carefully cut a slot in the old brake line collar to ease some of the tension? Sacrifice the brake hose fitting that is junk anyway and try not to damage the nut. Examine one of the old hoses to assist when cutting.

Or worst case- cut the fitting off and use a on - car flare tool and fit a new nut. That is, if you can cut the smallest amount possible off and still have enough room to push the shorter pipe down into place.
 
Last edited:
Normally just your hand, getting it as tight as your grip will produce. Adjust the tension wheel before you clamp the pliers, not after. This may take a few adjustments. Nothing says you can't get creative though.
Same info as Joe posted but may help with clarity.

drew
 
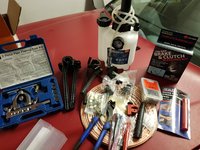
FWIW here are some of the JC220 "Get me out of jail" brake tools and fittings. So I can make new brake lines where needed and flare on the car etc. All new fittings and MB clamps which tend to rust out here.

20200323_224907.jpg
20200323_224926.jpg
On car flaring tool-
20200323_224910.jpg

Fluid tester, pressure blender, several mini pipe benders, cutters and a straightening tool complete the line up!

Usually this kit is put to use in the early hours of the morning with lots of swear words!
 
Cutting & flaring will work as a last resort, if removal efforts go south.

Assuming the brake tubing is the same as SLS (and fuel lines?) on the 036, it will need to be a metric "bubble flare", which is different than other flare types.

Joe, can you confirm the flare type on the 124 brakes? It's been too long since I messed with brake hoses, I can't remember!

:sawzall:

1585005130173.png
 
Cutting & flaring will work as a last resort, if removal efforts go south.

Assuming the brake tubing is the same as SLS (and fuel lines?) on the 036, it will need to be a metric "bubble flare", which is different than other flare types.

Joe, can you confirm the flare type on the 124 brakes? It's been too long since I messed with brake hoses, I can't remember!

:sawzall:

View attachment 95664

It is the bubble type flare for w124 and most MBs Dave. Not exactly sure what spec but my kits are marked for the brake pipe size so I know I am using the correct dye.

The flare is simple and can be practiced on spare tubing before doing it on the car.

But yes that is a last resort. Cutting the old brake line and / or filing flats on the nut to get better purchase with the grips might still work.
 
I went through hell when I fixed the brake system of my 300E, 1992 Sportline.

The good news is that the flexible hose can be destroyed. The danger is that the hard tube could be destroyed too. But, they can be replaced too. Therefore, however messy it is, it can be fixed. It won't be the end of the world, much better than the Chinese virus situation.

I have several flare wrenches but often I don't find them as useful due to the limited space and they sometimes round the bolt.

Finally, I found this set of tools work the best. They are flare crowfoot set. They are tighter in tolerance and can be used in different angles.

Just to share my experience.

jftu105

 
Alright. From now on, I would appreciate if I'd be addressed as Colonel or Sir. I believe I've earned it. 😁😁😁 (Jack Nicholson's phrase from "A Few Good Men")

I did it, but could not have done it with out your support and encouragement. Thank You all!

Not sure if it's 3 days of continuous application of penetrating oils, blow torch, 5WR pliers, or a combination of there of. Last thing I did before the nut gave was heating it up like a #$@&∆%, as if attempting to smelt it, and then immediately applying purchased-today Liquid Wrench. I used Lucas and PB Blaster oils on previous days, and also applied them right after blow torch, per @sheward suggestion, just not as much blow torch 🔥🔥🔥. It smoked nicely, but I was doing the job outside, just leaned back periodically and turned away to take a breath.

Came out an hour later, did an all out banzai with 5WR and the nut gave. 🎉🥂. 3 days + 1 evening in total to do all hoses. Thank you all again
 
What Drew said! Not too much just a short 5 or so second blast should do the trick. You can only use heat on this area if you intend to replace the rubber hoses. (Since the rubber hose will be forever compromised thereafter)
Here in New Hampshire, I deal with this often. I use the acetelyne torch, and heat until very warm. The come apart quite easily then. Be careful, as I have had to heat a couple so hot the hose blows off the fitting. I'm always fighting rust.
 

Who has viewed this thread (Total: 1) View details

Back
Top