• Hi Guest !

    Welcome to the 500Eboard forum.

    Since its founding in late 2008, 500Eboard has become the leading resource on the Internet for all things related to the Mercedes-Benz 500E and E500. In recent years, we have also expanded to include the 400E and E420 models, which are directly related to the 500E/E500.

    We invite you to browse and take advantage of the information and resources here on the site. If you find helpful information, please register for full membership, and you'll find even more resources available. Feel free to ask questions, and make liberal use of the "Search" function to find answers.

    We hope you will become an active contributor to the community!

    Sincerely,
    500Eboard Management

OWNER OttoB

Unfortunately unlike other parts (such as the gray trunk + door switches), the upper strut bars have NOT been proven to impress the ladies.

However, you are certainly welcome to prove 10+ years of people wrong, with a photo of women being impressed by the presence of a strut bar. Even my mechanical engineer and car-obsessed wife was a complete "meh" with regard to the bare aluminum Wiechers E500E Upper Strut Bar.

And so it sits...lonely and alone in my basement.....
By the way, I just now took my wife out to the garage and (re)queried her about the gray switches I had retrofit many years ago in my E500's door and trunk ... ascertaining her opinion about the ability to switch off the dome and trunk lights.

Among the stream of opinion/commentary that came out of her mouth, were the words "lovely" and "nifty".

And then it immediately prompted walking over to her 2017 Lexus, for her to check to see whether her trunk light was switchable (it was not). A "Hmmph" came out of her mouth and she confirmed that the gray switches are a nice bit of electromechanical engineering.

Not so shabby for a 28-year-old car?

The other thing that I know bothers her on a subliminal level, is that my 1989 560SEC and 1994 E500 both have "bulb out" capability, whereas her "modern" Lexus does not. You have to literally walk around the car periodically to see if there are any lamps out.
 
The cars and the strut bars are cousins, Erick… so yes - I expect that to be the case with yours but will defer to your guy on whether any part of rubber may have to be trimmed? It’s not an exact science sometimes as these cars are older, and the Hedgehog strut bars were adapted to our cars (but not necessarily meant for them).

We’ll find out soon with the hope yours can be back on the road where it belongs in the near future… Some of the MB’s in the SoFla Vintage Benz Club (pre-2002 only) you’re a part of, are some of the wickest, dopest ones I have ever seen!

 
Last edited:
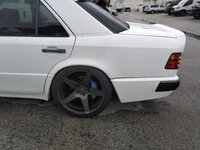
No body kit... just an accumulation of everything else listed above which has been done before by one (or several) owners at some point or another, but perhaps not all at once in 1 car? That particular bodykit you posted would look awesome on a 190, but not for me on my w124...

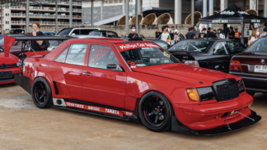
I think there is a red, racing widebody w124 in Malaysia (?) that is used for street/show, but no - nothing more than what I have shared with this thread so far (for now).
I found the widebody w124 that I mentioned the other day in previously having seen it and its also from Thailand, where Hedgehog Motorsports is located... these cars still do certainly enjoy a dedicated following in both Eastern Europe and Asia, no?

IMG_0737.pngIMG_0736.png


This particular car is not a 500e and I would question someone who would do this to one - although, who am I to tell someone else what to do with their car :)!?!
 
Last edited:
By the way, I just now took my wife out to the garage and (re)queried her about the gray switches I had retrofit many years ago in my E500's door and trunk ... ascertaining her opinion about the ability to switch off the dome and trunk lights.

Among the stream of opinion/commentary that came out of her mouth, were the words "lovely" and "nifty".

And then it immediately prompted walking over to her 2017 Lexus, for her to check to see whether her trunk light was switchable (it was not). A "Hmmph" came out of her mouth and she confirmed that the gray switches are a nice bit of electromechanical engineering.

Not so shabby for a 28-year-old car?

The other thing that I know bothers her on a subliminal level, is that my 1989 560SEC and 1994 E500 both have "bulb out" capability, whereas her "modern" Lexus does not. You have to literally walk around the car periodically to see if there are any lamps out.
What are these gray switches you’re talking about?
 
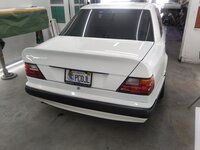
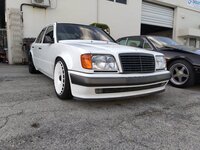
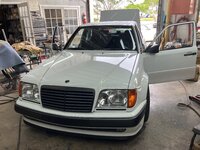
I am very excited to share the pictures below from fresh out of the paint booth in its resplendent new Polar White paint!!! I still have not seen the car in person but - definitely the right decision for me to pick Polar White...

For those that know, could you possibly indicate how many different white 036's were produced/imported/or any other relevant data on them, please?

96f35caa-e026-4e88-b6c3-e7803f828824.jpega936b81d-458c-4607-b6e3-ca4fd955e349.jpegbede29f3-b01c-49de-a5ff-4166d63d3511.jpeg137ce292-57fa-4e1b-b3fc-b7847937d9da.jpeg603a0c03-768e-467e-9c0f-6c140a0cf169.jpegdf570e93-ad99-48c6-82a8-ab89b8498070.jpeg

ba6c4fe3-94aa-4746-95cf-346ff77474cf.jpeg
 
Out of the total run of 036’s, only 51 came in one shade of white or the other? Cool!!

Thank you for the link, Drew! I recall some brief mention in a link I had posted before about white 500e’s, but never had an actual idea until 5 minutes ago!?!
 
That looks glorious, something about wide body cars in white, what colour do you plan to paint the brake calipers? My AMG C63 204 looks great with red calipers against the white paintwork, good combination in my opinion. Looking forward to seeing more updates.
 
I am always one for traditions when possible, within certain parameters and degrees - of course. Given my connection to my childhood racing hero Luis Mendez (who drove his aqua-colored 911 RSR originally owned by Al Holbert) coupled with the car’s recent ownership history of Albert’s considerable efforts to transform the car, I opted to once again use the light metallic blue as the accent color to break up the white and the Porsche Slate Grey! So, in my head, it was the only accent color to use based on my thought of “tradition”. However, it wasn’t an immediate nor easy idea to conceptualize using light blue with white and dark gray as I sought to devise the new design and vision for the car.

When I ordered my custom license plate holder at the time I bought the car 1.5 years ago, I had selected white and the light blue - perhaps by coincidence - as I had no notion of getting the car repainted then.

In order to break up the ‘darkness’of the wheels, I had decided to get light blue wheel center caps last year (but with the Porsche crest)… Although never installed, they have now been replaced by a new order of vinyl wheel center decals of the proper MB star logos in the same color and the calipers will follow suit as well, to give a pinch of blue to the otherwise white/black (really dark gray, actually).

I also plan on having some light metallic blue in the design of the vinyls that will adorn the Aerofans at the front. This car will be sharp when done and still lots more work left!
 
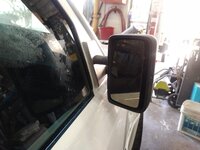
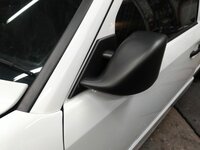
This is one of the more interesting parts of the entire project, which I do not believe anyone else could have pulled it off better than my entrusted and incredibly talented wrench (vs. wench), Michel... The pics below tell the story of personalizing this car with the most likely recognizable aspect of this 'build' or transformation - which is... the install of these Evo II style mirrors. So, the pictures below tell the story.

This is the goal (as also previously posted above):

ed39c11f-901a-46b4-a998-63324ed08af1.jpeg

So naturally, a template out of cardboard is the necessary first step where you measure 3 times and work in this instance, from the inside out:

781bb514-5b91-43a2-ac7c-728a7a184ff2.jpeg
68af0c28-6d2a-4d5f-8368-be420f2130ce.jpeg


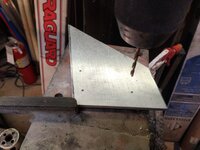
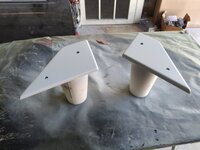
Next up, grab the template and cut out the same pieces out of metal x2:

e15e8fb9-95fb-4296-858a-f5b3087232d2.jpeg

4cccf49d-8328-4563-a1f2-aab1c70bcfc6.jpeg

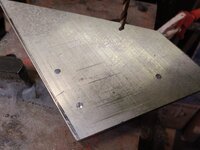
He made the marking holes in the metal brackets:

44bd3638-c093-4333-9cb3-0923ff40d3cf.jpeg
fd5a8769-f5b3-4dbc-a83e-d60b98abc096.jpeg
97a95304-d894-434d-abf1-45d75387cd96.jpeg

And now the screws that are going to allow the bracket to be held in place from the inside of the door are measured:

14578518-73ca-46c7-a22e-9a5c105c4e81.jpeg

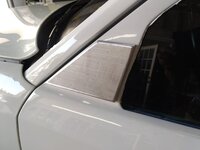
Giving a preview of what the bracket will look like once mounted on the door, before the mirror is attached (and looking absolutely flawless in the process):

3da82c8c-e5d0-4c0a-ad7f-6261da4d8c8f.jpeg
b33bd1af-f680-4f55-a763-e32abaecfa7b.jpeg

A looksy of how it appears from the inside corner of the door:

f17f03c6-5321-4ad3-b53c-2e71293e45f7.jpeg

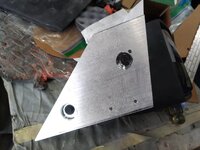
But now, it gets more serious in making the holes to mount the mirrors... Michel has ice running through his veins at all times and he usually doesn't need to measure stuff too many times (unlike me and perhaps a few of you?):

da3b5a41-bde0-4e86-a3a9-cbe85091a548.jpeg

ee4d9051-f945-4216-ab9b-4388136f05b3.jpeg

ca5bd6fe-9113-41b1-950f-dafaf8086c05.jpeg

Presto: we have mirror 1 and damn...

9fab1c6d-fadb-4082-bcd1-41e0bff54b81.jpeg

fef146b2-9e01-4c01-bd1e-03c26ce71edf.jpeg

02bb381b-73c7-4ba3-ad8f-94a7c1d0b212.jpeg

1 side down, the other to go and yup - this is so siiiiiickkkkkk!

2cf8ac05-a1f2-4dee-9ebc-9d07f79e70c8.jpeg


8f9757a0-bec4-4918-ae84-d1a373397b72.jpeg


6bd34f8d-7a30-46d7-a791-9d56464928a8.jpeg


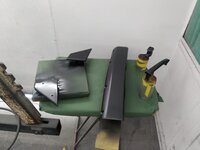
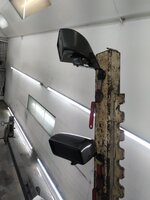
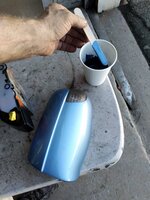
Now that they look perfect, they are good to go and are removed to be prepped for paint in the same exact color as the wheels, door handle/trim, front grill, and bumper strips:

3f099046-74cb-4630-9118-e44ace467d26.jpeg

b15be423-90b7-4268-8968-82336d12392f.jpeg


630840a9-ab50-47ed-915d-b77cbca747f2.jpeg

df23c29a-7c5a-48eb-976f-496d341f9133.jpegdf796c44-ed01-4b1b-8cd6-50b0989c5b6a.jpeg

435fbe4c-b8d4-464c-8e8f-4d26300d60d0.jpeg0137cbf7-0326-43d0-b796-7eaa35d14de8.jpeg
 
I have yet to see the car since July when I took the pics of the inside of the engine bay and trunk having been painted white (at that time)... Despite the color change having taken place with the new Polar White 149 on the car, there is still quite a bit of fettling left to do on the car including the front wheel adapters, interior modifications, some mechanical work, and everything else associated with my transformation of this car - which continues to be a labor of love :)

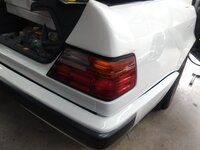
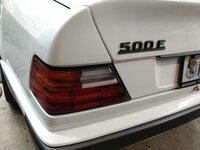
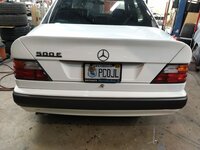
Here are some new pics with pre-facelift replacement taillights installed (which compliment the white beautifully!), as well as the panels being reinstalled. Very happy so far with the new look of this machine to make it into my vision...

IMG_1217.jpegIMG_1215.jpeg

Bodywork adjustments will follow, naturally. Michel is very adept at fine tuning all of his projects and this one will be no different!

IMG_1216.jpeg0276ffec-a3f1-4e92-95e4-e83989e87dbd.jpeg883efbf1-c507-425a-bfbe-0180a8f41db5.jpeg65e2d84e-4214-4906-b9c6-a62e3d21e793.jpeg
 
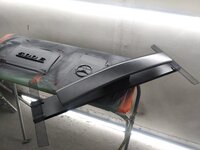
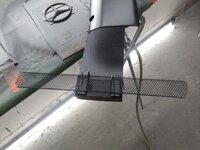
Here are some of the accessories being painted OEM Porsche Slate Grey, as initially chosen by Albert when he painted the front grill, wheels, door handles, and trim. Pictured below is the front license plate delete trim that came with the car when I bought it, the custom metal mesh inserts that will go in the new air vents made underneath the headlights, coupled with the car now being re-badged once more with the new 500e reproduction badge and MB star. I think these accessories, when taking in the wheels and the bumper inserts also painted in the same color, will certainly compliment the overall aesthetic of the car... I cannot wait for the finished car!!!
IMG_1550.jpegIMG_1547.jpegIMG_1548.jpegIMG_1549.jpeg
 
This part of the build process/project is now headed into the fun and visually appealing part, where all of the remaining modifications are slowly being reigned in to make the car whole again...

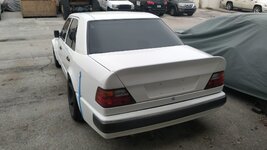
First up is a picture that shows the fine craftsmanship by Michel to make that dang warped, bent-out-of-shape AMG style duck tail look better than anything else out there, bar none. I definitely will prefer getting the car re-badged.
149eb76f-be68-4507-baaa-202ac2f23aaf.jpeg


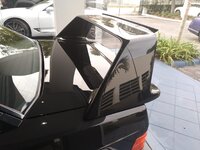
Next up is the roof spoiler which - I know many of you may not like it - but, it is easily removable if I change my mind down the road sometime and, something which I have installed on my other previous builds, so... I dig it and continues with the aggressive, motorsports theme of the car (and its Porsche DNA).

5279ca28-a5d8-4678-8836-0245464e54a3.jpeg


These beautiful European orange turn signals, contrasting with the white, and complimented by the amazing vents also came out better than I could have imagined, and man alive - how cool does that look, eh???

98fcc0e9-f0b6-4bcb-b709-a34d0740ae07.jpeg9eab542f-9c42-476a-b7e1-5e8d9287eb34.jpeg
 
The subject of dark wheels on cars can be a mystery in its own right as its very divisive... When I decided to completely transform my white 1991 911 Turbo 10 years ago, it was done to emulate the look that the 1974 Porsche Carrera RSR's - like the one Luis Mendez had while I was growing up - along with other modifications. However, race cars with black wheels have been around for a very, very long time. When I transformed my BMW 850 around the same time, I did not want black wheels because they lacked visual detail and sometimes, appeal - so I did the next best thing and got dark gray centers on the BBS LM"s instead. I believe that the look is more suitable on certain cars than others.

This 036 already came to me with the Porsche Slate Grey colored wheels, which more often than not - appear black. I am quite fond of the car's stance coupled with the wheels being 19's (all my cars always have a +2 or more on the wheels), and Neez at that! With blue being Albert's color combined with a brass color for the calipers, I opted to change the calipers to light blue as more in line with the car having been previously blue, and again - that Luis Mendez's RSR was light blue also! If I ever decide to redo the entire car again for another color in the future, then its likely that the wheels would change to a different tone as well, but I did not want to touch them for this particular makeover, hence the Polar White 149 choice as the plaid in the interior includes white.

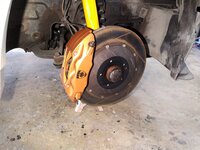
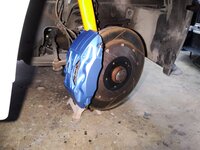
So, below are pics of the Stop Tech Big Brake 355 front calipers being cleaned, prepped, and painted (and the rear OEM ones out back, of course). Although the front wheels/brakes are going to be entirely covered by the Rotiform Aerodiscs (turbo fans), I think that the result will be very appealing indeed!

cb94552a-50b9-411b-8508-b85f864b2692.jpeg5a21fecd-c5fd-425c-98eb-79754823ee4c.jpeg


And yes - I realize that the car is not going to win any concours events (nor could I care for those events or the people that obsess over a car that falls under that type of scrutiny) based on the pic above... so for those whose knee jerk reaction is to point at the fact that the car will fall apart because its not ideally perfect, take a deep breath and put your feet up - you will feel better its not your car...

6fdbdfea-f05a-4b11-bcc0-8d6178d8daf7.jpeg08b56470-f382-4de3-9d1d-6536ab6db6ee.jpeg

c2c516f5-21e8-473e-9c87-4f0b649a45ea.jpeg
b1a6a714-9214-436c-ad73-eb5a1a068eb0.jpegf0551070-bdb9-471c-a7a2-cfabdd658fae.jpegffa5144c-0bd5-49d8-85a1-f603b006fba2.jpeg6d5eb3a9-03f8-4f5a-824c-d9ad03e057d5.jpege1c4746e-8103-4b42-9774-b5e7b93f4168.jpeg
 
Aside from the mirror swap - which I have previously addressed the reasoning behind same - I believe that the other most distinctive feature of this special car is the front application of Rotiform's Aerodiscs (aka turbo fans) as an ode to my background with auto racing + Porsches... coupled with the motorsports vibe/theme in this car which, in no small part, traces its roots to its assembly line at one of Porsche's factories in Stuttgart.

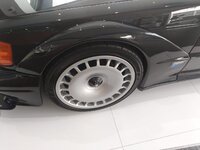
Neez wheels are special indeed, for those in the know... Not so common (vs. 17' and 18's) on 036's are 19 inch wheels, although there is a fair share of them around. Because the car was unique in its previous itineration, I wanted to see how far I could extend my list of exterior modifications, which through creativity and insistence, included the Neez wheels without simply having changed their color. So, I ordered center cap decals and had the calipers repainted. Check. Then, reached out to one of the most talented Turbo fan customizers/manufacturers in the world, located in Belgium, D-lng. Check. Then wait, wait, and wait some more until they were designed, assembled, and shipped.

After getting the car painted, installing the Evo type mirrors, it was now time for Michel to install the D-lng one-of-a-kind, world's first adaptors for Rotiform fans to be used on non-Rotiform wheels for my car. Except, it went far, far from smooth and the entire design had to be scratched
:( However, in turn - my incredibly talented, resourceful engineer - Michel, came to the rescue as this is an integral part of the build.

First - the side triangular portion of the adaptor would not allow for the fan to sit flush with the wheel, so it had to be completed shaved off. Steve, the builder, had implemented it as a safety catch so it that if the center portion came loose, the one bolt on that piece would hold the adaptor in place with the wheel so it wouldn't fly off! But, in concept - cool. In reality, not so:

e344b5b5-ef92-433e-9aff-8463a6fc205b.jpeg22bd6940-6ca2-42b9-902b-883c9a7d762f.jpeg

Next problem came that when installing the plastic center lock hex cap, it did not allow sufficient space for the wheel or the fan to turn. So, Michel methodically manufactured a spacer of sorts from pvc.

96267782-b288-4087-8a3f-665fe1db3adf.jpeg
be8d4c7d-841e-44fb-b209-470d4adf3ba2.jpeg

f81677b9-7673-4789-aada-3895a4310954.jpegd480dd68-fb29-4f64-9687-b0532ace5c62.jpegc4b50e7c-b76b-43cb-9ad5-b211a7487bea.jpeg46928acb-9458-45ca-956f-9bfab76e6a6f.jpegdb8f73d2-082e-4e9d-a334-fb5e4966be4e.jpeg


Michel not lacking in skill, ingenuity, and never wavering determination - decided that this was not the way to go and that he could certainly do one a lot better - even if he'd never previously come across anything remotely similar to this before. So, he took up this challenge in no time and created a new adapter out billet aluminum. I mean, why not? Easy breezy, right? D-lng who?

IMG_1827.jpeg

IMG_1828.jpeg
IMG_1824.jpegIMG_1825.jpeg


Get some black rattle can on the spacers...

2a7b5db4-390b-48a8-973f-d1fed101cbea.jpeg


Time for fitment... and, an endless debate on the looks of the car certainly to follow!
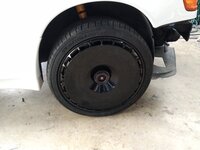
d1fc78b1-2940-4620-9005-e6ea8643f035.jpeg


I bought genuine BBS center cap inserts to cover the D-lng hex nut and, given that these turbo fans are glossy black, I had Michel wrap the center cap inserts with glossy black vinyl.

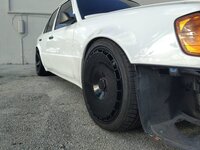

40f702cb-9a25-4e5e-b01a-5e4d6b9ba0ee.jpeg
73607a7b-d241-4a05-8641-1c2df6d13395.jpeg

I have created multiple designs to be installed in the plastic turbo fans as I don't really care for the plain black look, although... the goal was to simply be able to install them and know that traveling at upwards of 100mph, they don't affect the ride quality one bit, as per Michel who is in tune with details on all his cars...

Okay folks - time for a mini, partial reveal for the world to see the craziness - which is still ongoing and believe it or not, A LOT more to come!

3b7f1f78-129b-4985-b4ea-cb9d51321d6b.jpeg

4e3bb4a1-c18c-4df0-8fe1-fcc02beb0865.jpeg
 
"There's no going back at this point, is there? I mean... might as well go all in!?!" - said the sensible one.

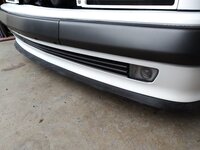
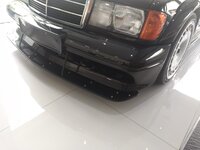
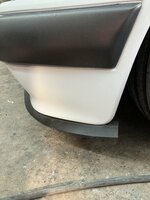
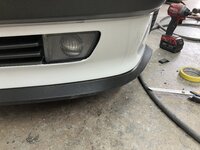
Given the amount of add-ons that have been piled on this car, here is another one to the list which - in my opinion (the one that counts!) - compliments what is already there. Its a rubber molding that is made by Rhino Lip and, aside from making the car look more aggressive, is pliable and modestly priced. If anyone has thought about this for their car, make sure you get the 10 ft one vs. the standard 8 ft they sell - you just have to request it and costs the same. Ask me now, how I know ;)

IMG_5885.jpeg

IMG_5884.jpeg2e7ff8ef-203d-49dc-bc17-800809ed49a9.jpeg3caddecd-9d2a-45b7-b326-0fed55f943d2.jpeg8e082e8a-fc6b-449a-8ea7-8ded2435a2a4.jpeg492fa6b6-f7fe-4967-8d0a-239c92c6cf8b.jpegc64a77aa-4db3-4b25-9303-0ea405ce91ec.jpegf7cd8915-2bdd-4e05-8a5b-ede1e61fc84c.jpeg
d1fae68c-aaa6-4de7-93f5-90cb772e2dda.jpeg


I am really digging the coming together of the car, slowly but surely! However... there is still a laundry list of repairs and items on the punchlist and more to come.

b0e3177a-4c8a-4970-b2d3-ee3c71c44472.jpeg
 
Nice tip on that rhino lip!

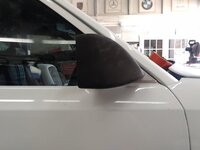
It’s so cool talking to Pablo about my car he mentioned someone else having a 500E in the shop to be able to look at hair car while assembling mine! I couldn’t help but snap a few pictures of your car when I visited the shop last week!
B7F1ADCB-6852-489B-B67F-397CB354DC27.jpeg
 
Michel’s shop and this other shop are located in the same industrial park… When you informed me that they were handling your car, I mentioned this to Michel so when he’s been too busy to work on mine, this shop can sort some issues having arisen from the car being quasi stationary for 10 months and counting…
 
I know I am not the only one who occasionally acts much younger than what we really are, and crank the stereo up louder than we should... when we can, every now and then? So let's talk about the boom factor and bass.

I purchased a 10' sub with a 100w amp built-in directly from Crutchfield - at the same time I had bought an Alpine head unit - since all my cars have one, and as I have previously covered in reference to Luis Mendez.

a6083a22-54bc-4dea-8eff-28d0803dd356.jpeg2363e836-bfd8-46d0-a2c4-dfde1b3b8e07.jpeg


The initial plan on my end, since this car is meant to be a daily driver, was to ensure it could be installed either in the back area of the trunk horizontally, or at the top portion of the trunk just before it opens, so as to maximize usability in the trunk.

After spending many hours perusing tons of photos and sources within the interweb, I saw something I asked Michel to do instead... which was to remove the area of the first aid kit in the rear shelf, and install the 10' sub there, with it being flush to the rest of the area (where the rear headrest go when not in use). Michel would simply remove the sub from the enclosure it came in and create a custom box enclosure, wrap it in black leather, and make it look as OEM and unobtrusive as possible. Well - that was the plan anyway!

On a Sunday afternoon, unbeknownst to me, he sent me all of these pictures which reflected the work he had done that day up to that point.

396146c0-a740-4ce3-b402-881a810a297a.jpeg

633306c5-0cd6-4f0b-8607-60c026c967fd.jpege857eaff-f0ad-4dc5-ab40-d0fa44319e54.jpega67ed6ec-e482-4c0c-8501-48288b64f360.jpeg
dec2edd0-a65f-4c9e-9603-70a8adf197b7.jpeg


Whereas Michel is an excellent craftsman and a perfectionist to boot, the pictures did not fall in line to what I had in mind... which was essentially, for no one to know there was a speaker there... I had no idea of the depth of the actually sub since it had arrived to me already in its own enclosure. But I knew for sure that, despite Michel working with what he had/was there in making the measurements to the most exact possible dimensions, that I did not want to go through with it as I did not want to be stuck with my car having some kind of hunchback box in the rear shelf - regardless of how good of a quality it was... So, I tested the limits of my friendship with Michel, called him up right away, and explained to him that this was not going to work! I wanted him to cut the metal off the rear shelf so the sub could sink in it and be flush, and if that was not possible, then the box enclosure idea was not my preference.

We are still friends and he knows I am stubborn when it comes to certain ideas on my cars... Below are pictures he sent me next which showed me the reality of the situation...

1b550714-269c-4eb5-a657-8746d2284622.jpeg

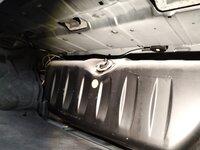
Since the gas tank is located immediately below the rear shelf, this would have caused the wrong kind of Boom that I was looking for! And, also explains why no other w124.036 is likely ever going to have a big subwoofer installed flush in the rear deck area of the vehicle. The gas tank put the kibosh on that notion for me.

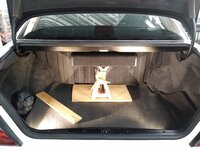
Plan B - "Okay, Michel... throw away everything you did today and simply get a bracket made to secure the subwoofer within its enclosure in the area of the trunk that allows me to still fit the most amount of luggage, groceries, skeletons, etc... you know, the usual right?"

16a0211f-d70c-4acd-8ec4-71eadebbd728.jpeg
7249f4ca-53eb-43ad-8c59-d4797e327e07.jpeg67d2e588-e44e-4748-81da-185da6b7a4e1.jpeg

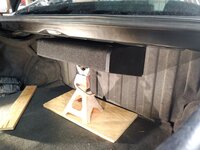
With limited options, I wanted to infuse a combination of a good/loud sound, keeping the vehicle as fully usable as possible, while also trying to make the install inconspicuous. But, this instead became the reality of the situation and for now, it will have to do (I haven't seen the car in over 6 months and counting).

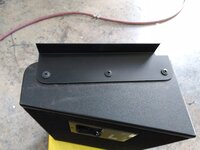
Michell fabricated some brackets out of aluminum, used the ol' rattle can shake, and presto! (for now, anyways)...

3afb269d-a050-42d0-9ecd-a87f68edd2aa.jpeg
d00af1db-3ef4-4d6e-b992-ef32a2d5bd83.jpeg885f87b7-8839-4f29-ab5e-3a36929386c1.jpegb4822c95-7564-4e14-bc7d-944179a52c79.jpeg

According to Michel... the stereo now sounds killer and has assured me that next time I want to crank it up a little higher than I should, I definitely will be feeling a little silly, deaf and young :)
 
Although I do not have the pictures, Michel noticed that the Hertz tweeter located in the passenger side of the dashboard, was not working. After removing it to ensure it was working, it turned out not to be the case. Replacements were ordered, installed (limited room with plenty of scratched knuckles to be expected), and now all speakers work as they should.

On another note, the a/c control unit relocated to the glove box area is not reversible on this itineration of the car, but certainly possible in the future should the custom hand-laid carbon fiber Albert created, be removed... But, this would also result in the replacement of all the other extensive areas of car's interior with carbon fiber to be replaced as well, and I am nowhere near there yet (if ever).

When the father/son mechanic's shop fixed the a/c (also relocated to the glove box area) after it went bad within the first 24 hours I got the car delivered to me, they dislodged/broke/disconnected something in that area. So, since the day I essentially got the car and, whenever I have used the a/c controls, it would result in the unit sinking deeper into the dash, which is complete bullsh*t, and I had become very frustrated at that, and at the fact that a shop would give a car back to its customer in worse shape than how it was dropped off to them... But then again, they were not my first, second, or third choice when this happened.

Michel to the rescue in 5 minutes' time when he fabricated some aluminum brackets and although not a big deal to many in the 'scheme of things' during this build, a certainly important one to me for functionality (and sanity)'s sake!

23eee086-632a-4482-bac2-f8d7709785f6.jpegb18911b7-b074-416a-a7fd-530f6b9b4b9a.jpeg76bed2f0-e4ea-4111-9e70-66a5c3aac0bf.jpeg
 
This next post is a must for me... why? Because it serves as a preemptive measure to avoid disaster! Case in point:

Speaker pic.jpg


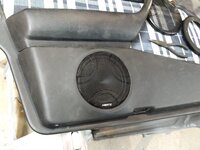
Above are the beautiful Hertz speakers adorning the door panels on the car when I got it... very tasteful, which I cannot say of many speakers or grill applications out there, even (commonly, sadly) on high-end cars that have crappy, cheap looking ones.

The dilemma - having a 9 yr. old ride shotgun where he's a magnet for everything. So, what to do? What to do?? Okay - buy some Hertz grills for the speakers! Except, I am no Michel nor have his skill set, so - off they went with him as there is nothing really around to hold the larger grills in their place on the actual door panels or even to the speakers themselves.

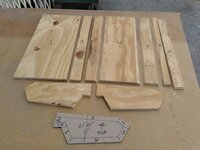
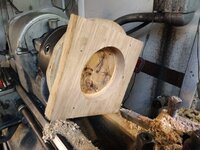
Step 1 - get measurements down and get some wood to create a buck to reshape the grills:

c31784f0-0a05-4419-abe2-bd85b514000e.jpeg
ef693c27-ff20-4645-bab2-4496716ffaa8.jpeg875e071a-a864-4478-8048-91c8fa1393e3.jpeg


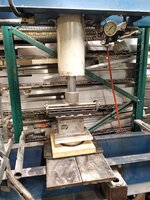
Step 2 - put 2 and 2 together by following the non-existing easy steps (for someone who knows what they're doing) of using the buck to place the bigger grills to bend them on the corners to squeeze the speaker, while maintaining the same exact radius with the help of the huge but ever useful press here or there...

bda3a963-4a80-4975-be98-d9a0af086f0b.jpeg6c088fea-f16a-4d36-abcd-5693d6ae2491.jpeg7dcd442f-1a3a-4d01-96af-5c8b686f2f9f.jpeg


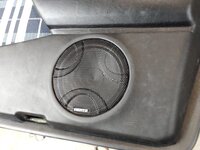
Step 3 - take a look at a job well done, smile :) and then install for the winnnn!!!!

e35b1a1d-9804-4f4a-8314-840f43b2b41e.jpeg7b53bdef-8877-487f-9436-2642232723a4.jpegd5812ac4-89f2-462b-bd21-f2d11efb5c64.jpeg5167f4ea-f53b-4f33-b1e0-3c859ef206e6.jpeg


So... now I should be able to get a louder sound than I had before (b/c of the sub), plus the added insurance that the cool + nice front speakers won't meet an untimely demise through a little someone who practices his karate often.
 
Work on the punchlist was keeping Michel busy, but I also expect the car to be turnkey when completed. Before taking the car to the shop in March of last year, I purchased replacement rear Michelin Pilot Sports 275/35/19's per post #79. With the Aerodisc/turbo fans, anything tire-related is expected to be a chore, so I naturally sourced 2 new front matching Michelins, which was a nightmare as they were on back order from Tire Rack who kept switching the expected shipping date 3 times over the course of 6 weeks.

I then called Michelin directly, who had no information on when they would go back to production, and somehow through perseverance found the 255/35/19 tires separately - 1 from Wal-Mart and the other from another vendor. In WPB, the national tire retailers only want OEM cars/tires in and out, so it's tough getting good help on cars like mine who have lowered suspensions and larger aftermarket wheels. In SoFla, that's pretty much the norm and I asked Michel to take the car to a tire place to get a 4 corner balancing/alignment as the new fronts had simply been mounted by another shop close to him (that does not do that work).

Resized_20221027_163109.jpeg
Resized_20221027_163227.jpeg

Resized_20221027_163122.jpeg
 
On Michel's drive back, the car was handling worse off than before the work had been completed. But, he had to make an appointment for them to see what's what and.... 3 of the 4 NEW tires had manufacturer defects where essentially, the owner of the shop did not recommend I drive the car at speed with my family, despite me having spent a pretty penny on all 4, the front tires not having been driven 5 miles, 100 miles the rears, and also spending good money on the corner balancing/alignment. What was shown to me was something I would have surmise existed, I cannot recall what the measurement was, although the normal range was x and my tires were nowhere close to that range. The website for the shop showed the exact type of cars most of Michel's customers drove, and completely competent/comfortable with my car - so I took this info/advice to heart.

I contacted the 2 vendors of the 2 front tires but they would not do anything since returns are not accepted after 30 days (in this case, was like 50+ or more, unfortunately). So what was my solution? Spend another boatload for brand new Falkens this tire shop could get in 2 days' time and although they too would be corner balanced + aligned, he wouldn't charge me for it a second time. So, folks be on top of stuff you buy to ensure it gets installed/tested quickly as damn... sucks to spend good money on good tires to turn out badly :(
 
Some more work done by Michel (important to me) but not sexy work/post/pics/update - although I am simply documenting everything he did take pictures of to reflect the time, effort, and resources on getting this car to my liking and specific standards.

Here is the chip install from one of our favored forum members whose name and identity under the helmet remains a mystery ;):

646c535f-1d49-4cb3-86ab-1eaaafaa5227.jpeg767e774f-c66b-43b9-8999-3922716059f1.jpegd0d02fdb-5b2b-453a-918a-eb262d8fe6b4.jpegb5f56664-7d4c-40a0-b8cb-9c94a8ca40de.jpeg56810379-1e9d-4922-b555-68e24c09d849.jpeg


And, here are pics of the replacement driver's side a/c vent I sourced from eastern Europe via eBay, along with the center ones from someone else also from yonder... they looked remarkably well in light of obviously being 30+ years old and coming off 2 separate cars:

9a578be5-3e41-467c-a7be-89ae493a4cf8.jpegc811badd-8c51-4729-a194-b166eec5e00a.jpeg
 
Otto,
..., I cannot recall what the measurement was, although the normal range was x and my tires were nowhere close to that range. The website for the shop showed the exact type of cars most of Michels customers drove, and completely competent/comfortable with my car - so I took this info/advice to heart.
Otto, were they showing you a Road Force measurement in pounds, from a Hunter balance machine? The max limit is around 26 lbs and the desired measurement is single digits.

That is awful about the Michelins. I'd have been pretty torqued.

:runexe:
 
Yeah... I couldn't believe it. Did everything right by replacing like for like and spending almost $300 p/corner for the rears, to then eat crow to locate the 2 fronts, and Michel doing me this favor to get them mounted, and take the car twice to another shop for this was... not pleasant. But, nothing else to but to move forward and learn a lesson somehow (I never, ever thought doing all this work would take this long)!!!
 
Now for some gratuitous glamour shots of a truly sexy car... that just so happens to be for sale at the local showroom of Michel's clients' dealership. I think its 1 of 1, the price is over $350K, and seems to be the actual one I decided to emulate with my mirrors - such a beast!!!

9bf2ceee-c5ed-44e4-ad44-983867ccceb8.jpega20899ed-f20d-48c1-9c60-ccbff2f0cf4c.jpeg2022d91d-6f4d-45c7-8657-8d7544cb00e0.jpeg40f21c72-828f-4680-a6ed-07dcf545c543.jpeged93f176-6c78-4384-a8aa-b6dc9f5f3aa7.jpeg29dc809f-8329-4047-9a95-9f1ea3ce37d8.jpeg0a4e8a8c-c787-4277-8919-67f34f9118b7.jpeg8e877237-afe6-43ac-bf3a-298216c1d663.jpege3c2247c-1a94-43a0-a4eb-c8099bfd25b0.jpeg1f577abe-a811-4b5c-b1a7-30a27818a0e2.jpeg656e8613-cde8-4e06-b6c5-28f279e40392.jpegb81a7127-5e1f-43ea-8f54-ea5f7add4eb1.jpeg


To my knowledge, a sport/racing version of the w124.036 was never made? But, they definitely did with these 190's... and, whether by mere coincidence or not, I have incorporated many of the styling cues found in this 190 Evo II into my car by having installed:

- lower lip spoiler
- center lock wheel application and turbo fan (at the fronts)
- the evocative mirrors which are the bee's knees and expect to see many other MB's across the globe get them installed as well
- roof spoiler
- rear (duck) spoiler specific to w124's
- replaced the facelift turn signals x4 back to OG

There is still more to go... but in the meantime, I have renewed my PCA membership and - decided to somehow make the car's debut at Werks Reunion at Amelia Island 30 days from today - on March 3rd, followed by Radwood the following day also at The Amelia!
 
Last edited:
... I purchased replacement rear Michelin Pilot Sports ....
3 of the 4 NEW tires had manufacturer defects ....., I cannot recall what the measurement was, although the normal range was x and my tires were nowhere close to that range.

Otto, were they showing you a Road Force measurement in pounds, from a Hunter balance machine? The max limit is around 26 lbs and the desired measurement is single digits.
I vaguely recall there being some excessively detailed information archived on this board specifically about Michelins Pilot Sport 4S and roadforce measurements. Such a dry topic ... no idea why someone would post that stuff here. :peep: :stirthepot:

In all seriousness, Mich PS4S, at least those made in the USA during the pandemic are known to be problematic wrt manufacturing defects…. Sorry you went through that.

-Mister Roadforce
 
Last edited:
When I built my extra wide body 965 a few years ago, the widest tire in 17’ for street application manufactured at the time was a 345mm - and only Michelin and perhaps Pirelli made them. So I went for Michelins all around given more availability if replacements were ever needed and never had any issues. Several other cars of mine also have had Michelins (and Pirelli, Bridgestone, Goodyear, etc.).

These were the tires Albert had on the car when he built this 036 - except he used Super Sports, and I was only considering 4 S (all season) simply to keep things status quo and ensure more durability. So, it never crossed my mind to research or consider any alternatives at all since by and large, Michelins have had a long-standing good reputation.

Eventually, I will post about stuff I bought for this project that never made it past the purchase stage… but, I had also thought at one point that I’d like racecar inspired raised white lettering on the tires - like RWB Porsche’s with their Idlers markings (but in Michelin instead) and many other competition cars!

Alas, still a piss poor way to buy 2 complete sets of tires, requiring 3-4 trips to tire shops, effort, frustrations, etc. in a relatively small amount of time, and even less mileage.

Similar story when I was building my 1985 Quattroporte III and bought the world’s only wheel set of Lamborghini Jalpa wheels for it. Car was at the shop (eventually for several years) and by the time they got to be installed the month after delivery, they wouldn’t fit. The eBay seller had sent me pics of a his mechanic holding the wheels in place on another QP3, but he was a complete fraud (plus there was an unrepairable flat wheel out of the 4 not obvious upon visual inspection). That was another sh*t show and a half.

As an owner of a project, you are quick to resolve issues requiring attention/items to purchase so there are no excuses for the work to be completed. You, however, are not dictating the pace that progress is made. And, in this occasion, on the hook for the defects not having been identified sooner.
 
When the car went into the shop almost a year ago, there was not actually much wrong with it at all other than at times, oil would seep from the head cover gasket - this, after the engine had been entirely redone some 6-7 months prior (post # 33). Although that father/son shop had attempted to address it, every now and then the smell of oil onto the headers would still somehow emanate during the longer car rides. It was not a dealbreaker for me as: a) they did the right thingy by replacing the gasket with another 'new' one after I brought this to their attention; and b) it was not an every day, every time I drove the car type-of-issue.

I knew making the interior rear dome light I bought (as the car did not come with one at all) be functional was something Michel could easily tackle. But, the last remaining item was the non-operational horn on my car, which is a necessity when living in SoFla!!! Shortly after the car was delivered to me from Cali, I opted to replace the nice (but usual) OEM steering wheel with my preferred choice of a Momo - which I sourced a suitable 4-spoke one from eBay UK. Per post #29 in the first page of this thread, it was not as straightforward as I would have hoped, in due part based on the experience level of the fella helping me combined with him also not having all of the necessary tools needed.

During the steering wheel swap, unbeknownst to me - the car with its fly Momo steering wheel left his hangar that day missing a metal plate from the no longer in existence wheel that came with my car, that would otherwise activate the horns when in use, hence why I had not been able to use it a 300+ times in the previous months! Michel discovered this when he took mine apart:

f46ed669-9f9f-48b2-889c-d62d51479be9.jpeg


So, Michel requested I get him a steering wheel that he could reuse some of the internals and make mine work like it should... The w124 series of cars went into production in the mid 1980's and it was normal for many models to have interchangeable parts. I did some research and interweb informed me that it was possible to swap a variety of different period correct MB steering wheels. I went to eBay and got an inexpensive, fugly one which would be sacrificed:

f50e5f6e-d6e7-45c3-bf78-4add8a266dd8.jpeg05c5054d-362b-4e8f-82b1-b043de52366a.jpeg

Off came the plate with the copper pieces attached at all 4 corners, noticeably having served a long life in that old steering wheel:

2be1dc99-0811-4b78-b0c8-831ae1810cdc.jpeg
d87effef-47de-40f4-b014-65d0ec116c5c.jpeg

Michel cleaned off as much corrosion as he could, test fitted this piece into mine, aligned the holes to secure it in place within the Momo hub, and magic :) Now we have a working Momo horn!

b6b82f06-5659-41fb-b846-b65bad49ef7c.jpeg
aafd6283-5e45-4cbb-becb-13497a98a7ae.jpeg99ee2e0c-2a13-4c0b-9a87-7e3271315c60.jpegfaa0541f-0c38-405b-90ef-eb61062f0da1.jpeg
 
While he was at it, he installed the Otis wheel locks to make sure these Neez wheels stay put on this car no matter what vs. an early departure from anyone with funny ideas looking to make their Impala have more flow... However, once the locks were installed, the car would not move. Turns out that the bolts for the rear, based on the offset/width of the rims, required a shorter length for them, so a quick adjustment took place and now we have locks on all 4 corners...

76780bee-404a-4064-95d9-e1c369830175.jpeg 1eb9429d-fd7c-430c-ab96-876c6f23304f.jpeg
 
Last summer, Michel told me he finally bought a new battery for the car, as the previous one was continually misbehaving. When I informed him that I had no previous issues with any electrics at all with the car, he seemed puzzled... However, as we are reaching towards the end of this project, he recently confessed to me that the car apparently developed an electric leak/drain during his car which made the car be without electricity, so he had resorted to simply disconnecting the battery when not in use. He spent many of his own hours trying to identify the possible source but this was something beyond his experience level.

I instructed Michel to take the car over to someone he trusts that knows these cars, as I do not want to have the car go to any shop for years to come or, at least that was the goal/plan! The piece of shit he recommended me, did not have glowing reviews online - which is the only information I had available at the time. However, this POS had been around for over 25 years only specializing in MB's in Broward, not too far from Michel's shop - and Michel had not previously had any bad experiences.

Not only was this scumbag lying to Michel as to his availability on switching dates when my car could go in (3 times in 2 weeks where the car just sat at Michel's), but he then lied to me too. I spoke to the guy over the phone the same day it was dropped off and asked him to locate the source of the electric drain and, because the car had its last oil changed in July 2021 when the engine was redone (after using the car not quite 2 months post purchase), to do that and go through the entire car to address any other issues. I am not keen on waiting this long to get the car back and then having to take it elsewhere for this type of service, especially since I have not found much luck locally with a knowledgeable and confidence-inspiring wrench.

Two weeks later with zero updates, he calls me to pay him 3 hours of labor where he deactivated the car's locking mechanism. No repair, no report card on anything else on the car, not even an oil change and too boot - the POS was aggressive towards me in having Michel pick the car up immediately, amongst other shortcomings that make me wonder how on Earth businesses run by Level 1, Class A a**holes can exist?

This was not in any way Michel's fault, although he genuinely felt bad. As the "Show Must Go On", enter Plan B. In the same industrial park where Michel's shop is located, there is another mechanic shop that works on everything although they are known to work on mostly European stuff. I asked Michel to take the car there so it can receive a clean bill of health, no expense spared - and to comprehensively comb over the entire car and address any/all issues.

They found oil seeping from the valve cover gaskets per my complaint and went to town to address it:

30fb8d3020fb894b33794e8a191a26422dc6c787.jpeg c7b762a29aaed15e288c3fe824c5246550e5ae04.jpeg81bb437dc7a1976e004a1ec5d25585e48dc11422.jpeg
image.jpeg


Next up was a leaking rear cv boot, so both were promptly redone with new, OEM parts (only pic available):

e057cc74c93d6df0d8c54c22c6956c49d55722a4.jpeg

As to the cause of the electric drain, they indicated that the pin hole in this rubber piece created a leak, which resulted in the vacuum system for the door locks to constantly be "on" (or an explanation in line with this?) in order to attempt to regulate the necessary pressure? Nonetheless, I was assured it was identified and repaired:

6250ba5cd896c02e2b09c42f2a1ec50fd8e7698b.jpeg
792c352d33b2e6552b63f254d4bb72f06bb7f038.jpeg85a28f91b1ec7b94d7ac619971dee3334f9031a2.jpeg6c612d297093d991d7c6130e6c413715018de4c0.jpeg

With a not inexpensive bill from this shop, we are now at the home stretch with only cosmetics left since the car has new tires, new oil, and all mechanicals up to par - or we hope that's the case anyway.
 
With a blank canvas, you are only limited by your imagination... After the Aerodisc/turbo fan in black being installed on the car with the adapter to make the car appear as if the front wheel has a center lock, I felt the need to bring blue to the outside of the car other than the center cap decal and the rear calipers... So, if I derived a design with white (to match the car's exterior) coupled with blue - the design would be creatively personal (blue being Luis Mendez's color for over a decade with his 911 RSR, while also paying tribute to Albert's rendition of the car in its previous iteration)... Being that the original desire for me to have this setup initially came from the Porsche 935's/962's and multiple dozens of other race machinery that implemented turbo fans x4 or only at the fronts, then I opted for a BBS wire-mesh application/design...

I had the graphic/vinyl guy who my cousin uses for all of his son's pro go-karting needs, use a Rotiform template but adding my choice of colors.

2466fcd2-7311-4321-b9a1-b85ca2a139d0.jpeg5d160c30-a980-4414-b29a-86aeb06dd6de.jpegae9c2a8c-7ac6-42a5-b23a-cf4fba407439.jpeg


Like those of you seeing this, I was not on board with this look/design.... so what to do? What to do? Go back to the drawing board? Yes - but, I also decided to switch things up and order a set of white Aerodiscs:

c75fe281-dcc0-4960-8095-627011780206.jpegd1295a1c-22bb-4b26-8d76-c8e7938084f3.jpeg


Upon starting yet with another blank (white canvas), I knew right away 2 things - the white was definitely going to stay, and - I needed to come up with a more crisp vinyl design because as good as the car looks without it, this car must reflect my personal story of how this all came about, even to the very last detail and still tie in the blue to the exterior of the car!

5daf3d6b-6983-40bb-a79e-8e65c2379e14.jpeg746b630f-af18-49a8-ac8d-5e06d304c992.jpeg7911fc85-a0df-4fac-8622-17c3775f2995.jpega2df34fe-3849-4b03-a9ab-f8edd19a97d8.jpegd0e91bad-2489-48d5-8118-9a6493f11909.jpeg
 
Last edited:
One of the reasons I came up with the idea of installing a Rotiform Aerodisc on my car that came with Neez wheels - aside from no one else ever having done that (or, to a 500E) or as an ode to the racing cars in the past - was that whereas the rear wheels are concave and can illustrate just how wide they are, the front wheels are essentially flat. I do think that the white version of the Aerodisc/turbo fan is attractive but needed an additional revision/touch as plain white was not going to satiate my imagination... The picture below is a different type of Aerodisc on a Rotiform wheel, as that one is concave and similar to the rear wheels - but no doubt show the 'depth' of that particular style of wheel:

IMG_2919.png


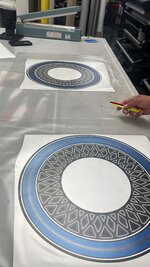
So, the mesh design was going to stay, but being that I was working with a primarily flat surface - then adding dimensions to the design itself was the way I felt it needed to go. I grabbed a template from the Rotiform website and had the talented folks at Extreme Kart Graphics USA once again go back to the well for another go around, in order to create what ended up being the final design... it has the blue from the interior plaid fabric (and carbon fiber) of the car into the outside, it has the mesh style of the BBS type of wheels from the racing Porsche's of yesteryear, but - I had the background color changed to dark gray to also tie in the car's trim color/wheels, coupled with some white for the car's exterior and this is what we got:

IMG-20221220-WA0124.jpeg

f667a49f-fd0e-4e8b-ba57-750e59b5de1d.jpeg


Because I was not going to get rid of the black turbo fans but could not also leave them plain/all black - I had Extreme Kart Graphics USA simply print out some white pieces to go in the middle of the turbo fan a-la Formula 1 modern era style of wheel designs. I figured the center cap with the blue MB logo surrounded by this piece of white, at least tied the car's design together.

432672d2-84ac-4ed4-a63b-77476ad490ac.jpeg5535b990-7840-4eda-93aa-4ec95796480f.jpeg97df0578-45c4-4d39-a0fb-f96f2fd25212.jpeg65a16fe7-41ba-4f09-a8ef-525f82ddaaa5.jpeg


Not the best pictures, but no doubt - the blue ringed one with the mesh is the one I am sticking with and the car is ready to be picked up.

2e65bdc4-8507-4f02-9357-0b12876ab018.jpeg6f9aea52-2366-4e53-8ae9-1176e6a19485.jpeg
 
D-Day has arrived... these pics were taken by Michel prior to my arrival and I could not contain my excitement!

076a4359-c938-47f2-9a80-c2c19c4f764a.jpg41303b4d-b114-4cc5-8552-f28261a75083.jpg

Michel installed the Lamin-x films to both headlights and given how nice the lenses are below at the fog lamps, had him also cut some clear vinyl to cover those as well!

e77e672b-5192-4dac-b2ee-a37bbcce5bb7.jpg


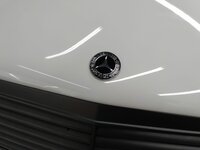
The badge above is the only piece of chrome in the exterior of the car... I had previously purchased an all black one, although it was difficult to see any of the details, so I found this one instead more preferable...
ba2f0e3f-69f4-471c-8492-b1896a60589a.jpg

I had to re-order a larger sized RhinoLip to compensate for the extra length needed upfront... I will post pics below of the final outcome.

b2bc6183-a772-471d-a754-8e57b8c186ec.jpg

d83dc021-990c-49e3-8c13-51348c8b44e2.jpg

2da23329-583d-4ab3-807a-079806153a7b.jpg


23118870-b8a9-4da4-b73c-0bc3607ba74e.jpg


aa28fb2f-1820-4df1-af7d-b9aabcc99e11.jpg6c9cbd63-b20b-4c9b-9dab-76d5ed17438a.jpg

And yes, the car's registration decal for the license plate was updated!
 
Last edited:
These are the first pics I took of my car with my phone since July... which had been the last time I had seen the car in person. Although I was at Michel's shop a couple of months ago, Michel was instead working on another one of my cars and the 500e was down the street getting worked on (under lock + key).

IMG_3029.jpegIMG_3031.jpeg


This required some tweaking to determine an angle and length to my liking, so we took a bit off the tip...


IMG_3032.jpeg


After shaping both ends, the circumference of the entire lower front spoiler from the Rhinolip let a lot to be desired...

IMG_3033.jpeg

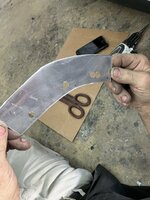
In order to rectify this, Michel grabbed some aluminum and created a piece that would serve as support bracket, to make it look as good as it should!

IMG_3034.jpegIMG_3038.jpegIMG_3039.jpeg

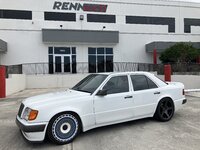
Seeing this pic, I also had Michel re-touch the black border off this fog lamp and the accompanying one, although I don't think I took pics of them afterwards... as I am now in a rush to get to RENNtech so I can get an airbox in time for next week's debut at Amelia! Needless to say, the car has gone a significant transformation in the past 11 months and aesthetically, it has exceeded my expectations!

The goal was to create as an aggressive, motorsports themed Mercedes 500E as I could without tearing into the bodywork, and my mission has been accomplished. The car's plaid interior harks back to when many race cars in the past used cloth materials (as the leather would have guys with and without seatbelts sliding everywhere) for the seats. Because the plaid Albert chose is white with blue/gray& black - then I think the white paint on the exterior really compliments both the interior as well as the color of the dark Porsche slate grey exterior trim/wheels. I look forward to sharing this special car with others at the upcoming shows and then, drive the wheels off of it!
 
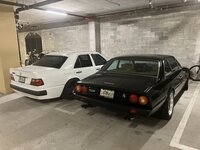
Pics of the car once back home along with one of his stablemates... In person, my 500e car manages to have some presence in comparison to the modern cars all around us and it has been getting compliments non-stop, whether they know the car is a special Mercedes or not - I am stoked!

IMG_3049.jpeg

IMG_3051.jpegIMG_3053.jpeg

Ahead of Werks Reunion a week from this Friday - which is one of the largest Porsche only gatherings in the eastern US - I had renewed my PCA membership and to me, this decal serves as a subtle reminder to everyone about this car's origins and roots...

IMG_3054.jpegIMG_3046.jpegIMG_3047.jpeg

But, the work on the car does not stop just because I have it at home... pics of the interior mods will have to wait, as I have to get the car to a detail shop so they can remove 11 months' worth of dirt, grease, dust, etc. Aside from RENNtech, I have a mirror with a built-in camera going in, the euro Hazard triangle at the trunk inner liner, and several odds and ends!
 
@OttoB,

Otto, Your car is turning out real nice. Can’t wait to see pics from Amelia Island Show.:)

But I gotta ask, where are your rear wheel covers?
 
Take a look at posts 46, 49-50 in the first page of the thread - as the look of only using Aerodiscs/turbo fans at the front is the one I am emulating, which range from them being installed this way in the 1970's and through today... I know its divisive as most folks are unaware of this mostly "front wheel only" application, but I do like the rears as-is... I figure that whenever I get tired of the current look, I may switch them to the black Aerodiscs ones or remove them all together, which is a 2 minute process.

I had the blue MB star center cap decals done with a dark gray background (for the rears, and for the front caps as well if/when I remove the adaptors) and, I then also ordered them with a gloss black background that go over the BBS caps that cover the D-lng hex nut/centerlock. The devil - they say - is in the details...

Below is a pic of the front wheel when Michel showed me how to undo the hex centerlock. Because the wheel caps I removed off the front wheels are painted the same Porsche slate grey and have the blue decals with the gray background (both unobtanium), I would really make the trek back to Michel if I were to every get the caps installed and remove the turbo fans.

IMG_3044.jpeg

IMG_3040.jpeg

IMG_3043.jpeg
 
I think I am good in terms of possible performance upgrades when it comes to this car. I am very fortunate that this 036 came to me already with a LSD, first-gear start, Leistung exhaust, Stop Tech 355mm rotors up front, Koni adjustable shocks, and certain to be forgetting a few others here or there. I added a pair of K&N's, a tuning chip from the Masked Helmet One, had to redo the engine, and also certain to be forgetting a few others as well...

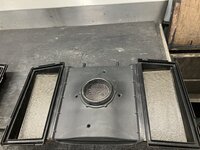
So, when I had been talking with my friend at RENNtech over the past year (who is their lead technical engineer), outside of a more aggressive tune on a mostly analog car where the benefits could be dicey, or a 6.0 transplant which is cost-prohibitive, or swapping to a manual 5/6 speed, the only thing that we both could think from a mechanical enhancement perspective (debatable), is a RENNtech airbox. This post is mostly done to share my experience and not to open the debates about air filters or air boxes, or to critique the engine bay on my car. I wanted my car to have RENNtech genetics somewhere and I visited their shop to place an order on one. Hope you enjoy the pics.

IMG_3057.jpegIMG_3059.jpegIMG_3083.jpegIMG_3061.jpegIMG_3084.jpeg


You either give them your airbox as a core in exchange for a credit, or you do what I opted which was to simply order one and they can keep mine when they finish the new one for me.

IMG_3085.jpeg

For the M119 engine, there are only 2 types of airboxes - the ones where the opening is located in the upper portion of the box:

IMG_3070.jpeg

IMG_3069.jpeg


Or like mine, where it is located dead center:

IMG_3071.jpegIMG_3068.jpeg


Whereas anything with RENNtech is supposed to impress the ladies ;), I don't want my good looking wife to find out that either: A) I got one; B) how much I had to pay for it; C) that its mostly cosmetic; and/or D) All of the above!!!

However, I do like how the car is turning out although still more to go!

IMG_3094.jpegIMG_3089.jpegIMG_3096.jpegIMG_3093.jpeg


I am humbled as to how warmly I was received by the crew at RT... They are used to working on high-end, multiple six figure machines all day and it seems this car struck a cord with them, in the most positive light possible. I am honored to have anything of theirs in my car, even if the chick magnet angle is no muy bueno (for now)!
 
Headed to Amelia tomorrow afternoon (5+ hour drive) and the car is as good as it can be from any which angle I can think of…

Been so dang busy these past few weeks, that I haven’t been able to post interior pics after finally spending many hours getting the entire car detailed professionally recently!

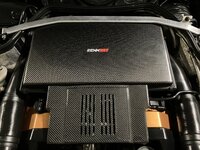
Here is the RENNtech airbox plus, a little something, something which I haven’t seen anywhere else before also in carbon fiber (pics will follow another time)

896F40A0-2659-47E5-99F1-936C2CC1CF6E.jpeg

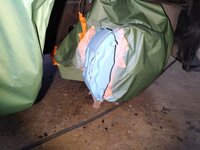
And as of moments ago, taped up the front end of the car with 3M light duty masking tape with the help of my 10 year-old who’s sadly not making it this year… Not pretty but it’ll get the job done until the car is detailed again with appointment on Friday morning at 8am before Werks Reunion starts 9am.

Wish me luck 🙂!

B331659C-5261-4243-ACE8-DF14A507002A.jpeg
 
Pitstop early morrn to the grocery store and grab some suds for the cooler I’ll keep in the trunk of the car for the 2 shows back-to-back:

C912A093-2D5E-4CD6-A2CE-5F4CD2A4A163.jpeg

One pic before hitting the road earlier today outside of my office garage:
A0D94ED0-B597-4648-9BD5-17FC49C9FBFC.jpeg

Pitstop for gas where it averaged 17.4 mpg:

EE0CAC1F-B9FC-45CF-976F-79548BE7933A.jpeg

And just finally arrived at the Omni, so I can get some much needed food, a shower, and some rest for a long day tomorrow!E220BD60-CE04-48B8-8427-B66D6F45EE42.jpeg
 
The CF on the front engine cover goes nicely along with the RENNtech airbox.

896f40a0-2659-47e5-99f1-936c2cc1cf6e-jpeg.162283


Aside from Jeff @captruff, I don't think we have many members participating/competing in exhibitions, if any?
It's nice to have another 500E/E500 ambassador, so good luck - let's vote for the higher awards! :victorious:
.
 
Long story... but, the Werks organizer sent me an email Wednesday night (after 11:30pm!) that the car was not being allowed in because it wasn't a Porsche. Yesterday morning when I saw this and got to the office, I politely took my gloves off and sent an enlightening email about Porsche Type 2758, along with links, pics, my personal background/history with Porsches, and the connection of this particular car with the marque. I then took things to Defcon 2 and got the national folks at the PCA involved... whereupon unsurprisingly, they took a step back a couple of hours later.

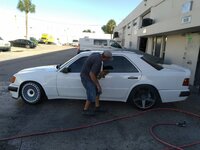
Today, however, was incredibly hectic + stressful to get here last night in 1 piece, get the car at the wash early this morning (that was another not so great experience which I will document later), to then make it to the show with all but 5 minutes (maybe) before the cutoff.

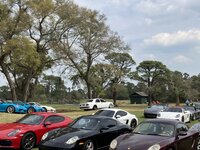
I got a great spot overlooking the field, I was not in the judging class as that's not for me - but was complimented by this fella as his favorite car at the show...

IMG_3796.pngIMG_3809.jpegIMG_3785.jpegIMG_3787.jpegIMG_3810.jpegIMG_3820.jpeg


I finally was able to take interior pics which really compliment the car and the turbo fan design. I was able to educate lots of folks about these cars and got many compliments, positive vibes, and admitted jealousy because several guys want one that's somewhat modded like this one. Overall, very satisfying and looking forward to Radwood tomorrow for Rd. 2. Now, I get to relax and spend time with the missus.
 

Who has viewed this thread (Total: 2) View details

Who has watched this thread (Total: 5) View details

Similar threads

Back
Top