• Hi Guest !

    Welcome to the 500Eboard forum.

    Since its founding in late 2008, 500Eboard has become the leading resource on the Internet for all things related to the Mercedes-Benz 500E and E500. In recent years, we have also expanded to include the 400E and E420 models, which are directly related to the 500E/E500.

    We invite you to browse and take advantage of the information and resources here on the site. If you find helpful information, please register for full membership, and you'll find even more resources available. Feel free to ask questions, and make liberal use of the "Search" function to find answers.

    We hope you will become an active contributor to the community!

    Sincerely,
    500Eboard Management

PRECAUTION: Check your battery tray & battery area !!!

gerryvz

Site Honcho
Staff member
Folks,

I have had an exceedingly weak battery over the past few days in my E500, prompting me to finally bite the bullet and replace it with an AGM battery. The old battery is an Interstate Batteries Mega-Tron Plus battery, purchased in March of 2011, so it has lasted more than 6 years in the E500.

When I went to replace the battery in the trunk a couple of nights ago, I was appalled at what I found: I found that the battery had leaked all over the battery tray, and below that onto the side trunk-well area. It has left a coating of fine white powder, some of it up to 1 cm thick on parts of the battery tray !!

There is some very very small surface corrosion due to this below the battery tray, which is about the size of a 50-cent piece and which I will easily take care of with some rust-prevention paint. I also gave the area a thorough bath in a solution of baking soda and water to neutralize any and all battery acid, after removing the battery tray from the car.

Below are some photos of the battery tray, as removed from the car. You can see that there is a significant "hole" eaten by battery acid into the end of the tray, at the "plus" terminal side of the tray.

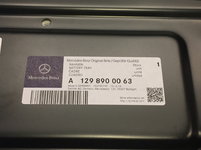
I have ordered a new battery tray, which thankfully is still available from MB. The price for this tray is around USD $68, and the part number is 129 890 00 63.

I urge each and every one of you to take 10 minutes and a flashlight to thoroughly check your battery terminals and connections, and to shine the flashlight down along the sides and behind the battery to ensure that there is no corrosion / ticking corrosion time bomb for you. If you have a traditional car battery (non-AGM), then there is POTENTIAL for something bad to happen. AGM batteries are generally exempt from leakage/corrosion-related issues.

It's a very small thing, but important. Be proactive and check things out so that you don't have a much larger problem in the future !!!

Cheers,
Gerry
 

Attachments

  • 2017-07-01 13.20.39.jpg
    2017-07-01 13.20.39.jpg
    660.9 KB · Views: 57
  • 2017-07-01 13.20.53.jpg
    2017-07-01 13.20.53.jpg
    286.8 KB · Views: 57
  • 2017-07-01 13.21.14.jpg
    2017-07-01 13.21.14.jpg
    352.1 KB · Views: 52
  • 2017-07-01 13.21.24.jpg
    2017-07-01 13.21.24.jpg
    250.1 KB · Views: 51
+1 On top of that for all people who still use acid batteries I recommend to install the breather plug on one side and the L shaped vent pipe and hose, this hose can be easily routed out of the trunk vents and fixed on the bumper edge. Will post part numbers and a photo of it tomorrow.
 
PRECAUTION: Check your battery tray & battery area !!!

Good find GVZ. Driving the e350 cabby all over lake Travis area, reminds me a lot of SoCal with the bendy hilly roads.
 
Last edited:
First of two coats of rust-prevention paint applied, and then I will apply a coat of primer in the original color. I also ordered new rubber bung plugs (there are two different sizes/configurations in the battery compartment). One of them I already had two spares of in my parts stock, as it is used on other models such as the 126 and 107.
 
I use Fosroc Galvafroid. It's a Zinc rich cold galvanising paint. Clean all rust with a grinder & wire brush back to clean steel. Then 2 brush coats of Galvafroid followed by the finishing spray coats is what I use. For areas out of sight I also spray on Dinitrol cavity wax. Rust never returns!
 
Similar I think to the miracle paint, encapsulation almost porcelain when done. As for the cavity wax - great stuff. I removed fender liner on my 26 year old C126 to remove hood hinge and the OE wax is still present.
 
Gerry,

I discovered a long time ago my interstate battery was not vented properly. It was just starting to do some damage.

Anyway I just connected a piece of clear plastic tubing to the battery vent and ran it out thru the vent hole under the bottom of the battery tray. Problem Solved.
 
I, too, have used uncle kent's miracle paint with success.
 
Last edited:
I did this battery tray repair a couple months back, you can see some pics of it in my owner thread...definitely a potential weak point for these cars.

you can also get the battery hold down clamp and nuts for battery tray fron MB too! I am moving to a sealed battery.
 
Great Stuff!!! I just replaced my battery with a Bosch acid battery :-( I could not find the vent hole and previous battery did not have a hose from the battery to outside the car. Can someone clarify where the vent tube exits the car? Many thanks!!
 
Thanks guys, found Uncle Kent's battery tray tutorial and his miracle paint line of products. Add another project to the list.

[video=youtube_share;6n1Bln19Juo]https://youtu.be/6n1Bln19Juo[/video]
 
Last edited:
Great Stuff!!! I just replaced my battery with a Bosch acid battery :-( I could not find the vent hole and previous battery did not have a hose from the battery to outside the car. Can someone clarify where the vent tube exits the car? Many thanks!!

You can do it either through the side vent flaps next to the battery or you drill a hole for the rubber grommet (item 23) in my post with the part numbers. Part number of grommet I can provide tomorrow.
 
Thanks guys, found Uncle Kent's battery tray tutorial and his miracle paint line of products. Add another project to the list.

Same thing applies to the C126. Pull that battery out, a few 10mm nuts and you will find lots of stuck junk under there and a rusty/acidic battery tray.
 
My painting and repair is done, and I'm just waiting on the new battery tray and four new tray nuts from MB, as well as the two rubber bung plugs that go below the tray.

I highly recommend neutralizing the battery acid as much as you can with a solution of sodium bicarbonate (baking soda) and water, before painting. Helps to rough up the area with sandpaper or a wire brush, too. I didn't use GSXR's uncle's Uncle Kent's Miracle Paint, but chose rather to go with a commercial automotive rust-reactant spray paint in the dark-gray color that MB used in the wheel well interior area below the battery. I did two coats, letting them dry 24 hours in between applications. I still may go with a surface layer of dark-gray automotive primer to finish things off, haven't decided.

I also recommend, if your battery tray is corroded/rusted, that you just replace it for $68 (current discounted price) rather than using paint to cover up the rust. I hate having any kind of rusty parts on my cars, even if the rust has been covered up/painted over. Two of the three nuts that hold the battery tray to the car, as well as the battery clamp nut, were also rusted, so I just ordered four new nuts!!

Lastly, to minimize these problems in the future, be sure to go with an AGM battery !!

Interestingly, I found a well-used pencil under my battery tray, which had its aluminum eraser holder totally corroded into a little ball of hardened corrosion. Didn't find anything else of note, and even the bung plug drain holes were clear and not clogged, thankfully.

Cheers,
Gerry
 
Great Stuff!!! I just replaced my battery with a Bosch acid battery :-( I could not find the vent hole and previous battery did not have a hose from the battery to outside the car. Can someone clarify where the vent tube exits the car? Many thanks!!

tomer,

When you remove the battery tray there is a hole in the floor under the tray. It should have a rubber grommet on it. If you look under the car you will see a rubber tube sticking down. This is the vent provided by Mercedes. As far as your battery vent you are on your own. My interstate provided a venting system that would have vented into the battery compartment. I just extended the battery's vent with an 1/8" vinyl tubing down into the Mercedes provided vent under the battery tray to the outside.

It's an easy fix but the Bosch battery I'm not familiar with. Have no idea about it's venting system.

Take Care
 
IMO the absolute best solution for venting is an AGM sealed battery. Well worth the peace of mind, for minimal additional cost, and typically improved battery performance as well...

:jono: :shocking:
 
I didn't use GSXR's uncle's Uncle Kent's Miracle Paint, but chose rather to go with a commercial automotive rust-reactant spray paint in the dark-gray color that MB used in the wheel well interior area below the battery. I did two coats, letting them dry 24 hours in between applications. I still may go with a surface layer of dark-gray automotive primer to finish things off, haven't decided.

I also recommend, if your battery tray is corroded/rusted, that you just replace it for $68 (current discounted price) rather than using paint to cover up the rust. I hate having any kind of rusty parts on my cars, even if the rust has been covered up/painted over.

So that's my question about Uncle Kent's miracle paint. I am just encapsulating the rust with the miracle paint? I was looking for those paints that chemically transform the rust and then you finish on top of that. I think that's what Lowman was doing with the Permatex stuff in his videos. My E500 battery tray definitely needs this and haven't looked closes at my 560SEC battery tray yet.

Gerry what's your product list for "commercial automotive rust-reactant spray paint in the dark-gray color that MB used in the wheel well interior"
 
IMO the absolute best solution for venting is an AGM sealed battery. Well worth the peace of mind, for minimal additional cost, and typically improved battery performance as well...

:jono: :shocking:

Next time but for me it could be up to 5 years from now. I on year 2 of a 6 year warranty. My last Interstate went 8 years.

I'll let you know when it takes a dump, lol.
 
Uncle Kent's "Miracle Paint" essentially encapsulates rust by smothering it with a thick layer of paint. Rust needs continuing amounts of moisture and air to grow. If you don't give it moisture and/or air, it can't grow.

If you've ever seen the product called "POR-15," it's basically the same as Miracle Paint.

I used a Rust-Oleum "Rust Reformer" automotive spray paint product that chemically reacts with rust to convert it to a more stable, neutral state. You can then add primer on top of it, if desired. It is a matte, flat finish product that mirrors the original primer in the area. You can get it at any Home Depot.

POR-15 is more of a thick, glossy rust-encapsulation product, as you can see from the image below.

One reason I went the way I did with it, is because my rust was not bad at all and easily scraped/wiped off before I applied the two coats of Rust Reformer.

By the way, I replaced my 560SEC battery tray a few years back, as well, with a new one. It was nowhere near as rusty/corroded as the one I just removed from my E500, but I decided to replace it nonetheless. On my former E320 wagon, I opted to have the battery tray powder-coated as it barely had any problems at all.

NOTE: On the C126, it's IMPERATIVE to remove the battery tray, because the car is GUARANTEED to have a major amount of leaves, and other debris collected underneath the tray. The only way to get it out is to remove the tray and suck it out with a shop vac.

The C126 also has a nasty deep area on the OTHER side of the inner firewall, directly underneath the fuse box and brake master cylinder area, that also collects major pine needles, dirt and other debris. This area on the 126 is a SERIOUS fire hazard due to the electricals in the area, and MUST be cleaned out with a skinny extension on a shop vac at least once per year to eliminate the hazard. More than a few 126 models have caught fire because this area was ignored for too long, and this bed of dry tinder caught fire underhood and spread.

Cheers,
Gerry


This is what POR-15 is:
proxy.php
 
I agree with this. I took a pool noodle destined for the trash and cut off 6" and jammed it in the end of my shop vac. Then inside the end I stick a 1/2 diameter flexible vinyl hose and that allowed me to snake it all around the inner firewall. But initially, pull the weather stripping gently as the glass seal is nla and the cowling is quite brittle. The rubber grommets on the windshield arms get baked and should be replaced when you do the job. (compressed air or a leaf blower works too but wear eye protection as it makes a mess) I think its best tp remove it all and clean by hand initially, lube the wiper linkage etc while you are there. That way you can use por-15 or miracle paint and apply to fix or to prevent rust in the areas.

As an aside, I cut some old hose about 1/2" long and cut vertically and set my battery on small rubber pieces at the corners and in the center so that the holes of the tray were not plugged by the case itself.
 
I just got notice that my E500's new battery tray, rubber bung plugs & hardware were shipped today, and that I will receive it via FedEx on Tuesday afternoon. At that point I'll re-install everything and get the car back up and running, with the new battery installed. The paint inside the battery compartment has had plenty of time this week to cure.
 
PRECAUTION: Check your battery tray & battery area !!!

I'm good for now, but one never knows about NLA
 

Attachments

  • e39f3f98fe2be1e0ddf7a143809e5340.jpg
    e39f3f98fe2be1e0ddf7a143809e5340.jpg
    121.8 KB · Views: 21
Forget investing in gold or silver... invest in MB parts before they go NLA! (Then hope MB doesn't do a new production run in China at 1/10 the price...)

:duck:
 
I just got notice that my E500's new battery tray, rubber bung plugs & hardware were shipped today, and that I will receive it via FedEx on Tuesday afternoon. At that point I'll re-install everything and get the car back up and running, with the new battery installed. The paint inside the battery compartment has had plenty of time this week to cure.
Battery tray is recent (Dec., 2016) production.

The battery tray nuts are superseded and nowhere near as nice as the originals. Fortunately, two of my originals are non-corroded, so I'll re-use them. The two others, which hold the battery tray to the car, are corroded, so I will use the new ones as they won't be visible anyway.

The "collars" on the superseded nuts aren't as wide as the originals' collars, nor are the superseded nuts plated as nicely. Cheap, cheap, cheap.

Battery tray looks totally equivalent to the original. Here are some views of the damage, vs. the new tray.

Cheers,
Gerry
 

Attachments

  • 2017-07-11 14.44.33.jpg
    2017-07-11 14.44.33.jpg
    151.4 KB · Views: 24
  • 2017-07-11 14.42.40.jpg
    2017-07-11 14.42.40.jpg
    619.3 KB · Views: 27
  • 2017-07-11 14.42.51.jpg
    2017-07-11 14.42.51.jpg
    234.9 KB · Views: 27
  • 2017-07-11 14.43.08.jpg
    2017-07-11 14.43.08.jpg
    313.5 KB · Views: 29
  • 2017-07-11 14.43.28.jpg
    2017-07-11 14.43.28.jpg
    237.4 KB · Views: 25
  • 2017-07-11 14.44.04.jpg
    2017-07-11 14.44.04.jpg
    190 KB · Views: 24
Here are a couple of miscellaneous photos.

First, the old battery tray nuts, vs. the new (superseded) battery tray nuts. As you can see, the new ones totally SUCK.
2017-07-11 17.33.11.jpg


And lastly, the larger rubber drain grommet at the forward end of the trunk-well area, directly under the battery's positive terminal and battery tray. This is a drain that can easily get clogged, so it's a good idea to clean it out once every few years. Also, you can see the cracked rubber at the exposed end of the grommet that empties under the car.
2017-07-11 17.34.38.jpg


New grommets are easily available, and are part number 107 997 27 81. They are used on a variety of chassis as trunk-well drains, including the W123, W201, W124, W140, R107, C107, W126, W202, W208, R129, R170, W210, and other models from 1979 through 2004. Utterly cheap part (currently USD $2.90), and at nearly 25 years old on our cars, well worth replacing.

:klink3:

Cheers,
Gerry
 
I'm going to pull my battery and new tray, now that it's been some months gone by, to inspect things and ensure that everything is how it should be and there is no corrosion or other post-battery-tray nastiness that I need to worry about. I have kept the AGM battery on a Battery Tender over the winter when not driving the car, so it's in decent condition.

I'll report back anything I find.

If you haven't pulled your battery + tray, and inspected things down in there, I HIGHLY recommend you do so.

Cheers,
Gerry
 
This type of Battery Mat is also quite useful at absorbing and neutralizing any acid or fumes that might otherwise deface the Battery Tray or the sheetmetal under the tray:


They are available from several sources in both Yellow and Black, get the larger roll and cut to exactly fit in the bottom of the tray. They are not too thick to prevent the battery hold-down clamps from functioning properly. And if you are running a vented battery, definitely run a Vent Hose setup, here are the OEM Mercedes Part Numbers for the 3 components you will need:

90 Degree fitment for attaching vent hose: 000-990-38-72, $4.05
Plug to close off the opposite vent on the battery: 002-997-24-86, $2.47
Vent Hose: 024-997-49-82, $10.73 for several feet of hose

And don't forget to also install the treated Felt Pads that fit under the Battery Terminals which will prevent them from oxidizing, they are available at any auto parts store.

Cheers,

George Jr.
 
I'm going to pull my battery and new tray, now that it's been some months gone by, to inspect things and ensure that everything is how it should be and there is no corrosion or other post-battery-tray nastiness that I need to worry about. I have kept the AGM battery on a Battery Tender over the winter when not driving the car, so it's in decent condition.

I'll report back anything I find.

If you haven't pulled your battery + tray, and inspected things down in there, I HIGHLY recommend you do so.

Cheers,
Gerry

Gerry,

Do you have a pic of the bottom side of the tray?

I think your’s looks like the one Jeff sold me but I can’t compare until I’m at my computer later today.
 
Unfortunately those are the only photos that I took of it, before I installed it.

I will be pulling the battery out and doing an inspection after I finish all of the engine work on my current project, but that may be a couple of weeks from now.
 
also make sure the bottom/forward edge of the battery is sitting UNDERNEATH the metal lip of the tray... if sitting on top, it will be too high.
 
also make sure the bottom/forward edge of the battery is sitting UNDERNEATH the metal lip of the tray... if sitting on top, it will be too high.

Dave,

That’s a possibility. That could damnwell
be the problem. It was a PITA to get the battery in.

I will check tomorrow (Sunday) I’m thrashed right now from “Micromanaging”’my two plasterers working on my house.

Thanks for that suggestion.

lol
 
Just installed a Duralast Platinum AGM battery from Auto Zone for $218.00 (sales tax not included) with a 36 month warranty. As Gerry recommended, I checked the battery tray for corrosion before installation. Luckily, there was no sign of rust or other corrosion. I attached a couple of photos of the new battery.20200810_221617.jpg20200810_160925.jpg
 
also make sure the bottom/forward edge of the battery is sitting UNDERNEATH the metal lip of the tray... if sitting on top, it will be too high.

@gsxr,:thankyou1:

Dave, GUESS WHAT? My battery was setting on the metal lip at the front of the battery tray.

JUST AS YOU DESCRIBED. >>>>>Your just to smart for your own good.
After getting over my frustration, I went out yesterday took a good look at the issue and FIXED IT! :wahoo:

:thankyou:for that helpful tidbit of info.

The battery is now correctly placed in the tray and the cover is now closed.
 

I posted somewhere else but here they are again. What good are the pics w/o some explanation so here it is;

First I removed the old tray. Then I vacuumed out the bottom of the battery compartment. I then treated the area with Baking Soda to kill the acid corrosion. I had a little damaged paint (no metal) after cleaning that up and drying it I painted the area with Rustoleum Black. I cleaned the rubber. grommet with Aerospace 3 Protector.

Then I cleaned up the new tray and painted the topside with a couple of coats of Rustoleum and installed it.

I next installed the battery which I had trouble fitting, UNTIL one of the smartest guys on the forum (gsxr) told me what I did wrong.

Next thing I knew it was INSTALLED!! :wahoo:


DSC03428.JPGDSC03437.JPGDSC03442.JPGDSC03448.JPGDSC03449.JPGDSC03452.JPGIMG_0221.JPGDSC03435.JPGDSC03432.JPG
 
Last edited:

Who has viewed this thread (Total: 1) View details

Who has watched this thread (Total: 2) View details

Back
Top