• Hi Guest !

    Welcome to the 500Eboard forum.

    Since its founding in late 2008, 500Eboard has become the leading resource on the Internet for all things related to the Mercedes-Benz 500E and E500. In recent years, we have also expanded to include the 400E and E420 models, which are directly related to the 500E/E500.

    We invite you to browse and take advantage of the information and resources here on the site. If you find helpful information, please register for full membership, and you'll find even more resources available. Feel free to ask questions, and make liberal use of the "Search" function to find answers.

    We hope you will become an active contributor to the community!

    Sincerely,
    500Eboard Management

OWNER bclifton (300D)

bclifton

124.133
Member
Hey there folks!

I've posted here a decent amount - and definitely browsed a bunch... but never done a formal introduction 🙂 My name is Brian and I'm in Chandler, Arizona USA. I've always loved the W124, W126, and the R129 and I found this site through BenzWorld a long time ago. I've loved the thoroughness of the documentation here and the dedication to being accurate and the general helpfulness of everybody here

My first "hands on" experience with a W124 was about two years ago when I bought a 1993 300E 2.8 with the M104 engine for $1,000. Some of the articles @gerryvz had from his experience back in 2012 were massively helpful!
1993_300e.jpg

I started YouTube'ing my experience as I sorted through this car which you can see here:

After it was mostly sorted I sold it on Bring A Trailer to a super nice guy in San Diego

I really enjoyed the M104 engine though, after taking all that time to get familiar with it. I ended up buying a 1994 SL320 from a person here locally on the cheap and have been fixing it up and using it as my daily driver. Again, I came back here and all of the documentation on the M104 was super helpful. I knocked out the engine mounts and some other jobs, got some non-period-correct AMG wheels, and then had all the wood refinished in Birds Eye Maple by Igor in San Diego
1994_sl320.jpg

Similar to the 300E, I've been trying to capture all the jobs as I do them on YouTube. You can check out some of those videos here:

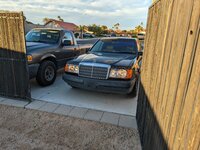
While I love the R129, I really miss the W124. Recently, someone on Craigslist posted a beautiful 1987 300D for sale and I got it for $2,000. I'm still at the early stages of fixing this up... but it's a great car. I'm working on getting the odometer fixed - but it has over 400k miles on it. I've never owned a diesel but I have a friend with a 1987 300SDL (W126) that is helping me learn. As a bonus, the previous owner had over $1,000 in parts in the trunk ready to install (engine mounts, tie rod ends, a new hood pad, and a ton more). The W124 chassis overall is amazing - it might be my favorite of all time
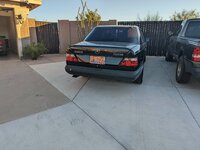
1987_300d.jpg

There are five junkyards near me here in the area which I visit almost every single weekend. I pick up tons of Mercedes-Benz parts and sell them on eBay at super reasonable prices. It's a really fun hobby and it helps bring in a little extra cash while being able to score parts for projects I have. I've been building up a parts stash for this new 300D along with replacing small parts here and there as I find them. In the pic above, you can see the 1994/1995 tail lamps which I found at a yard recently in mint shape (0 damage) which were a nice upgrade. You can ping me if there's something you're looking for in particular, I come across a lot of W124 (and W126). I just pulled a nearly mint dash from a 1995 E320 yesterday in around 1 hour flat - installing is going to take longer than that for sure 😂
1995_e320_dash.jpg


I know this most recent addition is not a E500 (or 500E) - but I wanted to take the time to introduce myself 🙂 It's always great seeing folks pop up on Bring A Trailer with W124 knowledge and also it's a pleasure just reading through the forums here. Thanks for taking the time to document things and for helping me along the way on various projects.
 
Tell us more about the 87 300D! I assume you've read my 'buyer's guide' on 124performance about the 124.133 chassis?

:jono:
 
@gsxr no; I hadn't seen your site before. Where can I find the `buyer's guide`?

In case anyone is interested, I have a fairly popular site for the R129 which you can find here:

I used to be crazy about the 129 (still am!) 🙂 My site hasn't been updated in a while- one of these days I'll get to it... But wow - you have a lot of files and content that I'll be browsing through! 😍

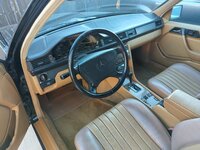
The 300D is a beast, I love it. It starts right up, no problems at all. It has a nice rattle when idling - the engine reminds me of the school bus as a kid (the sounds, the smell of diesel). It's palomino interior - which looks great when it's in good shape. But being in Arizona and also having over 400k miles, it's more "Pinkamino".

Here's a data card for it on lastvin:

Besides the tail lamps, I also took apart and fixed the drivers seat module (the headrest button was broken off). I got a spare one which worked great from the junkyard and used some Teflon spray to get the buttons moving nice and smoothly.
seat-module.jpg

I also got a Palomino center console roll box with a key which I've put in. Love having those - will need to keep an eye out for the armrest which has the storage

I ordered a stash of parts from MB of Scottsdale here locally (mbpartcenter.com) and picked them up today.
- Got new rubber "bumpers" for the trunk (2x 124-758-00-44-64 and 2x 124-758-01-44)
- new plastic/rubber gasket for the license plate lamps (2x 124-820-02-56-64)
- new battery tray (201-626-04-45 - only $26!)
- a new turn signal relay as mine was fried/completely not working (201-821-02-47)
- new windshield wiper (`124-820-11-45`)

And then some parts to prep for glass Bosch euro headlamps:
- 2x 011-545-50-28 (the 6 pin plastic connector; just need to take the 4 pin apart, put the caps into this)
- 2x 124-826-01-00 (headlamp attachment "rebuild kit"; has the hardware to attach a headlamp and the plastic part that goes in the top)
- Rubber fitting that goes around the headlamp (124-826-05-80 and 124-826-06-80)

I put on what I could; removed the headlamp wipers as I do not like those and disconnected the pump to them / plugged it (plug is part# 000-997-33-20) and went to work on the battery tray.

Here's what it looked like when I got the car - when I saw the yellow "BATTERY MAT", I knew I was in for a treat 🙂
battery-tray1.jpg

There was basically only a skeleton left. I removed all the rust parts and went to work with the Dremel.
battery-tray2.jpg


I had to use a cut off wheel to saw through the bolts but the studs (for the hold downs) are surprisingly intact. Unfortunately, rust has spread a bit more - I hit as much as I could today. This weekend, I'll be revisiting and getting that whole area down to bare metal and treating with POR15. But just for fun, you can see how the new battery tray looks! Vacuumed out the area really well 🙂
battery-tray3.jpg

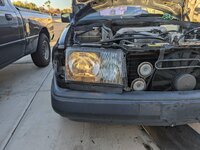
Glass OEM headlamps are on the way - the current headlamps are falling apart and they're just not bright enough 😢

I just removed the instrument cluster a few minutes ago and am packing it up now to send over to Rick Borth at speedometer.com (saw he was recommended by Kent Bergsma on mercedessource.com). The odometer is broken for sure; there's a bit of mystery as to how many miles the car has. The original service booklet was followed, stamped, and then they ran out of space and started writing on any page they could 🤣 The last written entry shares 303,500 miles on September 20th, 2007.
booklet.jpg

I pulled a Carfax and an Autocheck and found an entry for 315,115 miles in October 2008. The next entry is when doing emissions (May 2010) and they had installed a new cluster with 135,000 miles. It seems this cluster worked until October 2019 where it's broken and showing the same mileage as when I bought it (205,651).

Some quick napkin math puts the minimum number of miles at:
315,115 + (205,651 - 135,000) = 385,766 miles

And then if you just "guestimate" 12k miles of driving per year (purchased on October 2022, so 3 years)
385,766 + (3 * 12,000) = 421,766 miles

This is the mileage I'm going to ask Rick to set it to when the odometer is properly fixed. When I get it back, I'll paint the needles, check the light bulbs, and pop it back in 😃
 
Last edited:
@gsxr no; I hadn't seen your site before. Where can I find the `buyer's guide`?
Here's the link. I need to update this document, mostly with current prices and NLA bits, as it was last reviewed 10+ years ago:


Glass OEM headlamps are on the way - the current headlamps are falling apart and they're just not bright enough 😢
Get some top-notch H4 bulbs if you want more lumens on the road. Search the forum for a detailed thread on bulbs. If you don't connect the vacuum level control, the Euro lights may need a lot of adjustment out of the box, as the default position with no vacuum is "full low".


And then if you just "guestimate" 12k miles of driving per year (purchased on October 2022, so 3 years)
385,766 + (3 * 12,000) = 421,766 miles

This is the mileage I'm going to ask Rick to set it to when the odometer is properly fixed. When I get it back, I'll paint the needles, check the light bulbs, and pop it back in 😃
Good move having the odometer adjusted to the correct, higher mileage! I did the same thing on my red 87 300D, fortunately the PO had documented when the speedo was replaced and tracked both actual and indicated miles in his records over the years so there was proof of actual miles. Only about 305kmi though, long ways to go to hit 400+.

I bought an 040 black over Palomino (Tex?) .133 about 15 years ago, same color combo as yours. It had myriad issues so I fixed it up, and sold it... wonder how it's doing these days. Last Autocheck report was still with the buyers in Washington, but last registration was in early 2018.

BTW, have you clocked your new 300D from 0-60 on a level road with a stopwatch? It should jump off the line without a big delay waiting for the turbo to spool up. If there's a delay, you can fix that, more info is in the doc linked above.

:jono:
 
@bclifton, Wow! Checking into gsxr’s “Buying Guide” :thumbsup2: should keep your attention for a while. It looks like a great project.
Good Luck w/ your restoration :)
 
@gsxr no; I hadn't seen your site before. Where can I find the `buyer's guide`?

In case anyone is interested, I have a fairly popular site for the R129 which you can find here:

I used to be crazy about the 129 (still am!) 🙂 My site hasn't been updated in a while- one of these days I'll get to it... But wow - you have a lot of files and content that I'll be browsing through! 😍

The 300D is a beast, I love it. It starts right up, no problems at all. It has a nice rattle when idling - the engine reminds me of the school bus as a kid (the sounds, the smell of diesel). It's palomino interior - which looks great when it's in good shape. But being in Arizona and also having over 400k miles, it's more "Pinkamino".

Here's a data card for it on lastvin:

Besides the tail lamps, I also took apart and fixed the drivers seat module (the headrest button was broken off). I got a spare one which worked great from the junkyard and used some Teflon spray to get the buttons moving nice and smoothly.
View attachment 156774

I also got a Palomino center console roll box with a key which I've put in. Love having those - will need to keep an eye out for the armrest which has the storage

I ordered a stash of parts from MB of Scottsdale here locally (mbpartcenter.com) and picked them up today.
- Got new rubber "bumpers" for the trunk (2x `124-758-00-44-64` and 2x `124-758-01-44`)
- new plastic/rubber gasket for the license plate lamps (2x `124-820-02-56-64`)
- new battery tray (`201-626-04-45` - only $26!)
- a new turn signal relay as mine was fried/completely not working (`201-821-02-47`)
- new windshield wiper (`124-820-11-45`)

And then some parts to prep for glass Bosch euro headlamps:
- 2x `011-545-50-28` (the 6 pin plastic connector; just need to take the 4 pin apart, put the caps into this)
- 2x `124-826-01-00` (headlamp attachment "rebuild kit"; has the hardware to attach a headlamp and the plastic part that goes in the top)
- Rubber fitting that goes around the headlamp (`124-826-05-80` and `124-826-06-80`)

I put on what I could; removed the headlamp wipers as I do not like those and disconnected the pump to them / plugged it (plug is part# `000-997-33-20`) and went to work on the battery tray.

Here's what it looked like when I got the car - when I saw the yellow "BATTERY MAT", I knew I was in for a treat 🙂
View attachment 156770

There was basically only a skeleton left. I removed all the rust parts and went to work with the Dremel.
View attachment 156771


I had to use a cut off wheel to saw through the bolts but the studs (for the hold downs) are surprisingly intact. Unfortunately, rust has spread a bit more - I hit as much as I could today. This weekend, I'll be revisiting and getting that whole area down to bare metal and treating with POR15. But just for fun, you can see how the new battery tray looks! Vacuumed out the area really well 🙂
View attachment 156772

Glass OEM headlamps are on the way - the current headlamps are falling apart and they're just not bright enough 😢

I just removed the instrument cluster a few minutes ago and am packing it up now to send over to Rick Borth at speedometer.com (saw he was recommended by Kent Bergsma on mercedessource.com). The odometer is broken for sure; there's a bit of mystery as to how many miles the car has. The original service booklet was followed, stamped, and then they ran out of space and started writing on any page they could 🤣 The last written entry shares 303,500 miles on September 20th, 2007.
View attachment 156773

I pulled a Carfax and an Autocheck and found an entry for 315,115 miles in October 2008. The next entry is when doing emissions (May 2010) and they had installed a new cluster with 135,000 miles. It seems this cluster worked until October 2019 where it's broken and showing the same mileage as when I bought it (205,651).

Some quick napkin math puts the minimum number of miles at:
315,115 + (205,651 - 135,000) = 385,766 miles

And then if you just "guestimate" 12k miles of driving per year (purchased on October 2022, so 3 years)
385,766 + (3 * 12,000) = 421,766 miles

This is the mileage I'm going to ask Rick to set it to when the odometer is properly fixed. When I get it back, I'll paint the needles, check the light bulbs, and pop it back in 😃
Good stuff @bclifton ! Great to see …. That rusty battery area is painful. Just FYI - your strut mounts are cracked and it is likely the cracking is even worse on the underside. You should replace them …. And maybe the struts/boots/rest-of-the-tierods (I know you replaced the ends) while you are at it.

208545CE-2A35-4F07-80AB-31080AF500B7.jpeg

BTW if you squeeze the inner tie rod balljoints with a bigass set of channel locks, is there any movement? Like even 1mm? If so, replace!
 
Hey there Mike! Great to be here 🙂

I bought an 040 black over Palomino (Tex?) .133 about 15 years ago, same color combo as yours. It had myriad issues so I fixed it up, and sold it... wonder how it's doing these days. Last Autocheck report was still with the buyers in Washington, but last registration was in early 2018.

BTW, have you clocked your new 300D from 0-60 on a level road with a stopwatch? It should jump off the line without a big delay waiting for the turbo to spool up. If there's a delay, you can fix that, more info is in the doc linked above.

:jono:
Same color combo- that's awesome 🙂 Haven't clocked it, but this thing is quick (well, quick for a Diesel!). Nice and zippy 🙂

Thanks for the tie rod tips @Jlaa - I'll definitely be addressing ALL of the steering components. I have a new damper, the tie rod ends, steering linkages, and more in the box, ready to install. I'll probably do that at the same time as the passenger engine mount. RE: the mounts... I need to replace the strut mounts on my SL320 also - so this should be good practice. I can try this first to get a feel for it

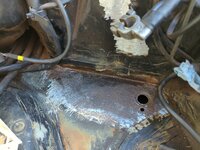
Today, I fixed up the battery tray area. Broke out the Dremel and got it down to bare metal.

battery-tray-before.jpg

I used the POR15 kit with rust converter and then got it painted
battery-tray-after.jpg

Overall, it turned out pretty good! I made sure it got to soak real good in the rust converter after I got as much rust off as I could.

I know I mentioned it - but I had gotten a center console box from the junkyard. I got it properly mounted today - had to drill some super small pilot holes and then it went right in 🙂 It has an interesting "key" - basically the flat key welded to a fender washer. I might be able to get a new key head (000-766-44-06) and cut the flat key away and then have a proper key. We'll see

console-storage-box.jpg

The instrument cluster is out for repair and I got a new LCD from a person Marcel on eBay for the temperature display (mine was broke). Once I get the instrument cluster back, I'll get the needles painted and put that new LCD in. NOS Euro spec glass headlamps (either Bosch or AL; basically the same thing) will be here on Monday. I got the new rubber seals and parts ready- that'll probably be next weekends job 🙂
 
Last edited:
I sell those temp displays for $20 + shipping - they are well advertised here if you do a search. Have sold them for many years for the 124 and 126 (both early and late 124s - they are different).

 
Dang - didn't know that @gerryvz; definitely noted 🙂 Do you still hit the junkyards?

The cluster I sent out for repair arrived w/ the person on Monday (Nov 14). I think he has a 1-2 week turn-around time so I'll try to knock out some projects before then.

First up - got new some AL euro headlamps:
headlamps.jpg

These are in beautiful shape! I did see a small crack on the plastic housing - must have happened during shipping (or someone knocked it off the couch). Either way, got that fixed and sealed up with some JB Weld. Now I just need to find a good H4 Halogen lights to put in there. It looks like there's a space for a "city light" also? (similar to W126). With the W126, that was part number `000000-008163` - curious if anyone knows if it's the same? Also curious if there's a recommended brand for the halogens

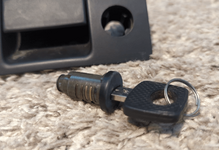
I got some lock cylinders from the junkyard. I got one with a key thinking I'd just swap it with the console box I got above. When I took it apart, I basically figured out how these work (it's not too difficult). There's 5 different tumblers in the cylinder and each is marked
cylinder1.pngtumblers1.png

I had a few spare lock assemblies laying around from other lock boxes or glove boxes that I pulled in the past, so I took them apart for more spare parts. This weekend I'll go and get even more. Rekeying seems very straight-forward: you just put your key in, see which tumblers stick out. Pull the key out, swap those out with a different numbered tumbler, repeat. with the key in and matching tumblers, the tumblers get "sucked into" the cylinder and it's free to rotate whatever it's connected to (plastic arm for unlocking glove box, arm for sliding the lock on console box)

The hard part is removing a cylinder from the assembly without breaking the plastic tabs. I'm going to the junkyard this weekend and just pull as many assemblies as I can find and try to perfect a process for removing without breaking the plastic tabs (glove box has 4 holding cylinder in; console box has 3).
 
Dang - didn't know that @gerryvz; definitely noted 🙂 Do you still hit the junkyards?
I didn't go to any yards this summer, as we got our boat and that took up most of my time and interest.

But I did go to one of the local LKQ yards last Sunday, and will continue to go as often as decent cars show up. Unfortunately the numbers of 1990s cars has dramatically reduced over the past 3 years or so. I'd say that about 80% of all MBs hitting our yards are 2000 and up now.
 
First up - got new some AL euro headlamps:
Nice! Where did you buy those, and what was the cost?


These are in beautiful shape! I did see a small crack on the plastic housing - must have happened during shipping (or someone knocked it off the couch). Either way, got that fixed and sealed up with some JB Weld. Now I just need to find a good H4 Halogen lights to put in there. It looks like there's a space for a "city light" also? (similar to W126). With the W126, that was part number `000000-008163` - curious if anyone knows if it's the same? Also curious if there's a recommended brand for the halogens
Search the forum for H4 recommendations. Lots of existing discussion on those.

For the city light bulb, it depends if you want stock 4-watt incandescent, or a larger wattage bulb. There are a few variants that will fit. IIRC either 4w or 6w incandescent, and 5w or 10w halogen. Anything with a Miniature Bayonet (BA9s) Base should fit.

Anyway - yes, 000000-008163 is the current OE number for the stock 4w bulb in Bosch/Hella Euros.

Note that if you don't connect the vacuum level system, the default position will be extremely low, and you'll need a lot of vertical adjustment to get the beam up where it belongs. With vacuum applied, there should be less adjustment needed.
 
Nice! Where did you buy those, and what was the cost?
Cost was $611.57 from a seller called `start245` on eBay:
Shipping was quick - about a week (from Latvia?). The seller has a coupon included in the box where you can use code `YDC15` (on their site Cars245.com?) to get 15% off. Good until end of 2022


Note that if you don't connect the vacuum level system, the default position will be extremely low, and you'll need a lot of vertical adjustment to get the beam up where it belongs. With vacuum applied, there should be less adjustment needed.
This is great to know, thanks! I definitely won't be hooking up the vacuum - just pointing the car at the wall and adjusting

I'll check out those H4 recommendations 🙂
 
Got some good time in at the junkyard today; got more tumblers and lock cylinders. I got a small organizer box from Home Depot and make a "rekey kit"
rekey1.jpeg

W124, W126, and R129 use the same tumblers which are numbered 11, 12, 13, 14, and 15. These are in the top row
W202 and W210 (and others I'm sure) use smaller tumblers which are numbered 1, 2, 3, 4, and 5. Those are in the second row
Bottom row has springs and empty cylinders

All the locks use the same spring. The cylinder has a small opening where you put the spring in and then push a tumbler in. I did this and found my key's combination in about 5 minutes and verified it works as expected 🎉

Here's what a rekey looks like:
- Grab an empty cylinder
- Setup the cylinder to be numbered 11, 12, 13, 14, 15. Put a spring in each slot before putting each tumbler in
- Put your key in
- See which ones don't fit (it'll stick out from the cylinder instead of being flush)
- For the ones that don't fit, take that one out and try a different number. If you had 11 and it was sticking out, try 12
- Repeat until all are completely flush with key inserted

The harder part is getting the cylinder out of the plastic locking assembly. I took a good picture here which shows the challenge
lock1.jpeg

The lock box has 3 tabs (highlighted above). When they originally assembled this, the person pushed the cylinder through and there's a lip (also highlighted) on the end of the cylinder that the tabs go under, locking it into place. The only way to get this out is to use a pry tool and separate the plastic from the cylinder. Once all three are pushed back you can push the cylinder through.

Sounds easy - but it's definitely not. Because it's old and brittle plastic. The glovebox assembly is similar to the console locking one- except the tabs are easier to access and there are 4 of them instead of 3. I tried mini screwdrivers, the aluminum tools you use for taking radios out, didn't really find a best way to do it.

I destroyed the tabs on all 3 glove box ones I took apart. The first console lock assembly I did I broke the tabs too. The second one (pictured above) I only broke part of a tab and the other 2 are "OK" (a bit scratched but otherwise OK). I'm going to find a way to snug this up... looking at using an E clip or a snap ring and wedging it UNDER the cylinder lip so that the plastic arm (used to move locking mechanism) stays in tightly.
 
Also quick update on the headlamps. I wasn't sure what brand of bulbs to get for them- so I ended up ordering the stock Mercedes-Benz part numbers. I guess we'll see what arrives 😂 I don't have a strong brand preference
- 000000-008162 for the main H4 headlights ($13.32 each)
- 000000-008161 for the H3 fog lights ($9.99 each)
- 000000-008163 for the city lights ($3.11 each)
 
Last edited:
That is fantastic info on the lock cylinders - thanks for sharing! :thumbsup2:

For the headlight bulbs, if you don't need super bright lights, the OE bulbs should be fine. I am curious what brand bulbs MB will supply. If you need more light output, one of the super duper "plus" halogens from Osram/Philips would help, or you could try an aftermarket LED replacement if you don't mind the non-standard beam patterns that Jlaa documented on the forum thread.

Also - put Lamin-X film on your new headlights. The lenses are prone to damage, and replacement pre-facelift lenses are surprisingly expensive. The protective film is cheap insurance.

:124:
 
Some quick but good updates 🙂

The rekeying went great; I used a file to grind down the plastic part (where the tabs are) just enough to slip an E clip under there nice and snug. It worked great! Here's how it looks
rekey-after1.jpg

This works perfectly for the W124 cylinder; the W126 cylinder is chromed and is an extra ~8mm tall, so an e-clip wouldn't work there. But the W124 cylinder works great with a W126 key. If anyone would like me to match a key to their lock, just shoot me a DM! I'd be happy to help

The headlight bulbs and some other parts (like antenna seal) are *almost* here. Should be here next Tuesday and I'll report back what I get 🙂 I've set the glass Euro headlamps aside in the meantime and I'm also prepping the valence panels that delete the headlamp wiper. Sanding, priming, and painting

I got 4 cannisters of LiquiMoly Diesel Purge and ran 3 of those cans through the engine (using a small hand held tank, bypassing the fuel tank). Ran into some rookie issues with air in the system, but you can bleed that out by just slightly loosening up the fuel filter bolt or the bolts on the hard fuel lines (on top of the injectors). After the purge, I replaced 2 of the 3 hard plastic fuel lines that have banjo bolts going through them... the 3rd one (with the "cigar ending"; it's basically the return line) is a bit of a PITA (due to space / reaching it under the intake) but I'll do that when I take the intake off to replace glow plugs

I went to the junkyard today and got a "sportline" style steering wheel from a 1994 S500. It's in great shape - was only $17
steering-wheels.jpeg

"New" used wheel on the left. My car is a 1987 with the W126 style wheel on the right. It has a contact ring that won't fit the newer steering wheel size.

@gsxr your pics/descriptions in Index of /images/W124_steering/steering_wheels are great! 🙂 From these, I can see that 1992/1993 had a different contact ring than the W126 one which won't line up. Finding one of those will be the next step - from your text description, it looks like they're part number 000-460-00-49 which is showing as NLA unfortunately (on partssearch.mercedes-benz-classic.com). I do also see a different part number available 124-464-02-28 which *is* still in stock... but I'm not sure if this will work

If anyone has this style contact ring or has advice let me know 😃

Also: Lamin-X universal kits added to my Christmas list for the family 🙂 I think these ones would work:

I got a set of Lamin-X covers for my old 1991 560SEC after getting a hold of unopened NOS glass lenses and it was super easy to apply and really protected the lenses great

I have all new suspension components (2x full tie rods, drag link, steering damper) which I'd love to tackle... but it's been raining this weekend in Arizona 😢
 
Last edited:
Also: Lamin-X universal kits added to my Christmas list for the family 🙂 I think these ones would work:

I got a set of Lamin-X covers for my old 1991 560SEC after getting a hold of unopened NOS glass lenses and it was super easy to apply and really protected the lenses great
Lamin-X charges an arm and a leg for their "kits" -- you may be interested in this for 124 and 126 head and fog lamps, if applicable:

 
Dang - that's a great deal, thanks @gerryvz! Will definitely consider that for the W124 🙂

I got a parts shipment today - all the light bulbs. I wanted to share what those looked like

2x H4 bulbs, 2x H3 for fog, and 2x city light
PXL_20221206_053659281.jpg

Here's the H4
SPAHN H4 U 12V60/55W E1 2A59 2203
PXL_20221206_053708338.jpg

And the H3
OSRAM 12V 55W H3 U E1 24W DOT 64151 GERMANY i1F2 1
PXL_20221206_053724495.jpg

And lastly the city light
SPAHN 2504 E1 2EA 12V
(I didn't get the full part in the shot; but nothing remarkable)
PXL_20221206_053737488.jpg

Besides these, I got the antenna seal (both top and bottom) which I'll be using once I get a refurbished Becker 754 with Bluetooth and original Antenna from Becker Auto Sound (along with the pigtails to restore both the head unit and antenna, which are aftermarket).

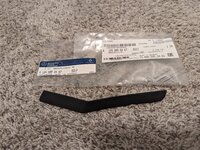
Lastly, I got the plastic parts that go on the dash, covering the screws by the speakers. If you go back a few posts, you'll see that I pulled a dashboard from a 1995 E320. I think it'll work in my 1987 - but I'm not sure. All of the passenger airbag parts come off and it looks like I can attach the glovebox instead. When I pulled that dash, the plastic speaker cover bits broke. Phoenix is brutal to any of plastic and rubber bits, unless you take regular care of the car and put something like 303 on it. I rolled the dice and ordered two covers since they were only $1.70 each and I'm pretty happy. One side looks black (code 8317) and the other is a dark blue (code 5076). I wasn't able to find the same color code for both sides- but these can always be painted. Haven't seen packaging this old in a while!
dash1.jpgdash2.jpg
 
Last edited:
@gsxr huge thanks for your great collection of photos!

Using the following picture, I was able to sort out that I did in fact need part number 000-460-00-49

I was considering other part numbers- but none were right. They all had the 5 holes. I found a person on eBay selling the 000-460-00-49 part number new and got one ordered 🙂

I shot a quick "intro" video yesterday of the car which I wanted to share

Car overall is in a bit of rough shape - won't win any shows. But it runs and drives 🙂
  • Instrument cluster is being repaired so I'm trying not to drive it too much. When that comes back, I'll clean it, paint the needles, check the bulbs, and put the gauges into a mint cluster assembly that I have. I have no idea where to get instrument cluster bulbs - will have to look at that.

  • Engine runs amazing after the diesel purge (not shown in video). I'll capture that in the next video since the engine is definitely special.

  • It needs the right (passenger) motor mount replaced badly- that side is shaking. Looks to be a PITA to get to that mount though.

  • Most important item though would be the brakes - I think they're loaded with moisture... the fluid is filthy. You really have to stomp it to get the brakes engaging.

  • The steering gear box is leaking and needs a rebuild. The rubber on the steering coupler fell off when I was wiping down the underside. I was thinking about going with C & M Hydraulics as they're fairly close by (Nevada) and I've sold cores to them before - but will search here for other recommendations 🙂
 
Last edited:
I got a parts shipment today - all the light bulbs. I wanted to share what those looked like

2x H4 bulbs, 2x H3 for fog, and 2x city light
Dang, MB is shipping Chinese H4 bulbs now? :(

Remember to wipe the glass globe clean after touching them with your fingers, before installing.


Lastly, I got the plastic parts that go on the dash, covering the screws by the speakers. If you go back a few posts, youll see that I pulled a dashboard from a 1995 E320. I think itll work in my 1987 - but Im not sure. All of the passenger airbag parts come off and it looks like I can attach the glovebox instead.
Yes, the late dash will work in the 87, you'll need to swap over the glovebox hardware. Replace all the vacuum pods proactively while the dash is off!! You won't want to repeat that job in the future. You can upgrade the door panels to match the wood dash as well, the pleated-leather door panels really help the interior look newer.


When I pulled that dash, the plastic speaker cover bits broke. Phoenix is brutal to any of plastic and rubber bits, unless you take regular care of the car and put something like 303 on it. I rolled the dice and ordered two covers since they were only $1.70 each and Im pretty happy. One side looks black (code 8317) and the other is a dark blue (code 5076). I wasnt able to find the same color code for both sides- but these can always be painted. Havent seen packaging this old in a while!
8317 is brown/brazil, 5076 is blue, and yep you can paint them.


@gsxr huge thanks for your great collection of photos! Using the following picture, I was able to sort out that I did in fact need part number 000-460-00-49

I was considering other part numbers- but none were right. They all had the 5 holes. I found a person on eBay selling the 000-460-00-49 part number new and got one ordered 🙂
Awesome! The only other option is to find a used 92-93 steering wheel and harvest the contact ring from the used wheel.


  • Instrument cluster is being repaired so Im trying not to drive it too much. When that comes back, Ill clean it, paint the needles, check the bulbs, and put the gauges into a mint cluster assembly that I have. I have no idea where to get instrument cluster bulbs - will have to look at that.
What bulbs do you need? They generally last a long time.


  • Engine runs amazing after the diesel purge (not shown in video). Ill capture that in the next video since the engine is definitely special.
You may already know this, but run that engine at full throttle to redline as often as you can for a while (aka "Italian Tuneup"). These older IDI diesels do not like part throttle, it carbons up the internals. If it belches clouds of smoke at first, that indicates it's cleaning out. Eventually you should see less and less smoke and the power levels may improve. Then try to do at least one WOT run to redline through the gears per tank of fuel.


  • It needs the right (passenger) motor mount replaced badly- that side is shaking. Looks to be a PITA to get to that mount though.
Yeah, these aren't fun, but not terrible. As long as the top bolt isn't seized, it's straightforward. If you buy OE mounts, post photos of the label with COO. I think all the aftermarket mounts are made in Asia now?


  • Most important item though would be the brakes - I think theyre loaded with moisture... the fluid is filthy. You really have to stomp it to get the brakes engaging.
Flush the fluid first, but it may also be a poor pad compound. Stock brakes on these cars are not that great.


  • The steering gear box is leaking and needs a rebuild. The rubber on the steering coupler fell off when I was wiping down the underside. I was thinking about going with C & M Hydraulics as theyre fairly close by (Nevada) and Ive sold cores to them before - but will search here for other recommendations 🙂
Yes - contact C&M and buy a rebuilt box from them. Only other option is resealing the box yourself. Usually it is only the top & bottom seals that leak, and on the early boxes, you may be able to DIY this. Late boxes (89-up?) require total disassembly which is not typically a DIY project.

:banana1:
 
Got the steering wheel sorted out 🙂 Made a video along the way to help share the knowledge

Working on the euro headlamps now! I made sure each of the bulbs was wiped down good... Put the new rubber surround around the assembly (124-826-05-80 and 124-826-06-80) and put the 3 small mounting clip pieces that go on each headlamp on the sides (what the screws go into when mounting; part of the headlamp refresh kit, 124-826-01-00 x2).

I took out the old headlamps which came off in pieces and threw them in the trash. Finally, I rewired the connector using the six pin plug (011-545-50-28). Here's a test fit of the right side - looking great!
headlamp-test.jpg

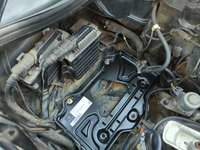
Unfortunately, I had to stop short there. We had a family get-together and then also I discovered some wiring that'll need to be addressed. The A/C compressor must have been replaced at some point and only has 3 wires going to it. A 4th wire was going into the fuse box for some reason? Not sure what that is about
wiring-hell.jpg

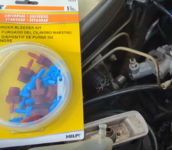
A 5th wire goes off to something else. I'll have to trace these down in the electrical docs. I'm hoping that phantom wire (pictured with a bend in my hand; wire is like 3 feet long) is just supposed to go to ground. That would be easy enough to fix 🙂 And then the three main wires were "spliced" but just wrapped around each other. The A/C is shorting like crazy, no doubt this is the cause. I'll get some butt splices in there to clean it up.
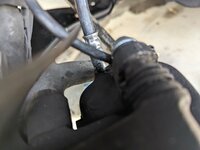
Also on the Left (drivers) side, the ABS braking module has an exposed wire (where the insulation fell off). That'll need to be cleaned up too
abs-module.jpg

I'm catching everything on video - so will share that when things wrap up. Then tomorrow I'll try to bleed the brakes too! Hoping that along with getting the air out helps restore the brakes back to good working shape.
 
I solved the "mystery wiring" situation and cleaned it up REALLY nice

Basically, that part of the harness had 5 wires - but it should have had 4. The green, white, and red lines go to the AC compressor. The other wire (blue) goes to the AC drier I think (one of two wires to that)? For some reason, there was an extra "fifth" wire spliced into the green wire and then tucked into the fuse box. No idea what was going on there. I threw that wire out, broke off the crumbling sheath around all of these wires, put new heat shrink over everything. Butt spliced everything back together and then heat shrinked over that too

The ABS module wiring was easy; just ran a new wire and got it grounded.

The rest of the install went well until putting the turn signals in. The left side must have some bent metal (on the body) or something else was off. I needed to adjust the position of the headlight after fitting the turn signal and it was in there so tight that it broke the tabs you squeeze. I show some of this (and the ghetto work-around) in the video. Overall, still happy with everything 🙂

headlamps-installed.jpg

Here's a video I captured for the whole process. Not enough free time on the weekends to knock out projects 😂 Next weekend - brakes.
 
Got some respectable work done over the weekend - along with opening a can of worms 😂

I forgot to share the new steering wheel. This is super comfortable... massive improvement from the old one
steering-wheel.jpg

Along with this, I've been having issues with the turn signal. I replaced the relay as it seemed like a short was happening when engaged. This got the right turn working but left one would only engage if you held in a very specific position. I got a new turn signal stalk for $90 USD (124-540-10-45). This did have an extra wire (you can see in pic; goes off to a round connector) that I don't have plugged into anything 🤷‍♂️ But it works great now (and wow - fresh lettering/paint)! 🙂
turn-stalk.jpg

I've been having Rick Borth at Overseas Speedometer look at my cluster (odometer broken) and finally got an update. He fixed the odometer and was almost ready to send back. But during bench testing, the trip meter didn't reset. I think it'll reset if you push it by hand- but inside the cluster, there's may not be enough length to push it all the way. Once I get it back, I should hopefully be able to figure it out and come up with something creative. I was a little bummed it wasn't completed sorted though. Total cost ~$200 USD

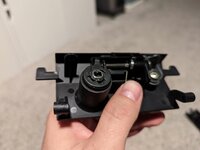
The odometer parts in the 300D are definitely different than W126 and also what I saw in the E500E section. I took apart a spare one from a 1989 300E which is similar to the one in my 300D. Mine has a metal backing that the spinning part screws onto. That has two visible plastic worm gears... and then a magnet under the needle. The needle goes up and into a plastic assembly (pictured below). You can see the "horseshoe" part, which is what mechanically resets the trip meter. With the trip meter, first, there are plastic "rolling" gears under each of the numbers that get lifted out of the way, so that the numbers can be spun freely. As you keep pushing down, each of the numbers on the trip has a "lobe" and as you push the reset in, thin plastic arms on the back move in and follow the lobe. As it pushes and follows, it basically "winds" the number back until it reaches a notch in the lobe (where it's back at 0). I took an up close picture (arms and lobes outlined in red; 4 total, 2 not pictured).
odometer.jpgodometer-up-close.jpg

I also got replacement bulbs for the turn signal part of the tail lamps. Since I retrofit the 1994/1995 parts, I needed to put an amber bulb in there. Turn signals finally working like they should 🙂
 
And now for the can of worms part 😂

I went to do a brake flush with Prestone DOT4. First thing was to check the fluid level. A lot of folks I've seen recommend sucking out the extra fluid, down to the "min" level. When I took the cap off and removed the screen, I realized the front compartment (it's split into two; there's a baffle in the middle) was bone dry. Nothing in there. That is definitely not good! I've barely driven this but when I did, it was not great at stopping. So I filled it up to the top with new DOT4

Got the rear end up in the air, threw jack stands under it, got the hoses ready. As for what I drained into: I drilled a hole in the top of a plastic Perrier bottle (5/16") and stuffed some 5/16" (outer diameter; 3/16" inner diameter) clear plastic tubing in (got at Home Depot). I poured some brake fluid in the bottle so that the end of the hose would be submerged in brake fluid
brakes-setup.jpgbrakes-bleeding.jpg

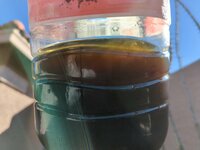
I got my wife to hop in the car, did the "open" / "close" thing (crack it open, have her push down, close it, have her release) and sure enough, it started to bleed nicely. The fluid was nasty - super dark brown. You can see it floating over the clean brake fluid in the bottle

At this point, I realized I didn't start with the furthest away one (whoops). Should have been the passenger rear. Oh well. I cycled things until it was coming out with no bubbles and also a decent color. Then I moved onto the other rear wheel

This is where things took an unexpected turn. My wife was busy, so I got my son to jump in and work the brakes. Nothing was happening - the bleed lines would never get fluid. I left it open and had him just push the brake pedal like crazy and it didn't do anything. This is when he noticed there was fluid on his shoe 😱

Basically, I think the master cylinder or the brake booster had a failure. I'm not familiar enough (yet) to know what's leaking, but the fluid is leaking down from around the rubber boot above the pedal (just on the other side of the brake booster).
leak1.jpgleak2.jpg

At this point, I gave up and started cleaning up. I sucked out what I could, removed the carpeting, and cleaned the mess. I'll have to do some more troubleshooting - but any tips are appreciated 🙂 You can hear a lot of squishy bubbly noises when the car is on and you push the brakes

That's all I had time for this weekend. If anyone recognizes the issue or has some guesses, I could definitely use your help 🙂 This is my first time ever attempting a brake bleed on a car and unfortunately it didn't go so well
 
Bummer about the brake issue! And yes, your master cylinder failed. Since the front reservoir was dry originally, it's hard to say when or how it happened. Normally I'd guess that when pumping the pedal, it was pressed beyond halfway, and damaged the seal when pushed past the ridge which develops over many years at the normal travel limit. But with the reservoir empty, it could have failed a long time ago, and when refilled the fluid rapidly appeared on your shoes. A rebuilt MC shouldn't be too expensive, and isn't that hard to R&R.

Next up: Please invest in a pressure bleeder! The basic Motive Euro kit is ~$50 and worth every penny, fancier Black Series is ~$90, or Speedi-Bleed is in the same ballpark. You'll likely need a pressure bleeder after replacing the MC anyway, so order now. This eliminates any danger of seal damage from excess pedal travel when bleeding the hard way, and also makes it a 1-person job. Works on all MB's at least into the early 2000's.


More discussion on bleeder types (vacuum, pressure, Motive, Speed-Bleed):


:tumble:
 
Thanks for the confirmation 🙂 After some more searches, it makes sense what happened for sure. Do you think the brake booster needs anything done? I'm not sure if fluid got in there - or if the master cylinder goes through it entirely (and is obscured by the rubber boot above the pedal)

Will be figuring out the options here for master cylinder replacement and will share what I find! 🙂

Quick search shows local parts supplier AutoHausAZ with a decently priced one. Might as well swap out the reservoir too
 
You'll have to pull the MC and inspect the booster. If the booster is full of fluid... uh-oh. I can't remember if that kills the booster completely, or if you can siphon/drain the booster successfully. Used boosters are cheap and plentiful, but it's not a fun job to R&R the booster. Based on your description, I'm pretty sure you'll find a booster full of fluid.

FCP has the same price as AHAZ on the Ate MC, but with free shipping and lifetime warranty:

 
As a clue to a brake booster failure. I had a failed brake booster on an older MB 67 230. The vacuum booster sucked brake fluid into the engine. When you stepped on the brakes it blew heavy white smoke out of the exhaust.
 
I ended up getting the parts from AutohausAZ (already had them in cart and they're local). I definitely want to try out FCP Euro sometime (especially for that warranty) - got them bookmarked now. With AutohausAZ, I got the parts in one day with just the regular shipping - great having them local 🙂 Every time I hit the junkyards, I drive by their office - but I don't think they let you pick up in person anymore
autohaus.jpg

I got the brake reservoir off, removed the brake master cylinder, and then got the brake booster out. It was completely flooded with fluid! There's an inside piece - where the booster attaches to the master cylinder and this came loose and fell off inside
booster.jpg

The fluid was nasty. Completely black. The only light parts you can see is either water OR the small amount of fluid that I added in when I was attempting the flush and it's separated to the top
fluid.jpg

I'm going through on eBay looking for a replacement part - part number for me is 003-430-16-30. Should be easy enough to fix once the new booster comes in. I got new brake lines too, while we're at it.

I captured a video of some of the process you can check out here

Happy holidays, folks 🙂 Going to get cleaned up and spend some time with the family and eat some amazing food
 
Damn - well... today was a mixed bag 😂 Days like this I'm glad I'm a computer programmer and not a mechanic. But I learned a lot

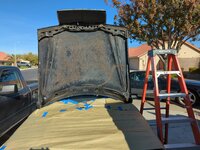
First job was an easy one. Not fun, but easy to do properly. The car came with a hood pad (124-680-14-25) and I got it all ready. Gently removed the old one and then cleaned up what was left with a plastic scraper. Wiped that surface down with soapy water and then one more pass with rubbing alcohol. Here's a before and after 🙂
hoodpad-before.jpghoodpad-after.jpg

For adhesive, I used the 3M Super Adhesive spray (08090). This stuff works great if you apply a LOT and if you follow the directions. Basically, I sprayed the entire hood area and then sprayed the back of the hood pad itself. Just going off weight, I used about 75% of the can - making sure to cover both surfaces entirely. Once both surfaces are tacky to the touch, you get a helper and then start fitting and pressing it on. After everything was in place (tucked under where it's supposed to go, etc) I just kept applying firm pressure over the whole thing. Using your hand to push down on all of the areas and then move along so that you can firmly press on each part of the hood pad. I did this for about 15 minutes and started cleaning up

While the hood was up curing, I decided to tackle the front brakes. I ordered a used brake booster which I'm waiting for - but in the mean time, I did buy new brake lines for both the front (129-428-00-35) and rear (126-428-03-35) and then my wife got new new OEM front rotors (124-421-16-12) and ATE brake pads (000-420-99-20). Only thing I needed was a few packets of brake paste (001-989-94-51-09) and two brake wear sensors (201-540-03-17)

The actual brake job went pretty good. I watched a few videos ahead of time and dug in and figured it out.
  • Super easy to remove the caliper. Two 13mm bolts and you counter hold them with a 15mm wrench. Those broke free pretty easy and I hung the caliper.
  • At this point, I disconnected the wear sensor (single 10mm bolt) and removed the brake line from the caliper (upper part you undo the 11mm fitting on the hard line with a line wrench while counter/holding the brake line with 17mm... bottom fitting was 14mm)
  • The part that holds the pads is pretty easy too. Two 19mm bolts - just needs some elbow grease to break loose
  • Rotor comes off the the 5mm allen for the bolt that holds it in place
  • Putting the rotor on was straight-forward. I put fresh blue thread-locker on all the parts taken off so far which already had some
  • Replacing the brake pads was pretty easy too. I wasn't sure how much grease to use on the backs - so I put a generous amount (like 1/3 of the packet on each side)
  • The caliper itself needs to be manually opened. When you do that, it's going to spew fluid everywhere. I just used my hands to push it really hard and compress it to be open

brake-paste-lol.png

Putting back together is fairly straight-forward... although you have to connect the new brake line to the caliper first. This is where things didn't go as planned. I'm not sure if the 129 part number is correct (AutohausAZ said it matches)? but the part looked identical when side-by-side with the old/worn one that was on there. I got a 14mm line wrench (flare wrench basically) out so that there's extra coverage around the edges. With the caliper bolted on and tightened, I hand threaded the brake line... then when it got tough, I used the 14mm line wrench. I had to REALLY use a lot of muscle. I ended up stripping the fitting and the wrench got stuck.

I broke the tool loose and it LOOKS like it's fine. The fitting wasn't able to make it flush though (against the caliper). At this point, I did start questioning myself. Should I just give up and go to a pro? Here's what it looks like
brake-line-extra-threading.jpg

I decided it was probably fine and pushed on. I'll need to check out (side by side) the other new one against the old one. Maybe the threaded portion is longer? If you look close in the pic- you can see the ~2mm or ~3mm gap between the end of the chrome fitting and the caliper it's screwing into

The next thing I ran into was after connecting the brake wear sensor. I went to reattach this to the caliper and noticed it was just hanging on by a thread. The actual wires were broken - only the rubber was still connected. I got out the electrical toolbox and hacked it back together with some butt splices - then shrink wrapped over that.
brake-wear-sensor-hack.jpg

This is another one of those things where I felt like a loser. But there's not much you can do - the parts are likely NLA (201-545-22-28). What I have should work short term- and it might be the cause of the red `BRAKE` light that's been on in the instrument cluster. I might get lucky on this one - there's a 1995 E320 at the local yard I can check for parts

I finished up with this about 5pm - basically only finishing the front left (drivers) side brakes. I still have the parts ready to do the other side. Will check that out this weekend

It wouldn't be a project without things going wrong 🙂 Luckily, I have a lot of patience and I know this will be worth it. It's fun learning too - I always enjoy sharing my notes here with people who have more experience than me. This is my first brake job on a W124 - I've only done the W126 before (and even then, I was just helping someone else)

I went to close the hood up and the latch broke and fell on the floor. Perfect way to wrap up the work today 😂 One more part (124-880-02-20) on the parts list
hood-latch-lol.jpg
 
Last edited:
Things rarely go quick and easy when working on older cars. I'm currently struggling with disconnecting a brake hard line from the flexible brake line. I'm surprised you didn't mention the same.
The gap between your soft line and the caliper is normal. The sealing takes place between the end of the line and the bottom of the caliper orifice.


Rephrasing your thoughts, if everything went exactly as it's supposed to, every time, it wouldn't be called work, and anybody could own these old cars.
 
Well said @sheward 🙂

I'm going to get up tomorrow and see if I can get some used brake wear sensors (the whole line) at the junkyard. Thanks for helping confirm about the soft brake line. I might have gotten lucky- but the 11mm flare wrench made it really easy to break the hard break line fitting loose after counter holding the other side with a 17mm

Here's the video form of that update for anyone interesting. Mostly keeping for my own records and reference
 
FYI, if you are looking for the harness/connector that bolts to the caliper which the wear sensor plugs in to... 124's with 4-piston calipers have different connections as they have 2 sensors, not 1. I think any diesel or M103 donor may work, but any M104/M119 (i.e., that 95 E320) may be different. You might be able to make it work though, I'm not certain, never looked into this before.

:rugby:
 
Found one! 😄 I pulled a pair (L 124-540-69-07 and R 124-540-69-07) from a 1991 300E. There was a newer E320 (w/ the M104) next to the car I was at and the brakes were different. So I think you're right on the money @gsxr (w/ regards to style being different for OM603/M103 versus newer M104/119). Looks like this brake wear sensor cables are still available new actually - but this pair only cost $20 and they're in pretty good shape

I got a handful of the rubber "nipple covers" for the bleeding screws in great shape along with some of the rubber "bellows" that go where the pin compresses on the calipers. Arizona takes a toll on any rubber (a lot of mine is destroyed)- but these all were in good shape. They're soaking in some ATF right now - should be like new soon. This weekend I'll drop this replacement sensor in, clean up the messy brake paste, tackle the other side, and show the car who's the boss 🙂 My wife is amazing and besides buying me some brake parts for Christmas she got a set of Lamin-X covers for the new Euro headlamps which I'll put in too
 
@luckymike good question - I'll report back. Some people have reported that it rejuvenates and softens rubber components. There are a few other popular choices too, including brake fluid. My friend Al has had good luck with using ATF so I figured I'd give it a shot :)

edit: whoops- he uses AT-205; not ATF 🤦‍♂️
 
Last edited:
Why didn’t you just buy some new rubber brake bleeder caps from MB? They are Uber cheap. I just bought eight of them from MB a few weeks ago.
 

Attachments

  • image.jpg
    image.jpg
    1.8 MB · Views: 10
  • image.jpg
    image.jpg
    1.5 MB · Views: 10
looking at your brake job video I didn’t see where you serviced the 2 sliding pins and their bore holes in the caliper bracket. Checking the rubber bellows/gaiters for cracks, which you did, is part of the job but the bore holes should be cleaned of old grease as should the pins and fresh high temperature caliper grease should be smeared on the pins. Brake cleaner or lacquer thinner can be used to remove the old grease and small tubes of caliper grease are readily available at any auto store.

Keep up the good work, you’ll have the car in tip top shape in no time.

Regards,

Peter Weissman
 
Thanks for the part number @gerryvz! (000-421-08-87-64). Added to "the list" 😃(~$1.63 each)
I tried looking it up but wasn't able to find it. I miss EPC (don't have subscription to modern equivalent)

Thanks for the tips @geraniumtr (and the encouragement)- I absolutely missed the pins. When taking the bellows carefully off the parts car, I realized how you remove them. It's pretty easy to use your thumbnail or a small pry to peel the rubber back so that you can properly remove the bellows and the full pin. I still have 3 packets left of the MB brake grease which should be more than enough

This weekend there will be some redemption 🙂 Sometimes you have to not feel good about a job before you can get the feeling of complete success when you revisit and knock it out of the park. Will put the good used brake wear sensor in place and properly clean and lubricate the parts (and then repeating new rotor/pads/brake line on the passenger side). The new (used) brake booster should be in tomorrow too - so it should be possible to get this thing back on the road for new years day!
 
Last edited:
Thanks for the part number @gerryvz! (000-421-08-87-64). Added to the list 😃(~$1.63 each)
I tried looking it up but wasnt able to find it. I miss EPC (dont have subscription to modern equivalent)
Why don't you have EPC access? There are multiple offline solutions that run on Windoze or MacOS, or you can get an official paid subscription online. You also need SDS for your R129, and many/most SDS setups include the EPC + WIS... so that's an option as well.


Will put the good used brake wear sensor in place and properly clean and lubricate the parts (and then repeating new rotor/pads/brake line on the passenger side). The new (used) brake booster should be in tomorrow too - so it should be possible to get this thing back on the road for new years day!
I'm sure you already know this, but go easy on the brakes for a while, and don't expect much stopping power when you first pull out of the driveway. New pads + rotors together can take a long time to fully bed in. Usually a few hundred miles of city driving over multiple days / heat cycles.

:3gears:
 
Got a happy update (finally)

I put the new brake booster in and then put the master cylinder in. Did an in-place "bench bleed" of the master cylinder using the Dorman Master Cylinder Bleeder Kit (part# 14151). Basically just threaded the inserts into the MC, attached the included hoses onto the insert, and fed them back into the brake fluid reservoir.
1672717087549.png

Once the MC was free of air, I reconnected the hard lines. Brake fluid is nasty - had to clean that whole area a bunch of times. Got it all over myself, all over a lot of things. But after it was clean, I finished up the brake refresh on the driver's side. Almost everything was done here - so I wiped off the excess brake grease on the back of the pads and then pulled out the pins on the caliper. Cleaned them real good with some brake parts cleaner and greased them up and replaced the torn boot. I put in the new brake wear sensors that I got from a parts car recently! After all this, I moved onto the passenger side and basically did all the steps there too (new soft brake line, new rotors, new pads, grease it up, remove/clean/grease the pins, replace worn boots, new brake wear sensor)

I shared in a previous post- but it seemed like there was a lot of threading sticking out from where the soft line screws into the caliper. This time (passenger side), I compared the old line (123 part number) with the new line (129 part number) and the threaded insert part is noticeably longer on this new part. So it's screwing in the same amount as before - that was great to see 🙂
1672717041756.png

With both front brakes refreshed, I got the rear end in the air and started the regular bleeding. I did a one person method - putting the transparent hose into the bottle like before (bottle halfway full, so the hose is submerged)... crack the line open a quarter turn, then just gently push on the brakes and check every 5 or so presses. I did this until the hose was a nice yellow tinted clear, completely full of liquid (no air bubbles). Close it up, onto the next wheel. Everything went great this time around! 🎉

I did replace the hood latch that broke last time (124-880-02-20) and also put a new hood ornament (124-880-00-86-67) in as mine was flopping around. Was great having these two small but noticeable things fixed. I took the car on a cruise - about 35 miles total. The brakes are working great for what they are. I didn't do any hard braking as I'm sure it'll take a while for things to wear in. But the important thing is that brake pedal feel is restored (finally). This is a really special car... and the jobs are good practice in case I do come across a dream E500 / 500E 🙂

Next up (and I'll capture pictures / how-to) will be installing Lamin-X on the headlamps. And will also be looking at the Motive Euro power bleeder (too late for this job; but will come in handy for when I need to do the brakes on my 129!)

Here's a video of some of the steps and progress made 😃

Video includes bonus footage of someone who had a nasty NYE accident and drove around with their wheel caved in (rather than getting a tow lol)
 
Last edited:
...And will also be looking at the Motive Euro power bleeder (too late for this job; but will come in handy for when I need to do the brakes on my 129!)
Looks like your R129 does not have ASR, so while the pressure bleeder isn't required (as it is with ASR), it will make the process soooo much easier. Also interesting your R129 has the rare 722.5 five-speed auto - neat stuff!

:jono:
 
Quick update as it's been a while! (not dead)

Happy to report that the brake job was a big success. The car is driving so great now - well, as good as a car with 420k miles can drive 😂 It desperately needs the passenger side motor mount replaced and pretty much all of the suspension and steering components need replacement. But we'll get to those! I put a full set of new Michelin tires on the car too and it's riding much better.

I was able to fix a long standing issue. Since buying the car, the air conditioning was broken; shorting really bad. The blower motor would turn on/off at seemingly random times and the recirculate button and other lights in the car would flicker as it turns on/shuts off. I pulled a climate control unit at the local yard from a 1988 300E and swapping that did the trick; AC is working beautifully now.

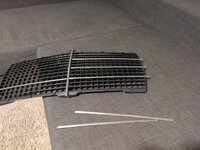
My grille had some bent metal on it and the plastic was looking tired, so I did replace the plastic grille insert (124-888-02-23) and all of the metal "slats" (6x 124-888-03-85, 1x 123-888-01-85). I found a replacement on eBay which is from Taiwan... but it seems to be well made and actually fits pretty well. It needed some X-Acto knife trimming to get everything clean and fitting (some of the plastic seams had lips from the mold). The slats you have to thread in between the plastic and I used a hacksaw blade to get the proper length. Overall, looks great - will have to capture how it looks on the car
IMG_20230123_201758_01.jpg

All of the wood is currently being refinished by Igor in San Diego. Once it comes back, I'll be able to tackle the dash replacement

The most recent thing - I got a replacement rear bumper from a 1990 300E last weekend at the junkyard (part number 124-880-03-40). Since it's 1990, it has the chrome on top... but I think it should work (either with the chrome or filling in the holes). It came from a white car so the color is off. I'm stripping it down now and will be looking at getting some paint at the local auto paint store (Space Age) and doing it myself. I'm trying to find the color codes for the side cladding - will dig in here on the forums and search as I'm sure it's documented 🙂 The best I can tell is that 040 black paint should be having 7700 altograu color. Since it was off a white car, I think it's currently 7738 satograu
Color code information taken from here

edit: found some great info in the wiki!

The main thing that has got me side tracked (ex: why I haven't gotten more W124'ing done): I've been hard at work on the R129. I pulled a full set of hydraulic cylinders at the junkyard over the summer and sent them off to Top Hydraulics in the fall. I recently got them back and went to work 😃 It was a wild job, but I swapped all 12 of those and the distribution block about 2 weeks ago and will be replacing the pump with a rebuilt unit this weekend. Last up for the R129 are some plastic bits (replacement clamshell plastic for the rear view mirror and the sun visor clips, both from OctoClassics) and finally getting the soft top fixed up (new plastic windows, adjustments to the frame if needed).

After that it's back to the W124! 😃 The wife is already dropping hints that she'd love for us to sell the SL once it's "done" so we can get the 300D parked in the garage. I'm starting to lean that way a bit, too - we'll see 🙂
 
Last edited:
Im trying to find the color codes for the side cladding - will dig in here on the forums and search as Im sure its documented 🙂 The best I can tell is that 040 black paint should be having 7700 altograu color. Since it was off a white car, I think its currently 7738 satograu
Are you planning to install the wide side moulding/cladding?
 
Im trying to find the color codes for the side cladding - will dig in here on the forums and search as Im sure its documented 🙂 The best I can tell is that 040 black paint should be having 7700 altograu color. Since it was off a white car, I think its currently 7738 satograu
Color code information taken from here

edit: found some great info in the wiki!
Honestly there is very little information about the W124 (but especially the V-8 models) that ISN'T here on the forum. 14+ years of operation and accumulated knowledge helps that.....

What was the climate control unit you replaced that solved the shorting issue? The push-button dashboard unit?
 
@gsxr good question... I don't mind the current look - but I think I'd need to pull a lot of parts to retrofit the cladding (which I do like better). I was planning to just replace the back bumper (fill in the holes where the chrome goes through, paint) and call it good. If that goes well, I can always remove the other pieces to refresh them too

@gerryvz absolutely - lots of great info here. Kudos to you and everyone else dedicated to collecting those details 🙂

The climate control unit was indeed the push button dash unit - part number 124-830-33-85. Replacing that got things working beautifully.

When I pull the dash, I'll definitely have to look at the vacuum pods. George Murphy offers a replaceable diaphragm - I was thinking about going that route. Unless there's a good source for rebuilt vacuum pods. The recirculate button *seems* to work, but once the dash it off, that's definitely time to put a known good item there! 🙂
 
When I pull the dash, Ill definitely have to look at the vacuum pods. George Murphy offers a replaceable diaphragm - I was thinking about going that route. Unless theres a good source for rebuilt vacuum pods. The recirculate button *seems* to work, but once the dash it off, thats definitely time to put a known good item there!
You can test all the vac pods with a MityVac by removing the glovebox. Pulling the dash will let you replace the pods - change all that require dash removal (recirc/main flap pods, center vent, and diverter pod).

Note the George Murphy / Performance Analysis Company kit will only repair the center vent pod completely. It will repair half of pink dual-chamber pods - most of the time this is acceptable, as the failed portion is usually the one GM sells the ACD-2010 diaphragm for. The GM ACD-2020 kit does not work properly, it restricts pod travel and will not fully operate the flap - search this forum and PeachParts for details. You can use a different p/n pink pod and use your existing metal rod, however all are NLA (AFAIK) except for a few remaining 1248003075 on Amazon at $50/ea. The diverter pod is still available new, and is a different size (smaller diameter), not repairable.

The main air flap (recirculation function) must be 100% working to ensure maximum cooling from the A/C in summer. Otherwise it will allow hot outside air to enter and reduce cooling performance. Get the system working 100% with all new/repaired pods and it will work much better.

:bbq:
 

Who has viewed this thread (Total: 2) View details

Who has watched this thread (Total: 6) View details

Back
Top