• Hi Guest !

    Welcome to the 500Eboard forum.

    Since its founding in late 2008, 500Eboard has become the leading resource on the Internet for all things related to the Mercedes-Benz 500E and E500. In recent years, we have also expanded to include the 400E and E420 models, which are directly related to the 500E/E500.

    We invite you to browse and take advantage of the information and resources here on the site. If you find helpful information, please register for full membership, and you'll find even more resources available. Feel free to ask questions, and make liberal use of the "Search" function to find answers.

    We hope you will become an active contributor to the community!

    Sincerely,
    500Eboard Management

Instrument Cluster - No Lights

8899

E500E **Meister**
Member
I'm in the middle of doing an instrument cluster R&R because the plastic face on my OE cluster has cracks on it. I managed to get everything switched over to a better/nicer condition cluster housing but now don't have any cluster lights except for the right-side idiot light (ABS, SRS, ASR, CE, etc). The gauges all work such as FOT, outside temperature, Tach, etc.

Can anyone please tell me which cluster connections provide power for all lights? I assume the 12v connection on the rear of the cluster provides some power for lights, but are other connections also supplying power for cluster lights?

Thanks
 
Greg, I'm not 100% sure what connector powers the idiot lights on the F/O/T side of the cluster. I believe it would be the large round connector on that gauge pod? There is also a red twist-in fuse on that pod, may not hurt to check that also (not sure what it does).

BTW, I was assuming you meant the idiot lights not working. If the idiot lights are all OK and it's the nighttime illumination that isn't working, that would be a different issue.

:klink:
 
Dave, thanks.

I replaced the red twist-in fuse, and that did not help. So yea, it is the idiot lights on the left-hand side of the cluster (high-beams, battery, brake, etc.) that don't work, along with the turn signals, ASR hazard light in the middle of the cluster, and probably the back-lighting as well (difficult to tell in the daylight).
 
I replaced the red twist-in fuse, and that did not help. So yea, it is the idiot lights on the left-hand side of the cluster (high-beams, battery, brake, etc.) that don't work, along with the turn signals, ASR hazard light in the middle of the cluster, and probably the back-lighting as well (difficult to tell in the daylight).

Greg, any chance you missed one of the wire connections? It sounds to me like there might be one wire not hooked up when the cluster was re-installed...

:detective:
 
No. I've removed/installed the cluster now several times and have gotten pretty good at ensuring that all wires are properly inserted into their socket.

Next step top will be to install Ntrepids cluster into my car to see if the light work....fun times!!!
 
Ok, so we installed Ntrepids cluster into my car and the lights work fine. Hmmmmm
 
I have attached an Instrument cluster Wiring diagram for a 1994 E500

Can you list what items within the Cluster that do not work? Maybe I can tell you where to check

For example-
Coolant Level Indicator
Windsheild Washer Fluid Indicator etc

View attachment 5038.pdf
 
Dave, thanks.

I replaced the red twist-in fuse, and that did not help. So yea, it is the idiot lights on the left-hand side of the cluster (high-beams, battery, brake, etc.) that don't work, along with the turn signals, ASR hazard light in the middle of the cluster, and probably the back-lighting as well (difficult to tell in the daylight).

From what you said above already about the lights these should all be out-


Illumination
Right Turn Indicator
Left Turn Indicator
Windshield washer Fluid Indicator
Coolant Level Indicator
Oil Level Indicator
Brake Fluid & Park Brake Indicator
Brake Pad Wear Indicator
Charge Indicator
Fuel Reserve Lamp
Coolant Temp Gauge

Yes these are all linked by one power supply. From the Ignition Key in Run & Start positions. Black Wire with Red and violet markings.


Since the other cluster works AOK – it sounds like your original Cluster Circuit board now has a break in that line or the connection pin has a broken / dry solder joint on that one connector.

If you trace the wire in the plug housing you will be able to tell which pin in the circuit board is suspect. And maybe try a continuity tester to locate the break in the circuit and / or try re-soldering where the pin meets the circuit board.
 
I think the issue was how Greg removed some of the interior parts. I took some video so maybe someone can see what he did.


Robert

[video=youtube_share;G6IuV9pE4rs]https://youtu.be/G6IuV9pE4rs[/video]
 
I think the issue was how Greg removed some of the interior parts. I took some video so maybe someone can see what he did.
Good point. It appears he may have forgotten to turn the key off before removing the HVAC controller at 0:13...

:banana2:
 
So I am happy to report Greg (8899) came in with an incandescent instrument cluster and left with an all LED cluster. it looks fantastic. The white LEDs really clean up the traditional yellow glow of the incandescent bulbs. BTW, this is not a job for the faint of heart and requires a little patience and intestinal fortitude. You are completely disassembling the cluster as well as dealing with the polarity of LEDs which requires a lot of trial and error (not to mention disassembling the bulb fixtures for the idiot lights to the left of the thermostat, blinkers, and cluster illumination). The ASR indicator on the speedometer is the holy grail of this project based on its location and the earlier factors mentioned.

He also did the courtesy lights on all of the doors and in the trunk. He successfully added an LED on Sunday to his gearshift.

All that he has left now is:

1. Rear Dome
2. Front Dome (Dome, Passenger Reading Light, and the 3 seatbelt indicator lights)
3. Left, Center, and Right vent lights
4. Center Console (Left & Right)
5. Ashtray
6. Rear Reading Lights
7. Thermostat Light (this requires soldering)
8. Passenger Vanity (Driver and Passenger Side)
9. License Plate


Robert
 
Last edited:
At around 2:30pm today I definitely felt like doing what the guy in the video (post #9 above) is doing....that's for sure. Wow, swapping cluster housings and then also swapping out all cluster incandescent lights to LEDs light is, in a word, frustrating.

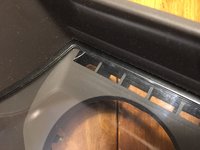
My primary objective was to get rid of the broken "glass" on my cluster housing:
 

Attachments

  • IMG_0229.JPG
    IMG_0229.JPG
    900.9 KB · Views: 18
  • IMG_0230.JPG
    IMG_0230.JPG
    868.5 KB · Views: 15
Swapping the instrument cluster housings essentially entails moving all instruments from one cluster over to the other. This process was going well until my potentiometer fell apart in the process. Tiny springs were literally popping out of the potentiometer. I felt like a watch-maker inserting the tiny springs back into the pot with tweezers. After successfully getting the pot put back together I mistakenly thought that doing the LED swap would be a piece of cake...but not to be.

The cluster LEDs are really not easy to get working...as described by Robert above in post #11. Without Robert's phenomenal troubleshooting skillz, I would still be in the dark.

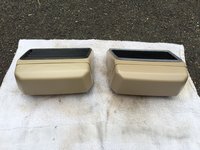
Today I also swapped my 3rd brake light. From a melted-lense parchment assembly to a new cream-biege assembly.
 

Attachments

  • IMG_0232.JPG
    IMG_0232.JPG
    1.4 MB · Views: 20
  • IMG_0233.JPG
    IMG_0233.JPG
    1.4 MB · Views: 18
  • IMG_0228.JPG
    IMG_0228.JPG
    984.9 KB · Views: 19
  • IMG_0231.JPG
    IMG_0231.JPG
    982 KB · Views: 21
Last edited:
I think the issue was how Greg removed some of the interior parts. I took some video so maybe someone can see what he did.


Robert

[video=youtube_share;G6IuV9pE4rs]https://youtu.be/G6IuV9pE4rs[/video]

I know I've seen that guy before and I know I've seen his work. I think he works at Lithia Mercedes in Portland. He handles all their returns.

:shark:
 
No. He may have relocated as I swear I saw him at one of the MB dealerships in the Washington DC area. ;-)


Robert
 
No. He may have relocated as I swear I saw him at one of the MB dealerships in the Washington DC area. ;-)


Robert

Regardless, definitely one of the best W124-specific HOW-TO videos ever produced. Kent at MercedesSource should pay attention to his technique.
 
Greg (8899) can attest to the fact that the LED replacement is not this easy (starting @ 1:52 in the video)


Robert

[video=youtube;9JzkBaE0Ams]https://www.youtube.com/watch?v=9JzkBaE0Ams[/video]
 
Greg (8899) can attest to the fact that the LED replacement is not this easy (starting @ 1:52 in the video) Robert

Yes, not nearly as easy to get those LED replacement bulbs to illuminate as represented by my buddy Kent. Again, I have to reiterate my suggestion that Kent spend some time watching the video in post #9 above to see how a real HOW-TO video is done.
 
I run the LED inside the car domes, the doors the license plate and the trunk. I dabbled with the tail lights to no avail. Perhaps a list of the specific lamps and source showing the replacement successful can be made in the WIKI or HOW-TO sections for the rest of the lamps that DO NOT trigger the indicator.
 
The issue with the tail lights as well as the high brake lamp (3rd light) is there is not enough draw on the line so the system assumes the bulb is out. One way around that is to put in a load resistor like the Sylvania/Osram one (link) versus a cheap knockoff. Note the way these help is they draw power and dissipate it through heat so you have to find the wire and then isolate it from touching anything that would melt.

I agree. A Wiki and HOW-TO would be great and am happy to pass along my experiences in making this modification.


Robert
 
Greg, what was the root cause of your "all idiot lights dead" problem? Is that fixed now?

:tumble:
 
Dave -

There were two issues:

1. Proper polarity of the LEDs. Unlike incandescent bulbs, LEDs have specific polarity so sticking them in reversed will not illuminate the LED
2. Ensuring good contact within the bulb holder to complete the circuit. This may require complete disassembly of the holder into 2 parts

BTW, thanks for your help yesterday in troubleshooting.


Robert
 
Last edited:
I popped into my E500 last night for a drive ... it had been a couple of months since I had driven the car. I noticed upon activating the headlight switch, that I had ZERO interior lights on anything.

To remedy this, I just rotated the dimmer switch back and forth a couple of three turns, and the interior lights perked right up. Beware that the dimmer switches are starting to get old and contacts are getting less efficient with age ... might be a good idea to stock up on spare dimmer switches before they go NLA. The W123 (and possibly W126) dimmer switches are NLA from MB, so I am sure that the W124 switches are not too far behind....

Cheers,
Gerry
 
Thanks, Robert! I was originally under the impression that all the bulbs were out with the original / incandescent bulbs. I didn't realize there was an LED upgrade at the same time.

I would be interested in the primary cluster illumination upgrade, if significantly brighter than stock... just the 2 big bulbs up top for the clear plastic light guides. Are those LED's properly dimmable?

:shocking:
 
I had ZERO interior lights on anything.

One other issue is if your idiot lights are on but the rest of the instrument cluster is dark along with the center console and gear shift is that little red fuse on the back of the instrument cluster. I replaced mine and everything lit up again. Of course, try twisting the potentiometer clockwise all the way should be the first step. Anything after that requires instrument cluster removal and surgery.


Robert
 
I would be interested in the primary cluster illumination upgrade, if significantly brighter than stock... just the 2 big bulbs up top for the clear plastic light guides. Are those LED's properly dimmable?

Dave -

The illumination is brighter and cleaner (IMO). The T10 led bulbs we used had 4 SMDs on the face so for brighter illumination you'll need to go for more SMDs (or better yet more real estate on the bulb end being LEDs. The cluster illumination are dimmable but not at the spectrum of an incandescent.


Robert
 
Yes, not nearly as easy to get those LED replacement bulbs to illuminate as represented by my buddy Kent. Again, I have to reiterate my suggestion that Kent spend some time watching the video in post #9 above to see how a real HOW-TO video is done.
Just watched his video. Maybe he sells special LED's that are polarity-neutral and work in any position!

:jono:
 
Greg, what was the root cause of your "all idiot lights dead" problem? Is that fixed now?

[FONT=Arial, Helvetica, sans-serif]The root cause of my problem, as Robert indicates above, was that one or more LED's [installed into the left-hand side idiot lights] was not getting the correct polarity. And I think there is a downstream effect if one bulb isn't at the correct polarity, it can affect the entire circuit. And for the left-side cluster idiot lights, those bulbs all get their power from the big, round, multi-pin socket.

So, the frustrating part was that, while the likelihood of inserting all LEDs into the bulb sockets at the wrong polarity is very low, I had no idea which bulbs were inserted correctly or incorrectly. None of them worked!!! Which made me think the problem was something much larger/sytemic than just not having LEDs inserted at the right polarity.

Further exacerbating the problem with my "no lights" problem was this challenge just after having to rebuild the pot....so it was a very challenging day.
[/FONT]
 
Actually, the lights all are illuminated independent of each other. We had 6 bulbs which did not illuminate due to incorrect polarity. The chances of that, are you know, are like flipping a coin 6 times and getting all heads -- 1/12. So we took a different approach and worked to get the first idiot light illuminated via trial and error with the LED polarity and then moved to the next one. Pretty painstaking but very rewarding in the results.

I'll work with Greg (8899) to build a "How-To" for the board.


Robert
 

Who has viewed this thread (Total: 3) View details

Back
Top