• Hi Guest !

    Welcome to the 500Eboard forum.

    Since its founding in late 2008, 500Eboard has become the leading resource on the Internet for all things related to the Mercedes-Benz 500E and E500. In recent years, we have also expanded to include the 400E and E420 models, which are directly related to the 500E/E500.

    We invite you to browse and take advantage of the information and resources here on the site. If you find helpful information, please register for full membership, and you'll find even more resources available. Feel free to ask questions, and make liberal use of the "Search" function to find answers.

    We hope you will become an active contributor to the community!

    Sincerely,
    500Eboard Management

OWNER Matt-R20

Matt-R20

E500E Enthusiast
Member
Hey there everyone. I finally received my 500e yesterday so I can now officially start and owner thread. I do appreciate all the comments and advice on the for sale thread for the car (BAT auction out of NJ). BAT Auction here

I’m a SoCal car nut and I have been collecting mostly Porsche cars although I do have a little of everything. I have never owned a Benz and the Porsche connection to the 500e is really interesting and I figured this is a good way to enter. Those types of projects are part of what kept Porsche alive in the late 80’s and 90’s.

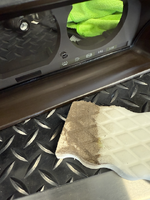
I will be retiring from my High Tech career next week and I’m pursuing various ways to keep busy that revolve around what I love to do which is hang out in the garage and play with cars. As part of that process, last year I started a Dry Ice cleaning business which is a really interesting process and is perfect for older German cars.

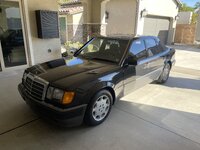
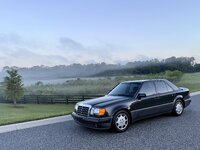
Now on to the car at hand. We have a 1992 Pearl Black over Black with 107K miles. This car was mostly a TX car but moved up to the North East and I purchased it on BAT from Dean L. Probably over paid a bit, but that’s the market right now if you want something, too many dollars chasing stuff. Over time this won’t be an issue. It is a very clean car for 100K+ miles. This car was not thrashed, you can tell be the interior condition and the rubbers that it has been stored inside much of its life. These are things I look for as I like to drive my cars, so miles aren’t an issue and I feel its harder to replace all the soft appearance pieces than address mechanics.

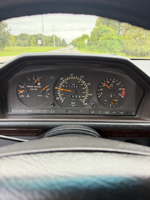
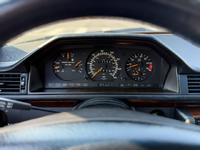
I know you all created a pretty long punch list which will be helpful in addressing things, but I plan to drive it a little and see what pops up and what bugs me before tearing into anything. Initially I’d say the cluster needs to be cleaned up and I think the clock is not working. It has some flashing console button lights when the lights aren’t on which seems to be a common issue to address. I has a little thump in the rear over sharp bumps, I cleared the trunk of all parts and it remained, so there must be some aging rubber part/parts back there that need sorting. And while its very clean, its not really clean and this is where the dry ice will really come in. I plan to do a full underbody cleaning so we can assess all the hard parts. Someone mentioned wheel wells so will check into those and get the wheels off. The last piece is all the nooks and crannies with 30 years of gunk, rubber parts, plastics, door jambs etc. Dry ice will clean and revitalize all the little plastic and rubber parts to really freshen and brighten this car up.

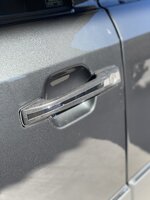
Should be a fun ride and appreciate all the info I’m sure I’ll get or already find here. Also attached some pics for posterity! :).
 

Attachments

  • E314701A-253D-4507-8DD5-78CB0801C0E2.jpeg
    E314701A-253D-4507-8DD5-78CB0801C0E2.jpeg
    2.7 MB · Views: 22
  • 2745BD68-A7EE-4175-8A30-FE46F34F7893.jpeg
    2745BD68-A7EE-4175-8A30-FE46F34F7893.jpeg
    2.9 MB · Views: 19
  • 06590AB1-5141-49C9-87D8-FB52AC9605FE.jpeg
    06590AB1-5141-49C9-87D8-FB52AC9605FE.jpeg
    2 MB · Views: 19
  • 7065EFDE-43A4-4CED-902E-FCC2C54CB5C7.jpeg
    7065EFDE-43A4-4CED-902E-FCC2C54CB5C7.jpeg
    2.6 MB · Views: 19
  • 9144A231-A96A-4132-B24C-A747095369A3.jpeg
    9144A231-A96A-4132-B24C-A747095369A3.jpeg
    2 MB · Views: 21
  • E0618344-2DCA-437C-A3C4-54FAB1F1D510.jpeg
    E0618344-2DCA-437C-A3C4-54FAB1F1D510.jpeg
    2.4 MB · Views: 21
  • 55C749AC-1033-47AB-9DF7-F2226038FD37.jpeg
    55C749AC-1033-47AB-9DF7-F2226038FD37.jpeg
    1.9 MB · Views: 20
  • 7F7EAAF3-4849-475B-ABB2-5E5D9094CA4B.jpeg
    7F7EAAF3-4849-475B-ABB2-5E5D9094CA4B.jpeg
    2.1 MB · Views: 20
  • 5889F203-C1B6-4A83-A59D-7681B9674765.jpeg
    5889F203-C1B6-4A83-A59D-7681B9674765.jpeg
    3 MB · Views: 23
Welcome! Please take copious before / after shots of the dry ice treatment! FWIW I would love to have this done as well, but do not know where to go in NorCal.

Also congratulations on leaving tech. It is a liberating feeling. 🍻
 
Welcome! Please take copious before / after shots of the dry ice treatment! FWIW I would love to have this done as well, but do not know where to go in NorCal.

Also congratulations on leaving tech. It is a liberating feeling. 🍻
Don’t worry, there will be full video, I put it all out on YouTube. I belong to a national dry ice community and we have a member in norcal who is working to get open so will be there soon. Thx.
 
Enjoy @Matt-R20. I chased a rear clunk for years, and along the way it ended up being literally everything. Hydro legs and strut mounts were about 50%, the RENNTech subframe / heim joints were about 40%, and by then old tires were the remaining 10%. In retrospect, maybe I could have done all of those at once like @Jlaa is planning to do now. But hey, the journey was what I was after with this car and a journey is what was had.

Cheers,

maw
 
I'm surprised that Dean didn't catch this in his mechanical preparation of the car for sale.

Generally, the rear-end clunk over speed bumps, particularly if on the passenger side, is most often the bottom joint of the rear hydro-struts. This is a DIY job to replace, and is a good time also to replace the cheap rubber bushings at the top end of the struts, where they mount to the body, as they will be compressed and hardened.

To have this done it will probably be around $1,500-1,800 for parts and labor at a dealership or knowledgeable shop (each rear SLS strut list prices at $540; available online via MB discount dealers for $375-425 each). Plus you have other parts such as new SLS fluid, copper washers, and the rubber bushings (if you want to do the job completely).

DIY for this job is here -- count on $800 for parts and probably 3-4 hours labor (the second one goes much faster):

 
@Matt-R20 , turn up the volume on the video below. If the noise on your car sounds similar, it could be the SLS shocks as Gerry described above. Definitely want to replace the pair along with new upper bushing kit. If there's no record of the nitrogen spheres being replaced, I'd change them at the same time (preventive maintenance), it's an incremental expense while the SLS system is open. Also check the subframe bushings, the rear (larger) ones in particular will collapse over time (but don't cause bumps in the night).

 
Thanks fellas the description in Gerry's link sounds like what I'm hearing as it takes a sharp bump to get the noise. I will say I think I may have an SLS leak as I have a few drips off the engine cover up front. I know its not motor oil and thought it might be PS fluid, but its very light. My guess now is may I have a leaking hydraulic line. Will get the car on the lift and check it out.
 
As mentioned in the other thread the SLS system doesn't leak much, at least from the pump and lines. It's more likely a power steering fluid leak. This is easy to monitor via the PS reservoir fluid level.

More detail on the "short hose" is here:

 
Thanks fellas the description in Gerry's link sounds like what I'm hearing as it takes a sharp bump to get the noise. I will say I think I may have an SLS leak as I have a few drips off the engine cover up front. I know its not motor oil and thought it might be PS fluid, but its very light. My guess now is may I have a leaking hydraulic line. Will get the car on the lift and check it out.
Front right of the car, fore and inside of the passenger front wheel, yes that's probably a hydraulic line leak. Separate from the high pressure steering leak, which I've never seen make the ground. My car has seen both repaired. The high pressure steering hose was just wet and was the only thing I noted pre-purchase. Gummed up with road dirt and grime, it didn't leak to the floor. The hydraulic leak came later, and left the clear oily fluid on the garage floor. The hose coming off the reservoir in the engine bay, IIRC. Makes sense as these bays run "warm" shall we say. GL

maw

PS... in hindsight, I wonder if needing new rear hydrolegs and possibly dampers resulted in that leak at the reservoir vs simply a failing hose. Mine had the fluid leak before the hydrolegs and fluid flush were done (Q3 2017). My car's spheres had been done but the rear hydrolegs had not. I've come to view this system as very similar to your CL55 where too much shock in one location can cause pressure spikes and harshness that becomes a leak in other locations. So there's a mutually beneficial learning curve between those two cars. Definitely change the spheres / fluids here as you would there, and vice versa.
 
Last edited:
Been driving this lovely beast around for a few weeks, really getting used to the car. I put her up on the lift, pull belly pans and did a look around. hard to tell where the leak is coming from, certainly on the drivers side and likely been there for awhile, not to aggressive, but has really done a number on the rubber cover of the AC line. Also had a smallish drip on the passenger side. So I’m thinking this may be the small hose in the V which is causing it to come down both sides. that or it have an oil leak on the passenger side. Otherwise car looks pretty good.

Started to dry ice clean the rear, car has new control arms so those are fresh, I’m assuming they were trying to solve the clunking and just didn‘t fix the right bushing. Also have a few interior bits to solve, headliner and interior light panel in front of the sunroof, rattles.
 

Attachments

  • DFF7B54A-05E3-4D29-BA45-CD0AE36CACD2.jpeg
    DFF7B54A-05E3-4D29-BA45-CD0AE36CACD2.jpeg
    1.7 MB · Views: 25
  • 1D521362-B79E-4A18-B841-FF55E043234E.jpeg
    1D521362-B79E-4A18-B841-FF55E043234E.jpeg
    1.9 MB · Views: 25
  • 83E6F908-6672-479A-B183-924E08E25F4A.jpeg
    83E6F908-6672-479A-B183-924E08E25F4A.jpeg
    2.2 MB · Views: 24
  • 4CFE1D30-D23F-444F-9270-8752A7F56C8B.jpeg
    4CFE1D30-D23F-444F-9270-8752A7F56C8B.jpeg
    2 MB · Views: 24
  • 050FCCB6-0480-49ED-8641-8A606609DED7.jpeg
    050FCCB6-0480-49ED-8641-8A606609DED7.jpeg
    1.7 MB · Views: 24
  • 3DED2FE0-AA28-4A7C-B02A-B97B8BB88738.jpeg
    3DED2FE0-AA28-4A7C-B02A-B97B8BB88738.jpeg
    1.9 MB · Views: 24
Driver side leak is likely from SLS or PS, but could be engine oil. Passenger side may be harder to pinpoint. Need to clean off all residues and see where it's coming from.

There should be a plastic cover below the rear control arms, btw... if missing, they are cheap to replace with new. Two special screws required for each (also inexpensive).

:jono:
 
@Matt-R20, +1 on Driver’s side leak. All M119s seem to leak from the SLS/PS Pump. It’s on my to-do list to replace the little 6” hose from the reservoir to the pump. a real PITA.

On the passenger side at the rear of the oil pan the the oil lever sensor will leak due to hardened O-Ring. It will leak down the wires going from the passenger side across the back of the oil pan over to the driver’s side. To fix requires the oil pan to come off. Also you need “baby hands” to remove the clip on the exterior side of the sensor. Another PITA:jono:
 
The interior overhead light is held in with two stationary molded plastic "fingers" on the driver's side and two spring clips on the passenger side that get bent from improper removal. Pull down the passenger side first, remove the light, and bend the spring clips back where they will hold the assembly in correctly.
 
Driver side leak is likely from SLS or PS, but could be engine oil. Passenger side may be harder to pinpoint. Need to clean off all residues and see where it's coming from.

There should be a plastic cover below the rear control arms, btw... if missing, they are cheap to replace with new. Two special screws required for each (also inexpensive).

:jono:
Thanks, rear covers are off for dry ice cleaning
 
The interior overhead light is held in with two stationary molded plastic "fingers" on the driver's side and two spring clips on the passenger side that get bent from improper removal. Pull down the passenger side first, remove the light, and bend the spring clips back where they will hold the assembly in correctly.
Thanks for the message on which side to start from, was going to search that up! Figured it should be a reasonable fix.
 
It's been almost 2 years since purchasing my first Mercedes and what a journey. I've been lax in posting as we sold off a few cars, sold the house, hopped in the RV and relocated to Florida. What an adventure! But lucky for me, I've gotten to know Pierre Hedary who has really been fun to work this car with. Quite honestly, I was really ready to sell it, it was sort of unreliable, never really drove well and has simply been sort of a hodge podge. But having someone with the knowledge and capability to get to the bottom of the issues with the car has been a blessing.

I think for those interested in the 500e journey, I thought I'd share what the last 2 years has taken to get a 100K mile 500e working to a proper level. First of all, I wanted a higher mile car so I can drive it without concern. This car fit the bill as all the pieces that wear from exposure were really well preserved, the interior, the rubber pieces, and the underbody has zero rust. Basically the car is all there and it really just needed to be sorted. My logic is to focus on the mechanicals first and then move on to the cosmetics. At this point I'm just about done mechanically and sort of at a crossroads one what to do with the cosmetics.

I know I did over pay for this one, with this mileage, bought at peak market, but that is sunk cost. To get to this point, we are at $18K in various deferred maintenance, age related failures and just getting the car running the way it should. Thus far, I'm at about $80K all in on this car. $57K purchase price, 5K sales tax, and $18K repairs.

I started the sorting journey in SoCal and utilized my local independent MB shop. They did the following work:

  • Replaced the PS pump and a few lines
  • Rear Shocks and Spheres
  • Blower Motor and Resister
  • Belt and Tensioner
The car never idled well, and basically was very sluggish. I was attributing it to the 2nd gear start and just being a heavy old car, but the reality was the car was actually not running well. Good news is Pierre really went through the car after we came to Florida and we really got into it.

  • Replaced the non MB tensioner with OE part
  • Tune up, plugs / cap / rotors
  • Idler arms
  • Grease and adjust front wheel bearings
  • Repair Transmission leak, service and replace rings Reaction valve, shift selector, 1-2 band
  • Replace ignition coils
  • Adjust transmission trigger cable
  • Recharge AC
I asked Pierre to drive the car and he put a couple hundred miles on it and really tuned it to drive properly. There is one thing to replace parts and another to actually adjust everything so it works the way it was intended. Unfortunately in digging in to an oil leak we found the that timing chain guides had started to come apart so we had a pretty major investment to replace those and fix the leaking oil.
  • Replace oil filter housing gasket, oil pan gasket and oil pan
  • Replace broken timing chain guides
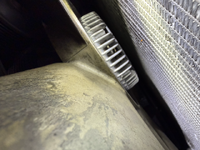
The last bit was being in Florida the car ran a little on the warm side. Again Pierre was not happy with this. We replaced the fluid in the fan clutch to stiffen it up, but the car still would push well past 100C. The strange thing was it would warm on the highway. With 80mph, 3K RPM in hot Florida summer air it needed the Aux fans running to bring the temp down. The solution was to fit a V12 fan clutch. Now the car runs very consistently below 90C in the heat. Makes a bit more fan noise than I like, but the temp situation is solved.

The last issue I'm working through is the LM LH Module is failing and it has clunking fuel lines at idle. It also has always had a lumping cold idle which my guess has always been the LM LH Module. So we'll get that fixed thanks to the help of y'all on this board.

All in all the car is finally running great and best of all reliable. Last month I took it on a 2,000 mile round trip to Louisiana from Central Florida and the car ran well. As you all know, these peak engineering Mercedes cars just love to eat up highway roads and they really make the trip enjoyable. I've put about 8K miles on the car and it's now sitting at 115K miles.

I'll write up another post about the punch list and what I've corrected there.

IMG_0652.pngIMG_0050.pngIMG_1420.png
 
Last edited by a moderator:
Thanks for the update & details, Matt! Great to hear the car is all sorted out now. With the repaired LH module that should take care of the last item, hopefully for a long time.

Any chance you could post a photo of the "V12" fan clutch installed? I'm not familiar with this modification. I didn't think the M120 V12 clutch would fit!

:apl:
 
Thanks for the update & details, Matt! Great to hear the car is all sorted out now. With the repaired LH module that should take care of the last item, hopefully for a long time.

Any chance you could post a photo of the "V12" fan clutch installed? I'm not familiar with this modification. I didn't think the M120 V12 clutch would fit!

:apl:
Hard to get great photos, but here you go:
IMG_1686.pngIMG_1687.pngIMG_1689.png
 
@Matt-R20, do you remember what P/N that was and if any other modifications were needed to make it fit or if it was "plug and play"?

Great job being tenacious with the car and seeing through all these fixes. I think poorly running cars are a key reason why some people sell them on after a less than two years.
 
@Matt-R20, do you remember what P/N that was and if any other modifications were needed to make it fit or if it was "plug and play"?

Great job being tenacious with the car and seeing through all these fixes. I think poorly running cars are a key reason why some people sell them on after a less than two years.
Thanks Tim! There is no part number as it was a used part. @gsxr is correct that it's an M120 clutch and its plug and play, just bolts in. I believe the nose or the front of the clutch is larger. Said differently it protrudes out the front closer to the radiator, but don't hold me to that.
 
Hard to get great photos, but here you go:
Those photos are perfect. Thanks! That does indeed look like an OE Sachs/Horton M120 clutch.

@TimL - part number for the clutch is 120-200-01-22 and it appears to still be available new, currently $705 MSRP, $475 at Laredo (link). [Edit: As of early 2025, price has increased to $1100 list / $750 discount.]

@jhodg5ck - have you tried the M120 clutch on the 034/036? Seems like this could be an ideal solution if the engagement temp is correct, which I bet it is. I'll have to dig into the M120 "Introduction" manuals and see if there's any FSM data. [Edit: Could not find a single bit of useful info in the Intro nor TDM manuals.]

:jono: :5150:
 
Last edited:
Those photos are perfect. Thanks! That does indeed look like an OE Sachs/Horton M120 clutch.

@TimL - part number for the clutch is 120-200-01-22 and it appears to still be available new, currently $705 MSRP, $475 at Laredo (link).

@jhodg5ck - have you tried the M120 clutch on the 034/036? Seems like this could be an ideal solution if the engagement temp is correct, which I bet it is. I'll have to dig into the M120 "Introduction" manuals and see if there's any FSM data.

:jono: :5150:
Its definitely OE. Just be aware its way more aggressive so you do get some low speed roar which isn’t ideal, but better than a warm car.
 
I wanted to address where I'm at on the punchlist. @cascade does a nice job of breaking down cars for sale so I figure it's relevant to address the punch list directly. I am not quite in a full cosmetic phase, but I did address some items. Also, some of the notes are not quite accurate when you see the car in person. Here's the list:

Official Grade: 7.5 / 10
  1. Odd serrations on right edge of airbag panel in dashboard
    1. These appear to be where the spot welds are on the Dash Structure, I'm guessing this will eventually show on every car.
    2. IMG_1696.png
  2. Light/modest fading of horizontal center console wood
    1. There's no fading (in fact, there is no fading anywhere I can see) but there is a slight crack in the shifter panel
    2. IMG_1698.png
  3. Light/modest fading of roll-top box wood between front seats
    1. I think the light was playing a trick, no fade but there is a severe delamination.
    2. IMG_1699.png
  4. Light fading of vertical dashboard wood
    1. Again, no fading present, but likely the wood needs to be refinished to be perfect and correct the issues above.
    2. IMG_1697.png
  5. Moderate (6.5/10) case of instrument cluster dreaded-dot disease (DDD)
    1. Agreed,I plan to disassemble this to fix it. I have tried the dry ice machine on a donor part and I think we can clean the dots and also remove the oxidation layer of the rubber coating to make black again. Its pretty delicate, so I need to practice a bit to see if it will work before I tear into my cluster.
  6. Headliner sagging in rear; requires replacement
    1. Fixed
  7. Driver’s side door map-pocket beginning to peel; requires re-adhesion
    1. Its not loose and looks like it has already been repaired, but just not very well, lumpy on the wrap.
  8. Appears to be a ding or blemish in the tint in the middle of rear windscreen
    1. All the tint is old, purple and needs to be removed.
  9. 500E trunk logo angled slightly up and to the right — requires re-adhesion
    1. Fixed
    2. IMG_1544.png
  10. Modest scratch (as indicated by seller) on driver’s side rear corner under taillight lens
  11. Door cladding gray color is mis-matched as compared to forward cladding behind front wheels, rear bumper and front spoiler
    1. The cladding has been painted / repainted but not all together, so this needs addressing.
  12. Front license plate mounting frame is oddly mis-aligned with bumper rub strip; requires proper fitment
    1. Fixed the filler panel was not installed correctly
  13. Front suspension dust boots mis-installed
  14. Typical rock/dirt dents in paint in lower cladding ahead of rear wheels
  15. Typical rock/dirt dings in paint in under-headlight panels
  16. Typical rock/dirt dings in paint on leading edges of front fenders
  17. Significant dent in under-headlight panel on driver’s side
  18. Appears to be a modest scratch in paint under trunk license plate panel, to right of trunk release button
  19. Gap between grill and top of front bumper appears to be slightly off; requires re-alignment
  20. Dirt/detritus in bottom of fuel filler compartment; requires cleaning and blowing out
    1. Clean
  21. Scratch on passenger side door mirror
  22. Rubber door mirror boots dirty/smudged; require significant cleaning
    1. These are basically new, they just needed some bleech white tire cleaner to remove the rubber oxidation
  23. SLS tank old and yellowed; sticker is browned; both require replacement/refreshing
    1. This one is a little nit picky. The tank is not brittle in anyway. I saw some of the group buys on these, would probably tackle it with the next one.
  24. Car’s air intake tubes have been replaced with later-model (“facelift”) air intake tubes
    1. There's no record of why, but the airbox and tubes were replaced. There is a record of all the snaps and clips being replaced, so my assumption is the used on didn't have the correct pieces. These all look in nice good clean condition.
  25. Car’s airbox lettering and MB circular star are all black, indicating that airbox has been replaced with one from a later year model
    1. see above
  26. Car’s hood-pad has been replaced with a “pedestrian” W124 hood-pad with foil square; not correct for this motorcar
    1. Corrected
  27. Car is missing foam piece mounted on center inside of hood
  28. Car’s trunk-lip stickers are peeling and should be replaced
    1. corrected
    2. IMG_1547.png
  29. Rusty curb-scrapes on edge of spare tire compartment in rear of car
    1. All the wheels need refinishing and I have a new spare tire to match the recent Continentals installed before I bought the car.
  30. Plastic rear lower-control-arm covers are weirdly discolored; require replacement
    1. This is incorrect, the covers had cosmoline on them so they were just yellowy. I have dry ice cleaned the entire underbody and this car is in fantastic condition, no corrosion anywhere as this was a Texas car most of its life. Here's a link of a funny little video of them getting cleaned. Lower Control Arm Dry Ice
    2. IMG_5468.png9F95D874-1072-4EEB-BBD9-00D972CBA103.png
  31. Rear sway bar appears to be oddly discolored
    1. Again, Cosmoline
  32. Car’s inside wheel wells appear to be painted (glossy appearance)
    1. The wheel wells are completely clean. Someone has done the correct thing and used a little wax / polish to make them look good.
My plan is to address the paint / blemishes as one project, assuming I want to make that investment.

Another item to put on the list is the car is in need a new windshield as the wiper ran across it without rubber at some point in its history. There are other small things like needing new floor mats and some other enhancements. I'd like to add a fixed iPhone mount and somehow tie into the CD changer inputs to allow streaming of music. to make the car a little easier to live with.
 
I addressed the mold in my gauge cluster over the last few weeks.

IMG_0828.png

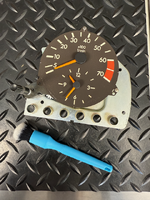
I pulled the assembly apart to get to the bezel. I was a little too inpatient trying to heat the glue on the clear plastic cover and thus broke mine, so I purchased a used version on eBay. Simple swap from there. I do want to point out that if you have marring on the black surround a little trick that worked well is to use a magic eraser and bleach white (white wall rubber cleaner) to pull out the marks and clean the rubber surface. Unfortunately, the brown tint is still there, the cleaner won't pull out all the brown, but the surface is very consistent afterward which is a major improvement. I also tried bleach white on the old cluster and it improved it, but did not totally remove the dots. I have sprayed a little dry ice on a different cluster with pretty good success, so once I have some ice back in the shop, I'll try to clean up the broken version. My concern is the dry ice, may just pull the rubber coating off altogether.

Attaching a few pics with the results.

IMG_1835.png

You can see how dirty the magic eraser gets from cleaning the rubber coated surface.

IMG_1807.pngIMG_1808.png

Here's the mark that was removed

IMG_1801.png

I also find that these nice detailing brushes work really well to remove lint and contaminants on the faces when reassembling.

IMG_1771.png
 
I addressed the mold in my gauge cluster over the last few weeks.

View attachment 203989

I pulled the assembly apart to get to the bezel. I was a little too inpatient trying to heat the glue on the clear plastic cover and thus broke mine, so I purchased a used version on eBay. Simple swap from there. I do want to point out that if you have marring on the black surround a little trick that worked well is to use a magic eraser and bleach white (white wall rubber cleaner) to pull out the marks and clean the rubber surface. Unfortunately, the brown tint is still there, the cleaner won't pull out all the brown, but the surface is very consistent afterward which is a major improvement. I also tried bleach white on the old cluster and it improved it, but did not totally remove the dots. I have sprayed a little dry ice on a different cluster with pretty good success, so once I have some ice back in the shop, I'll try to clean up the broken version. My concern is the dry ice, may just pull the rubber coating off altogether.

Attaching a few pics with the results.

View attachment 203984

You can see how dirty the magic eraser gets from cleaning the rubber coated surface.

View attachment 203985View attachment 203986

Here's the mark that was removed

View attachment 203988

I also find that these nice detailing brushes work really well to remove lint and contaminants on the faces when reassembling.

View attachment 203987
Well done!
 
Looks gooid!

I think your best bet is to remove the brown rubberized coating, and repaint the housing with black matte paint. Somewhere there is a HOW-TO and perhaps a few threads about solving DDD.

I know that MMWA on YouTube (he's an Australian W124 guru) also has a pretty good video up about taking care of DDD.

Another issue is that the faces of the gauges can get browned/color-changed with age and sun. Ordering new gauge faces really sharpens things up, particularly when done in conjunction with a cluster DDD removal.
 
I think your best bet is to remove the brown rubberized coating, and repaint the housing with black matte paint. Somewhere there is a HOW-TO and perhaps a few threads about solving DDD.

I know that MMWA on YouTube (he's an Australian W124 guru) also has a pretty good video up about taking care of DDD.
Yeah, I saw that option, was just trying to keep the OG coating. Rubber basically oxidizes and turns brown, so was hoping there was a way to resurface it.
 
Nice work! I have some spare housings but I plan to recondition my bad ones eventually. Can you elaborate on how you heated the housing to remove the clear plastic? Did you use a heat gun? I'm sure the possibility exists to melt things.
 
Nice work! I have some spare housings but I plan to recondition my bad ones eventually. Can you elaborate on how you heated the housing to remove the clear plastic? Did you use a heat gun? I'm sure the possibility exists to melt things.
I used a heat gun and then broke mine! Replaced with a used surround. I was just impatient and didn't get the glue melted enough. There's a few videos on YT showing the process.
 
Continuing to update the punch list on this car.

I did document the engine bay dry ice clean, plug wire and rough idle diagnosis and solution here.

As one of the members pointed out the air box cover was not correct as it did not have the silver Mercedes emblem and I do have receipts that the PO replaced it for some reason. I purchased a lightly used version with a silver emblem but not lettering to make it better and added a couple missing clips so it's all tidy and nice. Also replaced the yellow warning label on the drivers side valve cover. Here's a few pics to show the current condition. I think I finally have this car dialed in mechanically, so everything left to address is purely cosmetic.

IMG_2525.JPG

IMG_2517.JPG


IMG_2518 (1).pngIMG_2522.png
 
Last edited:
Just clicked over 118K miles, replaced the Windshield due to a rock smash. Now down to cosmetics and how much more I want to invest. Wheels need refinishing and hood / body cladding need a refresh to make this a 9/10 car for its age and miles.

IMG_3739.JPG
 
May 2026 and the car just ticked over 120K miles. Still running like a champ. In the past few weeks I have spent some time sorting through some interior bits.

1. Added a Rennline phone mount, nice and simple with good visibility.
2. Conditioned all the leather, everything looks fresh and clean.
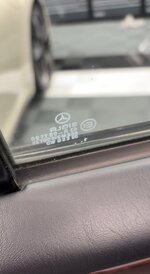
3. Removed the faded and scratched window tint.

In the tint removal process I found a great chemical to get the glue off the windows. Often when you buy a chemical for a specific purpose it never lives up the the hype, but this one did. Definitely exceeded my expectations. ATR adhesive remover was designed to remove window glue. I protected the top of the door cards, but did get some on there and had no adverse effects. Glue comes right off.

My technique is the following
  1. Remove Tint film, luckily all sheet came straight off, not much tearing.
  2. cover are below where the glue is to be removed to minimize chemical overspray and glue residue.
  3. Spray ATR adhesive remover liberally. This chemical needs to stay wet to work. Let it dwell a few minutes.
  4. Use a rubber film squeegee to remove the bulk of the tint glue.
  5. Respray ATR on the windows and scrub with 0000 steel wool to get all fine particles off.
  6. Wipe clean with a microfiber towel.
  7. Clean windows with Bilt Hamber Trace-Less which is a fantastic glass cleaner.
This process was really quite effective, I was able to get all the glue off. You do have to move the side windows down a bit to get the glue where the window goes into the frame. The other nice bit about this chemical is the glue remnants that are left dry up and are not really sticky so they can be brushed away. Makes the final detail a lot easier.

I’m still undecided if I will apply new tint or not.
 

Attachments

  • IMG_0181.jpeg
    IMG_0181.jpeg
    146 KB · Views: 3
  • IMG_0180.jpeg
    IMG_0180.jpeg
    84.5 KB · Views: 4
  • IMG_0182.jpeg
    IMG_0182.jpeg
    258.6 KB · Views: 4
  • IMG_0183.jpeg
    IMG_0183.jpeg
    448.1 KB · Views: 3
  • IMG_0184.jpeg
    IMG_0184.jpeg
    113.2 KB · Views: 3
  • IMG_0185.jpeg
    IMG_0185.jpeg
    177.5 KB · Views: 3

Who has watched this thread (Total: 2) View details

Similar threads

Back
Top