Thx Stefan! Yeah I fully get you and I am not a fan of newer cars either. But why then such a move - let me try to explain it but might be a long one:
So, generally I learned in 2022 what is the difference of a sporty car i.e. a AMG Derivate and what is a sports car. Even in its lowest power configuration it was world's better than the by that time actual AMG GT.
During the said event in 2022 on a Spanish mountain road, at an AMG! event was a comparison drive between different amg and competitor models. All 500+ hp except a basic Carrera 384hp (3L twin turbo, PDK) convertible. This seemingly "underpowered" car was by far the most joyous experience of all.
1. the accuracy (despite being a entry level and convertible, of brakes, steering and suspension.
2. the power could be used all the time where others constantly battled with the traction control.
3. general cabin quality impression with much more leather options and no rattling nosies as common on the amg gt for example.
Then in 2023 I drove the first time the current gt3 and was blown away by how immediate everything reacts and feels on this car. Double wishbone front end was also on my SL65 BS but it is miles away from the feel you get in these Porsche GT cars.
Then there is the matter that the manual transmission shift is beautiful with a still naturally aspirated engine that sounds amazing at every revolution. Chris Harris described it as a musical instrument.
Then the digital, new age stuff. I am quite fine with it as all important controls are still performed by real switches and the style is for a modern car simplistic, or almost to say outdated compared to all other recent stuff.
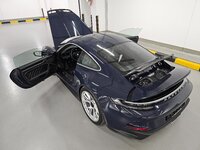
The interior/exterior design, inside with the "simple" electronics, the dashboard remained very slim, not such a heavy clumsy thing like in most modern cars, also I sit with my 1.9m perfectly "inside" the drivers space with perfect geometry between seat position, steering wheel position and pedals. Also I really like the exterior with it's simple yet sophisticated and understated shapes.
Then the limited, special edition factor on top with all it's change from the standard GT3 Touring...
Price, yeah price is outrageous. But considering the purchase price and sale price of my evo2 and the added amount - we speak about an actual total spend for this car of 50k € (excluding annual service cost for the evo). An amazing deal with something of a similar spirit of the evo2, with its high revving, manual setup less the homologationspecial aura but also limited availability. For about the same money of an S/T you can buy a limited edition McLaren 675LT, Ferrari Sf90 or way less a 296, but these cars - all highly depreciated for various or obvious reasons. These aren't it for me, too much show off, too digital, automatic or just too powerful. Besides the SL65 BS which was a brute weapon, I drive quite a number of high powered EV's and that stuff is just too much, not to say outright dangerous in unskilled hands and simply to fast to enjoy on country roads.
That brings me back to the experienc in Spain, where a lower powered car can be more fun and engagement to drive, especially with a rewarding drive train which YOU have to work.
So، OK a bit of a long post..simply said the GT3 Touring or the pinnacle S/T as in my case, is the only modern enthusiast car I would ever buy, or better said, I have bought because of all it's described attributes.
As an old modder, I replaced the monochrome tail light bar today with a red one, wired in a magnetic trickle charger plug in the front bumper and some small other touches. Check out the badge on the charger...


 . work will continue tomorrow.


 the 90s are the best


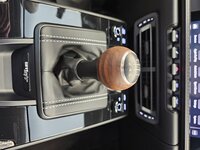
") Porsche looks greaaaaat ,and im Loving the wooden gearknob. Really fine detail
Porsche looks greaaaaat ,and im Loving the wooden gearknob. Really fine detail