• Hi Guest !

    Welcome to the 500Eboard forum.

    Since its founding in late 2008, 500Eboard has become the leading resource on the Internet for all things related to the Mercedes-Benz 500E and E500. In recent years, we have also expanded to include the 400E and E420 models, which are directly related to the 500E/E500.

    We invite you to browse and take advantage of the information and resources here on the site. If you find helpful information, please register for full membership, and you'll find even more resources available. Feel free to ask questions, and make liberal use of the "Search" function to find answers.

    We hope you will become an active contributor to the community!

    Sincerely,
    500Eboard Management

OWNER TimL

I just bought a cat back stock tips unit. My stock system has holes in the inlet pipes/resonater and it cannot hold the patches. My intent was to get the init modified further with a resonator. I do not wish to hear the exhaust - my SEC is loud enough.
 
Tim, any details on where exactly the transmission is leaking from? I'm disappointed in MB as well - that's crazy.

Rotors, yeah, one side went NLA which makes no sense. The brakes will be fine though, at least for non-Autobahn use. ;)
@gsxr , according to Steve the transmission is leaking where the rear cover meets the main case. Since this one was installed he attempted to fix it twice (major bills each time which were footed by MB) but to no avail. So now a third remanufactured transmission will be installed. Hoping there are no leaks and no flaring 🫣

Unfortunately the car will have to come back from the dealership to return in January when they have time to tackle the now increased scope. That also gives me some more time to find a used brake heat shield
 
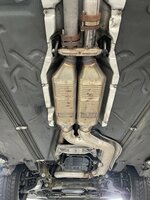
The exhaust front section from Germany finally arrived and it seems to have survived the transport unscathed 🎉 Was really worried about that one

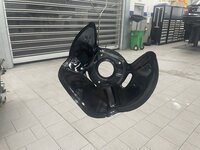
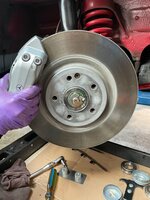
Regarding the 320mm front brakes, I had to buy a whole used knuckle/spindle to get that left hand side front dust shield (129-420-18-44). Will have to sand the shield down and repaint it, as it is pretty ugly. Slim pickings out there when it comes to that PN.

I should now have all the parts needed for the front brake conversion, exhaust front section swap, E&S switch install and tranny replacement. We’ll see how it goes.
 

Attachments

  • IMG_2707.jpeg
    IMG_2707.jpeg
    61.8 KB · Views: 21
  • IMG_2731.jpeg
    IMG_2731.jpeg
    1.9 MB · Views: 21
  • IMG_2730.jpeg
    IMG_2730.jpeg
    1.9 MB · Views: 21
Tim, while both shields are off the car (300mm and 320mm), could you measure the diameter of both? I think I have data on the 320 shield but not the 300 shield. I had guessed it was ~10mm smaller but I wasn't sure.

:apl:
 
If the 300mm shields are no.s 129 420 21 44 & 129 420 22 44 i have them. The overall diameter is 340mm.. 330mm.

Difficult to measure. By this I mean I was lazy and grabbed a short scale. I have new ones in hand. Using a more accurate method I find they are actually 330mm.
 
Last edited:
If the 300mm shields are no.s 129 420 21 44 & 129 420 22 44 i have them. The overall diameter is 340mm..
Hmmm... I need to re-measure. The 300mm shields are the numbers you posted above, but I was expecting the diameter to be roughly 315-320mm diameter.

My notes had the 320mm shields (#18 and #19) as ~330mm diameter.

And, the smaller shields for 15" wheels and 294-295mm calipers (400E/E420) measured ~305mm.

:scratchchin:
 
The exhaust front section from Germany finally arrived and it seems to have survived the transport unscathed 🎉 Was really worried about that one

Regarding the 320mm front brakes, I had to buy a whole used knuckle/spindle to get that left hand side front dust shield (129-420-18-44). Will have to sand the shield down and repaint it, as it is pretty ugly. Slim pickings out there when it comes to that PN.

I should now have all the parts needed for the front brake conversion, exhaust front section swap, E&S switch install and tranny replacement. We’ll see how it goes.
Car went to MB Lynwood this morning as they now have some availability again to tackle the scope and as all the parts have now arrived, including the remanufactured transmission that an East Coast MB dealer had in stock. Front wheel bearings and caps and rotors will also be done during this shop visit
 
About 3 years ago I damaged the silver coating on one of the NOS lenses in my parts stash and while I don't need them, it's been bugging me to know that I got this damaged part lying around. So I sent it off to @simeon40 to repair. He separated the glass from the frame, re-silvered it and put it back together. It seems that everything has gone well, so this is very likely a great source for others to fix worn lens frames. I will post an update with photos of the finished part once I have the lens back.

1704480410883.png
1704480665376.png
1704480696679.png
 
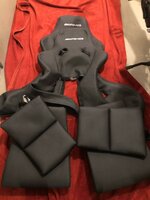
During the Christmas break I bought leather side bolster covers replacement pieces for the driver seat from Uli Baldeweg. Just received one of the pieces and am really happy with the quality of his work. He told me though that he is done with making Sportline covers replacement pieces (similar to @5thscaleracer being done with making his Fliessen exhausts). Just checked out Uli's website and it seems that he still has a complete set of grey Limited leather available. Sportline covers replacement pieces are now all gone it seems 🙁

To all you limited owners out there, this might be the last chance to buy a very high quality product.
 

Attachments

  • IMG_2793.jpeg
    IMG_2793.jpeg
    3 MB · Views: 26
  • IMG_2792.jpeg
    IMG_2792.jpeg
    3.3 MB · Views: 25
  • IMG_2791.jpeg
    IMG_2791.jpeg
    3 MB · Views: 25
Last edited:
Oh nuts. I had forgotten about the bolster covers... when I heard about these years ago, I wanted to get a couple of sets, but I don't think I ever located a source? This post reminded me again. D'oh! I wonder if anyone else would make covers, or if there is any demand nowadays.

Tim, how do those covers attach? I thought there were straps of some sort?

:runexe:
 
Tim, how do those covers attach? I thought there were straps of some sort?
This is Uli's website:
www.e500limited-leder.de

The bolster pieces, as well as the limited center pieces need to be sewn in with the existing pieces. To make that a bit easier, he seems to oversizes the width of the leather pieces a bit. In either case, you'd need to go to a real good upholsterer to get those sewn in.
AH! Those are replacement pieces, not external covers.

Many moons ago, someone had made strap-on covers for the driver outer bolsters, to protect new/good leather underneath. Those are different than what Uli was making.

:rugby:
 
One thing I have done on the 126 is to move the seat all the way back and make that position memory 2. Then when I start the car I press memory 1 and I get to my desired drive position, thus saving the bolster from my arse. So one button on exit and one for entry. Same as the e450 cab, wife has her settings I have mine.
 
Last edited:
Some progress on the car. The remanufactured MB gearbox is now installed, the Fliessen exhaust front section is deinstalled and the used left hand dust brake shield for the 320mm brake setup has been sand blasted and painted. Hoping that things will come together quickly before freezing temperatures hit and they salt the roads, so I can get the car back home to hibernate.
 

Attachments

  • 68F814D8-E98E-413D-8F66-8879B70CD915.jpeg
    68F814D8-E98E-413D-8F66-8879B70CD915.jpeg
    3.1 MB · Views: 26
  • 3BDB218B-E152-459A-985D-F4E8B67AF11E.jpeg
    3BDB218B-E152-459A-985D-F4E8B67AF11E.jpeg
    4.2 MB · Views: 25
  • 116A414E-8546-4747-B935-18616F243CEA.jpeg
    116A414E-8546-4747-B935-18616F243CEA.jpeg
    4 MB · Views: 22
  • DE63E723-076A-4935-992A-D7E50CFFFE8D.jpeg
    DE63E723-076A-4935-992A-D7E50CFFFE8D.jpeg
    4.1 MB · Views: 21
  • 394F9DC5-83D3-4A54-8145-22F9EEE442C5.jpeg
    394F9DC5-83D3-4A54-8145-22F9EEE442C5.jpeg
    1.8 MB · Views: 24
Last edited:
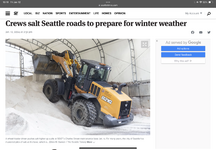
My hope that things would be done before they salt the roads has unfortunately not panned out 😕

1705101119787.png
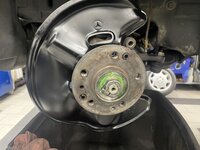
Things are progressing though, with the brake conversion to 320mm done, as well as the wheel bearings and dust shields and the exhaust

1705101455961.jpeg

1705101510224.jpeg

1705101560228.jpeg

1705101611489.jpeg

1705101709185.jpeg

The weather is supposed to stay bad for a bit with no rain to wash the salt off the roads in the forecast, so I will have to get it get it home on a flatbed 🤦🏽‍♂️

Not too thrilled with the exhaust front section, as it cosmetically looks rougher than in the ad from the German seller. I just hope that it’s not plugged up. We’ll see. Driver side dust shield is the used one and it’s also not the prettiest, but it’ll do.

Caps and rotors, as well as the E/S functionality still need to be done, hopefully early next week. This will conclude the list of all the things that I wanted to get done to get the car ready for the engine swap. Now on to the engine tear down at Stern Garage (realistically not before Q1
2025).
 
Just got word from Steve who is trying to dial in the transmission settings that the exhaust isn’t plugged and power levels are where they need to be! Will nevertheless keep the Fließen front section on the shelf as a backup in case anything ever goes wrong down the road
 
Tim, that is great news! (Well, except for the NaCl.) You will REALLY like the 320mm brake upgrade, it's a noticeable difference IMO. Go easy on the brakes until the pads have fully bedded. The cats don't look bad externally, and all the heat shielding is intact and not corroded... you'll quickly forget about the couple of small brown spots.

Now, you can get back to pondering the 6L going into a Brown/Brown Euro-spec car vs the Pearl Black USA car... 1705105306570.gif

:seesaw:
 
Tim, that is great news! (Well, except for the NaCl.) You will REALLY like the 320mm brake upgrade, it's a noticeable difference IMO. Go easy on the brakes until the pads have fully bedded.

:seesaw:
For sure @gsxr, I had bought fancy two-piece Brembo rotors for my Mustang and they came with a bedding in procedure. I’ve been following that every time new brakes go on any of my cars. There is nothing worse than brand new brakes that vibrate and hum just because they glazed over or have flat spots. Thanks for reminding me!

1705109238508.jpeg
 
Last edited:
Exhaust looks about as good as it gets! Overall fantastic.
Thank you Drew. The one that was originally on the car looked way nicer cosmetically, alas the baboons at the muffler shop managed to f$!* that up when I was dumb enough to have them put on a mid muffler delete pipe, the sound of which I absolutely detested. Their yanking and hammering to separate the original setup must have damaged the original cats. My mistake for even trying this. Oh well, live and learn. Just wish I had had a closer look around this board beforehand then I’d have known that separating these pieces comes with a lot of challenges

:doof:

1705109905191.jpeg
 
Last edited:
My car finally came back from the shop yesterday. Turns out the last remanufactured MB gearbox that was installed had a warped case which caused it to leak. The new remanufactured transmission MB Lynnwood just put in shifts very nicely, so I’m kind of hoping that the third time is the charm with these remanufactured MB transmissions. Unfortunately the E/S piece was not installed after all, as a bit more research is needed. I bought a used Euro shifter unit and hopefully that will tell Steve enough about what component goes where. He likened it to having the pieces of a jigsaw puzzle without the box/picture 😄 The car will go back in the shop once that used unit arrives and hopefully that will conclude that undertaking.

The used exhaust front section I bought in Germany is thankfully not plugged, so the car makes full power and has that mellow hum again, that I Iove so much about these cars. The Fließen front section definitely makes the sound much more aggressiv, which is ok, just not my cup of tea for this car.

The 320mm front brake calipers are on now too and although I know that the original caliper finish was black, I really like the look of the plated calipers in front and rear. I still need to do the brake bedding in, but it will be spring before I will do so. The car will just sit in the garage until winter is done.

as it happens it was good timing that the front calipers and dust shields got done, as it turns out that one of the front wheel bearings had too little grease in it and had gotten hot at some point, so it was time for that to go.
 

Attachments

  • IMG_6984.jpeg
    IMG_6984.jpeg
    1.4 MB · Views: 27
  • IMG_6986.jpeg
    IMG_6986.jpeg
    1.9 MB · Views: 27
  • IMG_6987.jpeg
    IMG_6987.jpeg
    1.5 MB · Views: 27
Last edited:
Unfortunately the E/S piece was not installed after all, as a bit more research is needed. I bought a used Euro shifter unit and hopefully that will tell Steve enough about what component goes where. He likened it to having the pieces of a jigsaw puzzle without thw box with the picture 😄 The car will go back in the shop once that used unit arrives and hopefully that will conclude that undertaking.
Tim, did the 3rd transmission have the Bowden / control pressure cable assembly with both vacuum chambers, to support the E/S function? Or, do you have any photos of the passenger side of the new transmission? This is not fun to install with the transmission in the car... hopefully it's the dual-chamber assembly, the rest is relatively simple.

:apl:
Good question, @gsxr, I just know that Steve said he ran all the lines necessary in preparation for an E/S mod when the first remanufactured transmission went in 11 months ago. I dropped off the used Euro shifter today and he’ll let me know when he’s ready to have the car come in again. We’ll see how it goes….

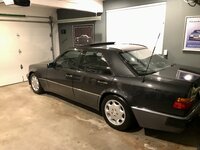
It was nice and dry today after all the torrential rains we’ve been having so I decided to do the bedding-in of the brakes. Think it did the trick. On that drive I also hit 113k miles, making it 26k miles I put on it since I bought it in June 2018.

Hand washed it after today’s drive as the wheels got pretty filthy and now it’s sitting tucked in again with the heat of the engine making the garage the warmest place in the house 😄
 

Attachments

  • IMG_2840.jpeg
    IMG_2840.jpeg
    851.7 KB · Views: 35
  • IMG_2842.jpeg
    IMG_2842.jpeg
    2.5 MB · Views: 36
  • IMG_2850.jpeg
    IMG_2850.jpeg
    1.8 MB · Views: 36
Last edited:
Good question, @gsxr, I just know that Steve said he ran all the lines necessary in preparation for an E/S mod when the first remanufactured transmission went in 11 months ago. I dropped off the used Euro shifter today and he’ll let me know when he’s ready to have the car come in again. We’ll see how it goes….

It was nice and dry today after all the torrential rains we’ve been having so I decided to do the bedding-in of the brakes. Think it did the trick. On that drive I also hit 113k miles, making it 26k miles I put on it since I bought it in June 2018.

Hand washed it after today’s drive as the wheels got pretty filthy and now it’s sitting tucked in again with the heat of the engine making the garage the warmest place in the house 😄
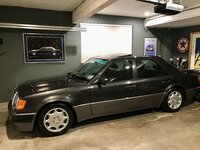
Love how you back into the garage (and have recessed lights in the ceiling.) Backing in is the way to do it!!!!!
 
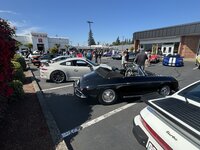
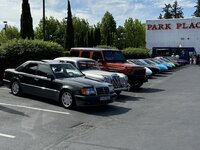
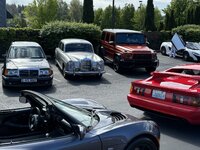
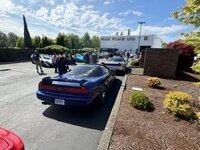
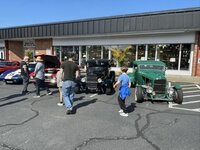
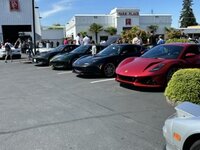
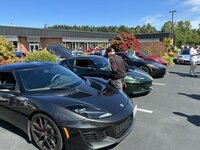
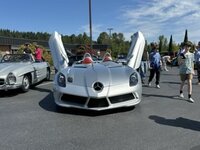
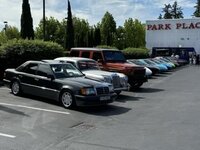
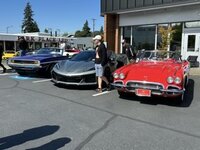
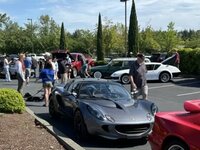
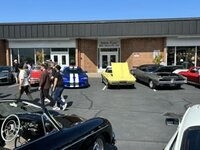
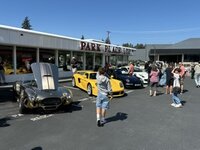
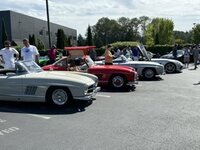
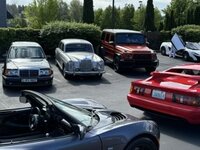
Went to a car show today at Parkplace Motors in Bellevue. To display cars there you had to be invited so they had a very cool selection of cars there. Some stuff super ostentatious but also some really neat stuff. Not many noticed my German taxi in there 🙂

It was nice to see such a small but strong Mercedes showing- didn’t expect that. Never seen a Stirling Moss SLR before and the 300SL all looked like they were brand new

A777fan was there and it was very nice to catch up- his 034 looks sooooo cool with all the sportline stuff he retrofitted! 😍
 

Attachments

  • IMG_7255.jpeg
    IMG_7255.jpeg
    3.2 MB · Views: 23
  • IMG_7265.jpeg
    IMG_7265.jpeg
    2.7 MB · Views: 20
  • IMG_7281.jpeg
    IMG_7281.jpeg
    2.7 MB · Views: 24
  • IMG_7278.jpeg
    IMG_7278.jpeg
    2.3 MB · Views: 23
  • IMG_7247.jpeg
    IMG_7247.jpeg
    1.9 MB · Views: 24
  • IMG_7263.jpeg
    IMG_7263.jpeg
    3.2 MB · Views: 24
  • IMG_7250.jpeg
    IMG_7250.jpeg
    2.4 MB · Views: 20
  • IMG_7347.jpeg
    IMG_7347.jpeg
    47.7 KB · Views: 13
  • IMG_7346.jpeg
    IMG_7346.jpeg
    34.2 KB · Views: 13
  • IMG_7345.jpeg
    IMG_7345.jpeg
    43 KB · Views: 12
  • IMG_7344.jpeg
    IMG_7344.jpeg
    39.9 KB · Views: 11
  • IMG_7343.jpeg
    IMG_7343.jpeg
    41.8 KB · Views: 11
  • IMG_7342.jpeg
    IMG_7342.jpeg
    40.1 KB · Views: 11
  • IMG_7340.jpeg
    IMG_7340.jpeg
    39.5 KB · Views: 12
  • IMG_7341.jpeg
    IMG_7341.jpeg
    43.6 KB · Views: 12
  • IMG_7339.jpeg
    IMG_7339.jpeg
    44.2 KB · Views: 9
  • IMG_7337.jpeg
    IMG_7337.jpeg
    42.8 KB · Views: 10
  • IMG_7338.jpeg
    IMG_7338.jpeg
    37.1 KB · Views: 12
  • IMG_7336.jpeg
    IMG_7336.jpeg
    37.9 KB · Views: 9
  • IMG_7335.jpeg
    IMG_7335.jpeg
    38.9 KB · Views: 9
  • IMG_7334.jpeg
    IMG_7334.jpeg
    44.3 KB · Views: 10
  • IMG_7333.jpeg
    IMG_7333.jpeg
    39.2 KB · Views: 10
  • IMG_7332.jpeg
    IMG_7332.jpeg
    40.7 KB · Views: 8
  • IMG_7331.jpeg
    IMG_7331.jpeg
    40.4 KB · Views: 8
  • IMG_7330.jpeg
    IMG_7330.jpeg
    39.8 KB · Views: 6
  • IMG_7328.jpeg
    IMG_7328.jpeg
    48.6 KB · Views: 5
  • IMG_7329.jpeg
    IMG_7329.jpeg
    40.1 KB · Views: 6
  • IMG_7327.jpeg
    IMG_7327.jpeg
    36 KB · Views: 4
  • IMG_7326.jpeg
    IMG_7326.jpeg
    40.5 KB · Views: 4
  • IMG_7325.jpeg
    IMG_7325.jpeg
    46.1 KB · Views: 4
  • IMG_7324.jpeg
    IMG_7324.jpeg
    33 KB · Views: 4
  • IMG_7323.jpeg
    IMG_7323.jpeg
    41.7 KB · Views: 4
  • IMG_7322.jpeg
    IMG_7322.jpeg
    3.2 MB · Views: 4
  • IMG_7321.jpeg
    IMG_7321.jpeg
    34.8 KB · Views: 5
  • IMG_7320.jpeg
    IMG_7320.jpeg
    45.7 KB · Views: 6
  • IMG_7319.jpeg
    IMG_7319.jpeg
    39.4 KB · Views: 6
  • IMG_7317.jpeg
    IMG_7317.jpeg
    45.3 KB · Views: 6
  • IMG_7318.jpeg
    IMG_7318.jpeg
    34 KB · Views: 4
  • IMG_7316.jpeg
    IMG_7316.jpeg
    47.8 KB · Views: 4
  • IMG_7313.jpeg
    IMG_7313.jpeg
    35 KB · Views: 4
  • IMG_7314.jpeg
    IMG_7314.jpeg
    51.2 KB · Views: 4
  • IMG_7312.jpeg
    IMG_7312.jpeg
    41.9 KB · Views: 4
  • IMG_7311.jpeg
    IMG_7311.jpeg
    42.1 KB · Views: 4
  • IMG_7309.jpeg
    IMG_7309.jpeg
    42.7 KB · Views: 4
  • IMG_7310.jpeg
    IMG_7310.jpeg
    40.5 KB · Views: 4
  • IMG_7308.jpeg
    IMG_7308.jpeg
    41 KB · Views: 4
  • IMG_7307.jpeg
    IMG_7307.jpeg
    42.6 KB · Views: 4
  • IMG_7305.jpeg
    IMG_7305.jpeg
    46.5 KB · Views: 4
  • IMG_7306.jpeg
    IMG_7306.jpeg
    44.8 KB · Views: 4
  • IMG_7304.jpeg
    IMG_7304.jpeg
    41.9 KB · Views: 4
  • IMG_7303.jpeg
    IMG_7303.jpeg
    37.7 KB · Views: 3
  • IMG_7302.jpeg
    IMG_7302.jpeg
    41.6 KB · Views: 16
Last edited:
Haven‘t really driven my car much since my last post in June and I guess that was a mistake. Started up the car and had all sorts of issues (rough running- moisture in the caps), ASR light on, ABS light on, loud high pitch humming noise from ABS pump, very loud rattling from air pump and the wood trim from the ash tray coming loose.

So, shop time is in order. First time that I am trying out Schmitt Automotive in Renton, as MB Lynwood lost Steve Geyer and he is too busy with his new work to take on anyone in his shop.

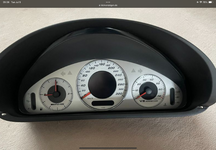
On my way to the shop the entire instrument cluster blanked out on me with none of the gauges working anymore, so one more thing to add to the laundry list I just dropped the car off with:
  • Replace ashtray mechanism, insert and trim with NOS unit
  • Replace sunroof liner and frame with NOS unit and repair sluggish wind deflector
  • Remove sagging headliner for refurbishment
  • Install NOS MB self-dimming mirror
  • Install new rear exhaust rubber hanger
  • Fix loose C-pillar trim
  • Replace E-Gas module (caps replaced by alphasud)
  • Diagnose check engine light
  • Fix rattling noise from front end of engine when engine is cold (air pump?)
  • Fix ABS noise and warning light
  • New oil and filter
  • Flush self leveling system and replace fluid
  • Cut vent slots in caps per 81 page instruction 🙂
  • Check tail light malfunction
  • Fix inoperable instrument cluster
I had the ashtray, headliner material, sunroof insert and rear view mirror sitting on the shelf for a long time, so I’m looking forward to getting those installed together as part of this go around. We will see how it turns out and if Schmitt is a viable alternative to Steve/MB….
 
Last edited:
Quick update on the repairs. Schmitt Automotive sent the air pump to C&M Hydraulics with a core exchange and the refurbished unit will go back on the car on Tuesday.

The headliner is being redone by Northwest Crafted Interiors in Everett with the headliner material I bought from a shop in Florida. That material looks quite close to the original, but it has a slightly more yellowish tone than the original material. I should be able to pick the headliner back up on Wednesday. The self dimming mirror went in without a problem.

The broken gauge cluster was caused by a blown fuse, so nothing major there, same thing with the taillight.

The check engine light was due to the broken air pump. Exterior c pillar trim is fixed (broken clip) and the exhaust hanger was replaced with a SL unit which has the steel wire inside, so hopefully no more sagging from here on out.

Overall it seems like Schmitt is doing a very thorough job. The only thing I’ll have to see is what they have to say about the ABS and ASR light. I should be able to pick the car back up on Friday and then we will take it to Cannon Beach for our family vacation. Really looking forward to driving the car on a longer stretch again- it’s been a while.
@JLAA’’s
Twisty Forest™️ route is calling!
 
@TimL,
Tim, You haven’t menuit lately I’m wondering how your 6.0 motor coming along? OR have you dropped it?
Hi Terry, no, I haven’t dropped the project. The engine is still sitting in the same warehouse in Germany where I left it two years ago (almost to the day)
1725294940673.jpeg
The plan is to get it all done (refurbishment of existing 6 Liter engine, shipping to U.S. and install) during the course of 2025. I started collecting parts for another car project and that has proven to be a somewhat costly distraction, eating into money that was earmarked for the 036. But I hope that other car will be fun too when done.
 
Last edited:
inquiring minds want to know! What is your other project?

I spent many years following IMSA racing around. Great memories.
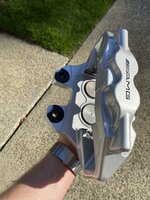
Hi Drew, too early to air out here, as I don’t have the car yet. Just been collecting all sorts of difficult to find new parts that I plan to upgrade the car with once I bought it. New black Series Brake calipers, pads, discs, new xenon headlights, new taillights, new instrument cluster, new AMG Performance Studio steering wheel, new anodized trim all around, new dress covers, etc., etc. A lot of this is NLA or about to go NLA, so I wanted to get the main parts before it becomes mission impossible in a few years. It will be a bit of a Frankenstein when done, but ought to be good fun
 

Attachments

  • 1725308337162.jpeg
    1725308337162.jpeg
    1.5 MB · Views: 12
  • IMG_3095.png
    IMG_3095.png
    4.1 MB · Views: 13
  • ek-yams-56dc5457ee234700bcb48e3d0221cec1-attachment-0-1715542101627.jpeg
    ek-yams-56dc5457ee234700bcb48e3d0221cec1-attachment-0-1715542101627.jpeg
    91.1 KB · Views: 13
  • IMG_7117.jpeg
    IMG_7117.jpeg
    1.8 MB · Views: 13
  • IMG_3071.jpeg
    IMG_3071.jpeg
    1.6 MB · Views: 12
Last edited:
Picked the headliner up from Northwest Crafted today. Paid $500 for their work with me supplying the headliner material. I thought that was kind of steep, but I really like how it turned out, so I would recommend them for that type of work. Unfortunately forgot to take pictures but will do so once it's installed in the car.

Everything should be put back together by Monday afternoon and I'm very much looking forward to taking it on an extended drive to Cannon Beach for our vacation.
 
Yep, I think I paid about $550-600 12 years ago or so in Houston, including material, by the very best interior shop in that area. Inflation.

Still holding up well in my E500, and I had them do same for my 560SEC, which is also in good shape so far.
 
You guys clearly aren't as cheap as me :)

Material was $300 and something, refurb was $500 and then most likely another $400 for install (shop rate of $185 at Schmitt Automotive). I think that's obscene money for something as non-value added (to my mind) as a headliner. Oh well, now it's done, after a solid 5 years of procrastinating on it
 
Back
Top