• Hi Guest !

    Welcome to the 500Eboard forum.

    Since its founding in late 2008, 500Eboard has become the leading resource on the Internet for all things related to the Mercedes-Benz 500E and E500. In recent years, we have also expanded to include the 400E and E420 models, which are directly related to the 500E/E500.

    We invite you to browse and take advantage of the information and resources here on the site. If you find helpful information, please register for full membership, and you'll find even more resources available. Feel free to ask questions, and make liberal use of the "Search" function to find answers.

    We hope you will become an active contributor to the community!

    Sincerely,
    500Eboard Management

OWNER nocfn

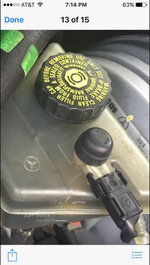
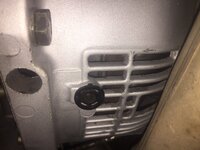
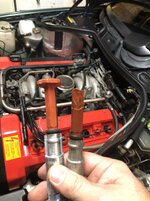
had some parts hanging around that I never installed after I put on new brakes and fluid. I replaced the cap on the MC reservoir, the under side of the cap on the new sample has a gasket that looks like a Zoro hat, the original "hat" portion was gone, leaving me just a hat brim if you know what I mean.

The other petrified piece was the cap on top of the level indicator. It was fossilized and broke into pieces. This was less fluid leaking but more like if you took off the cap and some dripped on the reservoir. New rubber should fix it. Cheap parts, should be replaced if any part looks sketchy. Imagine the language if you opened the hood to find leaking fluid and bare metal do to major failure.

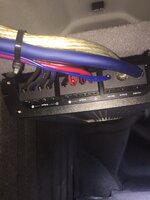
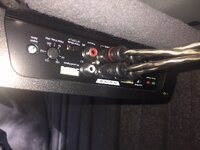
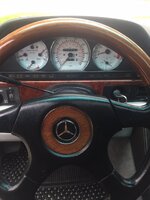
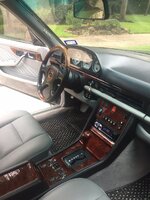
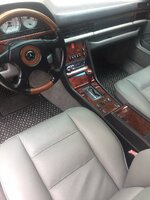
Also thanks to 7Delta for help adjusting my JL Audio system! Also did the same to the C126.

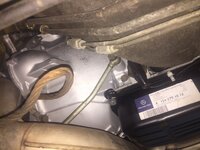
A note of thanks who reached out on the tranny, i appreciated your expertise.
 

Attachments

  • 753a8c82887ef7d2c6f82a0b13af1c1f.jpg
    753a8c82887ef7d2c6f82a0b13af1c1f.jpg
    172.7 KB · Views: 27
  • screeeeenshot.jpg
    screeeeenshot.jpg
    78.4 KB · Views: 27
  • 3b951f8e6c85cda4b71b3bb3907a18b9.jpg
    3b951f8e6c85cda4b71b3bb3907a18b9.jpg
    160 KB · Views: 19
  • fe41baa58c57155af2837c5114f4429b.jpg
    fe41baa58c57155af2837c5114f4429b.jpg
    335.4 KB · Views: 19
  • 0cec4026c3e277756d3e611087603ffa.jpg
    0cec4026c3e277756d3e611087603ffa.jpg
    124.8 KB · Views: 18
  • 303e609353b0454ebd3282fccb80d6af.jpg
    303e609353b0454ebd3282fccb80d6af.jpg
    120.8 KB · Views: 18
Last edited:
Dropped the E500 off at the shop for the tranny removal. Successful day, discussed getting MB glass delivered to him at his wholesale cost to be installed, and potentially saved my dealer a customer as i introduced him to Jono for a possible rebuild of an upper wire harness for a 96 SL that is NLA. A good day, had a friend help me re assemble my C126 hood after i replaced the hinges. The job was a success since the replacements are not bent and have no play.

A good story here, renee at mboemparts called to say the c126 Fender liner was superseded but not in the epc.... and at 3x the cost. I bought it anyway as mine is like shredded wheat. It came and has a piece clearly for the unit that sits behind fender for ASR. So Bob responds to pics and says we will order the cover and the plastic rivet free of charge since its not on the epc. This kind of service is great and that is why i use MB OEM PARTS .com
 
So an update but no pictures: first the C126 wood is set to ship out at the end of the week.

The E500 had the tranny delivered to shop today. Indy confirmed he will replace both flex disks due to wear and the shaft bearing. The rear
Main seal is ordered and also cooler hoses. Im told to plan on Friday for return - but i am thinking Monday.

Sux not having a car.
 
Last edited:
E500 Update - Shop called and my rebuilt transmission was delivered and will be installed today. I expect to get the car back Friday afternoon.

Will have new OL protection switch and O rings, Vac modulator, lines, connectors. Cable, Mercedes Flex disks, transmission cooler hoses and seals, support bearing, rear main seal and a 95 E420 FGS valve body. EDIT - I did drop off a new Bosch O2 sensor I had in my stash for the install since he was there.

C126 - Update HVAC project still awaiting wood refinishing. Turns out slider wood for the storage did not turn out as expected, nor did the cover for center console coin tray. So shipment was delayed and I hope to have that for next week. My availability to finish this will be hit or miss over the next 3 weeks, but hopefully soon we will be done with the restoration and appearance project.
 
Last edited:
Well the E500 has been completed. Shifts are tight and firm, really a huge difference. The trans shop rebuilt the stock valve body and vacuum sealed it for me should I want to switch back. Hard to get used to the FGS since i was in stop/go traffic but really the difference is the torque and responsiveness like it has awakened! Aside from the FGS, this is tight in suspension, handling torque - like it was new. Just a strong contrast to a good used, mechanically sound car to one that is virtually completely reconditioned to factory spec. It feels and drives much more visceral, yet refined and buttery like never before. I have now completed the expenditures in the GVZ rule. Mostly PM - but i am proud of the work completed.

$1,600 for the tranny rebuild, media blast. Labor to remove it, install it and rebuild the drive shaft and rear main r/r with all MB parts was $1,750 so with tax just under 4k.

1.jpg
 

Attachments

  • dbebd3ea13ab6e6b44406cc2a8c28899.jpg
    dbebd3ea13ab6e6b44406cc2a8c28899.jpg
    160.7 KB · Views: 21
  • 49b9006186c4d3fb29de08b6b0904045.jpg
    49b9006186c4d3fb29de08b6b0904045.jpg
    208.6 KB · Views: 19
Last edited:
Just an update - I took the family (kids back from college) for dinner about a 2 hour RT drive. Got a good workout in both highway and city driving. Buttery smooth and stealthy power, as you come to expect. One thing I think was rectified was a clicking while braking. I had already changed all the steering and suspension components on the front end, motor and trans mounts but still had a slight "knock" occasionally when braking. After new flex disks, and support bearing change the click on braking is now gone, and it occurred to me late on the way home. So this chapter is successful, and complete. Now to enjoy accordingly.
 
Got my wood back from the refinishing shop and have installed my dash, steering wheel and center console. More to come....

21August17 173k


I included pics with my steering wheel and without the door trim installed so you can see the difference. The steering wheel will go off to another specialty place, and the door wood is completed just not yet installed. Glad the AC rebuild is complete, it was a long project.

The E takes her rightful place in the garage while I get reacquainted with the C126 for a few months.
 

Attachments

  • a1367293b68738f873cad114fe9d6736.jpg
    a1367293b68738f873cad114fe9d6736.jpg
    161.7 KB · Views: 87
  • e25061cdbe79c5a2cfce958c073bd095.jpg
    e25061cdbe79c5a2cfce958c073bd095.jpg
    210.1 KB · Views: 92
  • dd651739a72f949b20e041ecb7479922.jpg
    dd651739a72f949b20e041ecb7479922.jpg
    184 KB · Views: 87
Last edited:
Got my wood back from the refinishing shop and have installed my dash, steering wheel and center console. More to come....

21August17 173k

I included pics with my steering wheel and without the door trim installed so you can see the difference. The steering wheel will go off to another specialty place, and the door wood is completed just not yet installed. Glad the AC rebuild is complete, it was a long project.

The E takes her rightful place in the garage while I get reacquainted with the C126 for a few months.

Love the stiched leather trim on the center console. Your interior looks gorgeous. I'd love to get leather trim on center console since mine is just not looking right on the passenger side at the moment. How was that done?
 
Thank you!

It is actually a high quality marine grade black matte leatherette. I took a picture of a current model to the fab shop who did my headliner and he made it happen. It has the same feel and texture of leather, like a cross between that and mbtex.
 
Took the C126 to get the MB alignment package. Its like your own personal mechanic as their senior foreman is the only one who works on w126/w124/w140. Didn't even try as he knew better on the rears. This MB is owned by the same group that employs our Dear Klink over in abstract plains USA

173,368
 
Last edited:
Forgot to add to the above, but getting back from dealer fedex delivered A pillar gasket for reveal moldings. Removed the brightwork and cleaned years of crud from the glass/frame mating surface. After an hour or so in the hot sun, laid a fresh bead of mb window sealant and installed the brightwork, Gasket and A pillar.
 
Last edited:
I took on the herculean task of,.... wait for it......

Changing the H4 seals on the headlights for the lenses. Fiddly, as the rubber is quite a bit "taller" in the channel when attempting to attach the clips. Anyway, this is a useful endeavor to prevent water entry into the assembly. 0018261480 x 2 is about $54 USD and seems to be a stock item for the euro assembly (C126) here in the states' warehouses.
 
Went to take the E500 out for a nice fall ride, No Joy!

Battery died, so took the opportunity to replace my battery with a Bosch AGM and installed the new battery tray. Mine had some scratches but no issue with leaking battery or other debris under the tray. 124,235

1.heic
 
Last edited:
Louis,

You have a lot of knowledge of how to keep water OUT of our C126 and 500Es.
Do you have a list of drains/channels to check, clean, clear and blow out of each car that you could post?
 
Last edited:
*** Admins can move this over to its own thread if you want ***


C126/W126/W124

Obvious water entry points are the rubber around the doors, trunk lid and the sunroof.

Sunroof - All chassis after a cleaning of the old gleitpaste off of the mechanical moving parts, using a pump up sprayer (I use a Griots pressurized bottle) containing hot water and a few drops of Dawn to specifically get water moving to the corners of the sunroof channel. Each corner has a metal drain nipple with a rubber tube down the respective pillar. Warm soapy water with a pressure bottle or even a 20 0z water bottle works with a little skill. The key here is to get the water running OUT to the concrete in a steady stream. If it doesn't, you have plug but most likely the soap/gravity will loosen and drain over time. A shot of compressed air does wonders too. When clean, an dry I shoot a few squirts of Aerospace 303 near the corners to let that product "condition" the rubber. On the W124, be sure the trunk cargo isn't / hasn't kinked the rubber drains out of the C pillars. Its been know to happen. Sunroofs are not a problem if clean, lubricated and attended to. If not they can rust as they are water tight not water proof. The capsule will rust if the water doesn't drain.

Trunk water is the ventilation baffles broken or missing, and the rubber grommets for draining plugged or missing. Of course the seals must not be broken or torn. C 126 has an issue with the back glass window seal that is well documented.

A pillar water entry on a W124 I am not aware of. All chassis can get water in from ill fitting replacement windscreens. Member luckymike had poorly made glass from MB on 4 or 5 attempts that went up to corporate on his C126. He can chime in if specifically asked if you are having that issue.

I think it is a good idea to open your hood on both chassis with glasses on for safety and use compressed air or a leaf blower to get the debris out of the engine bay, especially near the recesses of the firewalls. Specific to the W/C126, deep under the fusebox is the aux fan resistor, right next to a drain for the bowels and the entry for the front torsion bar and bushing. On the passenger side you have the battery and the mono valve, aux water pump and the other torsion bar bushing and drain. That area should be cleaned at a minimum of once per year with actual removal of the battery, but a big fire hazard on the driver side with that resistor. It is amazing the rats nest of debris that get in there. I also use the shop vac with a 6" pool noodle in the big hose end, then a 1/2 rubber hose about a foot long jammed in the pool noodle. This gives me suction ability or forced air depending on how the hose is attached to the vacuum.

The window cowl assembly is a much more sophisticated design for water dispersion than the C/W126 so this applies to the primarily to the latter chassis. However it is wise to be sure the W124 drain tubes (about 1" in diameter with a funnel on them) are clean and pour some soapy water in them. Your feet may get wet real fast based on where you are standing.

C126 you actually need to inspect this part often. Remove the wiper arms. Remove the window seal GENTLY (its NLA and very brittle) and do not let it bend or it will crack in half or in multiple pieces. Now the firewall seal lifts off (careful of the metal clips as they are sharp) to expose clips to secure the plastic cowling to the firewall. You will need to prise up using a plastic tool (this stuff is sun baked and brittle also NLA) the small connection push plugs that separate the two plastic cowl covers. One side is 2/3 the length and the DS is the other 1/3. After removing the DS section out of the space, the longer PS portion lifts with it as they are tongue/groove setup. with tabs that slid up under windscreen. Just be careful here, brut strength not required, but this is another piece of brittle plastic engineered with small tolerance for rough treatment.

Once the plastic cowl cover is removed, I actually painted mine with a black matte finish spray for plastic and let it cure. You will expose the wiper assembly linkage which you should remove and properly lubricate. You will also see a horn for the alarm, and my suggestion is that you remove that horn and the alarm module from the PS floor. The alarm can be a drain on electronic system and the horn bracket can be a rust issue so I remove it. Along that horn bracket is a dam of sorts to rout water to the PS drain. It has a rubber gate, and that area rusts very easily allowing for penetration. Each corner has a 1" drain hole, and the debris somehow plugs it up. Standing water can rust the area, and rodents have been known to crawl up the drain tubes and nest in the under glass area or worse, thru the fresh air intake. Flush the drains with soapy water to be sure they are clean, compressed air works too. The standing water at the drains rusts, voiding the seam of the cabin sheet metal, vulnerable to water entry. This is where it comes in on top of your feet when driving, or if you have water wet carpets around the anchors of the seats. Prevention is the best remedy. I took Miracle paint (por15) and painted the entire area proactively to prevent the issue from happening.

The rubber grommets over the wiper assembly attachment pins are typically an area of concern for failure of the linkage. Keep them supple with aerospace 303, I do it when I lube the throttle linkage.
 

That picture cracks me up. Your speedo P/N peeks out too! I thought the face of my gauge was scratched up there until I saw an image of the faces without the binnacle attached. Odd how some show, while others don't. Must be a fair amount of slop in the binnacle/gauge face placement.
 
Did a little test project to see exactly which paints closely matched what version of mushroom I have for the Facelift 1994 year.

I tested SEM brands


15823 LT Parchment ---- May work, depending on your interior fading. (good alternative for the door lace aka welt)

15863 LT Neutral ---- too light though the cap is great color

15803 MED Neutral --- too dark, making look Taupe in color

15753 Light OAK --- Winner! Cap is not indicative of the color, but it matched very well to the leather, the lace, carpet and MBTex found in the car. Keep in mind that the degree of fading will determine what is best for your car.

So If you have a 1994 Mushroom interior, have a go with refreshing your colors. I bought the last run of 124 973 0389 and that is the cover for the armrest bolts. Mine came in Brazil, and the respray got all three paint colors, and I stayed with SEM 15753 Light Oak it had some tanish tone versus lighter LT Parchment 15823

So do your homework, but if you have a 1994 or older W124 of our vintage, my testing shows 15753 or 15823. Get one of each and test a piece and compare. YMMV!
 

Attachments

  • Light_Oak.jpg
    Light_Oak.jpg
    1.8 MB · Views: 35
Last edited:
Did you use rattle cans for your testing? Where did you purchase your samples? I'd like to try the lighter shades for my 92 cream-beige. Care to recover your costs on the non matching items?

Drew
 
Oh i just went on amazon because my supplier locally who had every possible
Color flooded with the hurricane here.

So 13-15 bux for two rattle cans. If you are are not in a hurry, i have a contact at SEM where i can give them the paint code and they will match if not already made.

What code do you want to match? The plastic bits seem to get darker. Let me know
 
My cars' interior is 275. It is just a shade lighter than yours, so little that you need to see the two side by side to see the difference. (see this post http://www.500eboard.com/forums/showthread.php?t=10447 ) It sounds to me like the two colors you have that are too light may be a very good match for me.

edit; after going back and re-visiting some older posts I see that both shades are 275. The slight variations among different pieces in the car have become greater variations due to age.

Drew
 
Last edited:
Yes! The plastic bits turn almost saddle, look at the plastic near your left foot from behind the wheel. Also sit in back seat and observe the plastic cover on the armrest pivot, the mating of the center console to the leather roll top box and the back seat plastic on the rear roll top box. The plastic appears almost brown
 
Putzed a bit on the C126 today. I removed my plastic 2 piece baffle that was cracking in several places. I had one that was on my Parts car in storage that was newer, replaced back in the late 90’s. The baffle covers the space between the windscreen and the firewall. I also took the leaf blower to the recesses of the fire wall, battery tray and under the fuse box.
 
Swapped out the broken connector.

124,236
 

Attachments

  • 90.jpg
    90.jpg
    414.9 KB · Views: 41
Last edited:
Not your typical South Texas Morning.... No salt used here, and the roads are wet as it is much too warm (29F at the time of the picture) for this to last much past sunrise.


73.jpg
74.jpg
75.jpg
 
Last edited:
C126 oil and filter change yesterday with Brad Penn 20w50 and a new Mann Filter. Also changed out the passenger side wiper stalk grommet. This little bugger keeps the wiper linkage from water damage like rust to the linkage. I lubricated these a few weeks ago when i replaced the baffle.

80.jpg
. 174,524
 
Last edited:
Merry Christmas! I Got a torque wrench and a 24” breaker bar both 1/2” drive Tekton and a deflection beam 0-80 in/Nm 1/4 drive (and of course the bill).
 
Last edited:
Replaced the seal on the left H4 assembly. I had only an hour or so and Originally set out to drain coolant and as I got started, I realized I needed much more time. Since I have a lowered suspension, i have a skid plate that must be removed. So that involves jacking up the car to get enough clearance to remove to large steel - 35 lb plate. So I will deal with that after the cold spell, and also install the C126 2phast mirror.
 
Did a few things with spare time today. Traded out the c126 cluster lights to LED. The pic below is in the dark with the cluster on.

35.jpg


Also swapped out the fuel inlet fitting. It has a filter and was partially blocked with varnish. Here is a pic or two after i cleaned the old fitting. $9.25 from mboemparts.

36.jpg
37.jpg
 
Last edited:
With my kids back to college I was able to wash to 036 and place her back in the garage covered up until Spring. I plan to piddle with some odds and ends over the next few months.

The C126 got new G05 mix and a 2phast mirror installed. I will reinstall the skid plate possibly Sunday. I will also be rebuilding my spare SLS pump for that car. My current one has a small but annoying leak as discovered when the skid plate was removed. I love spare parts inventory.
66.jpg


Perfect temp!
 
Last edited:
Taking advantage of the holiday and mild weather by installing the skid plate on the c126. I spent about 2 hours looking for my C126 SLS spare pump. Finding it in a box mis-labeled, i was elated.

Taking it apart, I found some interesting things and pleasant surprises. For one, no scored parts or evidence of heat warp due to no fluid. This was from Trae’s first sec he bought. The oil seal at the back of the pump was completely gone, save the inner spring.

I cleaned the unit by having separated all the parts: cover, inner pump and all the pistons and cam. Replaced the 3 O rings, oil seal and the bolts. She is ready to go but the weather here is about to get ice and snow for the rest of the week so no car stuff for me. Here are the seals I replaced:

73.jpg74.jpg75.jpg

Edit: the above pump is not bolted, the top is sitting on the bottom. When torqued the gap between the mating surface is less than 1/8”.


So the brown seal should be black and the other seal was hard, lastly the front seal was totally shot.


Lastly, many thanks to Roy Francois (liviu165) who obtained an entire kit including new bolts, washers and all seals for helping him locate a C126.
 

Attachments

Last edited:
So with limited time, I began the process of many C126 projects. Thinking longer term, i wanted to revisit a slight noise still emanating from the right bank of the M117. So not wasting the mild weather, i have tackled quite a bit. I removed the alternator and bracketry along with the cruise control. Of course the fan had to be removed along with the belts and the power steering pump. With a naked forward block, i removed the last piece - SLS pump which is separate, not tandem like the M119. (See above post)

I will be degreasing the front side of the block since all the timing chain guide pins are exposed. Yesterday, I installed the new sprockets for the cams and replaced the guides since i was there.

Today I will be starting to roll in a new chain, which was the entire point to the project. Current guides were less than 25k, but i cannot see any evidence of chain change. It slapped a bit with new MB tensioner when cold, and my sprockets really showed their miles. So sprockets guides and chain will all be new.

I will be adding to this post as there are many facets to this particular endeavor.
 
I took out the chain yesterday and measured the old one. The Chain is almost 74 1/4" long - that is just shy of 1/2" stretch. New cam sprockets made in Italy with new chain and Guides. Waiting on 7Delta’s chain crimper. GVZ convinced me to use it. After bending the first circlip on install I was convinced to use the crimper.
 
In the words of BW 126, “Pics or it didn’t happen!”


Sent from my iPad using Tapatalk
 
Will update with pics when done. Here is a tease
17.jpg
18.jpg
19.jpg
20.jpg
21.jpg
22.jpg


Also replaced the bypass hose. Here is the original.

f4f2cbb80471692d5d500633f0fc8ef1.jpg
09a598bffae57d37b8bc55b14f2945e6.jpg
d4beaf358509f89d292c4510d1c4ac5a.jpg


First pass using the Baum chain press and crimp tool. Credit to GVZ for strongly encouraging me to use it, and to 7Delta for renting his tools!

Again this is first pass, the finished product looks like the factory crimps.

75757a31cd20bbc56b7460355209ddd8.jpg
 
Last edited:
Tonight i completed the C126 project. I removed the alternator, sls, ps, airpump left overs. Removed the baffles of the valve covers and removed years of lumpy buildup that had fallen into the valve train. Replaced the chain (tensioner was months old) and guides. Both rockers and hydraulic lifters on cylinder 4. Go/no go said they were in spec. All other lifters passed the test ad well. Cam in good shape. Replaced bypass hose and all the SLS pump seals. So far so good, but it is a different car with a 1/2” shorter chain and new sprockets. Quiet valve train and since there isnt LH to adapt, will have some adjusting to do.

59.jpg


EDIT 09/27/2019 175,500 After discussing the crimping of the circlip style chain, member Roy "Liviu" in Atlanta got to talking and we bought some double row chain links from various sources using original part numbers, including some w126 Diesel cars in search of crimp style for the M117. While successful for the length with Diesel, it was not rated for the higher RPM (so we thought) M117 p/n. Roy contacted IWIS and they did not recommend crimping the longer post like I did, and offered the original under a special order, which we did. So I did such a good job crimping the wrong style it took forever (like 25 turns it seemed) but by feel and sight verified, I found the modified master link, ground it off and replaced it with the IWIS factory special order. Popped the valve cover back on and yes while the crush washers were 1k old, they were replaced :D. (should be noted that the original modified, crimped circlip style link was tight and perfect, and I felt confident then with it but it still wasn't properly used..
 
Last edited:
I just realized you went past 124,036 on the odo last August / September and didn't take a picture!

:doh:
 
Geez, you went all the way out to New Caney for your inspection?!? :stickpoke: That's enemy territory....Montgomery County!!

I don't miss the annual inspection ritual of Texas. You still have to have annual $13 safety inspections! :banghead:

It's nice being back in a state with a bi-annual process ... and for all of my cars, no emissions or safety inspection ever required again.

marylandflag.gif

Nice feeling though !!

:tejas:
 
Geez, you went all the way out to New Caney for your inspection?!? :stickpoke: That's enemy territory....Montgomery County!!

My usual Dyno site in Kingwood was down and he wouldn't fudge it like he did the c126 when it was 24 years old. So I had to hit up Gomer Pyle and played checkers with Floyd. Betty Jean was there with her monster truck, but we had a good chat.
 
All cars 25+ years old are exempt from emissions testing in Maryland, and there is no safety inspection unless you bring a car into the state and put a regular plate on it, then a one-time EXTENSIVE mechanical+safety inspection is performed.

Historic plates eligibility = any car 20+ years old, and no inspection of any type required, ever.

Winning !!! :jono:
 
So after doing the chain and guides on the C126 I noticed some missing bolts off the right bank of my AMG headers (custom Clones). So after a ton of work trying to take short cuts but ended up dropping down pipes, getting longer bolts than what i had, and had to remove cyl 1/3 to torque 2/4 cyl.

The bolts used were stock length but were too short considering the flange thickness. So I got 5mm longer bolts and they grab stock threads in the head. All buttoned up and ready to install driver door wood in the morning to finish that new wood restoration.

Performed the driver door card wood install, cleaned off old lube and applied fresh to the slides and regulator teeth.

174,400
 
Last edited:
Had about a 1 hour break from the daily grind and took care of some, ...when I get around to it type of mx. For the E500, I removed the EZL and cleaned up both mating surfaces, then making application of arctic silver 5 heat sync paste. Two tubes equal to 7g of paste applied, and I was able to use the existing cellophane cover.
193.jpg


On the C126, my 14 month old hood emblem started losing its blue color - it was pealing off. Bob from Naperville sent a quick replacement. I have given it about 3 light coats of clear lacquer, and will give it two more before I let it fully harden before I install it to the hood.
194.jpg

203.jpg


Clear coated and installed.
 
Last edited:

Who has watched this thread (Total: 3) View details

Back
Top