I may have mis-understood your last post, but I would be very hesitant about using the puller to remove the center piston from the housing. Those holes where the spring-loaded pistons are installed are finely machined and I wouldn't want to mess them up while trying to pull the center piston out. As Gerry said, if you put a block of wood on the back of the housing, you should be able to drop it by tapping on the wood block after positioning it above two blocks spaced widely apart to allow the piston to drop down between them (though admittedly, it isn't for the faint of heart). I'm not sure, but if you use a puller like the one pictured below, you might even be able to pull the shaft seal without moving the piston, though I'm not sure how easy it would be to re-install the new seal correctly, plus there are likely additional seals on the bottom of the center piston as well. Good luck!

Last edited:

") I am doing a full DIY writeup on my method – I’ll post it at the weekend with more step by step pics.
I am doing a full DIY writeup on my method – I’ll post it at the weekend with more step by step pics.


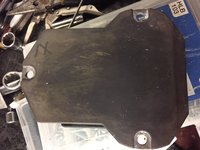
 Behold one custom E500E Fan Cowl! It’s as light as a feather and fits like a glove! Bodywork on the shroud has commenced. It’s going to be Satin Black for OE Stealth. It clips in exactly as the OE shroud does. Super happy with it.


 . I’ll be doing my 300E-24’s EZL this week also another tube of paste is on it’s way.

