• Hi Guest !

    Welcome to the 500Eboard forum.

    Since its founding in late 2008, 500Eboard has become the leading resource on the Internet for all things related to the Mercedes-Benz 500E and E500. In recent years, we have also expanded to include the 400E and E420 models, which are directly related to the 500E/E500.

    We invite you to browse and take advantage of the information and resources here on the site. If you find helpful information, please register for full membership, and you'll find even more resources available. Feel free to ask questions, and make liberal use of the "Search" function to find answers.

    We hope you will become an active contributor to the community!

    Sincerely,
    500Eboard Management

OWNER JC220

E36 Widebody or C124 Widebody?

  • Use the 500E widebody kit on my E36 saloon

    Votes: 2 22.2%
  • Adapt the 500E widebody kit for my 320CE

    Votes: 7 77.8%

  • Total voters
    9
  • Poll closed .
As it turned out the paint mis match appears to have been because the bodyshop didn’t buff the new paint enough. This pic shows an example of when I did the first brief pass with Meguires compound by hand only. (Before on Right)
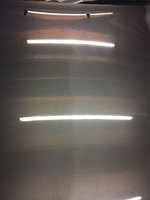
IMG_3400.JPG

So I’m about 9 hours into a ‘Mega exterior detail’ which will be complete after about another 8 – 10 hours! If the weather holds up later I’ll post all around pics of the 500E.
 
Before re-fitting the screen trims I painted 2x coats of Dinitrol Wax into the hidden areas - this should keep this area rust free for many years

IMG_3409.JPG

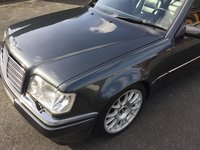
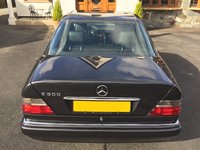
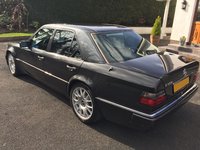
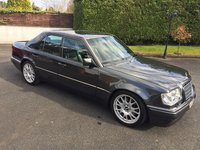
Then got it outside for some photos of how it looks now. Engine bay & Interior detail next in a few days. I'm pretty happy with the car - still needs some new window rubber trims etc but it's getting there. Front turn signal lenses not staying - jury's still out on the rear plate holder too :scratchchin:

IMG_3417.JPG IMG_3421.JPG IMG_3441.JPG IMG_3447.JPG IMG_3448.JPG

IMG_3449.JPG IMG_3458.JPG IMG_3478.JPG IMG_3480.JPG IMG_3483.JPG
 
I placed an order for more stuff from MB. One thing I can't quite figure out is does a 500E have a gearbox undertray / splash shield? Or just the one engine undertray PN 1245242730?

That's one of the items I ordered new, along with both front 500E arch liners since the originals are cracked & bits missing. Engine tray is totally gone hence I'm not sure what should be there.
 
I placed an order for more stuff from MB. One thing I can't quite figure out is does a 500E have a gearbox undertray / splash shield? Or just the one engine undertray PN 1245242730?
There is only a single, large plastic panel below the engine. There is not a separate panel below the transmission.

:tumble:
 
Parts delivery! :jono:

The other SLS hose turned up - this is a new pair. (circa $350 USD for a pair :doh:)

IMG_3561.JPG

New boot carpet

IMG_3568.JPG

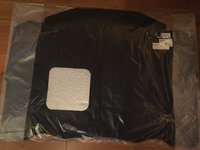
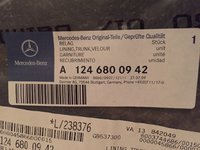
New under bonnet insulation quilt

IMG_3567.JPG

New Engine undertray (+ New hardware)

IMG_3569.JPG

Both new front wheel arch liners (+ New Hardware)

IMG_3571.JPG

Spare fuse kits + decal

IMG_3565.JPG

And I also got custom mats made in france for my 300E-24;

IMG_3570.JPG
 
Joe, does your new boot carpet have the thick (~10mm) padding glued underneath like the original, or is it just the bare carpet?

I bought one a year or two ago and it was just the carpet, without the thick pad underneath. I was never able to find a p/n for the pad.

:detective:
 
BTW - front wheel arch liners can be fun to replace. The old rubber edging is stapled on and doesn't like to transfer to the new ones. And, the fitment of the new ones was just a wee bit off compared to the old, the one time I shelled out for new liners. CUrious to hear how your install goes!

:banana1:
 
Joe, does your new boot carpet have the thick (~10mm) padding glued underneath like the original, or is it just the bare carpet?

I bought one a year or two ago and it was just the carpet, without the thick pad underneath. I was never able to find a p/n for the pad.

:detective:

Hmmmm it appears to be bare carpet Dave. Although it feels heavier / thicker than the original carpet does.

IMG_3572.JPG IMG_3573.JPG IMG_3574.JPG

Sorry the light in my living room aint great. (That's right almost every room in my house has 500E parts scattered around. I must remove them this weekend!)

Do you happen to have a picture of the foam pad that is missing? There is a thick pad in the boot of my 500E but it is bonded into the boot floor.
 
Do you happen to have a picture of the foam pad that is missing? There is a thick pad in the boot of my 500E but it is bonded into the boot floor.
I don't have a photo but I'll see if I can get one. All of my 036's have the thick pad. The pad is glued under the main carpet only, it does NOT extend over the battery lid.

BTW - my memory was off, per my notes last year it's about 4mm thick. I'll verify when I get pics!

:scratchchin:
 
BTW - front wheel arch liners can be fun to replace. The old rubber edging is stapled on and doesn't like to transfer to the new ones. And, the fitment of the new ones was just a wee bit off compared to the old, the one time I shelled out for new liners. CUrious to hear how your install goes!

:banana1:

The original liners had chunks missing but still the good rubber seals. I will be fitting the new ones in a couple of days so I'll update how that goes! It looks like they also attach / overlap to the engine undertray. The tray was AWAL so I'll need to test fit how these 3 peices fit together
 
The original liners had chunks missing but still the good rubber seals. I will be fitting the new ones in a couple of days so I'll update how that goes! It looks like they also attach / overlap to the engine undertray. The tray was AWAL so I'll need to test fit how these 3 peices fit together
In addition to the 6 main screws for the undertray, there are 2 extra which attach it to the liners, near the fog light flaps. Should be 8 screws total. :)
 
I don't have a photo but I'll see if I can get one. All of my 036's have the thick pad. The pad is glued under the main carpet only, it does NOT extend over the battery lid.

BTW - my memory was off, per my notes last year it's about 4mm thick. I'll verify when I get pics!

:scratchchin:

Dave this is the padding you are referring to I think. Well that sucks that Mercedes have omitted it on new replacement mats. (Kind of like the internal hose spring to the top 500E Rad Hose & the heel wear protector on my new recent genuine W211 mats) I’ll have to peel this foam off & re-glue onto the replacement mat. No-one wants a floppy bottom mat.

IMG_3585.JPG IMG_3586.JPG


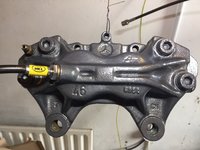
Work underneath resumes – got the SL600 / E500 front callipers off & given a lick of paint. These are big & heavy callipers – wouldn’t want to drop them on your toe that’s for sure!

IMG_3594.JPG IMG_3598.JPG
 
Dave this is the padding you are referring to I think. Well that sucks that Mercedes have omitted it on new replacement mats. (Kind of like the internal hose spring to the top 500E Rad Hose & the heel wear protector on my new recent genuine W211 mats) I’ll have to peel this foam off & re-glue onto the replacement mat. No-one wants a floppy bottom mat.

View attachment 62144 View attachment 62145
Yes! That is the pad I was referring to. Yours looks slightly different than mine - yours appears to be made from strands of something, mine is a closed-cell foam IIRC. I still need to get a photo. I was disappointed that the new carpet did not include this.

:runexe:
 
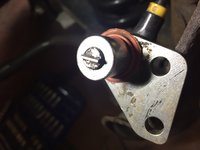
Small update for today. Took care of a pet hate of mine – sheared off plastic nuts to the underbody panels! This is a common problem & someone had kildly sheared off a total of 4 in the past :doof:


To undo these nuts – what I do first is take a pair of tin snips & crack them in half. Then undo with pliers & fit new ones with some grease. Trying to undo old ones simply with a ratchet will 50% of the time shear them clean off.


So I cut some replacement studs from a donor w124 & welded them back on as per the pics. All new plastic nuts will be fitted along with some grease applied to the threads first. This will ensure they will come off AOK in the future. I don't want the new arch liners flapping about when I get it on the Autobahn

IMG_3601.JPG IMG_3603.JPG IMG_3606.JPG
 
Is there any way to find out what the original stereo was in a 1992 Euro 500E - or more specifically based on Vin #?

From research in thinking it would have bee a Becker BE1150. But want to be sure - I would like to return the stereo to original spec - maybe even fitting a period correct CD changer too
 
Hi Joe,

If you can find out anything about this I for one would be pleased! From other threads on this subject, the answer doesn't seem easy to find. When I bought my 500E, it had a crap single CD player installed, and what I thought was the original (a Becker 1150 "Classic") was laying in the boot.

I assumed this was the original; however, my datacard indicates the car was fitted with a CD changer (since removed) - and as far as I can see the Becker 1150 has no CD controls on it!

I'm thinking that the original radio was removed when the CD changer was removed, and the 1150 was fitted to replace it - which was subsequently changed for the crap CD player.

I too would like to return the car to stock, but don't know which way to go. By the way, other threads here would indicate the original CD changer is NLA, but I think there are after-market units available.

Good hunting!

Stephen, yes I don’t think they would have had a CD player (In the head unit). I imagine Euro models would have been fitted with a Blaupunkt cassette player of some sort + CD changers. I’ll start looking through the manuals & EPC to see if I can find any more information on that.


Some progress has been made – the car is back on it’s wheels again. Hel hoses fitted up front, brakes bled, the new front arch liners & undertray fitted along with the cleaned up SL600 brakes. The entire front wheel wheels were thoroughly cleaned / degreased then given 2x coats of Waxoyl. The new arch liners fitted very well but it took me a while to get the clips all in the correct places & tightened up. I’ve so much practice with long reach pliers now I reckon I could tie shoe laces through a letterbox!

IMG_3622.JPG IMG_3626.JPG
 
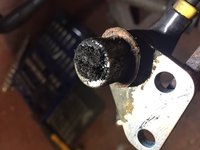
One other thing I forgot about – I thought I’d check / clean both front ABS sensors whilst I was in there. Check out the before & after!

IMG_3610.JPG IMG_3611.JPG

I guess the metallic debris is 25 years worth of brake disc wear particles. The ABS was functioning fine before - quite a tolerant system
 
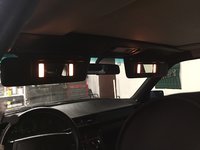
One other thing that was bugging me was the non illuminating visors up front. I took it all apart & tested each visor – AOK. The visors get power from the clamping affect of the bracket against a plastic plate / terminals on the underside of the roof.

IMG_3637.JPG


This is where the problem lay since the terminals were corroded & not making good contact. I cleaned them up & put them back together only to find that one visor still would not illuminate. So what to do? Took all apart again & on close inspection one terminal on the roof clip was cracked. Bugger. Not wanting to wait for parts I checked out my C36 donor car and got an idea. The newer models have the wires soldered directly to the terminals in the bracket – much better. So I tinned the existing bracket terminals and soldered new wires directly onto each one. Then there was light! Very happy with that.

IMG_3632.JPG IMG_3647.JPG IMG_3648.JPG


Now the rear sunshade has decided to start sticking in the upright position. The motor works just fine but the blind sometimes does not retract – I think it needs oiled somehow. That’s the next challenge.
 
JC,

My rear shade stuck once and I used a Teflon spray in the track when it was extended. It didn't take much but be careful not to overspray on the headliner. Also I don't extend to the end of the track. Stop about 1/2"/ 13 mm short. It's never stuck since.

Also, your front brakes and wheel wells look great!! Did you use a stencil for the Mercedes logos on the calipers?
Where did you get it?

Hi Terry - the Mercedes-Benz lettering on the front calipers are actually VHT self-adhesive vinyl Decals. They are easy to apply. I also applied them when the caliper paint was still a little tacky so they will stick on really firm. There is a clear strip on top which holds the letters in alignment & is peeled off last.

I got them here-

Brake Caliper Decal Sticker Badge Emblems Cast VINYL Universal Fits For All Type | eBay

The problem with the rear roller blind occurs only when retracting / lowering it. What happens is the motor works fine & pulls the blind down at the top bar. But the bottom roller does not fully pull the blind in evenly – it sort of stops at different stages leaving the blind floppy & hanging down. As if the retraction spring is weak or the drum mech is gummed up.

It’s pot luck in bumping the switch up & down trying to get it to seat fully back into place. Has anyone else experienced this?

As you suggest first I’ll try a little spray PTFE or Teflon lubricant (With a small application straw) into wherever I can reach & see if it helps free it up. It would sure suck to have to remove the rear parcel shelf for a second time (If I need to dismantle the blind to lubricate fully)
 
As you suggest first I’ll try a little spray PTFE or Teflon lubricant (With a small application straw) into wherever I can reach & see if it helps free it up. It would sure suck to have to remove the rear parcel shelf for a second time (If I need to dismantle the blind to lubricate fully)

I used a little teflon grease (from Ntrepid) in the shade tracks and it made the movement noticeable smoother. Mine wasn't sticking or having problems closing before adding the grease, so not sure if that will fix it, but worth a try.

Instead of a spray lubricant, you might want to try this:

Amazon.com: Finish Line Extreme Fluoro 100% DuPont Teflon Grease, 20g Syringe: Sports & Outdoors

You have to be a bit of a contortionist to apply it, but you don't have to worry about overspray.
 
Hi Joe!

I had the self-same problem with the rear window blind when I first got the car. It would raise quite properly, but was very reluctant to retract tidily. It seemed the motor was lowering the blind too fast for the spring retracting mechanism (i.e. the return mechanism couldn't keep up with the speed of the lowering motor), and one was often left with a crumpled blind laying on the rear shelf!

I suspected that maybe if the blind had always been left in the raised position, perhaps the return spring had weakened - so instead of immediately tearing everything apart, I left the blind in the down position for some months. It then worked almost perfectly. I say "almost", as occasionally the blind would falter as it retracted into the slot in the parcel shelf. I overcome this by always "pulsing" the switch to lower the blind in short bursts. The same applies in getting the last part of the blind through the parcel shelf aperture; just pause for a second, then stab the switch!

I know this may not be quite good enough for you, given the meticulous way your restoring your 500, but I'm happy to accept it given my car is 23 years old! When I park the car for any length of time, I always lower the blind. Over time, I have less and less problems.

Nevertheless, I will be experimenting with the suggestions by Terry and Melville to use some Teflon lubricant.
 
Thanks to all regarding the rear blind advice. I went out & tried some Teflon based lubricant I had on the shelf and touched it to both sides of the blind ‘axle’ as circled in red. The effect was immediate on the first side. As soon as the lube hit the axle the floppy blind sprung back tight & it’s been perfect ever since! Retracting up & down as it should without having to pause the switch & bump it.

IMG_3652.JPG IMG_3653.JPG

Got to love an easy fix! :)
 
Looking good..... Two round horns up there at the front? Aftermarket?

Do you get the Airbox still out? Or first unbolt one side of the strut?
 
Looking good..... Two round horns up there at the front? Aftermarket?

Do you get the Airbox still out? Or first unbolt one side of the strut?

Thanks, the 2x horns are new as the originals were rusty. I'll shoot them with Satin Black soon so they blend in.

I think to remove the air cleaner lid the 2x 17mm bolts holding the brace will need removed. But it's an easy task to take the top brace bar on & off.
 
JC,

Glad the Teflon worked for you. Sometimes things don't have to be complicated.
The MB decals on the calipers look pretty cool. Thanks for the info.

I'm traveling and my I-Phone 6 acts weird sometimes. No 'Thanks' button on this thread at moment so I wrote it out.

Take Care
 
So recently I had been doing a lot of work to the 500E in a short space of time (Some jobs detailed on here – others not simply because it would be info overload!) this is because of something forum member 44Raven very kindly made me aware of.


Insurance! Or rather the fact that some insurers have a small print section that says they will only pay out the purchase price declared on the policy in the event of a total loss / writeoff IF the car is an import (IE; Potentially NOT the insured value). Of course most 500E’s in the UK are imports as is my German delivered 500E.

This is VERY important folks. Take moment to read the small print in your insurance policies. Many members on here are like me & invest a lot of money to improve / restore their car. Don’t be caught out if the worst should happen. Which brings me to the next point.

Valuations. It’s all well & good having a £25 / 30k or whatever policy on your 500E…… but this means totally bugger all UNLESS you have a proper valuation in place. Either agreed with the insurance company directly (By means of an agreed valuation form – usually at an extra cost + requiring photos of the vehicle) and better yet- an independent professional appraisal of the car by a qualified specialist. (But remember even an agreed policy is STILL nul & void if the small print says purchase price / market value only for import vehicles)


So I chose another insurer at renewal in April who do not have the caveat re- import vehicles. I also have just had my 500E inspected & valued by our regional MB Club Valuer. (MB Club UK is recognised by Mercedes Germany) The valuer was a gentleman and he inspected my 500E at my home. This was also somewhat educational for me also since I am now more aware of what will add value or potentially de-value my 500E.


For example I was thinking of fitting a Big Brake kit up front. But this would take away originality & actually de-value the car in the eyes of a Mercedes Valuer. Indeed a couple of mods such as my electric fan install / cowl I now intend to reverse.

The valuation went well & moving forward I do want to concentrate on the Originality of my 500E and focus on more ‘pure’ restoration of the car. I am awaiting a Certificate from the chief UK Mercedes valuer within the next 2 weeks. If anyone is interested in that let me know & I’ll post it here.


So in short- LOTS more work to come in the coming months / years on my 500E which I will continue to detail on here.
 
Last edited:
Thanks. Interesting - what i the rationale of insurance companies in Ireland regarding full agreed payout ONLY if the car is an import? I do nit believe I have ever run across this in the States.
 
Thanks. Interesting - what i the rationale of insurance companies in Ireland regarding full agreed payout ONLY if the car is an import? I do nit believe I have ever run across this in the States.

What they mean is if the car is an import to U.K. then they will only pay out the market value / Purchase Price. (Ie; whichever is less) I will revert in full later & show the policy clause I am referring to
 
Last edited:
OK –please see the page attached. This is page 11 of 45 in my Policy wording (Which BTW is only available by a link & reading online – they did not send me a hard copy of this at any time or tell me about this) Again - thanks to member 44Raven for telling me to look out for this.

doc.jpg
My 500E was delivered in Germany in 1992 & exported to the UK around 1997 (The exact date is buried in the car’s paperwork which actually includes the original German registration paperwork) This situation will be the case with many 500E’s – particularly in the UK with so many Jap imports recently.

Just before I bought my 500E (Which I had to get a Plane to view for the first time) I used a comparison Search engine for the best price on Insurance. So that when I bought the car I was free to drive off legally right away. But unbeknown to me the comparison Site attaches a ‘Purchase Price’ which it had automagically calculated. This was calculated at £15K..... on a Policy for £25K Value.

So you think -this Purchase price is not really relevant right? It is a £25k policy and the car is worth that at least that in our market so all’s OK then?... wrong. So in effect even though I was paying for a £25K policy & could reasonably expect to get £25K in the event of a total writeoff I would have actually got shafted with a £15k (declared Purchase Price) payout because of that little policy clause attached.

This insurer is a major provider in the UK & goes under several market names also.

So now I have my 500E insured for £25k with a different provider who do not have an import vehicle / purchase price clause. My 500E was valued at a higher figure a few days ago. When I get the MB club valuation cert through this goes to the current Insurance company & locks in the agreed value 100% if the worst should happen. (I now also need to bump my cover up to match)

So be careful out there - make sure & read your policy documents fully as soon as you can.

Unless you have a proper valuation in place you might get a nasty shock if a total loss situation is encountered.
 
Last edited:
So today I went W124 parts hunting. Got lots of great stuff :)

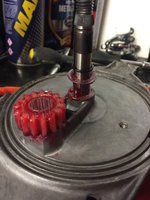
Among that was a late style w124 complete wiper mechanism. I bench tested it when I got home & it’s working perfect. I am tempted to strip it down, clean & re-grease then install it in the 500E. The main reason being that the later type W124 Wipers have a very easy to remove plastic cover – allowing good access to grease the outer part of the mechanism.

I do also have a couple of spare early type W124 wipers so I will compare them first to make sure the later wiper is compatible with an early wiper car. I also found this link with good pics / details on properly stripping & lubing the wiper mech. This is something I was meaning to do for some time since the 25 year old grease has to be well past it’s best.

How to grease 300E wiper gearbox - PeachParts Mercedes-Benz Forum
 
Remember that to use the late-style wiper, your windshield will need the channel along the bottom for the rubber weatherstrips that are integrated with the late wiper... and the channel isn't sold separately from MB.

:wormhole:
 
Remember that to use the late-style wiper, your windshield will need the channel along the bottom for the rubber weatherstrips that are integrated with the late wiper... and the channel isn't sold separately from MB.

:wormhole:

Thanks Dave. I actually have the strip / channel you are talking about in my spares collection. I took it off a late w124 - intact.

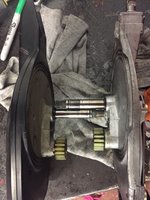
I have taken my 500E's original wiper out & apart. And compared it with the late style w124 unit. The main advantage of the late style unit is the plastic cover for ease of maintenance in the future. On doing several checks & mockups the late style 1995 arm works perfect with the early 1992 housing - gearbox. So in effect I am now building a hybrid wiper.

I feel a DIY coming on :D Re- full wiper lubrication. The old grease in mine was hard as heck.
 
Here are pictures of today’s going on’s for completion of my owner’s thread :) I am putting together a detailed DIY for 500E board which I will post within 24 hours.
The 'hybrid' wiper is now operating slicker than 2x eels fornicating in a bucket of grease :gsxrock:

IMG_3763.JPG IMG_3764.JPG IMG_3765.JPG IMG_3766.JPG IMG_3767.JPG

IMG_3769.JPG IMG_3773.JPG IMG_3774.JPG IMG_3775.JPG IMG_3776.JPG

IMG_3778.JPGIMG_3779.JPG IMG_3780.JPG IMG_3781.JPG IMG_3782.JPG

IMG_3783.JPG IMG_3789.JPG IMG_3790.JPG IMG_3792.JPG IMG_3797.JPG

IMG_3798.JPG IMG_3799.JPG IMG_3800.JPG IMG_3801.JPG IMG_3802.JPG
 
So the quest for originality started today! The electric fan conversion was removed & a new Genuine fan shroud installed. My original one was missing all of the flaps etc that they are supposed to have. And a new Borg Warner / ACM fan clutch was installed to the shot blasted & painted fan blade.

IMG_3828.JPG IMG_3829.JPG IMG_3830.JPG

So pretty much all of the cooling system is now brand new & the car runs very happily with the gauge pegged at 87 degrees.

My ‘new’ old Becker Radio arrived today also all the way from Cali! It’s in great cosmetic condition & I am looking forward to how it will transform the interior of the car. The modern Sony unit just does nothing for it. The radio came with the plugs on it (Except the speakers) so I will try to find a diagram and bench test it in a couple of days to make sure all is working. The seller did send me a code for it by email that apparently works – I shall see.

EDIT- Hmmm I'm not sure what this line out thing means. The other plugs have plastic pins too. If I must connect to a Amp I'll buy a new aftermarket (discrete) one maybe & rainbow speakers

IMG_3848.JPG IMG_3849.JPG
 
Last edited:
There were a few other bits I picked up a couple days ago –

IMG_3869.JPG IMG_3870.JPG IMG_3874.JPG

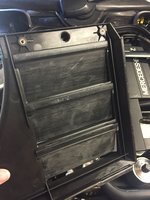
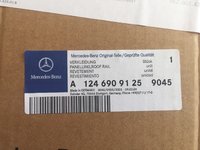
The headliner trim piece I have already replaced with a really good used one a few weeks ago. But these have a high tendancy to warp & sag so I wanted a new spare one to squirrel away for the future.

This piece was suspiciously cheap new from MB so I would surmise these may well go NLA soon. If anyone has a droppy panel now would be a good time to order one! Mine was only about £38

I also have a WTB out for this NLA small plastic trim circled red, If anyone can help with a used one please PM me

IMG_3873.JPG
 
Interior restoration has begun with some items I want to attend to. The single most annoying thing was the screw holes left in the centre console by a prior phone holder install. I see no propoer way of repairing that sort of thing other than re-placement. However, wouldn’t you know it’s NLA from MB.

I eventually tracked down what was purportedly a ‘Mint Condition’ w124 centre console in 9051 Black. So I had it shipped all the way from Germany only to find it came with removal damage Free of Charge-

IMG_3890.JPG

It looked to be screwdriver pry marks & was VERY noticeable. This bummed me out big time – it wasn’t cheap either getting it removed & sent to Ireland. So I broke out the heat gun at the lowest temp & after ~30 minutes the damage is 100% shrunk & rubbed out.

IMG_3891.JPG

A technique I’ve honed on a few leather Mercedes seats in the past :) There are some great videos on You Tube to show how. Just keep heat down & take your time is my advice.

So next step is to replace the centre console, fit the Becker Stereo & I also have a centre cubbyhole storage box to ‘build’. Ie; making one perfect one out of 2x ones I have. Then some minor re-trimming & leather stitching (Loose driver’s seat lower hem) which I will detail soon.

And I still have the hugely annoying driver's belt buckle squeak from hell. I have a whole buckle - Rail + bracket to fit to cure that.
 
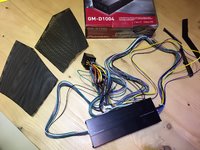
Got the new Amp today – it’s a little heavy but very compact. Infact it’s so compact it fits nicely under the plastic panel in the passenger footwell – so there it shall live.

IMG_3928.JPG

The speaker grills have also been dismantled & given several very fine spray coats of satin black after removing some little tiny dents. Just waiting on the new Speakers to get here then it’s centre console out!

I have decided that the new heavy gauge speaker wire I had proposed will have little effect on my modest system so I will retain the OE wires as they are – but interlink the new Amp just after the Fader & before the 4 speakers. (In 4x channel mode) That way the stereo is 100% stock in appearance but has a little power behind it. I also do not fancy taking the whole interior out just to run new wires - for likely zero advantage over the stock speaker wiring gauge. It just seems right to leave her alone sometimes! :)
 
With the centre console now removed I did some experimenting with the Burlwood. I had some spare timber which having lived in Ireland all it’s life was in pretty good condition with little fading + no cracking. So I am swapping some wood parts out & ‘refurbishing’ what original Burlwood I can.

For example – this cubbyhole I pulled from a scrap W124 that had no windshield for at least a year!

IMG_3972.JPG

After a serious cleaning, polishing and waxing by hand to remove the scratches & bring back the colour / shine-

IMG_3979.JPG

Looks almost as good as new in person. This can be used to replace the faded / cracked 500E’s cover & so forth.

IMG_3982.JPG
 
A short update – OCD interior restoration is slow work but.. Progress!!

Found another few defects in the centre console - then removed them-

IMG_3892.JPG IMG_3893.JPG

And I have the polishing technique worked out for the original woods which are not cracked. It is possible to put MEGA lustre into the original wood with a deep dark colour. Pretty amazing to think this is 25 year old wood! Goes to show the quality of materials MB had back in the day

BEFORE-

IMG_3994.JPG IMG_3995.JPG IMG_3997.JPG IMG_3999.JPG

AFTER-

IMG_4008.JPG IMG_4009.JPG IMG_4010.JPG IMG_4011.JPG
 
That is amazing! What is your technique? I had no idea the clearcoat could make the wood look so much lighter, and that polishing could make it appear darker...

:blink:
 
Sure – it’s simpler than you might think! I used the ultimate compound by hand with a microfiber towel. Make several passes one after the next (Buffing the compound off with another clean towel) rubbing the wood in circular motion getting into all crooks & corners. This process takes quite a while – I spent about 40 minutes on this trim alone. This removers the hazing, scratches and restores clarity to the clearcoat.

You really need to remove the wood from the car – the compound would make a mess of the leather / dash etc. Then finish with 2x coats of wax. The shine is amazing + the deep shine & clarity can be seen coming through as you use the compound.
That Ultimate Compound is AMAZING stuff I use it on all of my cars. Effortless way to remove haze + give very good shine.

Now I am doing all wood this way! That is original wood that has no cracking or severe fading. Some parts require restoration due to cracking. But wherever possible I love to retain the original MB wood finish.

IMG_4013.JPG
 
Wow Joe, looks really good mate! Defo going to use this on my woods that are not cracked.

Is there any easy way to cut out an extra option on the wood? I have 1 more space left that I need cut on the center wood I have.

Cheers
Matin
 
Wow Joe, looks really good mate! Defo going to use this on my woods that are not cracked.

Is there any easy way to cut out an extra option on the wood? I have 1 more space left that I need cut on the center wood I have.

Cheers
Matin

Hi Matin- thanks! Yes it might be possible to cut another slot- but only with a router I think (And great routering skills at that!)

Making a small timber jig would be a good way to do it. Cut to the exact shape to accommodate a router follower bearing / bit. Then clamp on top & router out using the jig. Second problem is clipping the switches in from behind after but with a spare trim to use plastic clips off it might work fine.

Thing is most all W124 Burlwood trim is now NLA. I know because I checked with my dealer with several options of Burlwood and all of it is NLA. Not just the centre console either - roller lids, A/C switch trim the lot is NLA.

So restoration is the only option now for cracked wood.
 
That is amazing! What is your technique? I had no idea the clearcoat could make the wood look so much lighter, and that polishing could make it appear darker...

:blink:

well..kinda different light setting on those two "examples",,so they look alot different in color..but i guess its not THAT different color after polishing..even some brightness will dissapear as it is the clear coat that gets "brighter" when getting older.so refresh the clear coat..will make it a bit darker :)
But anyways...awesome work...reeally does make a huuuge difference deep polishing the wood..and the results can obviously be seen here :)
Congrats :)
 
a huuuge difference
I think you mean a "yuuuuge" difference, eh?

proxy.php
 

Who has watched this thread (Total: 5) View details

Back
Top