• Hi Guest !

    Welcome to the 500Eboard forum.

    Since its founding in late 2008, 500Eboard has become the leading resource on the Internet for all things related to the Mercedes-Benz 500E and E500. In recent years, we have also expanded to include the 400E and E420 models, which are directly related to the 500E/E500.

    We invite you to browse and take advantage of the information and resources here on the site. If you find helpful information, please register for full membership, and you'll find even more resources available. Feel free to ask questions, and make liberal use of the "Search" function to find answers.

    We hope you will become an active contributor to the community!

    Sincerely,
    500Eboard Management

OWNER JC220

E36 Widebody or C124 Widebody?

  • Use the 500E widebody kit on my E36 saloon

    Votes: 2 22.2%
  • Adapt the 500E widebody kit for my 320CE

    Votes: 7 77.8%

  • Total voters
    9
  • Poll closed .
Yikes - I was aware that the e500e mounts were reboxed boge, those are for a different car I presume?
 
Yikes - I was a ware that the e500e mounts were reboxed boge, those are for a different car I presume?

Yes these are for my 1994 320CE who’s mounts are currently flat as a pancake! My 500E had new mounts fitted by a main dealer less than 10k miles ago and they are good.

Lemforder are off my Christmas card list!
 
I’ll take one for the team- going to fit them and make a note on here of date + mileage. We shall see how long they last. Hopefully my skepticism on Chinese Parts is misplaced. I need to be careful where I buy all the suspension arms from now.... Lemforder were my go to.
 
I do wonder that if Lemforder re-boxed Boge items before could they be re-boxing URO or similar items now? There are no markings on the mounts themselves
 
I’ll take one for the team- going to fit them and make a note on here of date + mileage. We shall see how long they last. Hopefully my skepticism on Chinese Parts is misplaced. I need to be careful where I buy all the suspension arms from now.... Lemforder were my go to.

A number of Lemforder parts for the 124 chassis have changed country of manufacture in recent years. The Lemforder steering links (tie rod assy's, drag link) had been made in Germany but are now made in Turkey. Lemforder strut mounts are made in Brazil. I am very curious what brand the current OE MB dealer engine mounts are (for M104), and where they are made. It's possible that MB is clamping down on their OEM's selling the same part (with logos ground off) via aftermarket channels. AFAIK, Lemforder was never the OEM for the MB mounts, but I'm not certain.

BTW, so far, I have not seen E500E Lemforder engine mounts that are not reboxed Boge.


I do wonder that if Lemforder re-boxed Boge items before could they be re-boxing URO or similar items now? There are no markings on the mounts themselves
Any time you get reboxed stuff made in China... you gotta wonder. However, I would hope Lemforder would still insist on some sort of quality control and not sell mounts coming from whatever factory produces URO / APA / FEQ / etc.

:wormhole:
 
I would hope Lemforder would still insist on some sort of quality control and not sell mounts coming from whatever factory produces URO / APA / FEQ / etc.
:wormhole:

These are my thoughts exactly. I hope that Lemforder still supply quality parts even if the country of origin differs. I have soooo many parts to buy for the CE I need to go aftermarket. I would love to buy all Genuine parts but needs must- and I want this car on the road next spring so I can drive and enjoy it. If it were a longer term project I would send these back but needs must.
 
Switch over periods are never good on quality. Things that were made for ages and switch manufacturing plants take a lot to get back to where it was quality wise. I've seen turkey made camshafts which were 0.10 underground at the journals. Ball joints which you could carve easily with a pocket knife.
Older parts tend to have less engineering definition and processes are buried. Oh, well Joe knew how to was suppose to be made- regardless of engineering blueprint. Now, you've given it to another country and Joe is layed off or retired... takes a bit to relearn and fix the drawing/process.

If these companies truly invest in having a true presence there and are not just made-to order, the quality can get there. Look at Swiss watch parts, Cummins, etc. Lots of examples.

I thought I was layed off there for a second :)

Joe
 
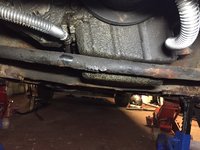
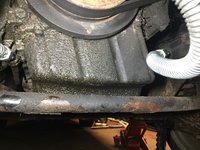
The engine mounts badly needed changed in the CE so I did it tonight. Those bolts are a PITA! A socket will not fit on at all due to no exhaust clearance. So I went and bought an extra 17mm 3/8 6 point socket. The cut it down in height so it just fitted over the bolt. Voila – bolt off in seconds. The other side had more room so got a S shaped spanner in and hit with a hammer to crack the top bolt free. There is a marked improvement and the engine is no longer resting on the ARB :? The mounts were the original 1994 items. Transmission mount next.

IMG_5527.JPG IMG_5535.JPG IMG_5529.JPG IMG_5531.JPG IMG_5530.JPG
 
The engine mounts badly needed changed in the CE so I did it tonight. Those bolts are a PITA! A socket will not fit on at all due to no exhaust clearance. So I went and bought an extra 17mm 3/8 6 point socket. The cut it down in height so it just fitted over the bolt. Voila – bolt off in seconds.
Brilliant solution! What did you use to cut the socket down so neatly?

:gor-gor:
 
Brilliant solution! What did you use to cut the socket down so neatly?

Thanks- it was a thin cutting disc on a grinder followed by a flap wheel to clean up the cut edge. A local auto store sells single sockets so it was easy to get a single one to cut down without destroying a socket set
 
I have a question guys hoping for some input. I am looking at several different full suspension Kits for the CE. Don’t want to lower it too much -30mm maybe kind of in line with the Sportline setup it had from factory. But new and not cracked!

http://www.europerformance.co.uk/pages/products/product_info.mhtml?product=2651020;car=mercedes_124

Some kits state they are not suitable for Sportline vehicles... I think it should not matter am I right?

There is a Spax adjustable kit too that looks very good. 28 settings on the dampers.
 
Last edited:
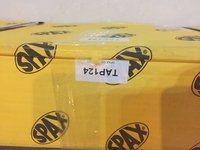
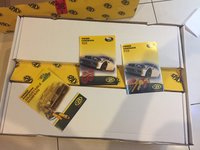
I treated the 320CE to the TAP124 Spax PSX kit :gsxrock: Seems to be one of the best out there and is fully adjustable – that’s new for me
 
I have a question guys hoping for some input. I am looking at several different full suspension Kits for the CE. Don’t want to lower it too much -30mm maybe kind of in line with the Sportline setup it had from factory. But new and not cracked!

http://www.europerformance.co.uk/pages/products/product_info.mhtml?product=2651020;car=mercedes_124

Some kits state they are not suitable for Sportline vehicles... I think it should not matter am I right? There is a Spax adjustable kit too that looks very good. 28 settings on the dampers. ...
I treated the 320CE to the TAP124 Spax PSX kit :gsxrock: Seems to be one of the best out there and is fully adjustable – that’s new for me
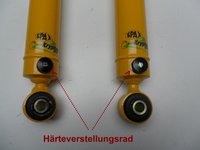
Just get the factory Sportline springs, based on the EPC spring charts. Sportline sway bars & LCA/subframe bushings too.

In general I would not recommend any coilover conversions for the 124 chassis. The front strut tower area was not designed to support the weight of the car, and I've seen the welds in that area break with normal suspension!

:duck:
 
Just get the factory Sportline springs, based on the EPC spring charts. Sportline sway bars & LCA/subframe bushings too.

In general I would not recommend any coilover conversions for the 124 chassis. The front strut tower area was not designed to support the weight of the car, and I've seen the welds in that area break with normal suspension!

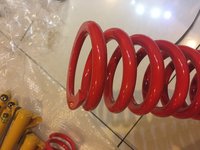
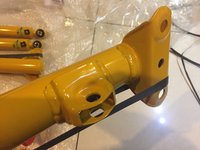
Hi Dave- the car had factory sportline option. But all Springs and shocks are rusted and one spring broken. The Spax kit ia not coil over - that’s just a generic image

The will be Spax Springs and W124 shortened gas adjustable dampers
 
Hi Dave- the car had factory sportline option. But all Springs and shocks are rusted and one spring broken. The Spax kit ia not coil over - that’s just a generic image

The will be Spax Springs and W124 shortened gas adjustable dampers
AH, got it. I would still use factory Sportline springs (they should be available new). For the dampers, I'm not sure if there is much to be gained with the Spax... but I don't have any direct experience so I can't say for sure.

BTW, I really hate sites that show generic photos that are completely different than the actual item being sold!

:oldster:

I can chime in on the Sportline springs, got them for my car. They are a nice mix of comfort vs. stiffness on the 124-chassis. But don't expect a very low car (but do expect comfort, even over road bumps).
 
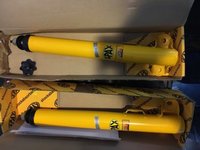
Dave & Thomas thanks for the recommendation. I agree factory sportline would be best – the springs are available I did check. But my dealer quoted over £1000 for the 4x springs and shocks. Comparatively the Spax adjustable damper / spring kit is £557 delivered. Spax are high quality items and a much respected brand in the UK. I think they will be decent – I did find pictures online of the W124 items I think-

447907c.jpg $_72.JPG 447907a.jpg

When the kit arrives I will post pictures for anyone curious. I will be installing all new 4 bump pads with these springs in the hope that the lower will be closer to 35mm from stock. I think Sportline is lower than stock already anyway so in reality the ride height will not change much. I am not after a ‘slammed’ look - not at all. But I do very much prefer stiffer suspension setup in MB’s (Like modern Avantgarde models) and the fact I can adjust the dampers is well worth a try I think. The roads here are great quality and I am a spirited driver lets say :)

I have a habit of over-restoring w124’s then not driving them. So the Coupe will get the same treatment – but not stuck 100% on originality like the 500E. And I will be driving the CE for sure as weekend use all year around.
 
My $0.02: I would still get factory Sportline springs... and use the Spax dampers if you prefer them. I am curious about the Spax, what adjustment is offered? KONI only allows rebound adjustment (no compression adjustment).

A lot of the aftermarket springs (form ANY manufacturer!) tend to be "one size fits most", which in reality translates into "one size fits almost nothing properly". There's a reason why MB has literally dozens of different spring part numbers. The springs are not cheap on this side of the pond either, last I checked I think it was $400-$500 USD for a set of four, from the discount dealers?

:spend:
 
This is the Spax blurb: http://www.spaxperformance.com/modern-products/psx/

If you are really serious about wanting to transform the handling characteristics of your car, you will need a SPAX PSX suspension kit with dampers that can be easily adjusted for stiffness, in seconds, with no dismantling. Controlling the bump and rebound damper stiffness allows you to alter the suspension set up to perfectly suit your style of driving. The result is more driver confidence and this means more enjoyment!
Some suspension kits may give your car cool looks and a sportier ride.
SPAX PSX Suspension Kits deliver SO MUCH MORE

Performance
SPAX PSX kits contain 4 uprated, shortened, 28 stage on-car adjustable dampers, matched to a set of our SSX Springs. SPAX engineers have developed these kits to produce maximum control and handling. PSX dampers are uprated, shortened and pressurised with Krypton gas. This produces not only superior low speed ride quality, but also high speed performance that is ultra stable, fade free and therefore significantly improved. The result is maximum cornering speed and traction, minimum braking distance and roll. Maximum adrenaline when you want it, minimum adrenaline when you don’t! PSX kits are ideal for most fast road applications and occasional “track days” because they have a wide range of on car adjustment with no dismantling. Transform your car’s handling from “drive to work” to “track day” in about a minute!
Quality
SPAX PSX kits are designed and manufactured to the strictest German TüV quality standards, using the latest technologies and methods. Each and every PSX damper is fully Dyno Tested to ensure you get 100% performance, 100% quality, 100% guaranteed. All PSX dampers and springs are Epoxy Powder coated and oven cured for second to none looks and extra long life.
Safety
Dampers and springs are safety critical parts of your car that can save your life. Optimal handling results in better driver control and shorter stopping distances and this leads to a safer and more enjoyable drive.
Value
SPAX’s massive buying power, commitment to value and “Factory Direct” pricing allows you to buy this premium product at second to none value.


I’ll set them in the centre to start with and go from there! OK I’ll re-think the Springs when the time comes. I have about 2 months Welding up next! The bit I’m putting off as long as possible
 
Dave: I did some checking a couple of years ago when I replaced the motor mounts on my E320 (M104 motor). I believe factory supplier is Corteco and I notice Peach Parts currently shows Corteco mounts as OEM and available. I didn't want to take any chances however and used factory parts.

Regards,

Peter Weissman
 
Dave: I did some checking a couple of years ago when I replaced the motor mounts on my E320 (M104 motor). I believe factory supplier is Corteco and I notice Peach Parts currently shows Corteco mounts as OEM and available. I didn't want to take any chances however and used factory parts.
Peter, I did some checking too... I found for the W210 (or at least, 210.072 chassis) Corteco is indeed the OEM and the dealer mounts are almost identical to Corteco aftermarket, but with the dealer mounts at 2x-3x the price. I took pictures of the OE/Genuine mounts (label claimed made in Germany, btw) but I haven't yet uploaded the pics to my website.

For grins, I also tried ordering a set of "OEM" Corteco mounts for 6-cyl 124 and I wasn't thrilled with what arrived. No country of manufacture to be found, and no markings on the mounts to indicate who made them or where. Made me wonder if they are reboxing some items. And, I'm still not sure if Corteco is OEM for 124 engine mounts - I don't think so, but I'm not certain. I'd like to get a pair of OE/Genuine mounts for inspection but ugh, they are $$$$$$.

:spend:
 
Darn- I was looking at Corteco mounts from Germany and they were cheaper than Lemforder by a good bit. But I thought I’d air on the side of caution and get Lemforder. Didn’t work out too well :doh:

Someone neeeeeds to buy OE mounts :)
 
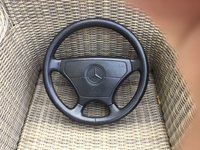
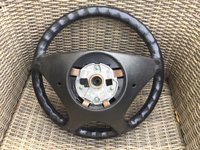
<!--[if gte mso 9]><xml> <o:OfficeDocumentSettings> <o:AllowPNG/> </o:OfficeDocumentSettings> </xml><![endif]--> MY 1994 CE had a cracked leather steering wheel. I swapped in the perfect one from the E220. But still lusted after a wheel like in my 500E. So I located and purchased another W124 Sportline Steering wheel:

s-l1600.jpg s-l16002.jpg

It is identical in appearance to my 500E wheel and 390mm diameter. But I can’t see any small bolt holes for the ‘Squib’ at the back of the wheel. My CE has the standard plastic squib with brushes on the boss. I hope I can transfer that plastic squib over and drill / screw it onto the Sportline Steering wheel pictured. (These are the seller's pics ill have it in a few days)

EDIT- Dave to the rescue again with his excellent pics! http://www.w124performance.com/images/W124_steering/steering_squibbs/
Those nuts just need taken off and my squib swapped in I think.
 
Last edited:
More on the Chinese Lemforder here:
Lemforder Engine mounts made in China

The buyer contacted ZF and was told they are legit mounts (i.e., ZF confirmed that particular Lemforder mount is produced in China).
:pc1:

Thanks for the link Dave – I guess I feel slightly better about the Lemforder Engine Mounts. The Gearbox Mount was also slightly worse for wear.....

IMG_5555.JPG

I can’t drive the car since it’s not road legal but it sure idles super smooth now VS the old mounts. I also received the Sportline steering wheel for the CE. Although the original leather is not cracked and is all in tact – it does look discoloured and has marks / indents from storage. I am going to refurbish the wheel myself if anyone would like to see a DIY created on that speak now! :)
 
As per the DIY thread below the sunroof refurbishment is complete in my CE:
HOW-TO: Complete W124 Sunroof Refurbishment | "HOW-TO" Tutorial Articles


Next I am planning to take it outside, get it jacked up and steam clean the entire underside and engine bay etc. Then welding / underbody restoration begins. The new suspension / underbody parts are arriving faster than I can un pack them! There is much to do and it will be a while before I begin to fit the all new underbody parts – likely the Christmas holidays.

I will keep the thread posted as the restoration goes along – initially it’s boring rust repairs :) The current plan is to have it MOT'd again (First test in almost 7 years) early next year after phase 1 is complete - the underbody resto.
 
I haven't had time to read the rest of your sunroof DIY. Looking forward to it. A vote of encouragement also for your posting the wheel refurbishing.

Drew
 
I haven't had time to read the rest of your sunroof DIY. Looking forward to it. A vote of encouragement also for your posting the wheel refurbishing.

Drew

Hi Drew- thanks and yes I have now got the materials for refurbishing the Sportline steering wheel at home so I’ll be tackling that on Sunday. Should be a nice project I think- I’ll aim to post a DIY on the subject if I’m successful! :)
 
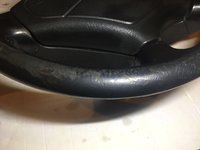
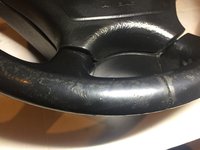
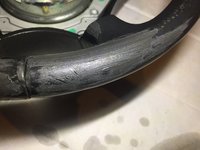
I’ve started on the wheel – obligatory ‘before’ pictures!

IMG_5747.JPG IMG_5748.JPG IMG_5749.JPG IMG_5750.JPG


It is important to note that the leather is not degraded, cracked or peeling. Rather – the leather has been indented / scratched most likely from years of poor storage and the leather colour is worn on the top face from use. So far I’ve cleaned and fed the leather several days in advance. It soaked in the cream very fast! Then removed the airbag, given it another thorough clean / de-grease with Dodo juice leather cleaner, hot water and a microfiber towel.


The first product being used is a black leather filler. Used to infill the dimples and marks in the leather surface before re-colouring. The filler will cure fully overnight then I’ll gingerly finish with 1200 grit paper (Not sure to use the paper wet or dry yet....) before moving on to the next steps tomorrow

IMG_5751.JPG
 
I made a mistake by trying to wet sand the leather filler this morning– it came off with the water. So I wiped the filler all off with a wet cloth and started again. The ‘advantage’ of that was any deep marks have filler in them now all to an even level. So it’ll take a few hours for the second / re-coat of filler to cure enough to have a second go at dry sanding it this time with very fine grades obviously.

The kit is simplicity itself! I used the special cleaner and a sponge before testing a small section of the dye. Dab it on with a small sponge in the kit and dry it in seconds with a hairdryer. I do like the finish - a matt charcoal (w124 esk) leather colour more than jet black and a nice matt finish - I hate 'shiny' fake looking products and leather 'slimes'. Dodo juice leather cleaner / seal products are great that way as they leave no shiny / sticky residue. I don’t want to over-apply the dye and 2x coats appeared perfect. This is the small test area re-dyed beside one of the more badly faded areas of the wheel (Left treated – right half untreated)

IMG_5753.JPG

For anyone who might want to do this also – here are the items I bought;
Leather Vinyl Steering Wheel Restoration Repair Kit BLACK 1000+ sales 5* reviews | eBay
https://www.ebay.co.uk/itm/50-ml-Le...cuffs-Cracks-Professionally-used/162632603316
Pictures of the finished wheel to follow later – assuming that is I don’t mess up the leather filler sanding again! :doh:
 
Sanding the leather filler with dry 1200 grit is the way to go! This is the wheel sanded and rubber backing edges masking taped to prevent dye transfer:

IMG_5756.JPG

After 1x coat of dye I could still see some small imperfections when looking close. So I applied a second coat of filler and now waiting on that to cure before a final sand and 2 or 3 final coats of dye. Squib was a straight bolt in swap from the CE’s non sportline wheel. I can see a manufacturing date of August 1993 on this Sportline wheel. This is the wheel now after 1x coat of dye and after another leather filler application to some minor remaining marks

IMG_5757.JPG
 
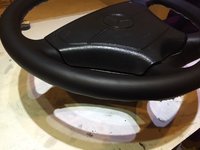
It’s done – and looking great I think! The finish is very even and looks original quality - It’s nice to save the original Mercedes leather. The time spent during filling, prep & sanding is most important here. All damage is totally gone. It took me a few hours sanding etc but well worth it. 3 coats of dye to finish which pretty much emptied the bottle. For applying the dye the best technique was to sponge it on in about 3 inch long sections at a time moving fast – but not fast enough to cause bubbles and immediately dry it off with a hairdryer before moving on with the next section of dye. I used my GF’s expensive hairdryer which was awesome for this – dusted off my prints (And dye!) and left it back exactly where I got it. What she doesn’t know won’t hurt as they say! I have just ordered 2x more kits to do my 500E steering wheel and I’ll be buying another used Sportline wheel to re-furb for my 300E-24.

IMG_5760.JPG IMG_5762.JPG IMG_5763.JPG IMG_5764.JPG

It will dry overnight then I will apply Dodo Juice leather sealer / protectant before fitting into the 320CE. A little leather cream applied to the rim will match the lustre of the Airbag.
 
Great result! Well done Joe and thanks for the taking the time to put it here!

Thanks Thomas and no problem! I would recommend that Kit I linked above if anyone wants to do their own wheel too. It’s not difficult at all but I would recommend taking the wheel off and doing it indoors under good lighting etc
 
Another small interior refurb job done in the CE. The speaker covers were taken off, cleaned and re-sprayed in Satin Black. Years of no use didn't do them any favours but a simple task all the same.

IMG_5774.JPG IMG_5775.JPG IMG_5776.JPG IMG_5782.JPG IMG_5784.JPG

There are a couple small adhesive residue spots on the top centre of the dash. From approx 1inch square sticky pads. It’s stuck on good and won’t come off by scraping with my nail. I think a solvent of sorts is needed – can anyone recommend anything they might have used that doesn’t damage the dash surface?

Edit - I bought this stuff to try initially but any other suggestions are welcome!
 
Last edited:
Citric acid is great with adhesives, but be careful and test it first on a hidden surface of the same material. I used citric acid to remove nicotine stains from sun visors, and the plastic on those did not react bad with citric acid, and the visors are probably clad with the same pleather as the dash.
 
Citric acid is great with adhesives, but be careful and test it first on a hidden surface of the same material. I used citric acid to remove nicotine stains from sun visors, and the plastic on those did not react bad with citric acid, and the visors are probably clad with the same pleather as the dash.

Thanks for the tip Thomas! I’ll try that too. I’ll test for colourfastness on spare trim first with whatever I use. It would be a shame to ruin a perfectly good dash in the process.

pic attached showing the stubborn Glue patches
 

Attachments

  • 3462C57C-1258-4A39-886A-00B36C19C80D.jpeg
    3462C57C-1258-4A39-886A-00B36C19C80D.jpeg
    1.2 MB · Views: 16
Last edited:
Vinegar works well and is safe for nearly everything including leather. Nice job on the wheel. I don't like shiny leather/plastic either so that limits many products.

Drew
 
Gents - thankyou for the suggestions. I will be sure to try those methods and report what worked best. Drew- if you can get Dodo Juice leather products over there give them a go! They are the best I’ve used and leave no shiny residue.
 
Has anyone bought Lemforder or MB engine mounts lately? Where were they made and are they Boge inside? I need PN 124 240 19 17 (Lemforder Ref: 38712 01)
More bad news... the Lemforder engine mount for M119 (MB # 124-240-26-17 or Lemforder 1085001) appears to be OOS everywhere in USA, and possibly NLA? These had been ~$100 or less in years past.

The mounts appear to still be available from MB but at insane pricing, $298 USD list, ~$225 discount.

The mounts are cheaper in Europe, €160 list (excl. VAT):
http://partssearch.mercedes-benz-classic.com/parts/A1242402617?tt=automatic

:runexe:
 
Haven’t been able to work at the CE since – but I did go on Saturday for a driver’s door latch. Admittedly I hooked on my trailer ‘just in case’ and filled it with CE Spares (I think I have a serious 124 Parts hoarding problem:doh:)

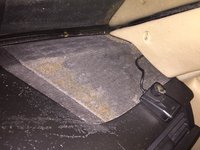
Complete Door, Front Bumper, Rear Bumper, All lower body cladding panels, All stainless trims, headlamp wiper motors -panels and arms both sides, another second pair of spare door mirrors, Centre Console, Centre roll top storage box, all Walnut trim in console top and bottom, one Door walnut trim, both rear speaker covers, all relays in the fuse box, full set of C124 cream trunk linings and mat - I prefer this evening over the grey ones my CE has, ‘trunk’ plastic trim panel, the instrument cluster, a full set of the original 15 inch C124 8 hole alloy wheels (The original wheels my CE came with from factory – I am keeping the genuine AMG 17’s on it and keeping the OE wheels in storage with the car) and some other bits I’ve no doubt forgotten about. Going back with the trailer again in a couple weeks to fill it once more :D

I also ordered an Outside temperature LCD repair kit and some reproduction stickers (for the 500E too) I will post details on the LCD repair when that turns up. I won’t get working on the CE now for nearly 2x weeks due to heading abroad so more updates will continue in December
 
Last edited:
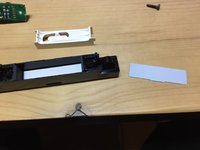
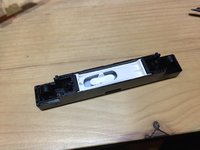
A small package arrived from the Netherlands today – earlier than expected. So I couldn’t help but squeeze in a little extra tinkering before I go on a short break. The exterior Temp display LCD in my CE was broken. Half Black and not working at all. A guy called Marcel makes replacement LCD screens for very reasonable prices so I thought I’d give it a shot- the pics are self explanatory. (He has both F & C display LCD screens available)


IMG_5838.JPG IMG_5841.JPG IMG_5843.JPG

IMG_5845.JPG IMG_5847.JPG IMG_5849.JPG

IMG_5850.JPG IMG_5851.JPG IMG_5853.JPG

IMG_5856.JPG


Quite a simple 10 minute DIY and no soldering needed. I have no clue how these screens work since it looks like clear glass where the little rubber blocks mount onto the ‘bushbar’. However- it was a successful repair! Marcel also makes the reproduction Mercedes stickers – and he supplies the MB classic centre. I bought some stickers also off him-

IMG_5836.JPG


His email is info@marceldeijkers.nl for these stickers and screen repair kits. Note: I have NO affiliation with Marcel at all – just passing on a great contact for 500E board members who might want similar items.


I got the glue off the Dash also – a total pain. Nothing would work but scraping it off – the dash survived the ordeal unharmed. One of my fingernails now has a very strange flat ground on it though :D The interior is looking a little better with the refurbished Sportline wheel in there too and the other little jobs done. There is ALOT more interior restoration planned for the CE...... can you tell that I’m still putting off the welding! Full DIY leather restoration, fitting a replacement centre console, new pedals and wood replacement / polishing are among the next interior jobs.

IMG_5859.JPG
 
well..its abit more than a 10 min job mate :)

But a veeery cool job to do,many overlook this,and leave the displays "broken".
Marcel delivers quality products i have to say.Got LCD displays for the lap counter AND temp display for my 190e,and various stickers..and they are indeed good parts.Have a look at post #572 on my thread if you want to.

The only thing about the LCD displays,,is that it is NOT 100 percent correct font for the celcius symbol.the C is a tiny bit slimmer...but still it is good enough and lightyears better than a broken original one :)

The stickers also is spot on ,appart from the red trunk warning sticker...which is a kina aluminium one originally..but the repro is not..but the other stickers are super nice.So marcel is a recomended "dude" for my part.
Nice job anyways you did there :)
 
Back
Top