• Hi Guest !

    Welcome to the 500Eboard forum.

    Since its founding in late 2008, 500Eboard has become the leading resource on the Internet for all things related to the Mercedes-Benz 500E and E500. In recent years, we have also expanded to include the 400E and E420 models, which are directly related to the 500E/E500.

    We invite you to browse and take advantage of the information and resources here on the site. If you find helpful information, please register for full membership, and you'll find even more resources available. Feel free to ask questions, and make liberal use of the "Search" function to find answers.

    We hope you will become an active contributor to the community!

    Sincerely,
    500Eboard Management

500E Red Baron (1of1 Brabus 6.5) .. no longer has hiccups!

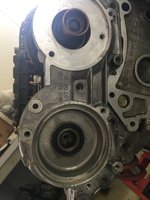
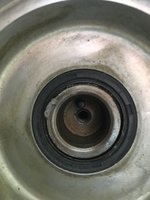
OK, just to be sure I will now change the right side, I will remove the seal first and measure the depth of the cover to make sure the seal is gripping on the cover

Measure the current depth from the front face to the face of the original radial seal prior to removal.

And the depth of the recess

And compare both seals side by side to ensure the same depth
 
I replaced the cam seals with OE MB on my Bornite 1992 500E last month and they sit differently (flat).
 

Attachments

  • 57CFCE8A-2BE0-4973-B0AC-E3D6125E79E6.jpeg
    57CFCE8A-2BE0-4973-B0AC-E3D6125E79E6.jpeg
    1.4 MB · Views: 11
  • DD69608C-615A-4117-A2B4-A51B8D86A698.jpeg
    DD69608C-615A-4117-A2B4-A51B8D86A698.jpeg
    1.3 MB · Views: 12
  • B5F61D90-5360-46D8-AC41-BACAF7543A13.jpeg
    B5F61D90-5360-46D8-AC41-BACAF7543A13.jpeg
    1.3 MB · Views: 12
  • D03EDB96-FB70-473B-AE51-721BB13382FC.jpeg
    D03EDB96-FB70-473B-AE51-721BB13382FC.jpeg
    1.3 MB · Views: 12
  • DBCA6DCE-EDC3-480A-A6C3-93627607F345.jpeg
    DBCA6DCE-EDC3-480A-A6C3-93627607F345.jpeg
    1.2 MB · Views: 11
Checked both of my m119s. The setback from the front was 2.44 & 2.39mm.

20190816_210618.jpg

Rear gap from the edge of the casting to the face of the seal was 3.33mm.

20190816_210628.jpg

I will check more tomorrow in terms of the camshafts themselves.
 
Update 2:

Finally had the right bank seal removed and replaced. Half a day gone just because of a stripped rotor bolt.

- Cam cover depth: 12-13mm
- Cam cover the camshaft stop/lobe (cant tell which): 17mm
- Seal thickness: 7mm

Both seals went in exactly 5mm on both side. I think it is supposed to be flush with the back of the cover, as the WIS file also mentions that the design of the seal pushes oil away from the seal, it does not make sense for the seal to be flooded with oil due to a 2-3mm recess from the back side.

Cleaning everything up now.
 
Sounds like 5mm is the maximum depth without the rear of the seal protruding. If the seals are normally ~2mm when originally built, the 5mm inset would move the sealing surface ~3mm away from the previous surface, theoretically allowing a better seal when the new ones are installed.

This assumes there is no varnish or other buildup on the surface which had previously been expose to engine oil; the sprockets are often a brown color due to a thin layer of varnish/buildup over the years.

:rugby:
 
Agreed Gentlemen,

I insured the seal, cam and cam cover is well oiled.

Just finished cleaning and reinstalling everything. I started it up and things look promising (proven by the water glass test).
Needs a good run now to get everything to operating temperature and any carbon buildup out since it has been idling alot during testing.

video hopefully tomorrow depending on the weather.
 
Update 3:

Toke it out for the drive, thought its cloudy with light rain.
Never felt smoother nor more responsive like its does now. The kick down from 90km/h to 220km/h is 450HP all the way... I LOVE BRABUS !

The LH adaptation has further improved.

Connected to Star, I did notice it had better combustion time at Idle WITH THE OLD OE BOSCH CAPS !!
Cylinder 1 in particular is slightly below spec while cylinder 8 being within spec but slightly less than the others. thought its only at idle in both cases.
The Beru cap had alot of corrosion on the cylinder 1 terminal, I sanded and cleaned the terminal but its not smooth. Both cylinders are at the buttom of the cap. I think the BERU caps have suffered from the misfire and corrosion and are not optimal anymore.

Gentlemen, your recommendations for the caps ?
 
Update 4:

After last week's drive, and a second drive the same day, then 3 more starts (in out of garage) I opened the distributor cap today.

Good news! But with a slight notice

The dust cover was dry with no oil misting, the edges were dry as well, the cover was wiped with acetone and no oil residue was seen.
But the distributor cap had misting ! The terminals also had misting and slight color change (picture 1). The distributor cap was wiped with acetone showed a yellow residue on the entire cap. As further evidence, the dust cover had a circular stain mark where it meets the cap (see picture 2)

I wiped everything clean for now and will check back in a couple of weeks, if the cap still mists I will have them both replaced.
 

Attachments

  • DSC_1668.JPG
    DSC_1668.JPG
    2.4 MB · Views: 19
  • DSC_1669.JPG
    DSC_1669.JPG
    3 MB · Views: 20
I'm not sure if new caps will cure the "misting". This could be normal...

:klink:

Hi Dave,
I have documented the condition and misting that used to occur before replacing the cam seals. This definitely has not happened.
The distributor cap was too oily compared to the dust cap, which is exactly the opposite to what we had before.

I will give it a couple of weeks, if I see the misting again on the caps I will have them replaced. It might as well be fine now
 
"Misting" inside the caps is a normal thing, and cannot be eliminated.

A fine yellow powder/residue is evidence of the brownish-orange insulator discs and/or caps undergoing slow degradation. They "slough off" fine amounts of this residue due to age, heat, combustion, and use.
 
195910... have you checked the resisitance values of your plug wires, as well as each terminal on the caps and rotors? There are specs for all of these. I was dealing with hot misfires and stalling on my 420, and it ended up being that the distributor caps were practically an open circuit. Replaced them with new, and all has been well. I know you’ve been swapping parts in this area as well as scoping, but its always good to get back to the basics first.

Have a looksee here: STAR TekInfo

Lots of MB specs and diagnostic tips which are M119 specific. I have found it very helpful. You will find the plug wire, rotor and cap specs in there.

You also mentioned having a pico scope, so I wanted to point this neat read out: Intermittent misfire | Mercedes W140 S-Class V8

Addintionally, i documented my own journey with this madness in my owner thread. My adventure starts out around post 508. (Not sure how to link to a specific post in my owner thread)

Thank you a777fan, these are good references that I used to trace what the mystery issue was. Best ever reference though was from Pittsbourgh ;)

I don't have the misfire anymore, except that this blow-by condensation was contaminating the distributors and causing corrosion on the terminals, this causes occasional miss. Now that the blow-by issue was addressed, I am left with cleaning the contamination on the caps or replacing them if they still keep venting.

Lets see what happens in a couple of weeks. Pretty sure its done.
 
I opened the left bank distributor, Dust cover is completely dry, and the cap is in better condition with only some sweating around the terminals.

I will test the right side Beru cap, as I seeing more stable values with the OLD bosch cap. Could be just moisture/oil that needs to be vented before installing
 
Update 5:

Condensation problem is FIXED. There is no more sweating, and the oil seen last week was from the right cap as the inner side and back of the dust cap was completely dry except for that ring stain.

I cleaned the caps (sanded terminals, soaked in acetone and wiped clean, the letting them dry for a day before installing. The dust cover was dry but cleaned everything just to be sure.

New observation: Still running smooth, but I am surprised that the combustion values are different!
Not only before and after cleaning is different, but old vs newer as well.

After a few drives (~180-200km) the adaptation has stabled showing a less that 10% increase in fuel in both lower and higher, this indicated no leaks. I am running sport filters.

Although its running smooth, I still feel the combustion values could be better.
Last test is to swap around the caps and see if the values change, right cap ohm test shows good values but they could be leaking voltage somewhere.
 
Update 6:

Distributors are confirmed clean (see picture 1).

Combustion values and lambda are back to normal. Swapping the caps between left and right banks I noticed better Cylinder 1 values; now ranging in spec range to 0.1 deviation. It appears the distributor terminal for cylinder 1 has premature wear compared to the rest, I assume its due to the "other" misfire issue we had previously.

* I would say its a FIX, but should I change the cap or give it some time since its running find on the left bank?

** In pursuit of perfection: scope shows an occasional higher KV at the spark leads which causes a minor dip ~0.4mV in the O2 measurements.
Could there be a secondary path or is this just noise ?
 

Attachments

  • DSC_1706.JPG
    DSC_1706.JPG
    3 MB · Views: 11
Update 7:

6 month after the last update. No contamination, but here is a new observation.

I had a slightly different combustion pattern on only one of the cylinders (that most technicians would simply ignore). Engine starts, runs, powers on perfectly. To add to this mystery this only occurred at idle when warm! contrary to every diagnoses literature.

I was suspecting that the distributor caps deteriorated in performance due to multiple contamination and cleaning, increasing in resistance when warm. Ohm testing the caps was difficult, and flaking in the insulation gave me an additional excuse.

I ordered a new Bosch cap (2018 production) and replaced the one on the 1-4 bank. But, I ended up with the same reading : /

Going through my notes several times, I found one more point to test. So off to see the patterns again, but first lets just double check the wires are seated properly, and I just happen to have the Multimeter near by. ( ALL Wires were changed last year, Brand new M-B Original set)

First wire... open circuit! Can't be, the probe pins are probably too short. 2nd, 3rd, 4th, 5th all showed readings!
Unscrewed the suppressor and replaced it with an adjacent cylinder. Reads find.
So I got a plug wire from the old set, plugged it in, started the car and let it warm. PERFECT combustion patterns all within spec.

Had this issue for more than a year now. Its amazing how well these cars Car run, drive and power even when something is out of spec.
But seriously, a bad wire again!!! Should have just bought a Beru set for 1/3 what I paid for the Original set at the dealership. : /
 
Were the MB Original wires Bosch gray wires with orange plastic suppressors?

Also, was the wire itself bad, or the orange suppressor?

:shocking:
 
Were the MB Original wires Bosch gray wires with orange plastic suppressors?

Also, was the wire itself bad, or the orange suppressor?

:shocking:

Hi Dave,

The original M-B Wires are now dealership assembled, not pre-cut/assembled. Consists of Orange suppressors (Bosch) and Black wires and plugs (Beru). The Orange suppressors are said to be the newer/better design and the complete wire with both heads has a reading of 1.8k ohms
(~2.3k ohms for old design)

Suppressor was fine and I reused it with an old wire to maintain the resistance values. Its the wire that's bad, even tested without the suppressor.

Thanks for the info. I will now be testing all new ignition lead sets with a multimeter before installation. Who would have thunk your new leads were an issue!? Good find
 
Ahhhh. In that case, it sounds like a mistake by the technician at the dealer who assembled the wires. I've done this myself and it's harder than it looks, even with the factory tools (as I mentioned in Gerry's recent plug wire thread). BTW, the wire itself with the cap boot attached should measure near zero ohms. The only significant resistance should be the suppressor.

I don't know if the orange suppressors are any better than the original style. IIRC, Klink has said they have a roughly equal failure rate. But in my limited experience, out of the several dozen I've measured of each type, I've measured far more orange style way out of spec (like, 5k to 10k ohms, instead of the rated ~2k). I've found very few of the old-style, 90° metal-jacket that are way out of spec.

I've also found some suppressors that measure far higher than spec, but the engine still runs relatively normally, or at least doesn't have any misfiring or other symptoms. Just a few months ago I checked my one E420 for grins and one of the orange suppressors measured 20k ohms! I hooked up the SDS and the ignition voltage on that cylinder was higher than the other cylinders; went back to normal after I replaced the one suppressor.

:scratchchin:
 
@gsxr Yes its definitely the wire+ cap boot as its measuring infinite, giving an additional air gap in the secondary.

I never thought its the wires again and the engine was running properly with only a slight pattern difference in one cylinder!
I had concerns from false air to "mechanical", all of which didn't fit the symptoms and the readings but its really difficult to say on a non-standard engine.

So finally a good thing happened in 2020 !!
 
@195910, what data were you looking at which identified the problem cylinder? EZL voltages in HHT-Win, or something else? How far off was that one cylinder vs other cylinders?

:matrix:
 

Who has viewed this thread (Total: 2) View details

Who has watched this thread (Total: 1) View details

Back
Top