Since this is an inevitable repair for our cars I figured I can write HOW TO, from my own experience. I couldn’t find very good info online, with pictures, so I figured since I am doing it on my 95’ E420 with 59k miles I can just record it. I expected it to be much harder. I took a lot of pictures and took my time.
Tools I Used:
Old vs New harness pics: As you can see old harness was pretty bad. New one looks great. Thx Jono!I didn’t have any problems with my old harness, it was more like preventive maintenance.

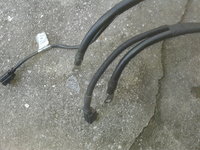

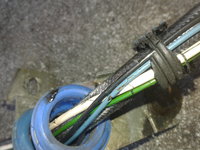

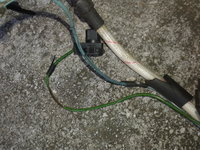
I drove my car on ramps and also put jack stands below just in case (SAFETY FIRST), removed the battery cables (very important!!), and removed the splash shield held by 6x 8mm screws.
I started First with the with alternator. I removed a little cap from the nut and removed a 13mm nut.

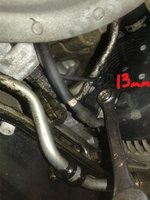

Other cable is held by 8mm nut. I used a 8mm wrench…

After I removed alternator wires, next was oil pressure sender connector, I separated little tab and just pulled it off…
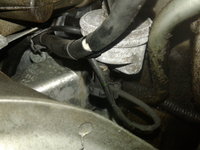

Next is oil level sensor connector. I just pulled it off.

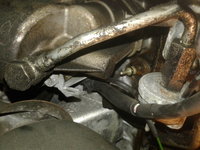
After that was done, I remove the harness from the clip. I did not do a great job here so the part of it broke. I will need to get another one and replace it. I plan on replacing oil level sensor and oil pan gasket soon so I will do it than.

You can see all 4 connectors loose now. One side of the harness is done. Now moving up toward the starter.

To see the starter, I had to remove 2 shields that were in my way, one is covering the starter and another one is right below it. First shield is held by 1x 10mm screw and 1x 10mm nut.
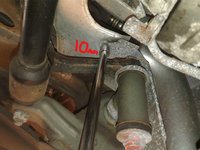
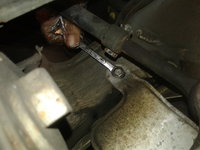

Looking from under the car, below are 3 nuts and screws holding it. You cant see them all but I tried to show them with the arrows. Only one is visible from this angle. One above the red arrow is facing the opposite direction and the one to the right is a nut for which I had to use a wrench to access it since the space was so limited, I think the frame was in the way.
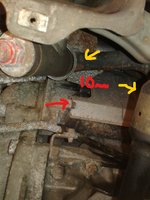
This one is the red arrow one at the bottom (from the previous picture)
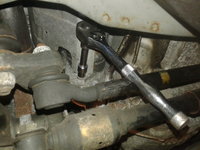
Below one is far right 10mm nut (from 2 pics ago)
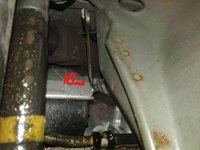
This one is top screw (from 3 pics ago). This one is facing the opposite direction as to the one below it.

Shield is out...

After the shield is off you can see the starter and 2 wires going to it. Top one is 13mm nut and smaller one is an awful Philips screw. I found an easy way to remove the Philips screw so it wasn’t as bad as I expected and read at some other posts. I tried going to the store and looking to replace it with a hex head but I had no luck, I found one but it was too long. I should have ordered it online but instead I just got the new screw (since I don’t anticipate doing this in a while and it’s not too hard to remove it). Correct screw size/thread is M4- .70.
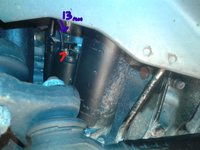
I was able to put the ratchet and a 13mm socket in there and take off the top nut easily


So now comes the Philips screw. Easy way is to do it from the top. It would help if you have someone to guide it from the bottom to make sure its seated in the head before you unscrew it from the top. I did not have anyone helping so I just set it myself from the bottom and that went from the top and grabbed the ratchet and unscrewed it. I used below set up…


This is how it looks from the bottom. You see the screwdriver since I tried that first but it didn’t work, so just imagine the extension and a Philips drive instead ��. I forgot to take the picture of the actual extension I used since I was excited to get that screw out.
When putting the screw back, I put the screw in by hand, set the screwdriver just like you see in the picture below, went from the top and screwed it in
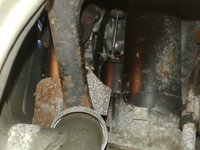
This is a view from the top, once you set it from the bottom, the ratchet sticks out right behind the oil filter.I grabbed it carefully and unscrewed it.
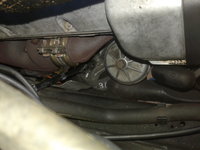
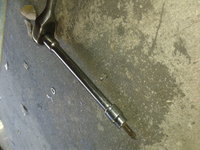
Now that all this is done, all that’s holding the harness under the car are 2 screws. You can see the first one from below, it’s a 17mm. Its kind of above the transmission oil pan. Jut look for the blue rubber hangers holding it. That’s the easiest way to locate these. I had to use a small extension since there is limited space up there.


Second one is 10mm nut right next to the gourmet hole where cable goes through to “under the hood compartment” behind the cann box and continuing to the area below upper wire harness connectors.
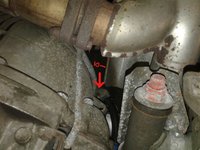


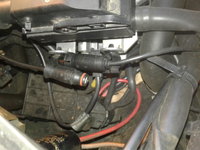
After all this, we are done from below the car. Now going under the hood. There are two wires/connectors, both are kind of below upper wiring harness connectors. Purple arrow shows the one connector, and the second wire is under the plastic cover. 2 red arrows show tabs that you need to press to lift the cover off. Other side of the cover is tied by a plastic string so you can easily move it to a side.

After lifting the plastic cover, you can see a 17m nut holding one of the cables (red arrow). To take it off, I used a long extension and a joint socket.


To remove the second connector, unplug the small upper wire harness connector so you can reach 2x 8mm bolts holding it, and unscrew them.


To separate the last connector (middle picture above) there is a metal clip holding it. Once the connector is loose, just pry the clip off and separate the connectors (one is from the car side and another one is part of the wire harness).
After this I went under the car and carefully pulled the cables from underneath until they went through, I think I had to go from the top once or twice to guide them a little but it wasn’t hard at all. Connector is small enough to go through. I can see how the connector for 500e can be a PITA since its much wider.
When putting a new harness back in I used wire running kit from harbor freight (https://www.harborfreight.com/3-16-inch-x-33-ft-fiberglass-wire-running-kit-65326.html). I attached one end to the connectors before I pulled old harness down. Once the old haress went through, I attached the new harness from under the car and pulled the wire kit along with the new harnes up. I used exact kit from the link and it worked great for me.
I did not take any pictures from installation but if you removed it yourself, it’s pretty self-explanatory and easy to install it,especially if you take pictures. Only recommendation I have is to make sure you keep an eye on all of the washers, don’t strip the Philips screw on the starter, and try to get as much room under the car as you can since the space is very limited. I am 6-6 so I am sure that doesn’t help, but putting the car on the ramp vs jack stands worked out great for me.
This forum helped me so much and I learned a lot from it, so I hope I can help someone else too! This job is not nearly as hard as I have imagined it.
Tools I Used:
- 3/8 ratchet and multiple extensions (from the smallest ones to a foot long one)
- Philips drive socket (for Philips screw on the starter)
- 3/8 joint socket (for nut under the hood under the plastic cover)
- Wire fishing kit (For installing new harness through the gourmet)
- 8mm Wrench (Alternator)
- 8mms Socket (Splash shield, small alternator wire, harness connector under the hood)
- 10mm Wrench (both starter shields under the alternator)
- 10mm Socket (both starter shields, screw holding the harness right at the gourmet from under the car)
- 13mm wrench (Alternator nut, starter top nut)
- 17mm socket (Nut holding the harness above the transmission, under the hood nut holding the ground wire for the harness)
Old vs New harness pics: As you can see old harness was pretty bad. New one looks great. Thx Jono!I didn’t have any problems with my old harness, it was more like preventive maintenance.


I drove my car on ramps and also put jack stands below just in case (SAFETY FIRST), removed the battery cables (very important!!), and removed the splash shield held by 6x 8mm screws.
I started First with the with alternator. I removed a little cap from the nut and removed a 13mm nut.


Other cable is held by 8mm nut. I used a 8mm wrench…

After I removed alternator wires, next was oil pressure sender connector, I separated little tab and just pulled it off…


Next is oil level sensor connector. I just pulled it off.


After that was done, I remove the harness from the clip. I did not do a great job here so the part of it broke. I will need to get another one and replace it. I plan on replacing oil level sensor and oil pan gasket soon so I will do it than.

You can see all 4 connectors loose now. One side of the harness is done. Now moving up toward the starter.

To see the starter, I had to remove 2 shields that were in my way, one is covering the starter and another one is right below it. First shield is held by 1x 10mm screw and 1x 10mm nut.


Looking from under the car, below are 3 nuts and screws holding it. You cant see them all but I tried to show them with the arrows. Only one is visible from this angle. One above the red arrow is facing the opposite direction and the one to the right is a nut for which I had to use a wrench to access it since the space was so limited, I think the frame was in the way.

This one is the red arrow one at the bottom (from the previous picture)

Below one is far right 10mm nut (from 2 pics ago)

This one is top screw (from 3 pics ago). This one is facing the opposite direction as to the one below it.

Shield is out...

After the shield is off you can see the starter and 2 wires going to it. Top one is 13mm nut and smaller one is an awful Philips screw. I found an easy way to remove the Philips screw so it wasn’t as bad as I expected and read at some other posts. I tried going to the store and looking to replace it with a hex head but I had no luck, I found one but it was too long. I should have ordered it online but instead I just got the new screw (since I don’t anticipate doing this in a while and it’s not too hard to remove it). Correct screw size/thread is M4- .70.

I was able to put the ratchet and a 13mm socket in there and take off the top nut easily


So now comes the Philips screw. Easy way is to do it from the top. It would help if you have someone to guide it from the bottom to make sure its seated in the head before you unscrew it from the top. I did not have anyone helping so I just set it myself from the bottom and that went from the top and grabbed the ratchet and unscrewed it. I used below set up…


This is how it looks from the bottom. You see the screwdriver since I tried that first but it didn’t work, so just imagine the extension and a Philips drive instead ��. I forgot to take the picture of the actual extension I used since I was excited to get that screw out.
When putting the screw back, I put the screw in by hand, set the screwdriver just like you see in the picture below, went from the top and screwed it in

This is a view from the top, once you set it from the bottom, the ratchet sticks out right behind the oil filter.I grabbed it carefully and unscrewed it.


Now that all this is done, all that’s holding the harness under the car are 2 screws. You can see the first one from below, it’s a 17mm. Its kind of above the transmission oil pan. Jut look for the blue rubber hangers holding it. That’s the easiest way to locate these. I had to use a small extension since there is limited space up there.


Second one is 10mm nut right next to the gourmet hole where cable goes through to “under the hood compartment” behind the cann box and continuing to the area below upper wire harness connectors.


After all this, we are done from below the car. Now going under the hood. There are two wires/connectors, both are kind of below upper wiring harness connectors. Purple arrow shows the one connector, and the second wire is under the plastic cover. 2 red arrows show tabs that you need to press to lift the cover off. Other side of the cover is tied by a plastic string so you can easily move it to a side.

After lifting the plastic cover, you can see a 17m nut holding one of the cables (red arrow). To take it off, I used a long extension and a joint socket.


To remove the second connector, unplug the small upper wire harness connector so you can reach 2x 8mm bolts holding it, and unscrew them.


To separate the last connector (middle picture above) there is a metal clip holding it. Once the connector is loose, just pry the clip off and separate the connectors (one is from the car side and another one is part of the wire harness).
After this I went under the car and carefully pulled the cables from underneath until they went through, I think I had to go from the top once or twice to guide them a little but it wasn’t hard at all. Connector is small enough to go through. I can see how the connector for 500e can be a PITA since its much wider.
When putting a new harness back in I used wire running kit from harbor freight (https://www.harborfreight.com/3-16-inch-x-33-ft-fiberglass-wire-running-kit-65326.html). I attached one end to the connectors before I pulled old harness down. Once the old haress went through, I attached the new harness from under the car and pulled the wire kit along with the new harnes up. I used exact kit from the link and it worked great for me.
I did not take any pictures from installation but if you removed it yourself, it’s pretty self-explanatory and easy to install it,especially if you take pictures. Only recommendation I have is to make sure you keep an eye on all of the washers, don’t strip the Philips screw on the starter, and try to get as much room under the car as you can since the space is very limited. I am 6-6 so I am sure that doesn’t help, but putting the car on the ramp vs jack stands worked out great for me.
This forum helped me so much and I learned a lot from it, so I hope I can help someone else too! This job is not nearly as hard as I have imagined it.


