• Hi Guest !

    Welcome to the 500Eboard forum.

    Since its founding in late 2008, 500Eboard has become the leading resource on the Internet for all things related to the Mercedes-Benz 500E and E500. In recent years, we have also expanded to include the 400E and E420 models, which are directly related to the 500E/E500.

    We invite you to browse and take advantage of the information and resources here on the site. If you find helpful information, please register for full membership, and you'll find even more resources available. Feel free to ask questions, and make liberal use of the "Search" function to find answers.

    We hope you will become an active contributor to the community!

    Sincerely,
    500Eboard Management

OWNER - Glen (744)

I haven't driven this car in a few months so I thought I'd take it out this morning to give it a little exercise. As I sat down in the seat l noticed some parts laying by the shift lever...
View attachment 44701

I look up and sure enough, my rear view mirror has exploded.

Here are the parts and pieces:
View attachment 44702

Anyone ever seen this before?

Yep. The plastic disintegrates and the force of the spring blasts that handle through the plastic. I also think that the small amount of grease applied to that pivot point during manufacture hastens the material disintegration in that area. And yes, the hotter the climate and/or the more direct the solar exposure, the more frequently it occurs.

In central Florida this would sometimes occur when the car was still in warranty. The customers would swear that they didn't do anything ham-fisted, and that they just "found it that way" We wondered what they could have possibly been doing to cause this, then it started happening on our own cars.

You could simply find a pile of parts on the console, or it will come apart as you flip the lever. I have often wondered how many unfortunate valets, spouses, children, etc. were blamed for this over the years...
:doh:

Can we expect the replacement part to act in a similar "explosive fashion" or has it been modified to eliminate the problem?

Oh, with enough time and sun, that thing's going to detonate just like the others...
 
I had this on my C126. Took a while to find a good one, but I swab it with A303 like everything else with UV exposure to help prolong life.
 
Went to San Diego Cars & Coffee yesterday to show off my friend Jon's project that we've been working on for the last 14 months. We successfully transplanted a 2006 Pontiac GTO LS2 with T56 6-speed transmission into his 2004 Mazda Miata. The front subframe, engine mounts, radiator, frame rails, rear diff mount, and axles were sourced from Martin Wilson of Monster Miata (here in San Marcos). The fabrication and mounting were done at Monster Miata by us on weekends from June to November. We then trailered the car to Jon's house and began the very tedious process of integrating the GM ECU with the Miata's systems (speedo, tach, CEL, evaporative emission systems, fuel tank pressure and level, etc.). There were many hurdles along the way but the car ran under it's own power for the first time in 14 months last Saturday! :-)

I have to say, the car is an absolute blast to drive. 400 HP/400TQ in a (now) ~2600 pound car makes it really quick. And amazingly, it can be driven very sedately around town and loses very little of what makes the Miata such a fun car. Anyway, here are a few pictures from yesterday:
 

Attachments

  • 8851056e622c3a1f0981d70ac06493ee.jpg
    8851056e622c3a1f0981d70ac06493ee.jpg
    146.4 KB · Views: 16
  • 082038a37a158cea8b68d16e72cf3a54.jpg
    082038a37a158cea8b68d16e72cf3a54.jpg
    158.3 KB · Views: 14
  • 328ec33d5de0f8ecd338a49bfc09d785.jpg
    328ec33d5de0f8ecd338a49bfc09d785.jpg
    146.1 KB · Views: 16
  • 9b8b4833956d463f27078fa7bd786f85.jpg
    9b8b4833956d463f27078fa7bd786f85.jpg
    145.8 KB · Views: 17
  • 82234dc2a55e9b6cf698eef2e9d2486a.jpg
    82234dc2a55e9b6cf698eef2e9d2486a.jpg
    155.2 KB · Views: 15
And for those interested, here are some pix of the Miata during the build (these are all recent, within the last month or so):
 

Attachments

  • df7676a9b1f82f49e2f952b03e62ae36.jpg
    df7676a9b1f82f49e2f952b03e62ae36.jpg
    89.5 KB · Views: 21
  • 6a7d6846daf42b89be9b49048a9ddb3d.jpg
    6a7d6846daf42b89be9b49048a9ddb3d.jpg
    131.7 KB · Views: 24
  • d86129bfebd0fb4072378dbd425e2f21.jpg
    d86129bfebd0fb4072378dbd425e2f21.jpg
    137.6 KB · Views: 24
  • df660dc12e33c9008bb648b79da61893.jpg
    df660dc12e33c9008bb648b79da61893.jpg
    112.3 KB · Views: 22
  • 724cb3af8834bf17d2c3e82bad395bb0.jpg
    724cb3af8834bf17d2c3e82bad395bb0.jpg
    140.1 KB · Views: 21
That is very cool Glen and looks like a great project. I love the LSx engines. Easy to work on, easy to tune, zillions of bolts on and plenty of power. What could possibly go wrong!
 
That is very cool Glen and looks like a great project. I love the LSx engines. Easy to work on, easy to tune, zillions of bolts on and plenty of power. What could possibly go wrong!

Thanks Ken. Our goal is to make it California smog legal, which is why its taking so long. Hoping to take it to a referee in the next few weeks.
 
Ugh, it happened again! [emoji52]
Sometime during the last few weeks, while parked in my garage the rear view mirror self destructed...you may recall this happened before too. It must be the car telling me I need to drive it more...
 

Attachments

  • 20fd3168e386d45417966195cf4ca30d.jpg
    20fd3168e386d45417966195cf4ca30d.jpg
    55.1 KB · Views: 22
  • dcf6dfa135159e27677ae4a381064fd2.jpg
    dcf6dfa135159e27677ae4a381064fd2.jpg
    263.5 KB · Views: 30
Glen, have you considered having a strip of window tint across the top of the windshield? This may reduce UV rays and miiiiight help prolong mirror lifespan. Funny, I've never seen this besides the two times on your car!

:duck:
 
Glen, have you considered having a strip of window tint across the top of the windshield? This may reduce UV rays and miiiiight help prolong mirror lifespan. Funny, I've never seen this besides the two times on your car!

:duck:

The car spends very little time in the sun. At home it’s in my garage. The few times a year I take it to work I park in a covered parking structure.
 
Just read all the way through this. Two e500e's. You're a lucky guy! (I do agree, 744 is faster tho... :D)

Anyway, i noticed something on your car that I haven't noticed before. Your PRND32B surround seems to be multi-colored. P is red, D is green etc. Are all 500s like this?


Sent from my iPhone using Tapatalk
 
Hi Jon. No, I made that shifter panel several years ago. I scanned the original and printed it out on thin plastic, actually several layers of plastic because the black wasn't solid enough with a single layer. It's not quite as crisp as the factory panel but looks pretty nice overall.
 
Today is my 20th anniversary with this car. In 2 decades, I've managed to drive it LESS than 40K miles but I love it more than ever. No pictures, just wanted to put it out there. Carry on.
 
The stock brakes are perfectly adequate for the driving I do, but that isn’t the point here.
I call this my “vanity” brake upgrade and it’s only about bling :-)

Enjoy...
6-piston, 345mm x 30mm rotor
IMG_9226.jpeg

4-piston, 330mm x 26mm rotor
IMG_9271.jpeg
 
Glen, those look amazing! What is the change in stopping power from high speeds vs stock? I assume you had the 320 front / 278 rear previously?

:3gears:
 
Glen, those look amazing! What is the change in stopping power from high speeds vs stock? I assume you had the 320 front / 278 rear previously?
Thanks :-) I don't know yet. During installation I found a bad tie-rod end that I need to replace before I can do any serious testing.
 
Glen, those look amazing! What is the change in stopping power from high speeds vs stock? I assume you had the 320 front / 278 rear previously?
320mm front and 300mm rear more likely? 278 rears was never matched with the 320 fronts?
 
Here in the U.S. we only got the small 278mm rear rotors. 🤨
Yep... USA + Japan received an upgrade to 320 front only, with the same 278 rears (and, the same MC+booster combo).

Europe/ROW received 320+300 plus a switching MC, different booster, and different ASR/ABS control unit. This was a NICE setup, it's very annoying that MB decided to pinch pennies in the USA + Japan markets.

:oldman:
 
While I wait for fresh brake fluid to come in for a full brake fluid R&R, I thought I'd share my journey to installing these calipers. I started this project in 2019 when I bought new SLK55 6-piston calipers through Tom at the Classic Center. At the time I also bought a used front spindle so I could mock up the brackets on the bench. Also bought some used matching 4-piston rear calipers on eBay. With the calipers in hand, I quickly realized that it would take more than a flat bracket to fit the huge 6-pot calipers properly. At the time, JC (5thscaleracer) had brackets for the 360mm rotors available but I wanted to use 345mm rotors to keep the cost manageable because as I mentioned, for me the upgrade was more about bling than outright performance.

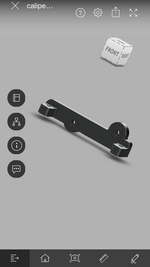
Anyway, as I pondered the project, 2020 rolled around and COVID hit. I shelved the project and sort of forgot about it. Fast forward to late 2024 and I bought a 3D printer and started to teach myself CAD using AutoDesk Fusion. After successfully making usable plastic parts for my cars and around the house, I suddenly had a lightbulb moment! I dug out the calipers and spindle and started designing a bracket to mount the calipers. After taking careful measurements, I drew up a rudimentary bracket. It took a few iterations but I ended up with this:
IMG_9199.png

Printed solid in ABS:
IMG_9202.jpeg

I then went looking for a machine shop to have them made and quickly found out that none of the locals wanted to touch the project for less than a 10 unit run. Fortunately, this is 2025 and there are a number of online shops looking for business with decent prices and most importantly they will take on a small single unit project. All you do is upload a file, select material and surface finish. An engineer may contact you if they have any questions and then you get a quote. It really couldn't be any simpler.

A few weeks later, I received my custom brackets in 7075-T6 aluminum anodized in black:
IMG_9212.jpeg

They bolted to the spindle perfectly!
IMG_9284.jpeg

Trimmed and painted dust shields:
IMG_9283.jpeg
And with the caliper:
IMG_9286.jpeg
 

Attachments

  • IMG_9285.jpeg
    IMG_9285.jpeg
    1.8 MB · Views: 9
Last edited:
And even though I probably won’t drive the car enough to wear down the pads, I wanted to have functional wear sensors. So I modified the new style sensors by soldering on the older style plugs.
IMG_9295.jpeg

I need to print some clips to secure the sensor plugs as my originals came off years ago.
 

Who has watched this thread (Total: 1) View details

Back
Top