• Hi Guest !

    Welcome to the 500Eboard forum.

    Since its founding in late 2008, 500Eboard has become the leading resource on the Internet for all things related to the Mercedes-Benz 500E and E500. In recent years, we have also expanded to include the 400E and E420 models, which are directly related to the 500E/E500.

    We invite you to browse and take advantage of the information and resources here on the site. If you find helpful information, please register for full membership, and you'll find even more resources available. Feel free to ask questions, and make liberal use of the "Search" function to find answers.

    We hope you will become an active contributor to the community!

    Sincerely,
    500Eboard Management

Rust removal using electrolysis / battery charger

JC220

🇮🇪 Resto Jedi 🔧OCD Zinc Plating Type
Member
Hi All,

This is something I have seen on you tube etc before and thought it looked very effective and low cost for cleaning rust from old car parts. I already have a suitable plastic container, plenty of spare steel to act as sacrificial pieces and a 12v battery charger with ammeter gauge. I think this will also be a little more gentle on parts than sandblasting. I am very curious just how much rust this method could effectively remove and how long it takes.

I have seen some good sites to describe this process likethis one

Have any members experience with their own setups and do you have any tips or hints to share?

I will be setting this up tonight if I can get washing soda in local shops and do a test piece first. Then ill clean up 2x rusty C124 rear hubs and I will share that on here and hopefully the results of how it the parts clean up!


[video=youtube_share;qi8qIxK4IlA]https://youtu.be/qi8qIxK4IlA[/video]
 
Last edited:
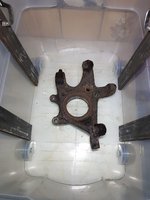
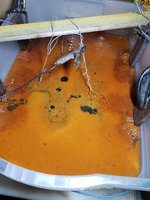
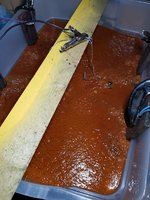
My rust removal is powered up and underway! My charger might be a tad higher than the videos siggest at 6amp so maybe I'll get a second more suitable charger but this one will do for now.

Quite easy to set up and so far it's only cost me £1 for a 1kg pack of the washing soda :) This is my first kick at the cat using this type of rust removal so ill see what I learn from this first hub

20190218_190943.jpg 20190218_190934.jpg 20190218_202456.jpg
 
Wow this is very cool stuff! About 8 hours in and this is how the tank looked:

20190219_062712.jpg

The heavy rust scale was very easy to clean off:

[video=youtube;FNaRuNP4ABc]https://www.youtube.com/watch?v=FNaRuNP4ABc[/video]

I put it in a sink full of hot soapy water and a paint brush easily cleaned off the now very loose rust scale.

20190219_065033.jpg

Some very small areas still remained so I flipped it around and it will stay in the tank until I get back from work in another 9 hours or so which should have it finished and ready for immediate painting with Black chassis enamel.

There are some changes I will make - using larger tin sheetmetal for the sacrificial steel and maybe a second tank so I can do 2x large parts at once and have the second stage rust removal in a clean tank.
 
So after work this is how the tub looked: :barf:

20190219_175201.jpg

There was a pretty large amount of rust and black sludge on the anodes and on the base of the tub.

20190219_191502.jpg

The hub is now free of all rust scale and to me looks just fine at this stage! I could have left it in longer but really it’s good for me and far exceeds what I expected after only 22 hours or so. I took some photos to compare it now with it’s matching hub pre treatment:

20190219_190528.jpg 20190219_190546.jpg 20190219_190610.jpg

20190219_190623.jpg 20190219_190633.jpg

I cleaned it some more with brake cleaner and a clean rag then let it dry for an hour on top of my home heating boiler followed by a coating of Aquasteel rust converter & primer just to seal the surface as soon as possible and fully treat any small traces of rust left over. It will be given 2x final coats of specialist underbody black enamel paint.

The tub is all cleaned and re-set up with the second hub in it now :gsxracer:
 

Who has viewed this thread (Total: 1) View details

Back
Top