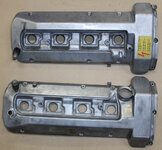
The previous owner of our 1994 E420 slathered some sort of brown shellac all over the valve cover gaskets (possibly Indian Gasket Shellac Compound?). Whatever the stuff is, it hardens like epoxy. As a bonus, he also didn't tighten the bolts properly. I discovered this immediately after purchase, but thankfully the minor leak stopped after tightening the bolts so I didn't have to immediately spend time scraping brown crap off the heads and covers. This was back in 2013 when we bought the car, with 114kmi on it.
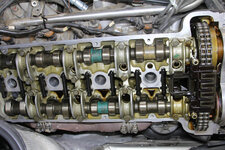
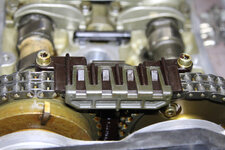
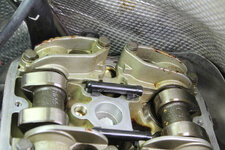
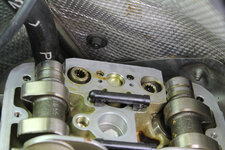
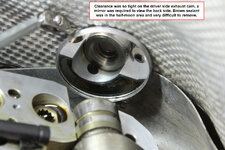
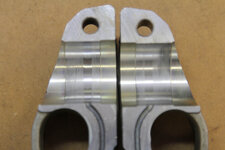
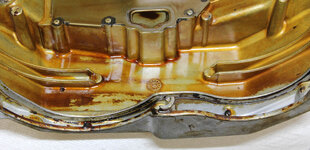
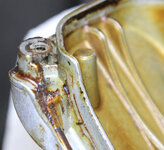
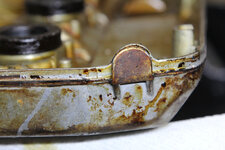
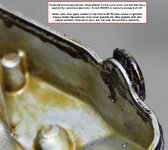
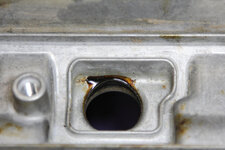
The oil leak went away for a number of years, but eventually returned. It was very minor so I kept delaying the job, as I knew it wouldn't be fun. Finally got around to the project in summer 2019 at the 150kmi service. Photos below... the brown shellac was on *everything*. It took HOURS to scrape it all off. I'd estimate 8-10 hours over several days, just to clean the sealing surfaces on the cylinder heads, and the valve covers. That did not include the normal time for the rest of the work. What a nightmare. I had already cleaned most of the cylinder head surfaces before I took photos, so it doesn't look too bad in the pictures, but trust me - it was a mess. I got photos of the valve covers before I started cleaning.
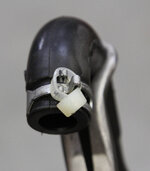
While in there, I also replaced all the fossilized PCV hoses/tubes and vacuum lines. I was also able to replace the ETA hose without pulling the ETA, but it took about three dozen attempts before it worked. With new OE/Genuine MB valve cover gaskets installed, plus new copper washers on the bolts, all torqued to spec, the valve covers have been leak-free, 4kmi later.
Please - do not EVER apply sealant of any kind to M119 valve cover gaskets. It simply is not necessary. I've seen this multiple times. The worst is RTV which "glues" the cover to the head, making it difficult to remove without damaging anything - then you get to spend hours cleaning once it's removed.

The oil leak went away for a number of years, but eventually returned. It was very minor so I kept delaying the job, as I knew it wouldn't be fun. Finally got around to the project in summer 2019 at the 150kmi service. Photos below... the brown shellac was on *everything*. It took HOURS to scrape it all off. I'd estimate 8-10 hours over several days, just to clean the sealing surfaces on the cylinder heads, and the valve covers. That did not include the normal time for the rest of the work. What a nightmare. I had already cleaned most of the cylinder head surfaces before I took photos, so it doesn't look too bad in the pictures, but trust me - it was a mess. I got photos of the valve covers before I started cleaning.
While in there, I also replaced all the fossilized PCV hoses/tubes and vacuum lines. I was also able to replace the ETA hose without pulling the ETA, but it took about three dozen attempts before it worked. With new OE/Genuine MB valve cover gaskets installed, plus new copper washers on the bolts, all torqued to spec, the valve covers have been leak-free, 4kmi later.
Please - do not EVER apply sealant of any kind to M119 valve cover gaskets. It simply is not necessary. I've seen this multiple times. The worst is RTV which "glues" the cover to the head, making it difficult to remove without damaging anything - then you get to spend hours cleaning once it's removed.
Attachments
-
 ETA_hose_trick1.jpg128.1 KB · Views: 169
 -
 ETA_hose_trick2.jpg81.6 KB · Views: 183
 -
 head_cleaning1.jpg301.5 KB · Views: 182
 -
 head_cleaning2.jpg243.7 KB · Views: 168
 -
 head_cleaning3.jpg220 KB · Views: 159
 -
 head_cleaning4.jpg142.4 KB · Views: 165
 -
 head_cleaning5.jpg212.1 KB · Views: 159
 -
 head_cleaning6.jpg200.5 KB · Views: 155
 -
 head_cleaning7.jpg192.4 KB · Views: 151
 -
 head_cleaning8.jpg111 KB · Views: 148
 -
 head_cleaning9.jpg238.5 KB · Views: 147
 -
 valve_cover_clean1.jpg288.9 KB · Views: 146
 -
 valve_cover_clean2.jpg310.2 KB · Views: 140
 -
 valve_cover_clean3.jpg208.7 KB · Views: 137
 -
 valve_cover_clean4.jpg183.1 KB · Views: 130
 -
 valve_cover_goop1.jpg225 KB · Views: 141
 -
 valve_cover_goop2.jpg213.9 KB · Views: 137
 -
 valve_cover_goop3.jpg193 KB · Views: 133
 -
 valve_cover_goop4.jpg237.9 KB · Views: 133
 -
 valve_cover_goop5.jpg143.8 KB · Views: 127
 -
 valve_cover_goop6.jpg169.3 KB · Views: 125
 -
 valve_cover_goop7.jpg166.7 KB · Views: 149