• Hi Guest !

    Welcome to the 500Eboard forum.

    Since its founding in late 2008, 500Eboard has become the leading resource on the Internet for all things related to the Mercedes-Benz 500E and E500. In recent years, we have also expanded to include the 400E and E420 models, which are directly related to the 500E/E500.

    We invite you to browse and take advantage of the information and resources here on the site. If you find helpful information, please register for full membership, and you'll find even more resources available. Feel free to ask questions, and make liberal use of the "Search" function to find answers.

    We hope you will become an active contributor to the community!

    Sincerely,
    500Eboard Management

REMOVING UPPER FAN SHROUD

TerryA

E500E **Meister**
Member
I’m in the process of installing my new ACM fan Clutch.

OK, I easily removed 2 Clips and 2 Bolts from
the upper shroud. There is I believe 1 more bolt on the driver’s side in towards the fan shaft.

This bolt is just spinning in place and will not break loose from the nut. At least I believe it’s a nut. Can someone confirm what size and shape of the nut? I cannot see it at present. I think I can possibly reach it from the bottom.

BUT as a Side Note, I was going to jack up the car to take a shot at it from the bottom BUT my jack FAILED. Luckily before I was under the car. It’s just to old. I’ve owned it at least 40 years. So I’m just going to go to Harbor Freight and buy a new 1-1/2 ton for $84.95 and move on.

Anyway, how about that bolt? Any info would be helpful.

Thanks
 
There are a total of THREE bolts that must be removed, that join the two halves of the fan shroud. With the bolts removed, the upper half should pull up and out. Two of the bolts are on the driver's side of the shroud (an inner and outer one) and one bolt is on the passenger side.

It is much easier to remove the radiator when doing the fan clutch job. A minor PITA, but worth the time to do it. And an opportunity to replace a gallon-plus of coolant, if you haven't done that in the past few years.

Consider getting a jack from Amazon instead of Harbor Fright. I got this one, and have been happy with it.

Thanks Gerry, It’s the inner bolt on DS that won’t break loose. It is just spinning. What kind of nut is on the back side?

PS I am planning to remove the radiator. Your jack looks great but I need it now today. So HF will do even if it costs a little more.
 
If your under the car its an axle stand you need not just a jack we have all done it
but its just not worth the risk
Graeme Johnson
@GRAEME JOHNSON, I have the axle jacks ready to use. I’ve been crawling under cars for a lot of years. As you get older you get wiser.
I always use all precautions.

Thanks for the reminder.
 
It's common for the captive nuts to spin in the plastic that surrounds them. There is really only one thing you can do, which is what I did, and that is to try to jam something in there, or use pressure with your finger, to try to stop the nut from spinning. What I mean is jam something like a nail or brad in between a flat side of the nut and the plastic to try to stop it from spinning.

After I did that, I drilled the nut out and hole, and used a regular nut and bolt to go through the hole. That has been fine ever since, many years now.
 
Terry, if the bolt is seized and you cannot stop the captive nut from spinning, the remaining options aren't pretty. The captive not DOES NOT have hex flats. It's a serrated round thingy in the plastic. It could be epoxied back in place if extracted using force. Alternately, you can remove the radiator (not fun), which will let you remove the entire shroud so you can work on it outside the car.

Remember that unless you have the special tools to R&R the original Sachs fan clutch, you'll have to remove the radiator anyway. There's not enough space to access the bolt without the special tools.
 
@gerryvz @gsxr, I installed the OEM radiator about 10 years ago. I guess I was ham fisted on that bolt. I think tomorrow first AM I will be able to get my hands on it from the bottom. Now that I have a new Pittsburgh 3 ton low profile rapid pump jack. It cost me $114.18 at HF. I know I could have paid a lot less for it at Costco but I could not wait for delivery.

I need to get this car up and running and smogged and new tags by 9/02/21 or registration will go up another $150.00

BTW, Which Zerox Anti- Freeze do I purchase?

Plus I need the part numbers fo the 2 soft rubber hose trans cooler lines from the radiator.

Thanks
 
@gerryvz @gsxr,... I guess I was ham fisted on that bolt. I think tomorrow first AM I will be able to get my hands on it from the bottom.
Terry, as I described above, there's nothing to get your hands on from behind or below... if one of the three M5 bolts with 8mm hex bolt is spinning and not releasing, you're - pardon the pun - screwed. :ROFLMAO:

EDIT: You are "screwed" if you want to remove the M5 bolts with the shroud installed on the car, without (1) damaging the shroud, (2) using destructive extraction methods, OR (3) REMOVING THE RADIATOR. Replacing the fan+clutch is a <30 minute job with the correct tools when the shroud unscrews normally. Removing the radiator turns it into a messy 2-4 hour job. The lower shroud is NLA and the intent is to remove / repair it so it can be re-used, and re-installed with the factory bolts if possible, or using replacement nuts/bolts if necessary.

After removal and repair/replacement, make sure the bolts will easily thread in with fingers only. If not, use a tap to clean the threads and repeat until the bolt will turn in easily. And then apply anti-seize before re-installing. With anti-seize applied you should never have a problem again.

:runexe:
 
Terry, as I described above, there's nothing to get your hands on from behind or below... if one of the three M5 bolts with 8mm hex bolt is spinning and not releasing, you're - pardon the pun - screwed. :ROFLMAO:
Thanks Dave,

I’ll get done somehow.:banghead:
 
Last edited:
There is more then one way to skin a cat. I know there are people here who enjoy trying to point out or nit-pick items where I may be perceived as inaccurate or outright wrong. As I mentioned, years ago I successfully remedied a spinning nut, and after removing the shroud removed the nut and bolt and replaced them with free-standing items that are not captive in the fan shroud plastic.

And every time I remove the shroud I am thankful that that one nut and bolt are separate items.

You have to use a little ingenuity to hold the nut from behind. You may be able to do it with a finger. Or a tiny nail or other item wedged in there. It is possible — I know because I did this, personally. You have to step back and think about how best to do this. BUT IT IS POSSIBLE, and YOU ARE NOT "SCREWED" unless you give up. For the last time .... I know, because I personally did this.

And I fixed the problem on that nut PERMANENTLY by replacing it and bolt with a non-captive pair.

Once the stock captive nut spins in the plastic, it is compromised and will never work the same. This is why I replaced it. If you get the others out, anti-seize will probably work for them. But for a nut that is spun, I would not try to fix it in compromised plastic. Just use a new nut and bolt.

As I said I thank myself for doing this every time I remove the inner bolt on that shroud. When I remove it, I can get a grip on the replaced nut from behind with a small box or open-end wrench from the fan opening.
@gerryvz, That’s the plan, if I can’t get to budge I’ll cut it off and replace it but it’s coming off one way or the other.

Must be careful not to damage the shroud.
 
Correct. Don't get frustrated and crack the shroud. That upper piece is NLA. The lower piece is still available from MB.

It could also be possible to grind the head off the bolt with a Dremel, but it is tight in there. I'd probably consider that as a last resort. But see what you can do to hold it from the rear, to keep the captive nut from spinning. That is what I did, and was successful.
 
There is more then one way to skin a cat. I know there are people here who enjoy trying to point out or nit-pick items where I may be perceived as inaccurate or outright wrong.
C'mon, call them out. People = GSXR. :starwars:


As I mentioned, years ago I successfully remedied a spinning nut, and after removing the shroud removed the nut and bolt and replaced them with free-standing items that are not captive in the fan shroud plastic.
The critical part here is you fixed this AFTER REMOVING THE SHROUD FROM THE CAR. Terry is still trying to remove the shroud from the car, without damaging it.


And every time I remove the shroud I am thankful that that one nut and bolt are separate items.

You have to use a little ingenuity to hold the nut from behind. You may be able to do it with a finger. Or a tiny nail or other item wedged in there. It is possible — I know because I did this, personally. You have to step back and think about how best to do this. BUT IT IS POSSIBLE, and YOU ARE NOT "SCREWED" unless you give up. For the last time .... I know, because I personally did this.

And I fixed the problem on that nut PERMANENTLY by replacing it and bolt with a non-captive pair.
I'm happy you personally did this. However not all fan shroud bolts will come out as easily as yours did. Some are corroded / seized and will not unscrew at all. Implying that everyone's bolts should come out with some effort to hold or wedge the nut is not accurate. They might unscrew, they might not. And if not, the nut may have to be forced out with destructive methods. Sure, after removing the captive nut you can then use a a longer bolt & loose nut/washer on the back side. That's not the same as successfully separating the parts and re-using them as the factory intended. As you said, different ways to skin a dog. EDIT: See post #19 below for @Derf's creative method to extract a seized nut/bolt from the shroud.


Once the stock captive nut spins in the plastic, it is compromised and will never work the same. This is why I replaced it. If you get the others out, anti-seize will probably work for them. But for a nut that is spun, I would not try to fix it in compromised plastic. Just use a new nut and bolt.
If the captive nut has spun, but was not spun excessively or forced out of place, it may be possible to re-use it after cleaning the threads with a tap and using a new factory bolt with anti-seize. It will never seize again after this is done. The bolts only freeze up because no anti-seize was applied from the factory and they generally go a decade or two in between removals. If the captive nut spins freely, and epoxy can not be used to hold it in place, then it will never work the same.


As I said I thank myself for doing this every time I remove the inner bolt on that shroud. When I remove it, I can get a grip on the replaced nut from behind with a small box or open-end wrench from the fan opening.
To each his own. I personally find that a loose nut on the back side is a RPITA. I would only choose this option as a last resort.


:gvzgsxr:
 
Photos.
 

Attachments

  • 500_fan_shroud_bolt1.jpg
    500_fan_shroud_bolt1.jpg
    94.9 KB · Views: 19
  • 500_fan_shroud_bolt2.jpg
    500_fan_shroud_bolt2.jpg
    169.8 KB · Views: 19
  • 500_fan_shroud_bolt3.jpg
    500_fan_shroud_bolt3.jpg
    136.2 KB · Views: 20
  • 500_fan_shroud_bolt4.jpg
    500_fan_shroud_bolt4.jpg
    130 KB · Views: 18
Pics of the factory bolt, M5x0.8 thread, with captive washers.
 

Attachments

  • fan_shroud_bolt1_914001-005002.jpg
    fan_shroud_bolt1_914001-005002.jpg
    130 KB · Views: 14
  • fan_shroud_bolt2_914001-005002.jpg
    fan_shroud_bolt2_914001-005002.jpg
    88.7 KB · Views: 14
Winner winner 🐔 🍽

That is how I would tackle such a repair. Modern epoxy glues are fantastic. I have clear epoxy glues that set up in 60 seconds for example in small syringes with mixing tips. Seconds to apply and just bin the mixing tips. Quick, strong & no fuss.

I also have a rivet nut set with yellow zinc and stainless metric selection kits. Very useful tool to have and the riv nuts get a proper purchase on the item which only tightens harder with the bolt. Maybe overkill on these plastics but just a kit to think about for your garages!

Gixers anti seize suggestion also very good 👍
 
I also have a rivet nut set with yellow zinc and stainless metric selection kits. Very useful tool to have and the riv nuts get a proper purchase on the item which only tightens harder with the bolt.
That reminds me, I need to get a metric rivet nut kit. Care to share what kind you have?
 
Last edited:
Terry, as I described above, there's nothing to get your hands on from behind or below... if one of the three M5 bolts with 8mm hex bolt is spinning and not releasing, you're - pardon the pun - screwed. :ROFLMAO:
@Glen, Thanks to fellow 500E member Glen who took pity on an tired old guy. My new ACM fan clutch is in and working. Glen asked if I needed help and at first I resisted but after 2 days of messing around my body was aching. The results of 2 surgeries in a span of 7 months and getting up and down from under the car pretty much finished me off. That was Friday around 6:30 PM by that time I was ready to say “Uncle” so I replied to Glen’s PM and he immediately sent back that he would be up about 8:30 AM.

Anyway, Saturday Glen arrived in his high miler after about 40 mile drive up the 5 frwy. I could see the immediate effects of a younger man at work. The radiator and shroud were out and back in and the car was running by 10:30 AM and that was after a trip to O’Rileys for an 8mm hex socket. Thank God Glen brought his hand fabricated wrench to hold the old fan clutch from turning because what I was going to try to use would not have been strong enough to hold. It took a 3/8” drive breaker bar along with a 4 pipe to break the original bolt loose. Also we had to cut a small block of 2x4 to prevent Glen’s wrench from damaging a rubber hose that runs above the PS frame next to the washer tank.

As far as the shroud spinning bolt we elected to leave it as is and reinstalled it back in the car. Since it came out relatively easy after the radiator it didn’t make sense to mess with it. Albeit if for some reason it had to come out again it would be a PITA. I would say that’s “deferred” maintenance at this point. Also of note even though I did this job myself about 10 years ago I don’t think I could have lifted the radiator out by myself this time. It took the both of us to wrestle it out.

My hat’s off to Glen for making my day. What took us about 2 hours may have taken me 2 days. My advice is “DON’T GET OLD”

MANY THANKS to Glen for
His Generosity and Time.😀

Also I might add my apologies for Glen discovering that I had a flea infestation in my driveway. Which we both were getting bit. I few weeks ago I discovered that the tre next to my car has a mama raccoon with a baby kit. Anyway the damn kid has fallen out of the tree twice and is injured I think. I was hoping they would be gone by now but they are still up there and I’m sure that’s where the fleas came from. I luckily had some ORTHO Home Defense and immediately sprayed the area around the car and it somewhat held them at bay but Glen had to go home with some bites for that I apologize. Anyway, later in the day I went to the Farm Supply and bought some Bayer insecticide that is supposed kill all BUGS and FLEAS in 24 hours. I sprayed the whole front yard and driveway.
 
Terry, it was great seeing you and catching up. I'm glad I thought to bring my fan clutch tool, it would have taken us much longer without it!
As it turns out, the fleas didn't do too much damage so please don't worry.
@Glen, Same here Glen, I especially enjoyed seeing your “High Miler”No one would know from looking at that it has over 600K miles on the clock. It really looks beautiful. I thought the new paint looked flawless.

As for the fleas I sprayed the whole front yard yesterday afternoon including all of the concrete. I saw no fleas out front this morning.

I’m currently in the back yard spraying everything I can reach. I stopped for a break and I’m writing this thread.

I do have some inside that I tracked in. They are going to be harder to get rid of. My wife has constantly reminded of them. I bought one fog bomb to try. If it works i’ll be getting more.

I also bought so “Critter Ridder” to see if I can discourage the Racoon from hanging out in my tree.

Anyway, Again, Thanks for the Help

It was much appreciated.

Take Care
 
As it was mentioned by Terry: is that ACM clutch still available in the US? Cannot find it in Germany nor while searching english pages.
 
As it was mentioned by Terry: is that ACM clutch still available in the US? Cannot find it in Germany nor while searching english pages.
I got my ACM Fan Clutch thru ARIZONA AUTOHAUS for under $100 but that was about 3 years ago. Just installed it due to health issues.

I’m sure they still sell them.
 
Zerex G-05. it comes in pre-mixed 50-50 ($$$) or full strength that you dilute (cheaper). Get at O'Reilly or AutoZOne etc.
I went NAPA yesterday to get 2 gallons of the Zerex G-05 and there I only found the 50-50 mix on the shelf for $19.99 per gallon. I took to counter to purchase and asked if they sold the full strength G-05. The gal behind the counter went in the back and bought out the full strength stuff for the SAME PRICE:).

Sooo, It goes to show if your LAZY you can pay DOUBLE for your premixed 50-50 G-05 OR you can buy a gallon of the Full Strength G-05 and add a dollar to you purchase by getting a gallon of distilled water and make 2 gallons of your own 50-50 mix.

I can see buying the 50-50 premixed in a pinch out on the road somewhere but otherwise IMOP it’s kinda a DUMB MOVE:jono:

BTW, Since the full strength was behind the counter and NAPA is pushing the 50-50 premix does this mean that the Full Strength is GOING AWAY?
 
Nah, they have always sold both 100% and 50/50 premix. The premix is for people who want to top off the cooling system without fiddling with mixing anything. You pay a premium for convenience. The full-strength isn't going away though.
 
I went NAPA yesterday to get 2 gallons of the Zerex G-05 and there I only found the 50-50 mix on the shelf for $19.99 per gallon. I took to counter to purchase and asked if they sold the full strength G-05. The gal behind the counter went in the back and bought out the full strength stuff for the SAME PRICE:).

Sooo, It goes to show if your LAZY you can pay DOUBLE for your premixed 50-50 G-05 OR you can buy a gallon of the Full Strength G-05 and add a dollar to you purchase by getting a gallon of distilled water and make 2 gallons of your own 50-50 mix.

I can see buying the 50-50 premixed in a pinch out on the road somewhere but otherwise IMOP it’s kinda a DUMB MOVE:jono:

BTW, Since the full strength was behind the counter and NAPA is pushing the 50-50 premix does this mean that the Full Strength is GOING AWAY?
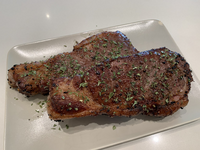
I mean techincally, I could buy the entire loin of the cow for $250+ but sometimes I’m just too lazy to take that huge thing home, section it into 20 steaks, and then individually bag them with my vacu-pack suction sealer you know? 🤣
 
I mean techincally, I could buy the entire loin of the cow for $250+ but sometimes I’m just too lazy to take that huge thing home, section it into 20 steaks, and then individually bag them with my vacu-pack suction sealer you know? 🤣
I thought beef from cows was no longer allowed in California. Not to mention gas stoves to cook it with, and outdoor BBQs that release CO2 from burning charcoal into the atmosphere. So how do you cook beef, assuming it is legal? Microwave oven?
 
I thought beef from cows was no longer allowed in California. Not to mention gas stoves to cook it with, and outdoor BBQs that release CO2 from burning charcoal into the atmosphere. So how do you cook beef, assuming it is legal? Microwave oven?
Har de har har. You asked for it! Sous Vide with an Anova Immersion Circulator and then Reverse Sear/Fry. In a carbon steel WOK. On a German Gaggenau burner. No Wolf/Viking/Bluestar/Thermador/GE/JennAir here. I bet you’ve never seared a steak in a WOK. It works better than a cast iron pan and is more consistent than a grill. 👍

If you’re a Becker connoisseur, then you are also a Gaggenau fan. 🤓

1630531080353.png 1630531837072.png
 
I thought beef from cows was no longer allowed in California. Not to mention gas stoves to cook it with, and outdoor BBQs that release CO2 from burning charcoal into the atmosphere. So how do you cook beef, assuming it is legal? Microwave oven?
California has gone off the deep end in more ways than that. Last year they made me answer about ten questions before I could get through to pay my annual bar dues. They obviously want answers from their attorneys on vitally important legal issues. I had to resort to a dictionary to answer the first question. Apparently I'm not "woke."

Sorry for veering off track here, but you made me do it. Feel free to delete it -- once you've shaken your head.
 

Attachments

  • IMG_20210902_011948.jpg
    IMG_20210902_011948.jpg
    270.2 KB · Views: 24
  • IMG_20210902_012456.jpg
    IMG_20210902_012456.jpg
    229.8 KB · Views: 24
  • Gender.jpg
    Gender.jpg
    37.9 KB · Views: 25
Last edited:
OK, I have my G05 coolant BUT before I install it I would like to install new heater hoses since they have never been changed.

Can someone give me the 2 part numbers for the left and right heater hoses on my 93 500E?

Thanks
 
Driver side = 124-830-76-96
Passenger side = 124-830-54-96

If the upper radiator hose is original, I'd replace that too. If it has been changed in the past with OE, leave it alone.

:spend:
 
OK, I have my G05 coolant BUT before I install it I would like to install new heater hoses since they have never been changed.

Can someone give me the 2 part numbers for the left and right heater hoses on my 93 500E?

Thanks
This was just discussed here on the forum, here:


More here


Driver side = 124-830-76-96
Passenger side = 124-830-54-96

If the upper radiator hose is original, I'd replace that too. If it has been changed in the past with OE, leave it alone.

:spend:
@gsxr, Thanks Dave, I just wanted to confirm the right part numbers. I have replaced all of the other hoses a while back but not the heater hoses. The others are in great shape.

@gerryvz, Gerry, I read those posts and was a little confused on the part numbers since it was for an E500. I will be referring to it for changing the hoses.

Thanks Guys
 
I have new valve cover gaskets to install. Something I may have overlooked as part of this work is the eight (8) spark plug holes in the valve cover.

Question: How do these openings seal? Do the spark plug holes require rubber seals / gaskets / crush washers?

If so what’s the part number?

Also what’s the part number for the 20 or so valve cover crush washers?
Hi Terry,

The valve cover gaskets (each side of the engine) kit has the outer gasket, but also includes four round, cone-shaped rubber spark plug hole seals that press onto the inside of the spark plug holes in the valve cover. The press onto a lip, and extend upward through the spark plug hole.

These are a press-fit, and no crush washers or other seals are needed. Once installed, they seal by pressure of the valve cover. You just want to make sure that each sealing surface on the top of the cylinder head is cleaned off where it mates up against the round rubber cone.

Photos in this post.

img_2458-jpg.15461


img_2509-jpg.15557


img_2510-jpg.15558


img_2515-jpg.15568


img_2516-jpg.15570
 
Last edited:
Thanks Gerry,

I don’t think they came with my valve cover gaskets that I ordered in June of 2019 from mboemparts.com by just the part numbers for the VC Gaskets. It was not a kit that I remember. I will check my parts again.

BUT I think I will need the part number for the plug hole gaskets.
 

Who has viewed this thread (Total: 1) View details

Who has watched this thread (Total: 3) View details

Back
Top