• Hi Guest !

    Welcome to the 500Eboard forum.

    Since its founding in late 2008, 500Eboard has become the leading resource on the Internet for all things related to the Mercedes-Benz 500E and E500. In recent years, we have also expanded to include the 400E and E420 models, which are directly related to the 500E/E500.

    We invite you to browse and take advantage of the information and resources here on the site. If you find helpful information, please register for full membership, and you'll find even more resources available. Feel free to ask questions, and make liberal use of the "Search" function to find answers.

    We hope you will become an active contributor to the community!

    Sincerely,
    500Eboard Management

OWNER MY911S

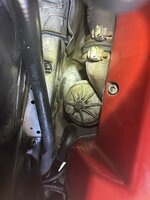
Good job! Do remember to get rid of that sarcophagus that entombs all the heat in there. As well, junk the plastic cover on the alarm horn (if not gone already) directly above the sarcophagus.
Thought about it as I saw a post on it. Thought that might actually be more of a heatsink and left it on.
 
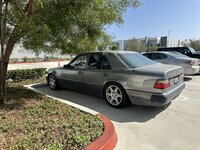
Took Beryl Beauty for a quick drive in the rain to Petco with the Mrs. Idles and drives nice and smooth, used to idle slightly rough once in a while- none of that on the short drive.
 
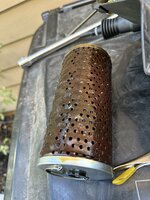
Started on the fuel filter system RR last weekend- got the cover off and the gas partially drained and then stopped. Didn’t want to wrestle with fuel lines under the car and I am a little preoccupied with the arrival of Miss Bee so I took Beryl down the street to have the work completed last Friday.

Got her back today. Seems to idle much better. Used to stumble occasionally at stop lights.
 

Attachments

  • IMG_4069.jpeg
    IMG_4069.jpeg
    1.9 MB · Views: 16
  • imagejpeg_0.jpeg
    imagejpeg_0.jpeg
    359.6 KB · Views: 16
Last edited:
Yes love the car and am excited to continue the labor of love. Idles rough so got to sort that out first. Sauce has been busy and hasn’t really driven the car so I’m hoping it’s some of that. Maybe an Italian tune up.

Update: Half tank of gas seemed to help and idles ok when warm just like the day I inspected and drove him. He does have that thumping noise that improved when we pulled the section of the heat shielf that seemed sandwiched accidentally between the chassis and muffler. But the sound still is there - kinda like an exhaust leak kind of rhythmic pulsing thing. Might have to peer under there soon.
 
Last edited:
@MY911S,
Nice to see it went to a good home. Last time I saw his car was at a GTG many years ago in I believe Carlsbad hosted by Norman aka Canoli. At that time it was covered with a vinyl wrap. Anyway we all went for a drive thru the local twisty roads and had lunch down there somewhere. I remember his car had the No2 setup.

Sorry to see Sauceman leave us but as time marches on and situations change.
 
Last edited:
Thank you. Interesting how “Pearl” makes a difference depending on what the next word is in reference to the 500E colors. My first one was the Pearl Black.
 
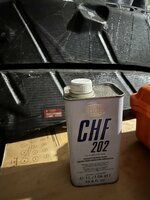
Changed the engine oil and tidied up the engine bay a little today. Noticed a few fluids were low. What one is this again?
IMG_8012.jpeg
 
I also figured out the burning metallic smell from driving him around 2 days ago. I thought it was the exhaust but it’s coming from the rear brakes. I also think I know how the left fender was hammered back into shape when the left wheel came off many years ago. I think it can be put back to proper.

The immediate item I'd like to figure out is the rough idle, specially at startup/cold. I have to put my foot on the accelerator or else it will stall unless it's already hot.
 

Attachments

  • IMG_8006.jpeg
    IMG_8006.jpeg
    1.7 MB · Views: 31
  • IMG_8003.jpeg
    IMG_8003.jpeg
    2 MB · Views: 32
  • IMG_8005.jpeg
    IMG_8005.jpeg
    1.8 MB · Views: 31
  • IMG_8009.jpeg
    IMG_8009.jpeg
    1.4 MB · Views: 28
Last edited:
Changed the engine oil and tidied up the engine bay a little today. Noticed a few fluids were low. What one is this again?
View attachment 199457
That SLS hydraulic fluid level actually looks a fair bit HIGH. It should roughly be around a half-tank, at or slightly below the level of the metal spring that surrounds the reservoir. If you pull the round black dipstick out of the top of the reservoir, you will see the level marking on the dipstick, and can adjust accordingly.

Your power steering fluid level is definitely LOW. Appropriate level marking is self-evident per your photo.
 
Oh interesting. Thank you @gerryvz ! I have some leftover from one of the cars, probably the GT3. I assume this will work.

IMG_8013.jpeg
 
Last edited:
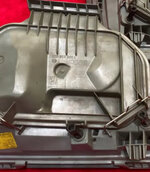
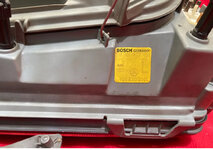
Haha yes thank you. I was going to make another assumption but I’ll just ask. I tried researching the Euro headlights but still not sure. Are these the correct ones. @Jlaa
 

Attachments

  • IMG_8020.jpeg
    IMG_8020.jpeg
    908.4 KB · Views: 12
  • IMG_8019.jpeg
    IMG_8019.jpeg
    656.9 KB · Views: 11
  • IMG_8018.jpeg
    IMG_8018.jpeg
    650.2 KB · Views: 12
  • IMG_8017.jpeg
    IMG_8017.jpeg
    903.4 KB · Views: 12
  • IMG_8016.jpeg
    IMG_8016.jpeg
    983.5 KB · Views: 13
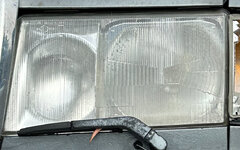
This is what’s on Mr. Grey, but the lens is literally just being held in place by the wiper. Was thinking of replacing the set with the “your” so I have a spare that I’ll refurb.


Hiya! You are welcome. Those headlights are pedestrian non-Euro-E500E headlights. 😐. You can tell by the fluting.

View attachment 199477
 

Attachments

  • IMG_8021.jpeg
    IMG_8021.jpeg
    739.7 KB · Views: 15
  • IMG_8022.jpeg
    IMG_8022.jpeg
    611.4 KB · Views: 15
Those are the correct lights on your car. Why don’t you just re-glue the lens to the frame? Or if the lens frame is not attached to the light housing due to broken clips, then you can use the pedestrian Bosch lights and put the 500 E lens on those….anyway, sounds like you have what you need to make a decent 036 set.
 
Those are the correct lights on your car. Why don’t you just re-glue the lens to the frame? Or if the lens frame is not attached to the light housing due to broken clips, then you can use the pedestrian Bosch lights and put the 500 E lens on those….anyway, sounds like you have what you need to make a decent 036 set.
Yes thought about that too. Let me see what’s actually happening in there.
 
Last edited:
This is what’s on Mr. Grey, but the lens is literally just being held in place by the wiper. Was thinking of replacing the set with the “your” so I have a spare that I’ll refurb.
Those appear to be genuine 500E Euro lights, and are worth a small fortune. Do whatever is necessary to refurbish them properly. Gluing the glass back into the plastic lens frame is the easy part. If the reflectors have become pitted or faded from moisture inside, get them rechromed.

In the meantime you can install any generic headlights to get by until the correct ones are restored.

:124:
 
Thanks guys!

I replaced the passenger side cap and rotor today. I’ll do the other side tomorrow.

Took a look at the rear passenger brake pad- still has some material - so not sure where the burning smell was coming from. Windshield washer connector was not mated- connected it and the washer works- yay - but the washer warning light is on.

Right now biggest issue is the car cutting out since it won’t hold and idle at cold - unless I sit there and depress the pedal slightly.
 

Attachments

  • IMG_8037.jpeg
    IMG_8037.jpeg
    2 MB · Views: 4
  • IMG_8034.jpeg
    IMG_8034.jpeg
    1.4 MB · Views: 4
  • IMG_8033.jpeg
    IMG_8033.jpeg
    1.5 MB · Views: 4
  • IMG_8032.jpeg
    IMG_8032.jpeg
    1.7 MB · Views: 5
  • IMG_8028.jpeg
    IMG_8028.jpeg
    1.5 MB · Views: 4
  • IMG_8038.jpeg
    IMG_8038.jpeg
    1.5 MB · Views: 4
Last edited:
I accidentally knocked the air filter centerpiece that affected the idle and in turn made me think about the deteriorated throttle cable I had noticed yesterday. I wonder if this is related to the problem. Either way any rate I needed to do the fix eventually any way.

 
Last edited:
Since the correct accelerator cable is NLA. Any idea if this one I found on eBay will fit or why it won’t? The seller thinks it won’t however it identical to what I think is correct for the 500E save for the orientation of the accordion seal piece

IMG_8046.jpeg
Part number 124-300-15-30

And the proper ones look like the other picture I posted (with the 2 pieces)


Thanks in advance!

@gsxr any input appreciated :)
 

Attachments

  • IMG_8040.jpeg
    IMG_8040.jpeg
    616.6 KB · Views: 9
Last edited:
Since the correct accelerator cable is NLA. Any idea if this one I found on eBay will fit or why it won’t? The seller thinks it won’t however it identical to what I think is correct for the 500E save for the orientation of the accordion seal piece

Part number 124-300-15-30

Thanks in advance! @gsxr any input appreciated :)
Part number 124-300-15-30 is for 124s with M103 engines. I have no idea if this will work on an M119, but if the length is close and the ends are the same, it's probably worth a try!

:apl:
 
I think it might work. It actually looks identical upon closer look even the tip which I thought was different- before it disintegrated in my hands.

My new OEM experimental accelerator pedal cable.

IMG_8082.jpeg
 
I'm running into a little issue with removing the plastic panel under the steering wheel, need to research more. I don't think I need to remove the carpet piece, maybe just fold over the carpet...but the accelerator pedal is in the way.
 
Almost there. @gsxr the guide I'm following doesn't mention this but. Do you know if I need to remove it. It appears so to liberate the threaded piece that pokes through the firewall into the interior.

IMG_8092.jpeg
 
Almost there. @gsxr the guide I'm following doesn't mention this but. Do you know if I need to remove it. It appears so to liberate the threaded piece that pokes through the firewall into the interior.
What guide are you following? I think there's a HOW-TO on the forum that I used earlier this year to replace the cable. I don't recall having any significant issues other than fiddling with the adjustments afterwards.

:scratchchin:
 
I didn’t have any issues when I did my cable back in 2020. It’s somewhere in my Engine Bay Refresh HOW-TO in the Project Journals sub-forum.
 
Yup figured it out and the procedure wa correct I just gently tapped the plastic barrel out from inside. Now I have to figure out the adjustments and which knob
adjusts what
 
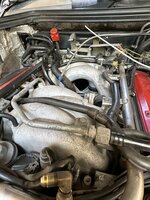
Pulled the MAF and reconnected the vacuum line behind the ETA that I believes goes to the EZL and is the source of the idle issue.

The white vacuum line that is next to the black that both go into the grommet with the accelerator cable was also disconnected.

Lastly I think accidentally yanked the vacuum line to the transmission and I believe I will have to go under the car to reconnect.

By the way is that small hole in the throttle body flap normal?
 

Attachments

  • IMG_8165.jpeg
    IMG_8165.jpeg
    1.5 MB · Views: 11
  • IMG_8150.jpeg
    IMG_8150.jpeg
    1.9 MB · Views: 11
  • IMG_8154.jpeg
    IMG_8154.jpeg
    1.9 MB · Views: 10
  • IMG_8153.jpeg
    IMG_8153.jpeg
    1.9 MB · Views: 13
  • IMG_8152.png
    IMG_8152.png
    5.8 MB · Views: 11
  • IMG_8165.jpeg
    IMG_8165.jpeg
    1.5 MB · Views: 10
  • IMG_8152.png
    IMG_8152.png
    5.8 MB · Views: 10
  • IMG_8153.jpeg
    IMG_8153.jpeg
    1.9 MB · Views: 8
  • IMG_8155.jpeg
    IMG_8155.jpeg
    2.1 MB · Views: 8
  • IMG_8154.jpeg
    IMG_8154.jpeg
    1.9 MB · Views: 9
  • IMG_8150.jpeg
    IMG_8150.jpeg
    1.9 MB · Views: 12
@gsxr. Yup I did. I'm de-integrating what I can and just selling the kit probably including the modified MAF with the nozzle machined in. I'll probably never use the NOS even if I kept it on the car.
 
Last edited:
Can someone link the part number and pics to what the fuel pressure test port schrader valve and the cap looks like? I've searched for the cap and even had the Pelican Parts person look it up for me but the part that came up doesn't look correct.
 
Did the coils last night. Getting better at it. I noticed one of the coils from Pelican Part looked - not brand new - bummer. Also Parts Geek me the wrong part- a bunch of washers instead of the spark plug wires. I'm guessing the red stripes are factory torque stripes?
 

Attachments

  • IMG_8189.jpeg
    IMG_8189.jpeg
    1.9 MB · Views: 12
  • IMG_8193.jpeg
    IMG_8193.jpeg
    1.6 MB · Views: 11
  • IMG_8195.jpeg
    IMG_8195.jpeg
    1.5 MB · Views: 12
  • IMG_8198.jpeg
    IMG_8198.jpeg
    1.4 MB · Views: 13
  • IMG_8202.jpeg
    IMG_8202.jpeg
    1.5 MB · Views: 13
  • IMG_8205.png
    IMG_8205.png
    5.5 MB · Views: 12
Thank you! Also anyone know what tool to loosen these fuel line brackets. None of my bits work.
IIRC a plain Phillips bit works fine. Don't over-torque when installing, the plastic will easily strip.


Did the coils last night. Getting better at it. I noticed one of the coils from Pelican Part looked - not brand new - bummer. Also Parts Geek me the wrong part- a bunch of washers instead of the spark plug wires. I'm guessing the red stripes are factory torque stripes?
If Pelican sent an obviously used part, I'd complain. Red stripes are factory marking after a fastener was torqued to spec.

:banana1:
 
IIRC a plain Phillips bit works fine. Don't over-torque when installing, the plastic will easily strip.

If Pelican sent an obviously used part, I'd complain. Red stripes are factory marking after a fastener was torqued to spec.
Yes thank you! I eventually realized a normal Philips screwdriver was the right tool. And I'll definitely ask for a replacement on Monday.
 
Back
Top