• Hi Guest !

    Welcome to the 500Eboard forum.

    Since its founding in late 2008, 500Eboard has become the leading resource on the Internet for all things related to the Mercedes-Benz 500E and E500. In recent years, we have also expanded to include the 400E and E420 models, which are directly related to the 500E/E500.

    We invite you to browse and take advantage of the information and resources here on the site. If you find helpful information, please register for full membership, and you'll find even more resources available. Feel free to ask questions, and make liberal use of the "Search" function to find answers.

    We hope you will become an active contributor to the community!

    Sincerely,
    500Eboard Management

  • DISCLAIMER
    500Eboard, including its owner, administrators and moderators do not endorse, approve or support any claims provided by sellers as to vehicle condition, history, title status or mechanical operation.

    Forum members/sellers are fully responsible for the accurate representation of all vehicles and/or parts they list and describe for sale on this forum. 500Eboard is not legally liable or responsible for sellers who misrepresent their vehicles per US Federal, State and local laws and regulations pertaining to proper and accurate vehicle sales.

    Thank you

FYI ASR Precharge pump - REPAIRED

canyoncarco

E500E Guru
Member
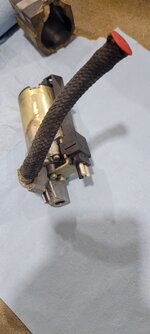
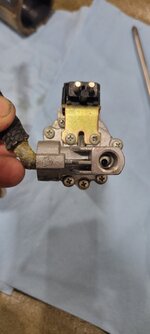
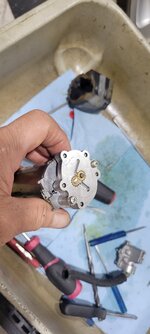
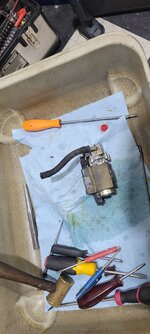
Moderator edit: pump was repaired, see post #2 and #4 below.

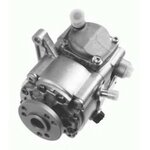
Hello all! Just like the title says I am looking for a ASR precharge pump M15 that is underneath the reservoir. Thanks in advance

Manny
 
Last edited by a moderator:
Hello canyoncarco,

Did you take pictures of the dismantling, cleaning and re-bleeding?

Thank you in advance
 
Hello canyoncarco,

Did you take pictures of the dismantling, cleaning and re-bleeding?

Thank you in advance
I did. Here are some of the precharge pump. It was taken apart and brushes were cleaned. The picture with the blue arrow is after cleaning. I have a video as well of the bleed. I will have to look for it.
 

Attachments

  • IMG_20230901_154337.jpg
    IMG_20230901_154337.jpg
    628.2 KB · Views: 84
  • IMG_20230901_154332.jpg
    IMG_20230901_154332.jpg
    544.8 KB · Views: 83
  • IMG_20230901_154319.jpg
    IMG_20230901_154319.jpg
    698.3 KB · Views: 81
  • IMG_20230901_154533.jpg
    IMG_20230901_154533.jpg
    2 MB · Views: 73
  • IMG_20230901_154314.jpg
    IMG_20230901_154314.jpg
    1.1 MB · Views: 72
  • IMG_20230901_154548.jpg
    IMG_20230901_154548.jpg
    990.6 KB · Views: 77
  • IMG_20230901_154328.jpg
    IMG_20230901_154328.jpg
    823.3 KB · Views: 74
  • IMG_20230901_154324.jpg
    IMG_20230901_154324.jpg
    381.9 KB · Views: 78
I would love to see a full detailed how to on this to show the electrical side of things
and cleaning the old gunky brake fluid out of the pump where the proper bleeding
procedure has not been done in years.
This would be of benifit to so many models of this era
With some of the high pressures involved its not something to just steam into
Graeme Johnson
 
As an aside, if you're looking to clean a motor commutator, don't use an abrasive such as emery cloth. Why? The small particles of the abrasive will come off of the paper backing while you're using it and can become embedded in the soft copper of the commutator bars. This turns the bars into little grinding wheels which will wear the brushes down quickly.

There are commutator stones that can be used on the commutator bars with the armature mounted in an electric drill. That's the preferred method.

Dan
 
Last edited:
Back
Top