• Hi Guest !

    Welcome to the 500Eboard forum.

    Since its founding in late 2008, 500Eboard has become the leading resource on the Internet for all things related to the Mercedes-Benz 500E and E500. In recent years, we have also expanded to include the 400E and E420 models, which are directly related to the 500E/E500.

    We invite you to browse and take advantage of the information and resources here on the site. If you find helpful information, please register for full membership, and you'll find even more resources available. Feel free to ask questions, and make liberal use of the "Search" function to find answers.

    We hope you will become an active contributor to the community!

    Sincerely,
    500Eboard Management

OWNER DerFuror

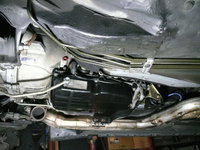
Installed the new drain duct. It takes a little time to massage it securely into place. A definite "one & done" part installation.

Drain_Duct.jpg

Also, a section of exhaust pipe heat shielding must be disconnected to allow for insulation installation. I securely reconnected the heat shielding.
 
Last edited:
Re: Stay wrenching, my friends…

It’s not often that I find a few free minutes these days, but when I do, I upgrade my 500E.

View attachment 52227

Found myself with some free time today because of damp weather. I headed out to the garage & finally replaced the front brake hoses with the braided sst Deerfields I had sitting on the parts shelf for too long.

View attachment 52228 View attachment 52229 View attachment 52230 View attachment 52231

Relatively quick & easy job. Love their look & construction.:hearts:

A quick nitpicky FYI:
I'm pointing it out because you do fantastic work, and try to have everything just so.
It seems counterintuitive, I know, but the upper dust boots are not supposed to be stretched over, or in any other way firmly attached to the lower guides on the struts. They are being stretched and deformed by this, and usually will either detach from the top mount, or break relatively soon in this condition. The guides are only there to keep the boots concentric with the strut so that they don't chafe and wear through, etc. Everything else is Derfilicious as usual...
:klink:
 
Re: Front Strut Dust Boots

Good to know. I always wondered what the proper configuration was for those things. Each of my front dust boots was attached differently to its strut (one from the top, one from the bottom).

The boot definitely doesn't look right attached to both points.
 
Re: Front Strut Dust Boot

A quick nitpicky FYI:
The guides are only there to keep the boots concentric with the strut so that they don't chafe and wear through, etc.

:brudda: What a goofy setup. Those guides make a great dust boot mounting system. A set of them at the top of the strut would make dust boot reattachment a whole lot faster, easier & more secure.

:star: The front dust boot attachments are now hung properly (I guess...), with no harm done to the gaiters.

Dust Boot 001.jpg
 
Last edited:
A beautifully sunny day with low humidity was perfect for finally painting (using aluminum hi-temp ceramic spraypaint) the wrapped crossover pipe to seal its insulating surface & look pretty.

It is now ready & awaiting reinstallation…and will provide more horsepower gain than a 500E SuperChip! :roadrunner:

Crossover_Pipe_Wrap 007.jpg
 
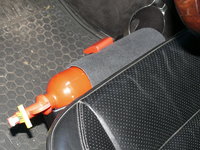
On the cosmetic side, a new black carpet wrap (129 868 10 39 9B04) was added to the fire extinguisher bucket assembly.

Carpet Cover 001.jpg


PS: It's a known fact that Chicks dig quality wrapping material. This quality carpet material subliminally encourages them to practice unlatching & latching the fire extinguisher safety catch while seated in the passenger seat. :tears_of_joy:
 
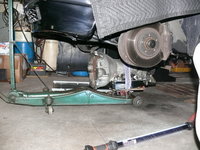
I also received a package containing some overlooked seal ring parts required to complete my transmission reseal job. I then gravity-tested the new seals by turning the transmission over on its sides for at least 3 hours at a time. No leaks.

Install 002.jpg

The transmission is now ready for re-installation. :banana1:

Install 003.jpg
 
I'll ask the inevitable GSXR question with regard to the PS hoses ... the job that I admitted being too much of a wimp to actually do ... Did you replace the long hose from the pump to the steering box along the driver's side frame rail?

I have indeed been contemplating its replacement. I have access to both ends. The motor mount cold-air tube is removed. The far hose clamp screw (steering box end) is facing the right direction. At the very least, I have new heat shield tubing that has been sitting on the shelf for a few years that I would like to install because the current shielding on the long hose is a little buggered up.

The little S-hose appears relatively new (it is not covered in shielding). Both hoses are either the same age, or I'd suspect the long hose is older. I have to check receipts to verify age.

UPDATE: Receipts show that the PS pump was resealed in 2006 & the steering box Pitman Arm seal replaced in 2007, but I didn't notice any hoses specifically itemized on the parts list...so hoses are at least 9 years old if replaced during Pitman Arm reseal.

I'll probably disconnect the easy end to r&r the shielding. I'll replace the hose if I don't like its looks...and if I find my hose-pull pliers for the far-end.

I'd pull that S-hose and shield it. I know it's a pain....

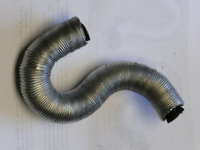
Today I did pull, inspect & shield the S-hose. The job wasn’t as tough as I thought it may be. The hoseclamp closest to the frame rail was loosened from above. The hoseclamp closest to the engine was loosened from below. Both were loosened using a long, thin, slotted screwdriver. The hose assembly was both removed & reinstalled by hand from below.

The hose itself was still in good shape for re-use. I will however buy a spare on some future parts order.

S_hose 003.jpg


Re-installed: top view...
S_hose 016.jpg

Re-installed: bottom view...
S_hose 017.jpg


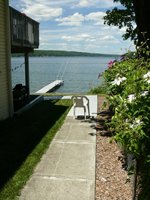
The job didn't tire me out, but I do feel like sitting down again...:D
Cottage 002.jpg

PS: Regarding a job that will tire me out...I took a long look at the long PS hose to conceive an action plan for replacing it in situ & finally opted out of taking any action at this time. Maybe during the off-season if I'm feeling masochistic. There currently is no issue with the existing hose & I need to get the car back on the road asap.
 
Last edited:
The transmission is now ready for re-installation. :banana1:

View attachment 53005

I re-installed the transmission today. Most of the reverse-order procedures were made before knocking off for the evening. The remaining procedures & final torqueings will take place next.

Install 004.jpg Install 006.jpg

Afterwards, all hydraulic fluids will be bled & replenished.

Getting very close to being back on the road, & hopefully in-time for Starfest 2016. :mbstar:
 
The job didn't tire me out, but I do feel like sitting down again...:D
View attachment 53028


Derf,

If I had that view I would be setting down more often. I'm glad to see that you have more ambition than I and you got your tranny back in the car.

Now "Get your motor running and get out on the highway"

Take Care
 
FINALLY....(well, almost)

Now "Get your motor running and get out on the highway"
I'm pretty sure everything that must be re-installed to get the motor running now is. Next time out in the garage, I'll add some ATF, start it up & see what happens...(metal cam oilers, lower harness, 150A alternator, tranny seals, cover gaskets, orings, exhaust wrap & all). :wow:
 
It's ALIVE!

[video=youtube;0VkrUG3OrPc]https://www.youtube.com/watch?v=0VkrUG3OrPc[/video]

The 500E fired right up after reattaching all remaining items except the airbox, bellypan & wheels. A good feeling after so long & so much work. Happy with the results so far.

Later today I may bleed the brakes so I can safely go thru the gears. I hope to go test driving within the next two days.

Here's a recap of the work performed over the last few months:


  • aluminum cam oiler tubes upgrade with new orings
  • new upper timing chain guides
  • new oil separator & breather tube
  • new cover gaskets
  • new cover bolt washers
  • new spark plugs
  • new distributor caps & rotors
  • new protective wiring loom replacement
  • new power steering short hose & aluminum washer
  • new PS reservoir gasket & oring
  • new PS reservoir filter
  • new lower wiring harness
  • 150A alternator upgrade with new voltage regulator
  • new oil strainer, pan gasket & sensor orings
  • new braided stainless steel brake hoses
  • new S-hose shielding
  • new orings & seals for transmission
  • new shifter linkrod bushings
  • new transmission insulation blanket
  • new drain duct
  • new oxygen sensor
  • new insulation wrapping of crossover pipe
  • new serpentine belt
  • new carpet cover for fire extinguisher
  • new SLS fluid reservoir filter

:banana1:Very much looking forward to get out on the highway.
 
Today I replaced the SLS, PS & brake fluid. For some strange reason the driver side front caliper kept bleeding air bubbles after the previous three bled out properly. Bizarre. It's the shortest brake line. I'll have get more DOT4 & do it again.

I couldn't drive today anyway. It rained throughout the day.

It is probably not air coming from the brake system proper. It is probably air being aspirated through the threads of the bleeder nipple. One will usually not see completely bubble free fluid in the hose. Air from the hydraulic system proper comes out in several relatively large bubbles that emerge somewhat violently, and that is only if there was truly air in there to begin with, which there generally will not be if you are doing a simple brake fluid change. A continuous flow of tiny bubbles visible in the clear hose is normal. If you want to test this concept, dribble some brake fluid onto the bleeder nipple threads at the caliper body and watch the microbubbles go away.
:klink:
 
I had replaced all four brake hoses last month, but got around to bleeding the system today.

The large bubbles dribbled out in volume a bit longer from this caliper than I expected. I called it quits on bleeding when the larger bubbles ceased but the micro bubbles kept coming albeit at a slower pace. Bubbles had ceased completely while bleeding the previous three calipers.

Afterwards, I didn't like the pedal feel. Even after repeatedly pumping the pedal, it was too soft for my liking.
 
Derf, how are you bleeding? With a pressure bleeder at 20-30psi, or something else...?

:detective:
 
Bleed On Me

Pressure bleeding at the bleed screw using a "Puller" style bleeder (Griot's Garage One Person Brake Bleeder).

Bleeding ABS pump both before & after. ABS pump & 1st three calipers bled beautifully. Last caliper was the prick.

Will repeat the process tomorrow. At the very least, the system will be completely flushed & fresh when the process is concluded.

BF Bleeder 004.jpg BF Bleeder 002.jpg
 
Last edited:
You're starting the engine when bleeding the ASR pump (port SP), right? Not that it would cause the bubble stream at the one caliper. Wouldn't hurt to run the 500ml through the problem caliper for grins...

:scratchchin:
 
You're starting the engine when bleeding the ASR pump (port SP), right? Not that it would cause the bubble stream at the one caliper. Wouldn't hurt to run the 500ml through the problem caliper for grins...

:scratchchin:

Yes. Start process by depressurizing pump at port SP. Then post-caliper bleed of pump with engine running. Then run engine at least 30 secs to repressurize pump before shutting down engine.
 
Yes. Start process by depressurizing pump at port SP. Then post-caliper bleed of pump with engine running. Then run engine at least 30 secs to repressurize pump before shutting down engine.
Sounds like you are doing it correctly. I'm with Klink on the probability of a bleeder screw issue... however, the soft pedal indicates something may not be right. Worst case you may need to do the factory procedure of pulling a half-liter of fluid from each of the 4 calipers while keeping the reservoir full. After that, I'm short on ideas (a MC failure while sitting seems unlikely).

Question - have you driven the car to confirm the soft pedal? It's difficult to determine pedal feel with the car in the garage.

:klink:
 
FWIW, I had one caliper in rear that I had to remove the screw completely to get a run on the c126. Made a mess but whatever funk was in there, no longer is. Non-asr system, but I thought I would throw that out there.
 
The Good, the Bad, and the Not so Ugly

Question - have you driven the car to confirm the soft pedal? It's difficult to determine pedal feel with the car in the garage.

The Good:
I incrementally filled the Transmission to capacity & went for a brief ride. The car ran smooth as silk & the transmission reseal job so far appears successful. No leaking.

The Bad:
After a seemingly successful re-bleed this morning, the pedal is still way too soft (even while driving)...&... no kickdown :x grrrrrrrrrrrrrrrr!....I have a great 1/4 mile straightaway outside of town & stomped on the accelerator. Nothing.

The Not so Ugly:
Lots of heads turned to attention & several tripped and drooled on themselves as I left the garage & hit the road.

I do have an inspection scheduled for this Friday. I know my disc pads are getting low. I do have a new set of Akebonos, but I will only install them with new rotors (perhaps my next purchase sooner than later). I do have a surplus set of new OE rear pads. I may install them tonight to see if they take up any slack in the system.

Other than that (or after that if necessary), I guess I'll do the 1/2 liter per caliper procedure & see how it goes.
 
I suspect those no dust Akebono pads pressing on proper width rotors may just solve the issue of soft pedal when the pistons get compressed fully during the install process.
 
Re: The Good, the Bad, and the Not so Ugly

...I know my disc pads are getting low. I do have a new set of Akebonos, but I will only install them with new rotors (perhaps my next purchase sooner than later). I do have a surplus set of new OE rear pads. I may install them tonight to see if they take up any slack in the system.

Other than that (or after that if necessary), I guess I'll do the 1/2 liter per caliper procedure & see how it goes.

Brakes are now a non-issue. I'm gonna run'em 'til the sensors shine (or the end of the driving season).

I repeated the bleeding process today, but this time around I bled 150ml from each rear caliper. 250ml from right front, 450ml from left front & 160ml from the ABS/ASR pump. The initial depressurization of the pump spooched 75ml.

The first 3 calipers were fine right from the beginning, but I figured I'd bleed them 'til there was no sense in going any further. I bled extra long on the pesky final caliper.

Upon conclusion, I now have firm pedal travel again. Feels safe & works very well.
 
:nomore: Operation Leak Elimination. Good ol' permatex is gonna be going places..

I was not satisfied with the results of my recent PS short hose replacement. It still leaked even after retightening / repositioning hose clamps. Upon inspection, I discovered it was leaking from the upper hose connection, so I re-did the job the way I originally intended...with Permatex.

I cut a new, longer hose length that filled the entire distance between connection ends. Permatex was applied to both tubing ends prior to hose installation & partially to the surface the gasketed reservoir sets on. Teflon tape was applied to the threads of the upper tubing connection that screws into the reservoir base.

It has been bone-dry for over a week.

I had already Permatexed the lower oil pan upon its reassembly a few months back. It remains dry.

The bellypan has been reinstalled now that I am confident the engine bay is dry.
 
Last edited:
Bellypan to the Rescue...again!

The weather has been great. An extraordinary amount of local driving roads have been freshly repaved. I've been making the most of this opportunity with the 500E. It runs fab after all the deferred/proactive maintenance & upgrade work done.

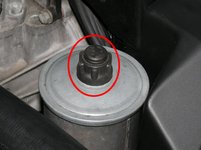
After a recent drive, I parked in the garage & opened the hood to vent the heat, only to notice that the PS reservoir lid retaining nut had come loose & fallen off. I thought I had that sucker on tight!

I've had this happen before...

I raised the car & lowered the bellypan. The nut was setting on top of the pan just like last time.

I think the drop of Loctite blue applied to the screw threads will now keep this pesky part in its place until I want it removed.

PS_reservoir_cap 001.jpg

PS: no evidence of any fluid leaks on top of the bellypan. Yay! :)
 
Re: New Oil Strainer & Level Sensor Orings

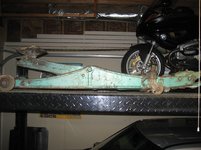
Thought I would post this for your amusement. Working, but awaiting restoration. For anyone else into floor jacks, see post 259.

drew
 

Attachments

  • green jack 001.JPG
    green jack 001.JPG
    376.9 KB · Views: 29
Black paint code 040

Did not know that I had one of 44 with the 040 paint Derf!

I could never remember the exact number, but I knew it was relatively small.
...& probably much smaller now after twenty-odd years of attrition. :e500launch:

:thought:
 
I guess I'm one of the 44 also. Probably more like 24 now.
No way to know for sure.

GV may have records on the 040s that have been dispatched to the boneyard.
 
Rules of the Road

While driving home from work on this picture perfect day, the driver of the pretty red Porsche was most likely enjoying unrivaled command of the motorway’s left-hand lane.

The pretty red Porsche arrived home knowing that it had its ass handed over by a flying black brick sporting a tri-star. :mbstar:

I didn't want my take-home food to cool down. :-)

...I’ll never sell this car. :hearts:

Impounded? Eventually. Sell? Never.
 
Re: Room mates

Okay, the picture in post #289 was slightly dark but looked like BMW. Any way those Guzzi's are cool.
 

Who has watched this thread (Total: 6) View details

Back
Top