• Hi Guest !

    Welcome to the 500Eboard forum.

    Since its founding in late 2008, 500Eboard has become the leading resource on the Internet for all things related to the Mercedes-Benz 500E and E500. In recent years, we have also expanded to include the 400E and E420 models, which are directly related to the 500E/E500.

    We invite you to browse and take advantage of the information and resources here on the site. If you find helpful information, please register for full membership, and you'll find even more resources available. Feel free to ask questions, and make liberal use of the "Search" function to find answers.

    We hope you will become an active contributor to the community!

    Sincerely,
    500Eboard Management

OWNER JC220

E36 Widebody or C124 Widebody?

  • Use the 500E widebody kit on my E36 saloon

    Votes: 2 22.2%
  • Adapt the 500E widebody kit for my 320CE

    Votes: 7 77.8%

  • Total voters
    9
  • Poll closed .
Only a couple of hours in and the tiny fragments of rust can be seen coming off the calipers and drifting towards the anodes, pretty cool to watch!

20220704_223331.jpg

These will get all night, then quick rinse and clean, rotate and leave again when I'm at work tomorrow. Then should be rust free and ready for final touch up in my shot blaster and rebuild / paint. (The electrolysis is fantastic for gently purging all heavy scale an much easier, gentle on the parts and more through. Bery easy to do a final wuick blast to leave perfect for paint adhesion)
 
W140 caliper update:

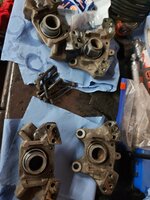
The electrolysis worked wonders overnight. From this

20220704_195459.jpg

To the top version in this photo. The rust just washes off in a sink and on bottom caliper is after I used my shot blaster for a quick 1 minute cleanup to remove traces of old paint etc.

20220705_203216.jpg

I was also surprised at how good these calipers are inside. Usually the outer lip would have corroded and jammed the piston(s) but these are rust free inside and perfect condition. New seals & dust boots will be fitted and repaint them in the coming days.

20220705_210825.jpg20220705_210832.jpg20220705_210921.jpg
 
One other thing I need to address on my S320 is the exhaust system. I am going to renew the 02 sensor whilst I have it out.

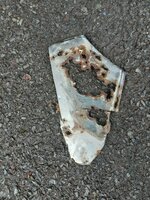
The exhaust was in good condition except for the middle section which was holed with rust and brackets missing.

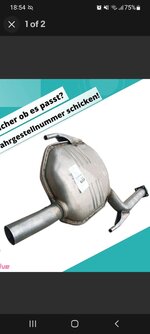
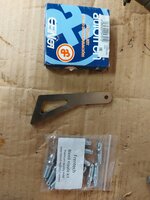
It was very difficult to locate one but eventually got a German company to provide a listing today and bought a new centre muffler so that will give me one nice complete original spec exhaust system. The whole exhaust will also get high temp aluminium POR15 and new hardware.

Screenshot_20220706-185445_eBay.jpg
 
I almost did a GSXR and forgot I had a set of wheels in the garage attic that would work well on my w140 S320:

[500Eboard] IMG_4886.JPG.jpg

These are replica wheels in r129 10 inch rear staggered format. But high quality reps. I test fitted them on my S280 and whilst wide they do fit and look really good. Offset and width means they are right out on the arches but still fit OK. Big improvement on the 15s. The tyres were wrong size for s classes so I got correct size tyres fitted. These wheels will need refurbished for sure. Initially I will spray them myself and plan refurb with diamond cut next spring if they fit well and don't rub for sure.

So for now they will be going on my S320 after I paint them. I still have the 15s with new Michelin tyres on them off this car so may run them on it at times also.

They are hard to find now and these exact reps now fetch decent £

Screenshot_20220707-224115_Samsung Internet.jpg

I bought these with my E320 124 coupe for £80 at the time IIRC.
 
Last edited:
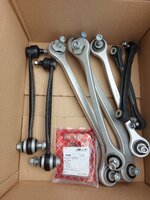
Some of the new rear suspension arms and hardware starting to come together

This is factory German spun galvanised new hardware. I will also be augmenting this S320 with marine grade stainless hardware where I can.

20220709_113657.jpg
 
Last edited:
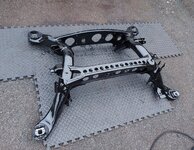
The subframe wire brush a thon got completed today. Tomorrow I will sand the POR15 and apply the POR15 topcoat product which is UV stable unlike regular POR15.

Nice to see the results of this PITA job

20220618_151458.jpg20220711_213555.jpg

The w220 rear brake sheilds do also fit the w140 just fine so that saved about £150 VS the 140 ones which helps a little towards the growing parts bill on this restoration!

The electrolysis tank is still in use and getting ready to take both rear hubs tomorrow and get closer to fitting the new parts at last.
 
Some of the new parts for the rear axle are being set out to make sure I have all the required hardware etc. Still some bolts to order tomorrow but should be the last order for the rear axle.

20220712_194638.jpg

I also started the final por15 top coat on the rear suspension parts today so tomorrow will have the main parts all in final coat and will keep working through the endless wire brushing and POR15ing 😩 There is alot of metal work under one of these cars that is for sure.
 
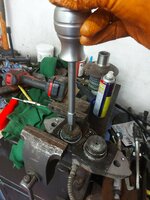
Bolt extractors to the rescue again:

20220713_204502.jpg

I am renewing the rear wheel bearings also. To allow for replacement brake sheilds and because they are old and grease was dried up inside so may not have lasted too much longer. (I could have cut the brake sheilds in half and welded them but I figured by the time I would do that I could replace the bearings)

The ABS sensors are stuck but I am able to work around them. The hubs have been electrolysis de rusted and are now in POR15 metal prep solution. Then I'll press in the new bushing and bearings before 3 coats of POR15 this weekend to complete.

20220713_210536.jpg
The last of the big suspension parts got their final POR15 top coat tonight so finally feels like progress.

Need to remove both fuel tanks over the coming days and carry out a couple of small weld repairs in the boot area of this S320 then get rear underbody ready for the subframe going back in which realistically will be 2 weeks away but by them the car should be in great shape.
 
I got some more work done last night:
  • Pressed in the new hub bushing joints
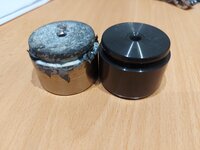
  • Painted the pistons on the rear brake calipers ready for final install
  • Removed the LPG tank from the car
The LPG tank removal was a struggle due to the typical seized screws issues. I had to drill them out of the filler point and cut it out to enable tank removal from the car. Not a huge deal just took about 90 mins to extract it which was a PITA. Had to be careful not to create sparks for obvious reasons! I will have the LPG service guy fit a whole new LPG filler neck when the car get's to him after MOT in a few weeks. Assuming the LPG system is still functional at this point I will try to burn up the 60 odd litres left in the tank before he works on it.

Next I need to remove the petrol tank which should be easy in comparison then this weekend I have 3 weld repairs to do in the trunk area.

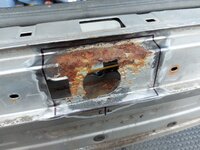
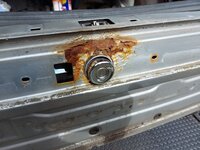
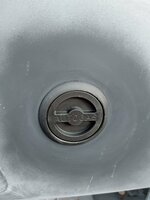
One is the typical W140 boot release botton rust they all get, the other 2 are a result of the past installers not taking care when installing the tank. Then next week I will re-satin black the sheetmetal inside the boot areas and re-install th fuel tanks and run the new fuel, brake & LPG lines under the car to work towards starting the engine after head gasket replacement.
 
I got the petrol tank removed and the rust at lock etc isn't bad at all and I will proceed with weld repairs over the weekend.

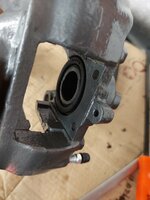
I did get a piston tool from a Porsche place. This is a 20 degree tool required for any brake calipers which have a C shape on the piston like these rear w140 calipers. The C orientation is very important to set correxctly dependant on brake disc direction for best brake pad wear and performance.

rotor1359597907.gif
20220715_211551.jpg20220715_191803.jpg20220715_211716.jpg20220715_211739.jpg

The calipers look fantastic re finished in Graphite caliper paint. I tested them gently with compressed air and the pistons are operating smooth as silk.

IIRC the front calipers on this car were sticking so they may present some issues. Indeed I would like to have them zinc plated ideally so need to get them off sooner than later to allow time for that.

The zinc plating is pretty critical on the inside outer lip of the caliper bores. I suspect unlike the rears where this was intact the fronts will be rusted there.
 
The LPG tank is very heavy and my S320 sat a little low at the rear before. I do have new Bilstein heavy-duty springs and 4 bump pads which should correct that.

The additional potential problem now is hanging a 60kg approx Bosal towbar on this car too. It will have alot of junk in its trunk so to speak!

So for now I'll leave the towbar off and get the car back on the road. Then set the towbar in boot and see does it sag. And if it does sag maybe I can drop a bump or two on the front spring pads to counteract it.
 
This one is sure to get a Gixer WOW emogie

20220716_153444.jpg

20220716_164123.jpg

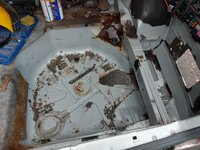
There has been standing water in around the LpG tank and battery tray at some point in this car's life. Due to a leaking bootlid which I have not been able to track down as of yet but now this is being taken care of properly with the LPG tank removed I will fix any and all leaks and make good the rust also caused by the past installation of LPG system!

Firs phase was a clean up and wire brush. Next is to weld in the rusted areas including boot latch and start re sealing and painting the whole inner boot.

20220716_163139.jpg

Behind the rear bumper externally was all in perfect condition zero rust which is a small victory! With all this out I may just go ahead and install the Bosal Towbar and deal with any ride height issues after.
 
JC,

Not sure if the 140 lower rear window trim attaches in a way similar to that on the 124, but if it does… the little rivets that hold the attachment clips to the body was the source of my mystery trunk leak. I replaced all of them with new, and added a little dab of marine grade selant to each prior to install. The trunk has been dry as can be since.

Your efforts here still leave me 😵. I don’t have anywhere near this fortitude for rust. Good on u!
Thanks for that yes I will take a look at the lower part of the rear windscreen ams see if there are any issues! On the surface I do not see any signs or rust or leaks up there.

I think there are at least a couple of small leaks which are making the problem worse. First being the LPG filler point on the side of the bodywork being poorly sealed when installed. I will get a new one of those fitted now and make sure it's 100% sealed.

The rust at the boot latch would also have been letting in water. IIRC the PO mentioned something about a bad gasket on a tail lamp also.

Me and my brother spent about an hour a few months ago trying to find the main active source from rain and it was all dry around the seal using a garden hose. The only trace we could see was related to the lights trim on the boot lid.

In any case these will all get sealed up and repaired properly now along with fitting a good used genuine set of 140 tails I got from a wrecked low miles 500. I also have the silver bootlid from that car if I am really beat! I'll keep after it now and make sure the boot stays dry after the car is repaired.
 
And yes the rust is a PITA for sure. I guess the way I look at it is it is unavoidable here and the result of 25+ years of regular use during winter etc and neglect.

Whereas once I have cut out/ removed the rust and properly treated / waxoyled the car then the rust is stopped for good. And given no regular winter exposure and careful upkeep the cars will never get like that again.

It does pose problems for fasteners etc and each job for me is a mini restoration as a result. Aka If I go to change a fuel filter I'll end up repainting all the brackets and replacing hardware etc. I'm just used to it I guess! It does absorb incredible hours every year about 75% of what I do is related to stopping and treating rust!
 
This one is sure to get a Gixer WOW emogie
Yup. :wow: :shock: 😲 🤯 o_O :blink::oops:

The amount of rust you can remedy is astonishing. I'd have looked at that and said "send it to the breakers, mate." But nope, Joe pulls a Fuzz Townshend, surgically slices out the cancer, and sneaks in minty fresh metal. It boggles the mind.

Joe, just curious, have you ever looked into the cost of importing rust-free cars from the southern/western colonies? The time saved in corrosion repair alone might make it worth a slight extra cost, assuming you aren't taxed to death during import.

:tejas:
 
This one is sure to get a Gixer WOW emogie

View attachment 150113

View attachment 150115

There has been standing water in around the LpG tank and battery tray at some point in this car's life. Due to a leaking bootlid which I have not been able to track down as of yet but now this is being taken care of properly with the LPG tank removed I will fix any and all leaks and make good the rust also caused by the past installation of LPG system!

Firs phase was a clean up and wire brush. Next is to weld in the rusted areas including boot latch and start re sealing and painting the whole inner boot.

View attachment 150114

Behind the rear bumper externally was all in perfect condition zero rust which is a small victory! With all this out I may just go ahead and install the Bosal Towbar and deal with any ride height issues after.
WOW, With that much rust in the tire well I be expecting to drop the spare tire on the road after hitting a hard bump. Incredible!

Joe, If your Architectural business ever goes away you could always work for a body shop.:jono:
 
Yup. :wow: :shock: 😲 🤯 o_O :blink::oops:

The amount of rust you can remedy is astonishing. I'd have looked at that and said "send it to the breakers, mate." But nope, Joe pulls a Fuzz Townshend, surgically slices out the cancer, and sneaks in minty fresh metal. It boggles the mind.

Joe, just curious, have you ever looked into the cost of importing rust-free cars from the southern/western colonies? The time saved in corrosion repair alone might make it worth a slight extra cost, assuming you aren't taxed to death during import.

:tejas:
To be compared to Fuzz is an honour in itself thanks Dave! 😁

Yes I have thought about importing rust free examples before but it does present some issues in itself.

  • Invariably the steering wheel will be on wrong side
  • Typically not as good condition interiors and rubber trim due to increased UV exposure
  • High cost of shipping and import taxes etc
  • Red tape regarding registration, special license plates and having to inform insurers it's an import.
  • Other issues with COO such as incorrect units on speedometer which we would have to change here to make it road legal including head lamps etc if wrong hand drive
Also, some people know me and the reason I have so many cars is they made me offers I couldn't refuse!!

This S320 as an example 3 years ago cost me £750. It had 6 months MOT, 4x new Michelin tyres and a working LPG system running fantastic. Yes it needed restoration work as I am doing now and whilst it's a PITA and a huge time investment, rust repairs cost very little carry out.

It's the associated parts replacement that adds ££££ but then again these same parts will also need replacement on any car rust free or not by now. Centre prop bearings, brake hoses, suspension parts etc.

So im OK with having to make good the rust I guess is what I'm saying and by now I'm well used to it it's just normal to encounter stuck fasteners and I've become quite good and always getting them out.

WOW, With that much rust in the tire well I be expecting to drop the spare tire on the road after hitting a hard bump. Incredible!

Joe, If your Architectural business ever goes away you could always work for a body shop.:jono:
Thanks Terry! A confession though is I HATE bodywork! I don't mind welding sp much at times but any sanding and paint prep is a real pain and in recent years I have started paying my painter to do that with mixed results.

I'll complete the underbody work as normal on this S320 but when it comes to the paint on this S320 I'll not be doing much myself and let the painter get the new wings etc sorted!

And whilst I fix the rust on my own cars, there isn't enough money in the world for me to take on anyone else's project!

This is one reason why I never sell any car I repair. I know what time it took to make the car right and wouldn't do it over again even if I could theoretically make a large profit to shift it on.
 
Last edited:
I got the first couple of weld repairs done today on my S320:

20220716_164123.jpg20220717_145044.jpg20220717_155251.jpg

(Etch primer is not final finish just to new welds)

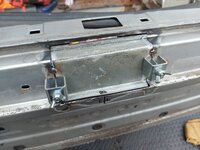
Then the typical w140 boot lock rust. I decided to also delete the sensor location since this car does not have the sensor so will never need it and just one more place to let in damp in the future!

20220717_160845.jpg20220717_174831.jpg20220717_185121.jpg

precise location for latch double checked with trim before I cut that out:

20220717_203425.jpg

I use hot dip galvanised heavy gauge sheetmetal. (Not the thin China rubbish body tin auto parts stores sell) harder to shape but worth it for the same gauge as MB original metal and will not corrode again.

I will fill and bodywork this latch repair also at a later date I'll fit a different better condition set of tail lamps too.

One more larger weld repair needed in the boot then done with welding at the rear of the car there wasn't much to weld really.
 
Also, when I bought this w140 I found an old BW thread where a guy had resprayed it etc. He did all that and just left the boot lock rust :slosh:

Here are some photos from that old BW thread in 2016:

Untitled.png
s class repairing body 6.jpgs class primed.jpg
 
[FONT=&quot]OK so when I got home the first thing I did was hook on my fuel pressure gauge to the S320. [/FONT]
[FONT=&quot] [/FONT]
[FONT=&quot]I tested the pressures running etc and all was in spec. But before I did the leak off (30 min+ time) test I started it repeatidly watching the gauge. About the 12th go the fuel pressure bled off in seconds on shutdown to zero and I caught it on my phone:[/FONT]
[FONT=&quot]
[/FONT][video=youtube;N-rbloIzlYs]

[FONT=&quot] [/FONT]
[FONT=&quot]So this is a bad fuel pressure regulator with intermittent rapid fuel pressure loss on shutdown. A new Bosch FPR is ordered and I hope that will be the cure for the occasional hard starting I was experiencing today.[/FONT]

Joe, I think that may be caused by a faulty check valve on the fuel pump... not the FPR...?

Your 140 may have the late-style single fuel pump with integrated check valve. My 210's have the same type of pump, and I had to replace both due to check valve issues.

:klink:
I thought I remembered something about the fuel pump in this S320 🧐

This is where my ramblings here serve as a good record for me!

I'll fit this new genuine pump I had on shelf now to eliminate those past issues.

20220717_215840.jpg
 
The new rear wheel bearings arrived in post today so I got them pressed into the hubs:

20220718_201405.jpg

It was instersting that the new aftermarket wheel bearings have radial grease seals on them. Probably much better than the old type plastic seal bearings that I removed which had also decayed and split. I can now mask off the bearings and bushing and POR15 the hubs.

I also cut into and split the remaining bearing races stuck to the back of the hubs:

20220718_204943.jpg

Will be nice to be putting the new parts together on the rear axle VS messing with old rusted bolts etc 🔩 👊
 
Last edited:
Well I guess I voided the returns policy

20220721_211327.jpg

Cut out 100mm, veed the joints and seam welded it back. Painted the weld inside the pipe and the muffler black VHT which the whole exhaust will be getting anyway.

The original rear silencer is in good condition and needs joined to this new middle silencer. I am going to use a stainless butt clamp jointer for that as it will be handy to be able to pull the rear silencer and not take half the exhaust off in the future.

Screenshot_20220721-212118_eBay.jpg
 
Work had me super busy there for a couple of weeks but I am back at my S320 again today. I removed the centre propshaft bearing and found it to be the usual poor / split condition for these on any benz. The bearing was also a little stuff to turn.

20220812_161053.jpg

I got the new bearing and support fitted onto the shaft and sanded / sprayed it. Tomorrow I will go back under the car and continue the wire brushing and POR15. Not long until end of month MOT Appointment and I do want to make that so lots to do. The front suspension was already replaced about a year ago (springs and shocks) I will rebuild and renew the brakes but no time for full resto up front just now that can be a winter project to finish on the scissor lift.
 
This was the last area on the back half of my S320 that required welding.

20220813_161434.jpg

That's a pretty sizable 'ole and was causes by the LPG installers cutting through for a outlet point and not sealing it properly. I think this car had its LPG install when it was only a few years old so it's been exposed to plenty of Irish winters and the weakness unraveled.

I will be putting the LPG fitting back but installing it differently so it will be fully sealed this time around and also using the usual hot dip galv repair sections which is very nearly done just need to sand and prime it shortly
 
And this is that repair finished

20220814_183415.jpg

(Whole boot will be resprayed in satin black this week)

This was made of 3 sections and to match the original construction - what was left of it at least

20220814_135946.jpg

Still need to also seam seal it both sides but it's nice to have the welding on the back half done
 
I like how Mercedes are kind enough to put drill hole marks or dimples in the sheet metal to mark drill locations for towbar installation, even on an S class

20220815_114109.jpg

I am going to go ahead and install the good used Bosal Towbar I got for my S320. It came with the original installation instructions which gave me the drill diameters required so I have all drilled this morning and will proceed to complete the wire brushing and POR15 etc on the back half of the car. But the remaining towbar installation is just a matter of bolting it into place. I have a new wiring relay kit for it but will await the car being back together before choosing where to route and drill the cable and make the connections.
 
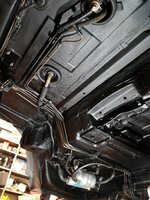
Today feels like a milestone! The back half of the car is finally completely solid and rust free. Every mm of loose underseal or rust has been wire brushed off. There was ALOT of loose underseal that was weeks of work. But now for the back half at least its easy now just painting and fitting new parts.

It did have a couple last surprises today, this was a larger of the last weld repairs when I removed the vent grill.

20220815_144435.jpg
20220815_153718.jpg

The front half still needs attention when I get the back axle installed and can lift it up. The left cill looks pristine it needs nothing but the right cill will need welding so can't put away the MIG yet!
 
Today feels like a milestone! The back half of the car is finally completely solid and rust free. Every mm of loose underseal or rust has been wire brushed off. There was ALOT of loose underseal that was weeks of work. But now for the back half at least its easy now just painting and fitting new parts.

It did have a couple last surprises today, this was a larger of the last weld repairs when I removed the vent grill.

View attachment 152469
View attachment 152470

The front half still needs attention when I get the back axle installed and can lift it up. The left cill looks pristine it needs nothing but the right cill will need welding so can't put away the MIG yet!
im taking notes dont worry
 
This evening after work I got the 2 coats of POR15 applied to any previous surface rusted areas. It only adheres to rust hence the name so would peel off of painted beyond that.

20220816_210441.jpg20220816_210422.jpg
20220816_210404.jpg
20220816_210346.jpg20220816_210339.jpg20220816_210303.jpg

Compared to how it started this is looking good and ready for final prep and the final satin black textured Waxoyl underbody finish.

Old fuel and brake lines will be remade with copper I was working around them for the moment as the old ones will serve as templates.
 
This evening after work I got the 2 coats of POR15 applied to any previous surface rusted areas. It only adheres to rust hence the name so would peel off of painted beyond that.

View attachment 152490View attachment 152491
View attachment 152492
View attachment 152493View attachment 152494View attachment 152495

Compared to how it started this is looking good and ready for final prep and the final satin black textured Waxoyl underbody finish.

Old fuel and brake lines will be remade with copper I was working around them for the moment as the old ones will serve as templates.
What’s your process for using a combination of POR-15 and epoxy primer? POR before epoxy for rusted joints? Even if the rust converter did a good job removing oxidation? POR only on unpainted or non visible surfaces?
 
What’s your process for using a combination of POR-15 and epoxy primer? POR before epoxy for rusted joints? Even if the rust converter did a good job removing oxidation? POR only on unpainted or non visible surfaces?
What I have done on this car so far can be summarised as follows:

1: Surface rust treatment.

This is where I use a wire wheel in a grinder or drill and remove surface rust and loose underseal. Then these areas get degreased, metal prep solution and POR 15. Paint on Rust 15 is a hard paint which bonds and seals to the remaining rust pits and stops it recurring. It cures like a hard plastic and will not peel when applied correctly.

2: Welding

I have also cut out rusted metal which had holed any of the sheetmetal. Cut out back to clean steel and weld in new galv repair steel. Since these localised areas are then new steel POR15 is not applicable so I used a self etching primer instead.

3: Reinstating seam sealer

Next step for me is to brush back on polyurethane seam sealer to anywhere I have ground out or removed the seam sealer.

4: Top coats.

For all primed or POR15 areas I will shoot them with some stone chip locally. For exposed metal work I will use a POR topcoat product.

5: Final finish.

For me this is always a total overcoat to all repair areas and existing clean and sound underseal with black Waxoyl underbody sealant. This is a waxy non setting underseal which self heals on stone impacts etc. That coating gets maintained every few years if needed but otherwise is the final finish and looks like this as an example when I did my S430:

20201020_222626.jpg

Not the factory finish but it looks very neat in my opinion and gives superb rust protection IF the car was correctly prepared in the first instance.

Aka some garages may have shot the whole car with Waxoyl and called it good but that's not the way to do it. Like anyone who does quality autobody work to any part of a car knows, 90% of the work is in the prep, the spraying is the easy bit!
 
Last edited:
I went to replace the front brake discs and pads on my w221 and immediately upon trying to take it apart discovered almost all seized pistons in the front calipers. The pistons have a chrome coating which is delaminating and making them seize.

One in particular was stuck very hard and could only be shifted when I drilled and tapped it and attached a slide hammer.

20220820_170159.jpg20220820_164631.jpg20220820_143834.jpg20220820_143421.jpg

I found a place in UK (Bigg Red) who sells the correct new pistons so I ordered 8x new ones and 2x rebuild kits. The most expensive brake job I've ever done!! But the calipers will be as new as the bores are all pristine so this will fix it.
 
Holy crap those look awful! I can’t tell, but does the second pic show the caliper split?
Yes that caliper was split so I could get full access to drill and tap the seized piston. I tried with the brake pedal. Clamp the other pistons and mash the pedal usually pops a stuck piston. But not this one, in fact it was so stuck a G clamp actually broke in half on another piston and shot across the driveway! Yet that one was stuck hard.

I never had any issue splitting a brake caliper FWIW. Brake seals are made of very durable material and I could see they were still proud of the sealing surface. The caliper is bolted back together now awaiting a go in my parts washer before a lick of caliper paint and wait on the new pistons to arrive.
 
I am proud of the slide hammer trick that worked here :cheers1:Usually a piston stuck that bad scraps the whole caliper if it can't be removed

20220820_211826.jpg20220820_211842.jpg

It is also surprising the caliper bores are in such good condition but I'll take it!!

20220820_204110.jpg

This is still one of the most expensive brake jobs I've had to do requiring new discs, pads, pistons and seal kits. Could have bought used calipers also but they are probably all degrading in this way hence why preference was to rebuild my cores with new pistons & seals myself.
 
I know my w140 which I will be rebuilding the front calipers on next also has one or two seized pistons.

Usually brake pistons have a hollow in the centre:

Screenshot_20220821-101200_eBay.jpg

Which means the drill and tap trick would not work on that car. I already have about 6 slide hammer kits but noticed there are specialist slide hammer sets for brake piston removal so I also bought one of those I think it is one of those tools you won't need often but when you do you NEED it!

Screenshot_20220821-101010_eBay.jpg
 
I painted the W221s front calipers last night. ETech silver caliper paint. But they looked like crap this morning the silver paint is flat and just didn't like is so reverted to my typical E Tech Graphite caliper enamel and think they look better 🤔 (silver was on right, repainting graphite per left one)

20220821_195538.jpg

I got the w140s MOT date pushed to middle of next month as I will not make it by end of this month. I have 5 days off work soon so will have another push at the w140 and try to get the whole rear axle installed and get the front lifted and brakes stripped etc.
 
Well I survived the test drive so I guess that was a success!

20220823_201147.jpg

As you might imagine the brakes now feel much better and much sharper / more responsive.

My w221 also has the infamous 7 speed conductor plate issues. I bought the parts and new speed sensors and I intend to rebuild that myself. Will wait until the S320 is on road & S430 off the lift before I start that as the transmission needs to be refilled perfectly level and I can't do that on Jack stands in driveway.
 
I got back to my S320 and have been working at the bodywork to remove more minor rust bubbles etc. As a recap this car was owned by an older man who "used the rear bumber as a parking sensor" and the PO to me had bought the car from him and repainted it in his garage.

He didn't do a terribly good job and when I bought the car there was black mastic on the right rear taillight. I took a closer look today and it appears the old guy must have bust that taillight at some point in the past and this was probably the main source of the water getting into the boot for years.

Glad I spotted the gap along where the seal was and I straightened / hammered and welded a small strip to ensure the tail light has a perfectly flat surface to seal against.

Problem area:

20220827_145815.jpg20220827_145824.jpg

Straightened, welded and bodyworked:

20220827_210518.jpg

The tail lights were in bad shape too having had water getting into them for years the chrome reflectors were corroded. I did have a full set of low mileage mint w140 tail lights in my garage spare so I'll install them.

The LPG filler was another area Subject to prior shoddy workmanship and leaking so I have a new filler kit and ground out the rust bubbles today and have it in primer tonight ready for repaint with rattle cans tomorrow. The new LPG filler will be bedded in windscreen adhesive this time around so there is no gap left for water to sit in and cause rust. (Those LPG fitter guys dont care about your car so best i do it!)

20220827_132404.jpg20220827_202130.jpg20220827_210556.jpg

I completed the boot lock repair and the rattle can brilliant silver paint and laquer are surprisingly good quality and match. It will not be perfect but it will be better than having rust bubbles below the paint that much is for sure!

20220717_155345.jpg20220717_185121.jpg20220827_183050.jpg

I'll continue to remove any small rust bubbles on the rear wheel arches now too and blend all in as best I can. The prior repaint did cause issues such as them sanding through the edges of the paint and minor rusting was ocurring around the tail lights. I am fixing all of that and whilst a full repaint would be the best option for now the spray cans are blending surprisingly well.
 
I got the new LPG filler fitted this morning. On my S320 and the C124 parts car which had LPG they cut the sheetmetal, left the bare edges and installed the filler with no adhesive so water is encouraged in by capillary action and rusts. Crazy bad workmanship.

I got a new LPG filler kit and bedded it home with a thick bead of windscreen adhesive them wiped off excess with pre paint sprit. The new cap also has an O ring behind it so it is 100% sealed now and no gap at all for water to get into.

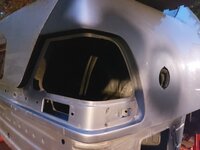
I think for a £10 rattle can paint job the wing looks acceptable as temporary job. (There is a load of light overspray which makes it look worse match than it is) I think giving the paint a couple weeks to harden and wet sanding / buffing the whole quarter *may* make for a semi invisible repair. And at least when the car does make it to my painter it's an easy case of rub the car down and it's ready.

20220828_090902.jpg20220828_162936.jpg20220828_163153.jpg

Hard to keep motivated on boring rust repairs but I have a couple more days off work and If the weather holds out I'll blend in the rear arches too in the same way. Really and truly the car body is in good shape then except for the front wings which are trashed with rust but I have a new pair to go on.
 
Today was another long day!

I took the boot trim off at lower edge of rear windscreen. No rust!! For once. A couple of the clips were rusted out so I removed all of them and will pop rivet them back, including 2 replacement spares I have with sealant.

I waxoyled the sheetmetal and fitted the good spare set of tail lamps I had. Which are in very nice condition compared to the water damaged originals which I binned. I am confident the water ingress issue should be solved- time will tell. (The sheetmetal above tail light still needs some adjusting so that will happen at a later date before proper repaint)

I also fitted the repainted used Bosal towbar and got some Waxoyl done so the towbar doesn't get overspray on it. (It's a detachable bar)

20220829_185637.jpg

Feels like I may not make the MOT date in a couple of weeks but will keep trying and at the same time I dont want to cut corners after coming this far.

Once it does get MOT this will be my autumn steed
 
I got the S320s boot closed up and more rain water got in! After fixing multiple leaks that was very frustrating.

Used a strip of paper to test the boot lid seal all around and found a low area at the bottom which I slide hammered gently back up again a couple mm which was enoigh for the paper to get contact again.

Testing with hose shows it appears to be watertight fingers crossed but I won't know for sure until the next rainy day. PITA water always getting into that car for years I need to get it stopped and will keep after it until I do eventually have a dry boot after hours of rain!
 
Last edited:
One pretty major problem with most w140s but my S320 currently is if the back doors are not used often they stop working / opening!

Lots of threads on the issue and most people end up butchering the door or door card to open the door. The interior in my S320 is mint condition cream leather and I would never be able to source replacement door cards so that was off the table.

I forgot I had a full box of spare w140 handles so took a closer look. There is a small lever which if not in the correct location means the handle does not operate.

I found a tiny gap and pushed my USB endoscope into the door cavity within the glass track. It is well sealed up but I found a tiny gap just large enough for the small camera if I lever it open.

20220831_205330.jpg

20220831204701.jpg

20220831205041.jpg

The issue can be seen above. The small lever circled needs to be up in the arrow location in order to open the door.

It was late and dark so I will return to this tomorrow and see if I can snake a coat hanger or similar into the door nether regions and click this lever over. If I do get the door open at last then I will pull the door card and clean + lubricate the latch to stop this being an issue.
 
I had this issue happening on the rear of my W124 when I got it. It wasn't being driven much. I told myself I would have get to it after the paint work. I greased the latch mechanism when the car was apart and after using it the problem has not re occurred.

I really enjoy following your metal repairs. This sort of thing rings special with me growing up in the rust belt.
Thanks sheward, yes this is a lubrication issue and a great idea to grease them up any chance you can get!

And if you like rust repairs I have a special w140 one coming in a few days, oh dear 😩
 

Who has watched this thread (Total: 5) View details

Back
Top