• Hi Guest !

    Welcome to the 500Eboard forum.

    Since its founding in late 2008, 500Eboard has become the leading resource on the Internet for all things related to the Mercedes-Benz 500E and E500. In recent years, we have also expanded to include the 400E and E420 models, which are directly related to the 500E/E500.

    We invite you to browse and take advantage of the information and resources here on the site. If you find helpful information, please register for full membership, and you'll find even more resources available. Feel free to ask questions, and make liberal use of the "Search" function to find answers.

    We hope you will become an active contributor to the community!

    Sincerely,
    500Eboard Management

OWNER JC220

E36 Widebody or C124 Widebody?

  • Use the 500E widebody kit on my E36 saloon

    Votes: 2 22.2%
  • Adapt the 500E widebody kit for my 320CE

    Votes: 7 77.8%

  • Total voters
    9
  • Poll closed .
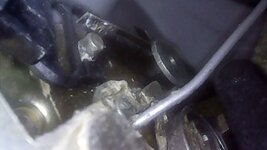
Update on the w140 stuck doors, the plan worked out perfect and I got both back doors opened for the first time since 2019 IIRC! The small drill hole I tried to shoot oil in through before was used to put in a coat hanger and watch on the endoscope and click the stuck pin into correct place then as soon as the doors opened I took the doors off and lubricated the locks within.

20220901_201359.jpg20220901205542.jpg20220901205929.jpg

The doors are locking and unlocking perfectly now and handles functioning again.

I thought the MOT was 18th but its the 13th! And I am going to try to make it which will be crazy tight given the amount of work left but I'll try.

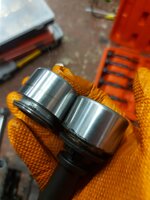
I did go ahead and get the front brake calipers off and 48 hrs in electrolysis rust removal. I got all pistons out but one was badly seized. It fought for over an hour but lost on the end up and came out! I used my press and brake piston slide hammer kit to work it in and out and had to use alot of heat and oil. Bores are perfect so I can restore my cores but the one seized piston has visible corrosion damage on the chrome so I have ordered a new piston to replace that bad one.

20220902_200317.jpg

20220902_203847.jpg
 
@JC220, lots of hard work going into the S320. Just curious, would you still make the same decision to restore this car or would you have scrapped, knowing what you know now about how much work this would be?
 
@JC220, lots of hard work going into the S320. Just curious, would you still make the same decision to restore this car or would you have scrapped, knowing what you know now about how much work this would be?
Thanks for the Q Tim, I suppose how it may read is alot of work but for me personally this S320 has been a fairly easy one compared to my S430 for example!

So absolutely I do not question my decision to restore the car and i am very much looking forward to getting it back on the road and putting miles on it.

I will restore all of cars eventually but it will take a number of years to get through it
 
There was torrential rain all day yesterday so I could only work on the front brake caliper clean and repaint. I checked the S320s boot and there was STILL a water dribble getting in.

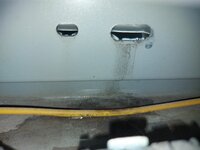
I traced it to these holes along the back trim:

20220903_191525.jpg

That is bizarre as they were always like that but I sealed them up anyway and will check again the next rainy day.

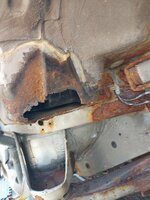
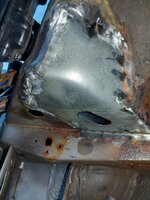
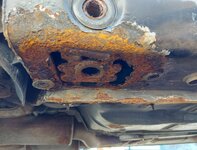
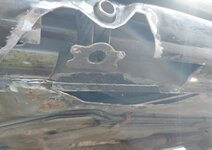
Then onto the large rust repair I knew was waiting for me on the drivers side front cill

20220904_161458.jpg20220904_161715.jpg

Check out those lovely brake lines by one of the past morons to work on this car. (Will be replaced)

I have since cleaned up inside the chassis rails and POR15d them. Then made the repair section:

20220904_181557.jpg

I will copper spray the seam on the car and plug weld this back as a repeat of the original construction. (Was spot welded flat seam)

Jacking point will need an extra plate made for the front of it when the first large section has been welded in.

I also found more rust and repairs needed up front on the drivers side. I wasn't going to go there just yet but ended up doing so when I was taking the cill cover off. I will have to push the MOT date on to allow time to work through these repairs.
 
The rear brake calipers were all cleaned, painted and rebuilt already. I had taken the front calipers off about a week ago and removed one seized piston. They were electrolysis treated for 48 hours and wire wheeled to remove all rust before being repainted. The bores all cleaned up perfect condition.

Just awaiting one new brake piston in post tomorrow then these front calipers can be finished off.

20220905_204858.jpg

I have all new brake pads & hardware, bleed screws, discs, and hoses to go on also. So the brake system will be virtually new throughout.
 
Last edited:
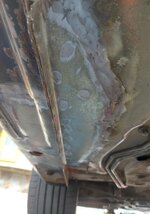
The cill repair was welded back on and is getting painted etc

20220906_204642.jpg

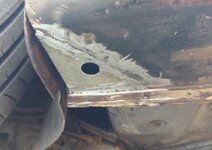
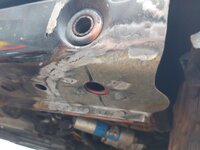
This was another rust repair carried out yesterday

20220910_164651.jpg20220910_181820.jpg20220910_194843.jpg

It has since been primed etc and will get stone chipped in and painted in the engine compartment side.

I *think* the other side is OK here.

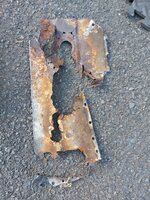
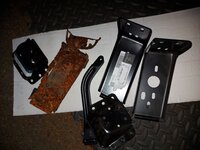
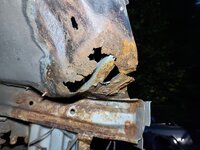
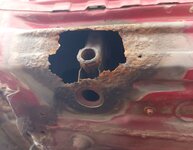
What I do know is both front bumper brackets and mounts are in terrible condition but I was able to buy new from MB so easier repair with less welding. But other sheetmetal reinstating there is still required to be able to weld on the new bumper brackets.
 
The front right bumper mount looks like it really did come out of the sea:

20220912_201652.jpg

20220912_201946.jpg

This sheetmetal repair has compound curves so I'll form it in 2 pieces.

The other side turned out to be solid but since it has heavy surface rust and I have the new brackets anyway I will renew it also.
 
The front right bumper mount looks like it really did come out of the sea:

View attachment 153967

View attachment 153966

This sheetmetal repair has compound curves so I'll form it in 2 pieces.

The other side turned out to be solid but since it has heavy surface rust and I have the new brackets anyway I will renew it also.
Joe, Was this car lost in a snow bank for a few seasons?

Just curious, Do you beat yourself with a whip every day?

Just Kidding :jono:
 
The S320 resto has been plodding along with what free time I can muster.

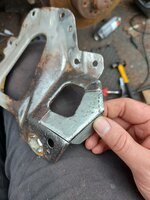
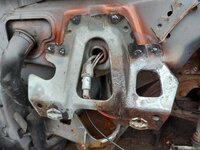
I had to buy used (less) rusty fender brackets, repair them and weld them onto my car to replace the destroyed originals. (These are NLA from MB and any few parts cars are all the same!)

20220919_125214.jpg20220919_130659.jpg

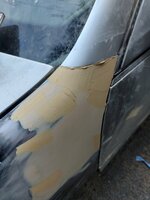
Then I got to bodyworking the new aftermarket fenders to the car. With the growing parts bill aftermarket was my proffered option but you can't just send them off to paint as the fitment will not be perfect. Indeed mine required alot of adjusting and a fine layer of filler at the A pillars to make the fitment perfect. The gaps etc are set better than the originals now.

20220919_150154.jpg20220919_151334.jpg20220919_190812.jpg20220920_200011.jpg20220924_181553.jpg

For example the left fender started out terrible fitment per above. I bent it into better shape and slide hammered it out and that's just a fine layer of filler to make perfect. This took many hours to get right but I can drop them with painter shortly. Then at a later date he can shoot most of the car.
 
I really enjoy seeing your metal craftsmanship. Nice work around. I have just yesterday revisited bodywork filling and prepping hail damage on the roof and trunk of my W210 that was there at purchase. Very satisfying.
 
I went for a long drive today (3 Hr return) to collect a set of really clean C140 headlamps complete with wiper motors, arms and trims.

C140 parts are getting near 036 levels lately. As an example at the moment on ebay UK one headlamp motor bare is £143!

So I was very happy to score these complete spare units for a good price locally. I have multiple spare lamp sets for all my cars except the S500 Coupe until now.

Fast forward 5, 10 or 15 years. If a headlight cracks you may not find one or if you do it will likely be silly money. So this is cheap insurance in my book
 

Attachments

  • 20220925_212516.jpg
    20220925_212516.jpg
    2.4 MB · Views: 2
Been hard to get time to work on my S320 but I did get a good few hours in this weekend.

I removed the remaining exhuast heat sheilds in preparation to clean and waxoyl behind them. Then wire brushing for 4 or 5 hours to complete the rust removal on the right cill of the car. This included welding new threaded studs onto the car to receive the new brake lines and hardware.

I then got the wire brushing and cleaning completed to the front right wheel well which was one of the worst areas of the car for surface rust.

I did remove the upper control arm to enable full access to all sheetmetal for wire brushing and it put up a fight but lost in the end! MB in their wisdom use lots of treadlock and Allen cap bolts to hold these arms to the car. 2x of these were kindly pre stripped by the last guy so I welded nuts on to remove them.

The sheetmetal behind was fine, the control arm is crusty and 27 years old ish so I ordered a pair of new front Lemforder upper control arms and new stainless cap bolts.

20221002_180611.jpg
 
An update on my progress recently, my w221 was up for MOT and passed first time. I did spend a weekend detailing the car, interior etc. And underbody cleaning, brake pipe painting and adjusting parking brake shoes. Anyway it's passed for another year.

On the w140 front I got a few hours today and completed the front right wheelwell weld repairs. This was one of the harder repair areas with the shape of the repair required but it turned out like original IMO:

20220910_150422.jpg

20220912_201946.jpg

20220916_193023.jpg

20221016_165648.jpg

That whole wheelwell is now fully repaired including any snapped off fender liner studs.

The other wheelwell has already had the new brackets welded in and just needs a final wash and POR15 etc.
 
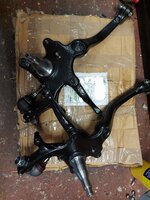
There has been more progress on parts restoration since. Both front hubs were completely stripped and POR15D. And lots of small parts wire brushed and painted. Really time consuming stuff.

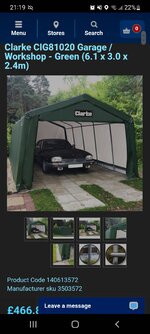
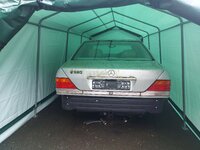
The main issue holding back progress is the weather has been terrible! And with the car outside on Jack stands rain means can't work on it. I have a temporary solution now to let me get this w140 completed- will have this up tomorrow

Screenshot_20221111-211930_Samsung Internet.jpg
 
Not working in the rain anymore!

20221112_132320.jpg

Yes the car is dirty hasn't been washed yet, first time it drives out under its own power before Christmas hopefully it will be thoroughly washed.

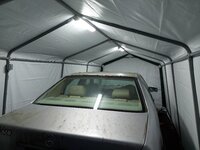
The temporary garage is a great job, very sturdy. Each post is chemical anchored down too for storms. Now I'll let the area dry out with door open until tomorrow and get all brushed out under car and lay down rubber matts to work on. Then the underbody can start to go back together finally!! The under body will be like new and rust fixed on the bodywork for now. Repaint next year.

Curious to see what this garage is like. I have other masonry garages of course but they are all full. This temporary one is positioned around the back of my house such that it doesn't block any other cars. So worked out great really. It can go up for winter storage a few months each year. It won't be up year round.

Need to get some LED Lighting set up now. Prob 3x sealed strips zip tied along the ridge.
 
Had the first heavy rain since the temporary garage went up. Went out to it last night to check when it was lasing down rain and not a single drip on the car! There were some trickles of rain water underneath which I was expecting really and can mastic some trims down to direct that away also.

I did get a couple of cheap weatherproof LED light fittings and installed them yesterday. Just decent overall lighting I still will be using worklights under the car and engine compartment. (I already have lots of LED work lights for this)

The lighting was all zipped tied in and done so it can be taken down and stored with the garage during summer months.

20221113_151619.jpg20221113_163936.jpg

I did also lay alot or rubber matting under the car for easy access and comfort. Now I just need to get some work done to the car on my last day off work!!

I will install the new LPG pipe today, finish some wire brushing and POR15 and start making new brake lines.
 
It has been 2018 the last time my 500E was at a MOT Station. Expired late 2019. Which would have meant spring 2020 next planned MOT then the stations were hit by Covid and closed.

My 500E just sat on the carport not driven. Had the appointment booked a couple months ago. Forgot all about it and realised at 7am on Thursday morning it was up at 8am. Oops 😬 so just started it and took it for fresh fuel and drove to MOT Station. It passed flying colours cobwebs and all still attached.

That is a nice thing about a properly sorted classic. Even our modern benzes here would have required brake pipes painting etc to pass each year!

The igntion cap mods recently carried out are working fantastic despite negative comments and assertions by one member.
:update:

My w221 has a fan belt coming off and some other oil leaks at present so it's suddenly off the road.

Which meant I got an MOT cancellation for my 500E at short notice and took It for MOT today. No prep, cobwebs attached again and it passed no issues 😀

It is driving perfect no issues at all. My work commute is alot more interesting for the next few days with the V8 torque and soundtrack 👌
 
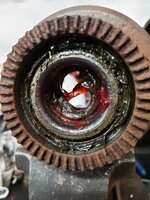
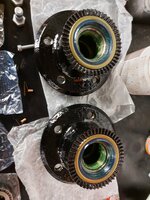
Back to the S320 resto now as I have some time off work. The front hub wheel bearing seals had degraded and were letting in some dirt.

20221121_201016.jpg20221121_200813.jpg

The original wheel bearings were still serviceable with very little marks on them. But when I priced the seals it was the same price to buy Febi Germany (actual made in Germany!) Full bearing kits with hardware.

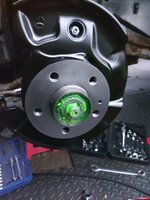
So the hubs were stripped with the old bearings pressed out then wire brushed and POR15 painted. I re tapped the threads to clean them and pressed in the new bearing races. The new bearings were packed by hand with the special green goo and new radial seals pressed in. The grease was coming out all around of each needle bearing, fully packed correctly.

In the next couple of days I will get the refurbished front spindles installed on the car and get these hubs set and sealed up to protect them from flash rusting.

20221223_150337.jpg20221223_153408.jpg20221223_153845.jpg
 
My w220 S600 has been draining its battery almost overnight for a while now but I never get time to look at it. I suspected a PSE pump problem as the locking also stopped working.

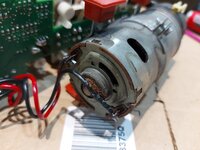
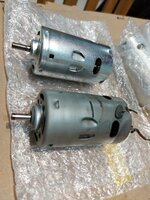
On taking the pump out today it appears the motor may have been on fire! And was definitely dead. There was a hole in the casing!

20221227_141717.jpg
20221227_142946.jpg20221227_145204.jpg20221227_145222.jpg

Fortunately I have literally about 14 good spare w220 PSE pumps on the shelf and a parts PSE pump. (Where the PO of my S430 took it apart and lost all the screws)

The circuit board looks in very good condition still. So I took the spare good lower clam shell off the spare pump and ordered a new motor from China. I will repair this original pump when the new motor gets here. For now I will fit and programme a spare pump. My S600 needs MOTd also will try to get to that soon and get it back on the road.
 
My w220 S600 has been draining its battery almost overnight for a while now but I never get time to look at it. I suspected a PSE pump problem as the locking also stopped working.

On taking the pump out today it appears the motor may have been on fire! And was definitely dead. There was a hole in the casing!

View attachment 159110
View attachment 159111View attachment 159112View attachment 159113

Fortunately I have literally about 14 good spare w220 PSE pumps on the shelf and a parts PSE pump. (Where the PO of my S430 took it apart and lost all the screws)

The circuit board looks in very good condition still. So I took the spare good lower clam shell off the spare pump and ordered a new motor from China. I will repair this original pump when the new motor gets here. For now I will fit and programme a spare pump. My S600 needs MOTd also will try to get to that soon and get it back on the road.
:update:

This is a strange one but long story short I also discovered my W140 S320 soft close motors are the same and it's motor was also hot and about to melt down.

20221229_172009.jpg

The soft close was intermittent in the w140 so sure enough the motor was black and smokey inside and a smelled of burning electricals when opened.

So I ordered 7x new motors which arrived today. That leaves me 5x spare to keep stashed away for future maintenance when they are still available.

I first rebuilt and tested the failed w220 PSE pump. New motor is working fantastic.

20230106_211123.jpg20230106_173546.jpg


20230106_173859.jpg

W140 soft close repair next.

These new motors also have inbuilt cooling fans which will hopefully help them live a longer life. The original motors had no cooling.

The motors are high quality and I negotiated a good deal with the China specialist supplier. There was only one issue I encountered which was the drive collars are not an interference fit!! They machined them exact size. So I had to crimp my original drive collars slightly to make them a tight fit.

Otherwise very pleased I now have all new spare motors in stock to rebuild my own w140 soft close and PSE motors and also w220 PSE motors. (W140 PSE motors are different type which I bought 19x from a prior group buy) Since those serve so many systems in ageing S classes they are critical IMO.
 
I enjoy seeing the extensive work you are accomplishing on your various models and learning more about them thru your work. You have been instrumental in my decision to never own and maintain an early S class. Seriously.

If I were younger and it was my only car, possibly.
 
I enjoy seeing the extensive work you are accomplishing on your various models and learning more about them thru your work. You have been instrumental in my decision to never own and maintain an early S class. Seriously.

If I were younger and it was my only car, possibly.
Thanks Sheward! Although I don't want to put people off S classes 🤣 They are worth the trouble - at least that's what I keep telling myself!
 
I have wanted a TIG welder for years now but wanted one with all functions which are £££. (AC / DC pulse for welding all metals)

I was looking at a Draper one for a long time then one turned up locally on a free adds site brand new and unused by a guy. It was a couple hundred £ cheaper than the RRP so I went and got it.

20230111_210810.jpg

I also need to install a 32amp power supply into my back garage for this welder and my Plasma cutter which I have also been putting off for years! Heavy duty cables all ordered and will install that larger extra power supply next Saturday.

For TIG it needs Argon gas so the C02 bottle for my MIG is no help. I went and paid the deposit (steep) on a rent free cylinder so that is sorted also.

I do have a project for the TIG welder so I'll get learning on it quickly once up and running hopefully! This setup covers all aspects of TIG welding so it should be worth the high initial investment long term.
 

Attachments

  • 20230113_103704.jpg
    20230113_103704.jpg
    1.7 MB · Views: 4
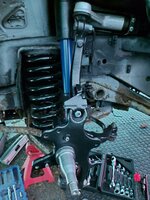
Back at my S320 now to try and get it ready for MOT this spring. The front spindles went back on the car today they look alot better now

20230303_160408.jpg

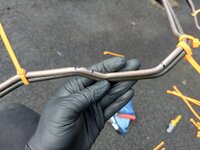
I am also making new 8mm Kunifer fuel hard lines for it. The original mild steel ones have rust and I'd rather replace them now. Kunifer is stronger and more resistant to salt etc than even copper. But it's hard to bend:

20230226_171647.jpg

It kinked when using a standard bender

Screenshot_20230226_180340_eBay.jpg

So I had to buy a Ridgid bender which has roller dies etc but is expensive. I'll get use out of it though as I'll eventually be replacing all fuel lines on my cars.

20230301_132507.jpg

The Ridged bender forms perfect bends and no damage or kinks to the pipe at all.
 
Back to the S320 resto now as I have some time off work. The front hub wheel bearing seals had degraded and were letting in some dirt.

View attachment 158970View attachment 158971

The original wheel bearings were still serviceable with very little marks on them. But when I priced the seals it was the same price to buy Febi Germany (actual made in Germany!) Full bearing kits with hardware.

So the hubs were stripped with the old bearings pressed out then wire brushed and POR15 painted. I re tapped the threads to clean them and pressed in the new bearing races. The new bearings were packed by hand with the special green goo and new radial seals pressed in. The grease was coming out all around of each needle bearing, fully packed correctly.

In the next couple of days I will get the refurbished front spindles installed on the car and get these hubs set and sealed up to protect them from flash rusting.

View attachment 158972View attachment 158974View attachment 158973
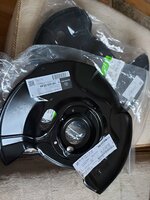
This weekend I got the restored hubs ready to fit back onto the car. All threads re tapped and a2 marine stainless cap bolts on hand for the brake shields & upper control arms etc.

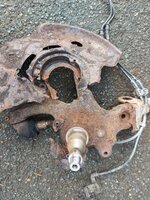
They went from

20221030_115407.jpg

To

20230305_112947.jpg20230305_174619.jpg20230305_192610.jpg20230305_201327.jpg

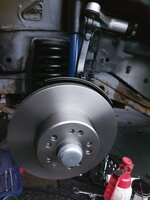
That's both hubs and new upper control arms, link rods and brake discs + bearing kits installed. All torqued bolts get green paint pen mark so I can check all of them are done.

Wheel wells are not waxoled yet. I'll mask the hubs off and shoot them soon as final black protective coating.

The front subframe has not been restored yet and is rusty. I'll do it later this year. Support engine from above and drop it out below the car on my lift. I can split the new lower balljoints and leave the hubs on the car for that. Which will be the only part under the car which hasn't been restored just yet but I can't remove it with the car outside on Jack stands and don't want to do it half whilst in the car.
 
I also got one of these Kwix UK tube straightener tools. Which works very well as it turns out. A rolled coil becomes a straight tube ready for bending to copy the original line.

20230305_114559.jpg

I will be making all new Kunifer fuel and brake lines and installing them on the car this week with new brackets and hardware from MB
 
I also got one of these Kwix UK tube straightener tools. Which works very well as it turns out. A rolled coil becomes a straight tube ready for bending to copy the original line.

View attachment 162592

I will be making all new Kunifer fuel and brake lines and installing them on the car this week with new brackets and hardware from MB
id pay for a kit :spend:
 
Hahah no I meant a full set of correctly measured and pre bent kunifer lines for w124, though probably not worth it for you given the man hours required
They aren't hard to make once you have all the tools to hand. The trouble is the size of a full set you wouldn't be able to post them!! I think MB also supply some (Maybe not all) new lines as coils now.
I can make a How To on the methods to make brake lines if there is interest. There are some tools and tricks to get professional results.
 
Update - this took a long time but I have the 2x replacement 8mm Kunifer fuel lines made for my W140.

These are exact replicas of the existing fuel lines. Ridgid bender was worth the money all smooth bends not a dink or kink anywhere.

20230318_133116.jpg20230318_133148.jpg20230318_133439.jpg20230318_140706.jpg20230318_164102.jpg20230318_164444.jpg20230318_164458.jpg20230318_170018.jpg
 
@JC220, You Da Man Joe!

What a great job!
Thanks Terry I appreciate the feedback hope you are keeping well 😀

I got another fuel / Vent line made today. Now I have the lines made I'm a pro at it

20230319_144619.jpg

This completes the new fuel hard lines. This old one was very rusty definitely at end of serviceable life.

I got the larger lines re installed in the car today. Tricky job to snake them in around the engine bay. They fitted absolutely perfect like factory which was pleasing.

I am going on to make the new brake lines next. The PO had already replaced them in the past and made a mess of it. So I have no real templates to follow there. I do have another very low miles Singapore w140 so I'll have to take a look under it and copy the shape of the lines to make new ones.

I notice even when the car was new it had joints in the brake lines. I will not be reinstating jointers even though I have them on hand. There is no need for them that would have just been for factory assembly reasons.

Alot of small sundry clips etc are fragile and cracking on the car so I'll have to order up that stuff this week so I can work towards getting the rear axle back in within the next week or so.
 
Hi all,

Apologies for not posting in a while my work has just been very, very busy and one day blends into the next in a blink!

I did manage to take on rust repairs on my S600. I had done alot of other restoration work on my 600 a couple years back as documented on here but the only area I had not yet addressed was behind the plastic cill covers.

So I opened them up and not really surprised at what I found:

20230406_174949.jpg20230406_175008.jpg20230406_194045.jpg
20230406_194104.jpg20230407_152810.jpg
 
I cut out the rust and repaired anything behind. Then protected the inner structure with copper weld through primer.

New heavy gauge galv repair patches were made and fully seam welded back in. Followed by new edge sealing etch priming and black waxoyl shutz finish. (Which will all be hidden anyway but will give permanent protection against future rust) The inside of all the cills were also treated to hot wax injection.

20230407_173616(0).jpg20230407_170226.jpg20230407_152829.jpg20230408_124437.jpg20230408_124507.jpg20230408_150608.jpg20230410_103205.jpg20230410_143857.jpg20230411_112314.jpg20230411_112556.jpg20230415_173538.jpg20230415_173543.jpg20230415_173554.jpg20230415_173559.jpg20230415_173604.jpg20230415_173613.jpg20230415_173623.jpg20230415_173645.jpg
 
That welding was all completed in about 5 days and the car put back together. It passed MOT no issues and took a while to run the old fuel through it. The car is running superb now. It had been off the road for about 2 years so I'm glad to have it back running great and still putting down its effortless brutal m275 power.

There were some other small jobs done on my 600 also.

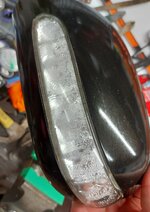
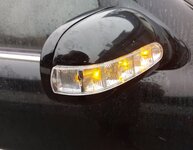
Replacement mirror LED lights

20230415_202540.jpg20230416_081851.jpg

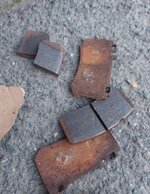
And renewing the rear brake pads which were not worn out but were delaminating

20230421_204205.jpg20230421_204157.jpg

I also painted the disc hats (some excess which came right off first drive)

20230421_192829.jpg20230421_205610.jpg

I have some maintenance planned in the coming weeks including a full service Inc trans and brake fluid flush. Other than thay my 600 needs nothing really at present
 
I did also upgrade some of my tools:

A 200L air compressor for my front garage

20230225_161446.jpg

A mini inverter arc welder

20230401_111639.jpg20230402_122620.jpg

An air hose reel 10mm bore all high flow pcl xf fittings

20230401_162250.jpg

An inverter mig welder (replaced my transformer mig)

20230430_163419.jpg20230501_162333.jpg

Then for my back double garage I bought a slight project - the largest type of air compressor which can run on a single phase power supply

20230508_162528.jpg

Control board

20230508_161416.jpg

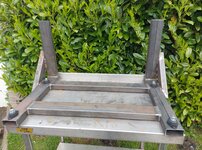
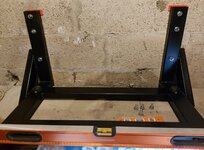
It is a large compressor so I wanted to wall mount it up in my garage attic so I made a bracket

20230513_162516.jpg20230515_194448.jpg20230516_193100.jpg20230516_193946.jpg

I am servicing the pumps etc and wiring in it in now. This will also serve a new sandblaster pot I bought.
 
I did also upgrade some of my tools:

A 200L air compressor for my front garage

View attachment 167877

A mini inverter arc welder

View attachment 167879View attachment 167880

An air hose reel 10mm bore all high flow pcl xf fittings

View attachment 167878

An inverter mig welder (replaced my transformer mig)

View attachment 167881View attachment 167882

Then for my back double garage I bought a slight project - the largest type of air compressor which can run on a single phase power supply

View attachment 167883

Control board

View attachment 167884

It is a large compressor so I wanted to wall mount it up in my garage attic so I made a bracket

View attachment 167887View attachment 167885View attachment 167886View attachment 167888

I am servicing the pumps etc and wiring in it in now. This will also serve a new sandblaster pot I bought.
Dang that “mini inverter arc welder” is tiny! No, I need to research arc welding, and if I need it! L O L.
 
Dang that “mini inverter arc welder” is tiny! No, I need to research arc welding, and if I need it! L O L.
This one is Rohr branded and on amazon for £60 which is a total steal for the quality of the little welder. If you have no welder these ones are definitely worth having around for automotive and home repairs. Even making a tool etc when needed great to have. Takes 1.6, 2 & 3mm rods etc.

Inverter welders are very easy to use compared to their older transformer cousins. Eg, hot start and anti stick function.

Your metal work is top notch stuff, Joe. I enjoy seeing this type of craftsmanship. You may have missed your calling.
Thank you for the comment Drew much appreciated!

I like working on my own cars, working on someone else's car would be a nightmare :cheers1:

I dont think hes done yet ...... Im pretty sure well be reading, in the future, some magazine about a metal work restoration specialist in Ireland that is unsurpassed in quality and craftsmanship.
Maybe there will be reports in the future of old benzes with perfect underbodies and cills - here's hoping!

I did also start some jack point repairs on my red C124 coupe. That car needs out of my front garage and MOTd before I can register it. It's still registered in the Isle of Man so I'll probably have some explaining to do now :oldster:

20230501_170735.jpg
20230506_164956.jpg

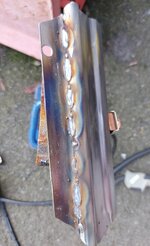
My new R Tech Mig Welder is a very nice machine to use. Even on thin sheetmetal it can lay smooth beads

20230501_190315.jpg
 
Excellent metal work, as always!


Any additional info you could offer on this little guy? Link?
Here is a decent, short you tube review of this little welder in action


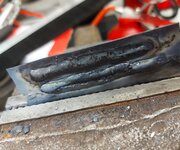
It's capable of welding thin car bodywork (I tested it with 1.6mm rods worked surprisingly well)

20230403_184813.jpg

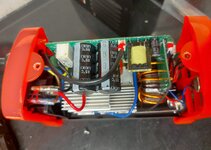
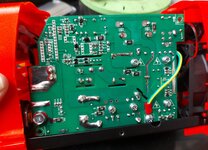
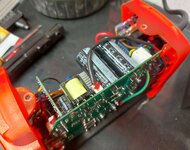
This Rohr one was good quality. I did open it up and check there was a real fuse in the plug. (Other similar welders from amazon can come with bolts instead of a fuse!!)

20230404_225131.jpg20230404_225148.jpg20230404_225142.jpg20230404_225209.jpg20230404_225154.jpg20230404_225215.jpg

It came with decent leads and a carry case etc.

The mask these come with is no good! Disposable really. So if you are thinking of one allow for an auto dimming mask. There are true colour masks now for about £50 on amazon which are very good.

Even for getting out broken bolts, making garage benches etc these are very handy. If you have a broken exhaust bracket say you can weld it up yourself.

If any of you have never welded before and are curious to try it one of these little inverter arc welders would be a great addition to your garage!

For what it's worth here is the amazon UK link to the exact one I bought

Röhr SMINI-120NI ARC 2 in 1 Welder Inverter Gasless 120 Amp DC Anti-Stick Portable Welding Machine Hot Start MMA IGBT 240V AC - Variety of Accessories Included https://amzn.eu/d/hSlHCz1

The features these have is very good for the price. Unbeatable really.

MIG welders are more better but alot more expensive to start out with especially considering the need for a gas bottle. But the arc welders are cheap to start out and don't need any gas.

This one takes up little to no space either and you can take onto a roof etc if you have an aerial bracket to weld or something like that. I have used mine on my carport roof.

It was after seeing how good this little inverter welder was that got me looking & also upgrading to the R Tech Inverter MIG welder.
 

Who has watched this thread (Total: 6) View details

Back
Top