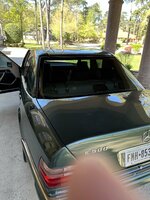
• Hi Guest !

    Welcome to the 500Eboard forum.

    Since its founding in late 2008, 500Eboard has become the leading resource on the Internet for all things related to the Mercedes-Benz 500E and E500. In recent years, we have also expanded to include the 400E and E420 models, which are directly related to the 500E/E500.

    We invite you to browse and take advantage of the information and resources here on the site. If you find helpful information, please register for full membership, and you'll find even more resources available. Feel free to ask questions, and make liberal use of the "Search" function to find answers.

    We hope you will become an active contributor to the community!

    Sincerely,
    500Eboard Management

OWNER nocfn

131,733 - E500

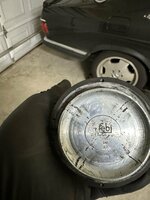
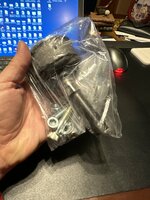
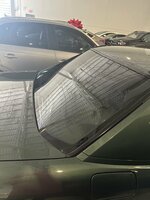
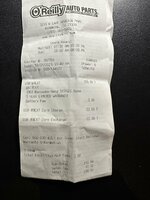
Completed instalation of a new to me Bosch re-manufactured Alternator. I hate how hard it is to do this job, nothing is easy it just sucks. Also replaced my battery with a Champion Gel Mat as I had indicated before. My tensioner device is still robust, but prior to my ownership, the Torx head screw was pretty savage. I have the replacement Febi but if someone has a PN for just the threaded screw that would be ideal. Thanks to Emerydc8 and GSXR for their help. Now it will be time to purchase new tires for the E500, the Pilots are about worn to the bars and one is showing a belt. I last had an alignment by MB when I did the front end suspension work. I will see what the problem is when I take it in for another alignment. Last but not least, our dear KLINK who kept me from blowing up the car. Symptoms of whining and all my warning lights / destroyed battery are presently over and I hope this ends the saga for a long time.

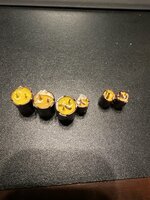
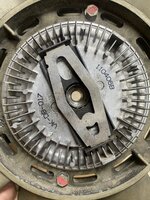
Do note that each of the reman alternators I have, did not have any markings on the black part of the Voltage Regulators. So the Bosh Reman claimed to be reman from Bosch itself, but yet the voltage regulator looked identical with no markings on it when compared to India COO Voltage Regulator.
 
Last edited:
131,800 E500

Consistent with previous work, I got some Continental Extreme contact 245/45/17 to replace the worn Pilot SS I purchased when I bought the car. My belt exposure front inside left, I noticed during the Alternator R/R was a missing balance weight. That particular wheel needed a 75 inside and it had nothing as it turns out. All other wheels were evenly worn.

Also, I had a chance at the shop to inspect the rear subframe mounts and thankfully there were no air-gaps or signs of issues.
 
Last edited:
132,070 E500

Replaced the fan clutch that was installed by PO's shop. It was aftermarket, and I used the ACM aftermarket replacement. The one removed showed some traces of escaping fluid but no doubt, it was never roaring, even in my hot texas shop with the temps in the 100's @ 3800 RPM..... even after a 20 minute drive in stop and go heat. I have a new SA BEHR radiator to install to replace original if needed, so for now all is well. Raining here so its only in the mid-90's. Will report some stop and go traffic when the heat is on!

(A few posts earlier I had seen good results with the Tstat change, block drain and replacement of coolant but never got the roars, even after replacing all temp switches as well the temps stubbornly reaching the 100-110 range and no roar so this needed to happen.)
Great! Are you able to tell / do you have pics of the old aftermarket fan clutch?
 
Here ya go!
 

Attachments

  • EB5A5EE1-D3F4-4401-8E83-27D1EE76A059.jpeg
    EB5A5EE1-D3F4-4401-8E83-27D1EE76A059.jpeg
    2.5 MB · Views: 9
  • 0BC457C3-B69B-4353-8A56-00F1928F5F4A.jpeg
    0BC457C3-B69B-4353-8A56-00F1928F5F4A.jpeg
    2.4 MB · Views: 9
  • D39579FF-1204-47A9-B44B-AA49E611CCFD.jpeg
    D39579FF-1204-47A9-B44B-AA49E611CCFD.jpeg
    1.8 MB · Views: 9
Kinda late to ask, but did you get pics of the new ACM clutch? Also, did the new clutch have the same markings as the old one (VK-DB-017)?

:tejas:
 
I thought I had one, i will keep looking. It came on a borgwarner box but ACM on box and sales slip. It was in parts stock from a few years ago but the numbers are faint for the first series then a dash then easier to read them. Hopefully I have one.
 
Kinda late to ask, but did you get pics of the new ACM clutch? Also, did the new clutch have the same markings as the old one (VK-DB-017)?
Hmmmmm... that VK-DB-017 marking is ACM.
Here's my VK-DB-017 ACM when installing it in 2016....

1660952264447.png
 
Jlaa, I can't recall, have you confirmed if your ACM disengages at 3500rpm (or at least by 4500rpm)...?

:wheelchair:
 
Jlaa, I can't recall, have you confirmed if your ACM disengages at 3500rpm (or at least by 4500rpm)...?
Yes, it disengages at higher rpm (the roar goes away).
I don't have a lot of miles on it though ---- only about 10K miles.....

It also doesn't get a lot of thermal stress. As you know, my mediterranean climate here means it has been around 65F-72F all summer long here.....
 
Jlaa, I can't recall, have you confirmed if your ACM disengages at 3500rpm (or at least by 4500rpm)...?
I'm confused as to why you are going down this line of questioning? I thought @nocfn's issue with his old ACM (as opposed to his new ACM) was that his old ACM was never roaring, which is clearly wrong?
 
I'm confused as to why you are going down this line of questioning?
Just confirming that your ACM disengages at high RPM, as it should. Some aftermarket clutches do not, which I don't like.


I thought @nocfn's issue with his old ACM (as opposed to his new ACM) was that his old ACM was never roaring, which is clearly wrong?
Correct! This may also be the first documented failure of an ACM in long-term use.

🤓
 
Just confirming that your ACM disengages at high RPM, as it should. Some aftermarket clutches do not, which I don't like.


Correct! This may also be the first documented failure of an ACM in long-term use.

🤓
My ACM seems to be working perfectly but I have less than 1K miles on it. Sorry I can’t confirm if the number is the same VK-DB-017. Today I waited in a line (idling in drive) to get into my local car show. It was 85 degrees and my temp never rose above 100:)

@gsxr, I’m not sure what the RPM range is. I can hear it roar when rev up the engine in neutral but with the WDWs up and driving I don’t even notice it.

lol
 
I replaced an ACM as it no longer engaged at all. I have no records as to the install date by PO shop, but it was a good death. After sitting in some stop and go on blazing hot days or just standard 90F, it would raise up to the 100F and stay there or start raising slowly which meant defrost and open windows. I had previously flushed out and block drain, new distilled and Zerex, new Tstat with added bubbler holes. I either was going to change the radiator to my COM South African Behr unit, or the fan clutch. In this case, the fan clutch keeps me in the mid-80's regardless of heat or traffic experience.
 
C126

183,157

Smelled some strong gasoline in the garage that shares a home with the Wife's modern cabriolet. Turns out the bladder within the Fuel Pressure Regulator mechanism gave way a some point recently. There is a rubber teat and a vacuum line on the end of the Fuel Pressure Regulator that takes raw pressurized fuel back over to the opposite valve cover baffle to burn as needed to prevent a fire. In my case the internal breakage may have been enough to eat away the rubber teat and the fuel would just trickle out the back of the unit down the engine via the intake weep holes, cleaning a path all the way to the shop floor. Very fortunate to not have had a Car-B-Que!

Had a decent spare from a yard pull back in 2018 and she is installed, holding good pressure and most of all no leaks. However, I am still ordering a new one and from MB with the lowest net price of $323 with tax and free shipping. That is substantially lower than RM, FCP, PartsGeek and AutoHausAZ. The highest price is napaonline, and that was a shocking $1,100 plus tax.

1670107146517.png:hot:


:bbq:
 
C126

183,715

Hearing a clunk under my feet made me suspicious that the Guide Mount bushing was toast. Jacked up the left side of the car this weekend and indeed, the bushing is non existent - just some scraps that rubber was there. I had replaced the right side not long ago - so the left side finally gave way. As we all have dealt with, when it rains it pours... HYDRAULIC FLUID!!!

Upon removing the jack stands and clearing the jack out of the way, I began to back the car out to reposition it for other activity in the shop. As I exited the vehicle I found my left rear tire sitting in a growing puddle of SLS fluid. I have accumulator to strut lines to replace the 1991 OE as a preventative measure. Sadly, I never got around to that preventative business. So I managed to remove the line (must remove the rear seat back to access the struts - unlike the W124.036)

My hope to finish this replacement this week and investigate the ruptured hose to see how that came about. I am rather certain that 32 years under pressure was the culprit...

Swapped out the hose and crush washers per fsm and allowed the air to blow out the system. It wasnt long ago that I had installed new fluid when I installed the new white SLS bottle. Anyway the fluid was clear, and after letting the air naturally evacuate I filled the system to max line and went for a drive. All appears to be as expected with the SLS, now awaiting the guide rod mount kit for delivery. The OE hose was very brittle but did not appear to be a burst. it was just brittle and likely leaking under pressure from the lower fitting as the top of the strut was dry at the banjo. Both hose connections were tight to the strut and sphere.
 
Last edited:
C126
183,825

Installed a new Lemforder guide rod mount. I replaced a Febi unit that the indy mechanic installed when I bought the car back in 2010, it was a good death.

CBD09555-9C13-4385-9F50-A5EC7E34CB31.jpeg

Many thanks to @luckymike for the tip on the breaker bar when installing a new bushing (guide rod mount) - it worked perfectly with absolutely no shimmy or alignment noticed.

I did decide to try the hardware to install the dogbone and it stripped out - that was quite a joy to remove. So instead, I used the original MB hardware, it was robust. The bushings in the dogbone will need to be replaced on the next cycle as they are getting tired. No separation from the metal on either side of both bushings.
 

Attachments

  • 66564166-7ECE-4D65-93DD-647667B79293.jpeg
    66564166-7ECE-4D65-93DD-647667B79293.jpeg
    1.2 MB · Views: 16
  • A347C10F-9DDF-482C-913E-C94CDA273629.jpeg
    A347C10F-9DDF-482C-913E-C94CDA273629.jpeg
    1.6 MB · Views: 16
Last edited:
I did not say Lemforder guide rod mount is crap. The FEBI was the one replaced, and it lasted since 2010. The Lemforder is made in Poland, the units I have purchased and I would buy them again (if made in Europe).

@luckymike suggested to wedge an 18" breakerbar as follows: business end up against the shock mount at the control arm, the handle will go up and wedge on the body. To get there you begin by measuring the distance from the end of the control tube attachment at the control arm to the inboard edge of the current threaded adjustment bolt of the unit. I was spot on 14" at the start. Then I began to unthread the ball joint from the tube until you get the front wheel pushed forward enough to allow that breaker bar to wedge into place. Once you have it wedged, you tighten the bolt back up until that bar is FIRM in its position. Once that was complete, I un-threaded the unit almost all the way, then dropped down the bolts to the cross brace, and the dog bone. finished the removal of the guide rod bushing. Removed, cleaned and added new bush and installed in reverse. No cussing or use of hydraulic straps - just used the design of the mechanical setups to do the work. And you do not need forearms like GVZ to move that 19M wrench... :stickpoke:
 
Unfortunately Lemforder stuff is also crap these days, UNLESS it is made in Europe. It's about par for the course that the Febi stuff failed as it did.

For the set that I purchased for my own full-on C126 front suspension rebuild, I got the MB factory guide rod bushings.
 
Sorry, wasn't implying the Lem joint was crap, just the HW they included in the kit - it sounded like it broke and you just reused what was on the car?
 
I did reuse the MB part that was there because I broke the one provided, Using existing bolt with existing nut worked fine, a light smattering of blue thread lock. To be fair, I had the part upside down so it was going to break no matter what I used.
 
Today I have some good news to report. One of my clients is a retired electronics guy, think corporate sales. Anyway I went to see him and we got to talking about his electronics shop in his house. Lights went off in my head. I have a WOT LH module that was ticking my FPR and the capacitors were bad and getting worse. Fast forwards several months and BAM my 84 year old said bring over that LH and I will have a go at it. He replaced all the caps with the ones I ordered (thanks JLAA) and it got the car up to temp and no relay ticking. He tested each cap and 4 were shot, one was just less than half capacity and the other was fine. As a cautionary measure, I had him replace them all. Seems good news is nice to share. Pics of the removed units.
 

Attachments

  • image.jpg
    image.jpg
    3 MB · Views: 16
Last edited:
C126

Basic mx here but the rare time in Houston we open car windows with a passenger in the car came about. The sounds were tell tale quick so I stopped and put it up. Pulled the door card and inspected slide rails for the regulators basically dry - and it sounded like it. Removed all traces of old grease and vacuumed up the detritus around the weep holes. Was able to reapply grease to the vertical slides and to the horizontal surfaces. The teeth are not visible so you have to reach up inside the door to clean and reapply blind. GVZ has several HOW-TO write-ups but this should be considered regular considerations to your spring PM schedule every few years. If the 126 is your driver, consider alternating brake fluid replacement or cooling system replenish with regulator servicing.
 
Last edited:
132,758

Took the E500 in to the only MB /AMG authorized collision center in Houston to replace my back-glass that has had cracks in it when the frame was replaced. While my frame was relatively new, I authorized a completely new one and the seals for it. I reused the Joint cover since they are NLA, and the lower seal I had already replaced a while ago. We did a clear ceramic film by their body wrap folks (I have used that subcontractor before so I was happy to hear it was them).

I had arranged for a drop-ship of glass locally several months ago but life got in the way to act then. When I reached out to Bob at Naperville to get it done now, the vendors changed nationally and the drop-ship deal was now out of the possibility. So that really added quite a bit to the bill than I expected, but the glass is in, it is certified now and thats the way it is. I did consider the 9 hour round-trip drive to Laredo TX to get the glass for 50% off list, but the time and expense of fuel would have brought me to even on the cost of the install.

So that's it, sometimes you gotta say WTF!
 
Pics will show up when I get the car, based on the fact that my schedule today is crap, I will need a ride, and the time to make the round trip is about 1.75 hours with no traffic. Everything is Bigger in Texas. If someone wants black trim frames (two pieces and their rubber "covers") let me know.


:txflag:

As promised, the pics! It turned out perfectly. It is different not having limo black, but the UV heat protection is a lot better than smoked glass having the ceramics. So with 8.25% tax and market prices, glass, trim, rubber, install kit and 3m ceramic film, $1,754 out the door. They did hand wash and buff the paint as well. It was also the talk of the shop, and there were some 250k GTR and such so I got to go thru the history as a brand ambassador....
 

Attachments

  • 208CDCAE-DBB9-4647-89BF-8C079DEF116F.jpeg
    208CDCAE-DBB9-4647-89BF-8C079DEF116F.jpeg
    1.4 MB · Views: 20
  • 12B62175-FC59-46DE-9D0E-82D6B1CFB9A6.jpeg
    12B62175-FC59-46DE-9D0E-82D6B1CFB9A6.jpeg
    1.6 MB · Views: 20
  • 7504B1E3-BE6D-4E25-825F-F3C90A8DDF95.jpeg
    7504B1E3-BE6D-4E25-825F-F3C90A8DDF95.jpeg
    1.8 MB · Views: 20
  • 1471828C-0757-4DA4-992C-B3EEBD4BFD7D.jpeg
    1471828C-0757-4DA4-992C-B3EEBD4BFD7D.jpeg
    1.9 MB · Views: 20
Last edited:
Today I have some good news to report. One of my clients is a retired electronics guy, think corporate sales. Anyway I went to see him and we got to talking about his electronics shop in his house. Lights went off in my head. I have a WOT LH module that was ticking my FPR and the capacitors were bad and getting worse. Fast forwards several months and BAM my 84 year old said bring over that LH and I will have a go at it. He replaced all the caps with the ones I ordered (thanks JLAA) and it got the car up to temp and no relay ticking. He tested each cap and 4 were shot, one was just less than half capacity and the other was fine. As a cautionary measure, I had him replace them all. Seems good news is nice to share. Pics of the removed units.
An update on this repair. I have ended up removing the repaired WOT LH prior to taking the trip to get the back-glass replaced. I was getting some High RPM missing and that was not what I experienced when the unit was working prior to the capacitor issue. So we will work the adaptation reset and see if that clears the issues with that module. If it doesn't then I may send it off to Programa to diagnose and evaluate the cost of repairs.
 
@nocfn,

Louis, That looks like a nice cover in the pics. It’s just for indoor use right? What do you think of the quality?
 
I like it. I have a different version for the E500 that Captruff has and they are two different manufacturers, but of similar quality. Both indoor with a cut to fit with pockets for mirrors. Only for inside, does not shield for UV or rain/snow.
 
Well yesterday I was letting the heat out of the car after a round of golf and only 3 of the 4 windows returned to their closed positions. So there are three regulator brands for the right rear, and the best one is the "Italian job" . So after pricing them out at the various stores, the cheapest has the highest shipping and so on down the line. In the end, FCP has always supported their sales while the others play catch-up. So they got my order, all in at $199.98. Again others were cheaper per item but shipping took them over $200 for my Zip code. And, to be consistent, many of these are in low supply quantity.

While I am perfectly ok with supporting fully closed glass with 1/2" pvc in goal-post fashion with 1/4" notches up top inside the door, its just nice to say the rears work. In my case the slider crumbled, stressed the pulley cable and the metal fatigue rendered the unit Tango Unicorn. I might add that the color of my un-gloved hands were black with grease so for this guy, I may have saved me a year or so by greasing this stuff up when I got the car. This was an age/fatigue related - plastic crumbles with age.

I will amend this post when I actually install the unit...... :pc1:
 
That is a good thought Mike. Honestly it is so hot here the only reason to open them is the let the heat escape while driving the initial 500-100 feet. I replaced the rear left last year and the front left has been replaced by PO. I will try to remember that tip however.
 
133,348

Today I replaced my OE radiator with a South African made BEHR radiator. Since I block drained/flushed less than 8,000 miles ago I replaced the coolant with a bottle of water wetter, and a 60/40 mix of G05 and distilled water. There was plenty of 50/50 left in the system with this old radiator. I used two cans of coil cleaner front and back and allowed it to soak for about 30 minutes before I hitting it from both sides with water/and compressed air. Not as much debris as I expected, but enough to inhibit cooling on that old radiator for the bottom 6 inches. The radiator seemed a bit bowed and not rectangular like perhaps it was bent when the car was worked on - there is no history or evidence or a collision either.

As a while you are there opportunity, I also replaced the tensioner that was also OE, but the torx bit was mangled and I could not get a good purchase on it. So I used a new FEBI unit that I bought years ago made in Germany, transferred over the pulley and the nut and finished the job. I let the car run for about 25 mins in the shop, then took her out in stop and go traffic. Fans came on at scheduled temps and we never needed to get to the roar temps, even sitting still for 10 mins while I dropped of recycled oil/G05. Edit: I do have a new MB tensioner unit on the shelf and wanted to preserve it for the potential NLA status.

************************************************************************************************************************************

Additional info: I took my OE Radiator out to the trash after sitting outside to drain for several days. That thing was bone dry, yet weighed like there was a brick attached to it. I did clean out the fins but I think there could have been years of sediment and other sploodge (industry term) that was limiting the flow and adding to the weight. It is gone now but I should have opened it up with a sawsall. So hopefully if someone reads this getting ready to replace an OE unit that is 29-31 years old, maybe you do an autopsy on yours from left to right along the midline
 
Last edited:
133,365

Finished the right rear regulator swap today, This Italian unit was different than the left rear I did a few years ago in that the right side came with a motor but the left side did not. Either way, I lubed up the unit and got it installed without incident.
 
Starting to "hear" the E500 with the windows up and the music on. One of the resonator inlet pipes has a hole in between the two pipes right 15mm before the can. Was able to use the JB Weld tape successfully while I consider my cost effective options. With 3 days into the repair, temporary may be a long time. I do not want to replace the knees and hips when we have an ingrown toenail, so for now - $6.50 repair on a part we do not see is a good temporary fix. I have located proper repairs, will also be contacting the fabrication shop who did my SS dual exhaust mod with my headers for the 560sec.

(will update mileage and delete this parenthetical at that time)
 
Nothing to report here, just placing in some historical info I had on my phone for posterity.

Courtesy of Klink - note this is for 126 chassis, the part numbers for 124 chassis are different, AND vary by model year:

1695236915098.png

Oh, I forgot to mention, if you are tired of your automatic climate control dribbling cold air up onto your windshield when in a temperature maintenance mode when set to automatic, and causing the outside of the windshield to fog on humid summer nights, do this: Disconnect the defroster flap stroke limiter element from the very last valve nipple on the vacuum valve group. I forget if it's valve number six or number seven, but it's the one all the way on the bottom. Plug that nipple with any suitable plug so that it remains vacuum tight. That port will no longer be used. Then, "Y connector" the line that you removed from the last valve and connected in parallel with the center jet valve. I think that is number four, at least it's the vacuum element that sits just below the right center – vent. Unless both of your systems have already been set up this way by hyper competent technicians that worked on them in the past, do this with both your 126 and your 124, and you will love the way it functions. You will still get a light dribbling of air out of the defroster ducts when the system is in a heating mode to keep the dash clear, but you won't get any more cold air dribbling up there when it is in a temperature maintenance / moderate cooling mode during hot weather. You can thank me the next time you drive the car a longer distance at night in the summer...
 
And now saved to my hard drive for future use / instructions. If the guys can't figure it out I'll ask Klink to tell them how. This is great intel, especially for hot, humid SoFL.

maw
 
C126

184,793 on the clock

Took my battery in to check the CCA after it was installed in Q1 2018 and she was Kaput! 12.5v maintained from the tender/maintainer and yet this only prevented a battery from lasting 30 months in the heat of Texas - which is pretty average. So the battery minder got me almost 6 years so that is pretty good considering that I alternate vehicles every 5-6 months with the E500.

The previous battery was a free replacement for a battery that had bowed out under the stresses of heat. $220 or so out the door.
 
Last edited:
Louis, what brand/model/type of battery did yo install in early 2018?

Also, do you have any desulfator in use with the battery, OR a maintainer with full-time desulfation? Just curious!

:apl:
 
I had a Oreilly's branded standard (non-agm). I use the maintainer with desulfator that was suggested on this forum years ago. I also keep the hand held jumper in the trunk of all 3 vehicles I own. I have had to start the C126 about every 6 starts, even after have driven for 20 minute trips or 50 minute round trips. I did not have any type of parasitic draw, and I consider this a stunning success.

I have lived in SE Texas since 1988 and 30 months is pretty average on a daily driver. I have had 2 Tacoma, 1 Mazda, 2 Mopar, 4 MB and 1 Honda. None of those batteries lasted longer than 4 years, most shiT the bed at 30-32 months. AGM were a few of those - most recently the 8/2019 purchase of my wife's E450A just got her AGM replaced at the dealer. And I might add, The alternator and voltage regulator are fine on the C126.

Per the receipt it is a SSB (Super Start)49EXT with 990 CCA 3 year warranty
 

Attachments

  • IMG_1722.jpeg
    IMG_1722.jpeg
    1.6 MB · Views: 3
Last edited:
133,393
E500

Had some intermittent idle stumble and have not had any issues since a complete overhaul was done years ago. So for grins, I pulled off the cap on the passenger side and the rotor was quite loose. It was only 4-5 turns until the rotor was free from the bracket. I estimate about 40 minutes of driving until it was completely off. It was loose enough that I could move it freely and get clicking in and out as I pushed or pulled on the rotor. No issues now, 9NM and some light blue loctite.

Happy Thanksgiving. (as a note to all - I removed the insulator on both as well, no oil leak from my cam seal job) years ago..
 
Last edited:

Who has watched this thread (Total: 3) View details

Back
Top