• Hi Guest !

    Welcome to the 500Eboard forum.

    Since its founding in late 2008, 500Eboard has become the leading resource on the Internet for all things related to the Mercedes-Benz 500E and E500. In recent years, we have also expanded to include the 400E and E420 models, which are directly related to the 500E/E500.

    We invite you to browse and take advantage of the information and resources here on the site. If you find helpful information, please register for full membership, and you'll find even more resources available. Feel free to ask questions, and make liberal use of the "Search" function to find answers.

    We hope you will become an active contributor to the community!

    Sincerely,
    500Eboard Management

Rough Idle and CEL on

SBG

1993 400E
Member
First things first: thanks! All the posts and information here has gotten me a long ways to resurrecting a 1993 400E (CA model) project I inherited from my brother. When I got the car it wasn't running. With your collective help, it's on the road and getting closer to completion.

I have several (potentially related)issues:

1. Rough idle: When it starts idle is around 1000 rpm and declining to around 650 rpm. Idle speed cool is around 550 rpm, as it warms up idle speed drops to around 500 rpm and becomes somewhat erratic. It doesn't stall and runs smoothly at any speed above idle.
2. CEL will stay off after a reset and come on after several restarts. It's failed twice in Colorado for HC (3.52), CO (17.23) and NOx (3.23) with virtually the same numbers. While the test was the same, it was performed at two different stations. The high values all correlate (see figure), so I'm thinking it's either related to transient emissions associated with shifting gears, or an electrical issue. When I got the car it was definitely running rich, judging by the smell, but replacing the O2 sensor helped a lot. O2 sensor replacement also improved the idle. The car spent most of it's life in Seattle within about 300' of sea level. I sometimes wonder if it has trouble learning that there's a lot less air in Denver.
3. Charging light is dimly lit. Voltage is battery is: 12.81V. Voltage running is: 13.91V. Voltage at Fuse 5 is 12.08V. The light is off or very dim when the car starts and gets brighter the further the car is driven. Headlights don't dim (or increase the brightness of the Battery light).

Here's what been done thus far:

1. New plugs (the correct ones) gapped to 1MM
2. New caps, rotors and insulators;
3. Wires all tested at around 2.1k ohms
4. New crank position sensor with shim
5. Checked coils and they seem to be in good working order, though sometimes the spark in individual wires seems to be inconsistent.
6. Camshaft position sensor tested for continuity and appears to be working correctly
7. New flywheel (missing magnet meant no power from the right bank of cylinders)
8. New fuel pressure regulator and lines tested for correct pressure
9. New injectors
10. Water temp sensor tested for resistance and continuity
11. Air temp sensor cleaned
12. MAF was replaced by my brother and harness looks good (not ecojunk)
13. Upper wiring harness was replaced; tag confirms it's OK from a date perspective.
14. Lower wiring harness rebuilt and replaced (definitely ecojunk)
15. New alternator
16. New battery
17. New O2 sensor
18. Vacuum hoses checked with carb cleaner and smoke (no leaks)
19. All contacts in CAN cleaned with contact cleaner.
20. Diagnostic module (under floorboard) checked for connection.
21. All fuses, and fusible links replaced (Including in CAN)
22. Throttle linkage adjusted (no ASR), but I haven't adjusted the idle stop or adjusted it at the pedal.

Error codes on the blink reader are as follows:
Pin 7: Code 6 (cleared, we'll see if it stays that way)
Pin 16: Lights up when pin is inserted, but then only one blink.
Pin 30: Code 9, won't clear. But the SRS system probably isn't related to the issues at hand.

About the only things I can think of to address the idle at this point are replace the NSS, assuming Code 6 comes back on PIN 7, and completing adjustments on the throttle linkage. Any other ideas or items I may have missed would be greatly appreciated.

As far as the Battery Light issue goes, 12.08V going to the light seems low, as does the 13.91V at the battery when the care is running. My guess is that the light coming on is related more to the warning light circuit than the car not getting adequate current from the alternator. Given that the light essentially goes on due to voltage differential across the bulb, it seems like finding a source or resistance in that circuit is the best approach. The fact that voltage differential increases (and the Battery light gets brighter) as the car warms up also leads me to the conclusion that resistance in the wiring is the culprit. Any ideas on where to start looking would be great.

Thanks again for all of the collective wisdom. IMG_1346.jpg
 
What code is present on pin 19 for the DM, which will tell you why the CEL is on?

Any codes on pins 4 (fuel) or 17 (ignition)?

I've never seen an emission test report from a dyno test, I have no idea how to interpret that data... can't quite tell why it's failing, or what value(s) are excessive...

:doof:
 
Pin 19: One quick, and somewhat faint, blink.
Pin 4: One blink
Pin 17: One blink

Standards for the Colorado Front Range are:

HC: 1.2
CO: 15.0
NOx: 3.0

My read on the test is that we are still running rich based on the HC and CO numbers. It looks like we have too much fuel and not enough oxygen for a clean burn. I'm not as worried about the NOx just yet. Under number of conditions, it is very low, which would indicate the cats are working. So the question is why are we seeing fuel spikes? Thanks for your thoughts.
 
I didn't particularly suspect it. When I first got started on this project, there were a whole lot of codes to sort through and one of them may have been Pin 19, Code 8. I think the 4 pin connector among other things enriches fuel during cold starts. In any event, after cleaning the connections and testing the resistances of the two circuits in the sensor, the error code hasn't returned.
 
I don’t know about Colorado but in Arizona the 124.034/36 with ASR are exempt from the dynamic roller test because ASR cannot be disabled. I usually have to remind the state inspectors who want to run the test. Even my ‘95 E420 without ASR is not tested except for idle. I just tell them it has first-generation anti-slip and it can’t be disabled. They don’t know the difference. I know it doesn’t fix your engine issue but maybe it could help getting through emissions if you didn’t have to do the dynamic roller test. There is a bulletin somewhere in the Arizona MVD system because some of them have checked and they have this disappointed look when they return. Do you have ASR?

Have you considered having the dealer or Autozone test your battery with their tester just to rule out a bad battery? I have read posts where a bad battery affected idle. There was also a post where the battery cable was loose or corroded and it affected either idle or ASR (I don’t remember which).I recently had a bad voltage regulator affect the engine Idle. I was able to test the battery voltage when it was occurring and it had spiked to over 19 volts.
 
Last edited:
If the CEL is on, there MUST be a code on pin 19. If the CEL is off, and staying off, don't worry about it.

Jon, this car does not have ASR. Guess it depends if the local shop will take his word for it to skip the dyno test.

To check the 4-pin coolant sensor, use the resistance values in this table and compare with an ohm meter. If replaced, only install OE/Genuine (or a good used sensor), most aftermarket sensors may be junk.

Without live data from SDS/HHT-Win this could be difficult to troubleshoot further. Next thing I'd check is if the LH module (fuel computer) is the correct part number, and also open up the LH module to see if there might be an aftermarket EPROM chip installed.

I'm curious about the charging light is dimly lit, however this could be related to a failing lower harness, which connects to the alternator. If the insulation is crumbling off the wires behind the alternator, it's time to pull that harness and rebuild it.

:shocking:
 
I plan on doing the following today:

1. Recheck codes on Pin 19;
2. Pull the DM recheck the contacts and reinstall it
3. Recheck the codes
4. Report back on the results
5. Check the LH module number. It look original by outward appearance, we'll see.

If the CEL has to go through the DM, I agree there should be a code. All I got was one faint blink as opposed to the typical ones on other pins.

Thanks for the thoughts on avoiding the dyno test. However, with the rough idle, I think results could be even worse than when it's running.

I looked over the dyno sheet in more detail. Each of the spikes follows a period of acceleration. NOx and CO return to steady, almost passing levels under steady load, HC is high period, and particularly high under acceleration. It seems there are a couple of potential causes:

1. Still too much fuel. On that point, does anyone have a fuel injection logic diagram? I'm trying to figure out which sensors would contribute additional fuel to the system.
2. Too little air. If the MAF is indicating too much air, or somehow didn't account for the air density difference between sea level and 6k feet, the engine would be rich. Is there a way to reset this other than simply disconnecting the battery and hoping the system "learns" where the car is at.
3. Bad cat. My guess is that the car ran rich for a while, however, the cat looks OK visually and there is no rattling around inside. The question is, will running rich somehow poison the cat? Can the cat be rehabilitated? Perhaps a long Sunday drive. . . . While this could fix the emissions issue, it won't fix the idle.

The lower harness was definitely ecojunk when I got it. It's been rebuilt with heat resistant wiring and sheathed in thermal tape.
 
Fuel logic diagram is in the FSM, see link below. Lots of reading.

Bad cat would only cause high HC, right? At least, that's the result with non-dyno emission testing.

Is the rough idle an actual misfire, or just what seems like a rough idle from old/sagging engine mounts? Tired mounts is one of the main causes of "rough idle".

You can reset the LH adapation to mean values by "clearing" blink code #1 (this is described in the factory docs - use this PDF if you aren't already).


:cel:
 
Thanks for your respective thoughts and input. I've made some progress as follows:

1. I went to the local indie (who has a better code reader than mine). Based on the codes, we replaced the fuel purge valve which solved the CEL issue.
2. We replaced the coolant level sensor and connector which eliminated the Battery warning light issue.

So now I have no warning lights, that's the good news. However, it still has a rough idle (though less than before) and still fails emissions with virtually the same numbers as before.

Since then:
1. I performed a smoke test on the intake and found a large leak around the EGR valve. After that was fixed, there are no other leaks in the intake. I also sprayed brake cleaner around the various fittings to further confirm there wasn't any major vacuum leak.
2. I tested power generated by each of the plugs. The left side showed notable decrease in power, which the right side had little or no effect.
3. I performed a vacuum test on the intake. It came back steady at 8"Hg. Up here in Colorado it should be closer to 15" Hg (as opposed to closer to 20" Hg at lower elevations).

Based on these finding, I began to suspect I had a timing chain problem. I pulled the right valve cover (BTW, the screw at the right rear of the cover is a real PITA). That revealed the following:

1. Intake cam timing 38 degrees
2. Exhaust cam timing 16 degrees (see attachment)
3. Broken guide between the cam shafts (see attachment)

Based on all of that, my conclusions are:

1. The timing chain needs to be replaced simply based upon the 7 degree stretch at the intake cam. My hope is that the lower rails are in reasonable good shape and I only need to replace the upper rails.
2. The exhaust cam has jumped two teeth
3. An oil pan drop and cleaning is in order because the only parts of the guide are tiny bits of plastic on top of the head bolts.

Since I'm this far into the process, the question for the group are:
1. What else should I be thinking about replacing/cleaning along the way?
2. Any particular pointers for timing chain replacement, other than the numerous other threads on the site?

If I had to go through this process over again, I think I would have done a couple of things differently. First, I would have pulled each of the plugs to see where exactly the engine was losing power. Second, I would have run a smoke test. Finally, I would have run the vacuum test. Early on I suspected a vacuum problem of some sort. A rough idle and hard shifting made me suspicious. I figured a leak would cause these problems. What I didn't think about was the fact that a slipped timing chain would impair the ability to CREATE vacuum. I'm learning that vacuum is a critical issue that can create a myriad of seemingly unrelated problems.

Thanks for your further thoughts and input.
 
Assuming you checked cam timing by inserting the 6mm diameter pin into 1 cam at a time, and read the balancer... yep, the cam timing is out of spec. However, 7° difference can be cause by broken chain rails, even if the chain is new. I would start by replacing all the upper chain rails and then measuring chain stretch again. If it measures within 2-3° of spec with new rails, leave the chain alone. Rolling in a new chain is NOT fun and is rarely needed. Also, your exhaust cam may have only jumped 1 tooth (20° at the crank) plus some additional out-of-spec "stretch" due to broken rails.

The thread linked below is very long, but has pretty much all the information you need:


BTW, your attachments did not come through. There is a generous size limit for photos, if they fail to upload due to size, try changing your camera/phone settings; or downsize the image with an editor.

:gsxrepc:
 
Thanks for the response and the post link. I definitely like the idea of replacing the upper guides first and rechecking the timing vs. rolling in a new chain. Thanks also for forwarding the post above. I'll let you all know progress and any insights I have when done. For completeness pictures are attached.
 

Attachments

  • Right Head.jpg
    Right Head.jpg
    2.4 MB · Views: 13
  • Exhaust Cam.jpg
    Exhaust Cam.jpg
    1.8 MB · Views: 13
Note that the upper guides in between the 2 sprockets are a two-piece affair, with a separate rubber seal between the guide and valve cover. It appears your primary guide may be broken (hard to tell in the photo) and the "fingered clip" which should surround the chain is completely missing. Make sure to order all that stuff, along with the 3 curved guides located down inside the heads (not the lower ones inside the timing cover).

While you are in there, consider replacing the oil tubes with metal ones. Yours are plastic, and these are prone to popping the ends out, which causes lifter tapping. There are used sets on eBay plus a couple for sale in forum classifieds, although I think they might be sold - some sellers are not good about updating their for-sale ad when an item is sold. Info on the oil tube swap is in this thread.

If you haven't bought parts yet, use OE/Genuine valve cover gaskets. Don't forget new copper washers for the bolts. And you may need the 5mm swivel hex driver to access the lower rear bolts, they are very hard to access otherwise. More info here. Check the oil separator on the rear passenger side cylinder head, if missing or damaged, replace those also... click here.

:spend:
 
However, 7° difference can be cause by broken chain rails, even if the chain is new. I would start by replacing all the upper chain rails and then measuring chain stretch again. If it measures within 2-3° of spec with new rails, leave the chain alone.
Would a broken chain rail between cam sprockets cause the timing to be off, Dave, or is it the lower banana rails you are referring to here. While on the subject, I’ve replaced the cam sprocket rails on both cars but it was well over ten years ago. Any recommendation on change intervals for these? Ditto with the tensioners.
Please don’t say they are NLA.
 
Would a broken chain rail between cam sprockets cause the timing to be off, Dave,
Jon, I don't believe the "top" rails between the sprockets will cause an error in timing. However if the top rails are missing, the chain can intermittently rub against the valve cover, causing other issues.


or is it the lower banana rails you are referring to here. While on the subject, I’ve replaced the cam sprocket rails on both cars but it was well over ten years ago.
I believe it's primarily the 2 rails at the inside of the heads, the "V" area of the chain path. Rails #8 and #14 in the diagram at this post. The lower banana rail (#3) seems to last a very long time, and although I've never attempted it, allegedly can be replaced without removing the timing cover. The only rail that requires timing cover removal is #29, so pray that never breaks.


Any recommendation on change intervals for these? Ditto with the tensioners. Please don’t say they are NLA.
Great question on chain rail change interval. I suspect it's a combination of time/miles, age, and heat load. Assuming the engine doesn't see high temps (100°C+) regularly, I'd wild guess they should last 75-100kmi or more. Might be a good idea to pull one or both valve covers to inspect them starting around 75k or so? But pulling valve covers is a PITA... and then, how often do you repeat afterwards, every 25kmi? Alternately you could drop the lower oil pan and check for rail debris but that's no picnic either, and lack of plastic bits doesn't guarantee no broken rails. I'm curious what @Klink would recommend for rail inspection / replacement.

The tensioner does not need periodic replacement, AFAICT. It is still available new, but the metal-shim OE gasket is NLA. Re-use the old metal gasket. Worst case, cut a new one from bulk fiber sheets of gasket material of similar thickness.

All the rails are still available new from Mercedes, however prices on some have increased substantially, for example the 'fingered' clips have doubled in price vs 5+ years ago, and the one rail below the exhaust sprocket has increased 4x (+300%). Interestingly, the Chinese Febi rails are not much cheaper than OE. Also, the rubber seals between the top rail and the valve cover are both NLA, re-use the old ones.

:wormhole:
 
Great information, Dave. It’s been years since the valve covers were removed. I have the gaskets but not sure if I want to use them just to inspect the chain rails between the sprockets, especially since neither car is leaking right now. I replaced the timing chain tensioner on only one car circa 2010. I’m thinking aside from a new chain, the tensioner is the best way to prevent jumping a tooth.
 
Forgot to mention - the tensioner uses oil pressure (in addition to an internal spring) to maintain pressure on the chain. My understanding of the design is that it seems unlikely the chain would ever lose tension unless both the internal spring broke, and there was near zero oil pressure. The chain should have a very hard time jumping a tooth if the top chain rails are intact, wrapping around the chain between sprockets.
 
I'm going to tackle the upper rails, the cam oilers and the oil separator on the right head at the same time. The parts list is below, please let me know if I missed anything. I will get the copper washers (PN 007603 006106) and Gasket Sealant (Locktite 518) locally. O-rings for the cam oilers are included in the assembly. In addition, I'm getting a rail pin puller and definitely the universal allen wrench (been there already).
 

Attachments

I'm going to tackle the upper rails, the cam oilers and the oil separator on the right head at the same time. The parts list is below, please let me know if I missed anything. I will get the copper washers (PN 007603 006106) and Gasket Sealant (Locktite 518) locally. O-rings for the cam oilers are included in the assembly. In addition, I'm getting a rail pin puller and definitely the universal allen wrench (been there already).
Overall the list looks good. The chain tensioner gasket is NLA so you'll need to re-use the old one (should be metal shim type). For the rails and gaskets, make sure to only buy OE/Genuine, from an online discount parts dealer like MB of Laredo for example.

119-016-03-80 - Gasket appears to be NLA
119-016-05-80 - Gasket appears to be NLA

119-180-02-66 - Oil tubes - If buying new, make sure to only buy the Rauch & Spiegel aftermarket (link), or buy used OE metal tubes if you can find a set of 16.

009-997-87-92-64 - This is an 8-rib belt for 1992 models. A 1993 model should have a 6-rib belt, part # 010-997-78-92 (may supercede to a different number). Double check before ordering.

If your PCV hoses from the valve cover to the intake manifold are either fossilized (old OE) or are abnormally soft/degraded (aftermarket), consider replacing those as well... buy OE only, but they are not cheap. Details here. If they are in good condition you can leave them alone.

:spend:
 
Here’s the progress update:

Two steps forward:

1. Replaced all of the upper chain rails. The upper rails between the cams in both heads were broken as were the ones inside the Vee. The lower left head rail wa worn but intact. I replaced all 5. The exhaust cams on both heads had skipped a tooth.

2. I replaced all of the cam oilers at the same time and cleaned up the heads. There were some plastic bits in the Vee that I removed with Hemostats.

3. I ran out of time and did not replace the valve cover gaskets. I have them, but it’s a project for another day.

The result is that the car idles well; 650 in park, 550 in drive and runs smoothly.

And now for the one step back:

1. The car smokes like hell. It’s white smoke and is particularly bad under load or acceleration. No coolant smell and no oil in the coolant or coolant in the oil. Since the coolant system wasn’t touched as part of the project, I doubt the smoke is coolant related. I was generous with the assembly lube when the camshafts, and the only thing I can ascribe the smoke to is assembly lube burning off. I all ears for any other ideas on this. This brings me to the second issue.

2. Low oil pressure. After putting everything back together I went for a test drive. Oil pressure started at 3 bar and ultimately dropped to zero. I’d stop, wait a few minutes an oil pressure would start at 1.5 bar but then quickly drop to zero. Oil pressure before this project was on the low side, but it didn’t go to zero.

I changed the oil to 10w40 (and filter) thinking excess assembly lube could be the problem. The filter didn’t look clogged. I ran the drained oil through a filter, there were no plastic or metal bits which leads me to believe that clogging of the oil intake is not the problem.

The problem persisted after the oil change. Next I replaced the sensor. The problem continues to persist. BTW, ohms on the old sensor were 10 ohms.

The problem seems related to temperature. At start up pressure is 3 bar. At 80c the oil pressure drops to 2.25 to 2.5 bar. 90c= 1.5 bar. 100c = 1 bar. 107c = 0 bar.

The engine seems to be running hot. 107c seems excessive for a 84 degree day in Denver. The electric fans kick in as the car heats up.

It seems like the simple answer is to replace the fan clutch and get the temp down in the 90C range and see if that stabilizes the oil pressure. That said, I’m would like your thoughts for an alternative explanation. I really want to take the car on a longer trip to hopefully get rid of the smoke issue, but I’m concerned about doing so until I have an answer on why oil pressure is so low.

Thanks in advance for your collective wisdom.
 
@SBG --When it heats up and oil pressure drops to 0, is this at idle? Does it increase with RPM?

If you haven't already done so, I would consider pulling the oil pan and checking the oil intake. Maybe some of the sealant got stuck in the strainer screen and is restricting the flow. I'm sure you will find a lot of the chain guide pieces in the pan as well.

The strainer and rubber adapter are fairly cheap from the dealer. It would be rare if you needed one, but the oil pump itself is showing "currently unavailable" from Mercedes Laredo. I think @gsxr mentioned those words don't necessarily mean NLA. If you order the parts and pull the pan you might want to consider adding the O-rings for the oil quantity sensor as this is a common area for leaks from the upper oil sump (passenger side of engine) and it's not a tough job to do. See attached parts diagram.
:gsxrepc:
 

Attachments

Last edited:
1. The car smokes like hell. It’s white smoke and is particularly bad under load or acceleration. No coolant smell and no oil in the coolant or coolant in the oil. Since the coolant system wasn’t touched as part of the project, I doubt the smoke is coolant related. I was generous with the assembly lube when the camshafts, and the only thing I can ascribe the smoke to is assembly lube burning off. I all ears for any other ideas on this. This brings me to the second issue.
That's not normal... and not good. Smoke is pretty rare from an M119, I forget what the possible causes might be. Make sure the PCV system isn't messed up somehow. Are the spark plugs normal, or are the insulators oil-fouled?


2. Low oil pressure. After putting everything back together I went for a test drive. Oil pressure started at 3 bar and ultimately dropped to zero. I’d stop, wait a few minutes an oil pressure would start at 1.5 bar but then quickly drop to zero. Oil pressure before this project was on the low side, but it didn’t go to zero.
This is also not good...


I changed the oil to 10w40 (and filter) thinking excess assembly lube could be the problem. The filter didn’t look clogged. I ran the drained oil through a filter, there were no plastic or metal bits which leads me to believe that clogging of the oil intake is not the problem.
The oil drain plug sits ~1/2" above the bottom of the pan. There can be a lot of debris in the pan (broken bits of chain rails) that would never drain out. The pan must be removed to clean this out, and check the oil sump pickup / screen.


The problem persisted after the oil change. Next I replaced the sensor. The problem continues to persist. BTW, ohms on the old sensor were 10 ohms.

The problem seems related to temperature. At start up pressure is 3 bar. At 80c the oil pressure drops to 2.25 to 2.5 bar. 90c= 1.5 bar. 100c = 1 bar. 107c = 0 bar.
I'd consider trying to connect a mechanical oil pressure gauge to verify the readings, but if those numbers are accurate, there is a serious problem with oil flow / pressure. I would not drive the car until this is confirmed and corrected.


The engine seems to be running hot. 107c seems excessive for a 84 degree day in Denver. The electric fans kick in as the car heats up.
107C is excessive in 84F ambients. If coolant temps drop rapidly (down to 95C or below) shortly after the electric fans kick in, this may be an airflow (viscous fan clutch) issue. However, low oil pressure certainly won't help, the engine oil also helps cool internal components.


It seems like the simple answer is to replace the fan clutch and get the temp down in the 90C range and see if that stabilizes the oil pressure. That said, I’m would like your thoughts for an alternative explanation.
See above - if the electric fans reduce coolant temp, yes, replace the fan clutch. This absolutely should not have any effect on oil pressure.


I really want to take the car on a longer trip to hopefully get rid of the smoke issue, but I’m concerned about doing so until I have an answer on why oil pressure is so low.
I would not drive the car anywhere until all above issues are diagnosed and repaired (low oil pressure, smoking, high coolant temp).

I would not run the engine at all except for testing oil pressure - this should be fixed first, once oil pressure is normal, then you can drive it more and see if smoke reduces and/or coolant temps are normal (remaining below ~100C).


I agree 110% with @emerydc8 - you must remove the lower oil pan next.

:klink:
 
Anything with oil or petroleum-base (outside of fuel / black smoke) is going to be blue smoke.

White smoke generally denotes coolant, as you know. Do you know if the coolant level has decreased? Also, have you checked for perhaps an EXTERNAL coolant leak, perhaps onto one of the exhaust manifolds or other hot area in the engine compartment? Or is coolant only coming from the tailpipe?

I am wondering if your oil pressure sender is failing - it is a known failure part with age and use.

As mentioned, I'd drop the lower oilpan (get a new Elring or OEM MB gasket) and see what is down in the pan, clean (and potentially replace) the rubber oil pickup boot and metal mesh screen, and take this opportunity to also replace the oil pressure sender, which is very minor labour at that point.

Then report back with what you find, along with photos of the inside of the oilpan, and up into the oil pickup area underneath the engine.

As far as the coolant temp, as @gsxr mentioned 107F is probably high for a mid-80s ambient temp. I can tell you that I replaced EVERY COMPONENT of my cooling system (radiator, water pump, thermostat, hoses, fan clutch) with new OEM or MB parts, and in 85-90F ambient temps, with the A/C on high, I will see 100-102C temps when driving at speed. Not quite enough to trigger the Stage 2 fan. When going slow in those temps (say, a parking lot) I'm down in the ~95C indicated temp range. All temps are 3-5C cooler if the A/C is not running, in otherwise identical conditions.

My issue is that my factory/MB fan clutch was mis-adjusted out of the box, and I need to adjust it. Pretty much all MB fan clutches for the M119 were never really correct out of the box / from the factory installed on the car. A significant flaw.

By contrast, I put a new factory MB fan clutch on my M104 G320 about four years ago, to remedy a massive overheating problem that was manifesting itself in 110-120C temps when running at speed. With the new clutch, I have never seen the temp get above 90C, ever since, even in the highest ambients and under the highest loads.

The problem is that I ran the engine with those high temps for a couple of years, and this weakened the head gasket to the point (and it is already a weak point with the M104, and all of the M104 head gaskets fail between 100 and 150K miles) where at 135K miles, my head gasket is PUKING coolant. I'm just days away from starting my second epic M104 Top-End Rebuild from the one I did back in late 2013 on a former E320 wagon I had.
 
Last edited:
Looking forward to following it.
I will be taking the lessons learned from the last rebuild and applying them to this one. Fortunately I have all of the special tools needed, and many of the replacement parts from the last time. And.....in the G-wagen engine bay there is much more room around the engine to work, than the W124 had.
 
With the parts situation were you able to source what you need from the dealer? So many of the parts you used on your .036 top-end resto in 2020 are currently NLA. Is it like that on the M104 engine too?
 
With the parts situation were you able to source what you need from the dealer? So many of the parts you used on your .036 top-end resto in 2020 are currently NLA. Is it like that on the M104 engine too?
Overall, I think the M104 situation is somewhat better in terms of parts availability from MB.

The upper wiring harness for the G was replaced when I got it, thankfully. I will check the ETA when I remove it, but I have a spare in my parts stock that is post-1998 (no guarantee that the internals are still good), but I believe the current ETA is in good condition. I will be careful in removing it in terms of the wiring, though. It uses a standard E320 ETA, so they are readily available used as needed.

As far as I know, though, all of the rubber (ETA boot, etc.) is still available. The M104 doesn't have all of the idle speed air hoses that the M119 does - it's not nearly as involved. The intake manifold has two large round rubber boots, but those should be available as well. I guess I need to check a few of those things. The head gasket is certainly available, and it is of the latest/updated design, so it should never need to be replaced again. Valve cover gasket, etc. is available.


:update:

I compiled a list of the commonly replaced items that would be done (and/or what I previously did) and checked availability on them, for the M104.

Really there are only a couple of items NLA from MB, but everything that is NLA from MB IS available from ElringKlinger (which is an excellent quality gasket/seal, and often an MB OEM). One big one for my G-wagen is the air filter, which is a special version of the M104 E320 air filter with a metal reinforcement in it. I have one NOS spare and one installed that is perhaps 10,000 miles, so I have plenty, and the standard/regular M104 E320 air filter fits and works perfectly in a pinch. The G-wagen's metal reinforcement is solely to keep the air filter from disforming if it were to get waterlogged (i.e. if the truck was fording a river and sucked water into the air intake).

Other than that, everything looks available that I need. The ETA gasket seems NLA, but that is available from AutohauZ as an Elring Klinger product for like $2.25. I will go ahead and likely spring for the Elring Klinger head gasket complete kit, as well as the Elring valve cover gasket kit (though that is available from MB). Elring also makes a lower oilpan gasket kit (though I have a spare MB OE lower oilpan gasket in my parts stock), so I will probably get that because it is a kit.

Timing chain tensioner is $131.25 from MB (discounted), and only $44 for an INA brand from AutohauZ. But, alas, I will probably spring for a new MB tensioner. Looks by far to be the most expensive individual part for the refirb.
 
Last edited:
Sounds like most of the M104 parts are still available. I don't know if this would be an issue, but if you use the Elring Klinger head gaskets instead of factory I would make sure they are the same thickness as factory. I rebuilt a small block Chevrolet (L98 350 TPI) back in 2016 and instead of the metallic factory gaskets I went with Fel Pro because the factory was NLA. I didn't realize until recently that the Fel Pro was twice as thick and it really affected the compression and power of the engine. Eight years later the engine still runs perfectly but the compression is sitting at around 125 PSI on all cylinders. I thought a head gasket is a head gasket. Live and learn.
 

Attachments

  • Fel Pro Head Gasket.jpg
    Fel Pro Head Gasket.jpg
    1.2 MB · Views: 5
  • Original Factory Head Gasket Chev. 350 CI.jpg
    Original Factory Head Gasket Chev. 350 CI.jpg
    1.9 MB · Views: 5
Thanks for the heads up. What I have found is that the Elring gaskets are identical to factory pretty much in all ways, if not the actual MB product without the star. So there haven’t been issues that I’ve seen up to now.

I will ALWAYS select Elring gaskets over Victor Reinz (if both are available) as I have just heard too many bad stories about them failing from both folks here in the US and in Germany. I realize that both companies are OEMs for MB, but I have never heard a single bad story about an Elring Klinger gasket failing, ever.

Tallying up the “known” parts list for the G-wagon … not gonna be super cheap. Not because of the known soft parts I’ll be replacing, but rather the “unknown” parts that I’ll be replacing once “in there”. I’m sure it will lead to things like the front crank seal and much other stuff. I know I will also be doing the steering system but I’ve had those parts for years on my shelf. First things first though …. Getting that head off and refurbished.

I’m actually looking forward to another big job like I last did over a number of months during COVID.

Doubly so as my boat is down for a few weeks while I’m waiting for my service appointment to come up — recently blew an engine coupler, which is a stern-drive-off and engine-out job to replace. While I’m having that done, the gimbal bearing and rubber bellows will also be replaced.

At 5 years old, it’s time for the bellows to be done. I was going to have it done after this season anyway. If a bellows fails, water enters the boat and it can sink. It’s hard to believe that a simple tubular piece of corrugated rubber held on by two ring clamps is all there is keeping water out of so many hundreds of thousands of boats out there !!!
 
I thought about that after I posted. I guess the aftermarket is a lot different for Mercedes versus Chevrolet. Like you said the Elring is probably identical. And IIRC, I had a bad experience with Victor Reinz valve cover gaskets so that part is a dealer-only part for me.

At 5 years old, it’s time for the bellows to be done. I was going to have it done after this season anyway. If a bellows fails, water enters the boat and it can sink. It’s hard to believe that a simple tubular piece of corrugated rubber held on by two ring clamps is all there is keeping water out of so many hundreds of thousands of boats out there !!!
I don't know anything about boats except a lot of my friends have told me the happiest days in their lives were when they bought their boat and when the sold it. So if the bellows fail you don't have any kind of bilge pump to stay afloat? That is crazy that a torn piece of rubber on a part that looks like a CV boot can sink your boat, especially if you are taking it out to sea.

Anyway, I think we are all looking forward to another excellent string on the M104.
 
Last edited:
I don't know anything about boats except a lot of my friends have tolf me the happiest days in their lives were when they bought their boat and when the sold it. So if the bellows fail you don't have any kind of bilge pump to stay afloat? That is crazy that a torn piece of rubber on a part that looks like a CV boot can sink your boat, especially if you are taking it out to sea.

Anyway, I think we are all looking forward to another excellent string on the M104.
The boat has a half-dozen bilge pumps, and they will run off the house batteries (although I keep the boat in a slip, and connected 24-7 to shore power, which keeps the batteries trickle-charged and all of the boat's systems powered up. For minor leaks, bilge pumps are fine and can do the job. But for a major leak, say if a through-hull fails, or if a bellows suffers a catastrophic failure, all the bilge pumps in the world won't work forever. Or, if a pump burns out, or on battery power if the battery goes flat, then the boat is toast.

I'm sure there are plenty of youtube videos out there detailing the results of a bellows failure.


That's one reason why outboards are so much in fashion these days - no outdrive and associated transom holes/mounts, easier access to the engine(s), and you can tip them up and out of the water when not using them. And in recent years outboard motors are now just as powerful as inboards, which didn't used to be the case.

I'm hoping this M104 refirb is a good thread, as well. It's the 104.996 variant (G-wagen specific), whereas the E320 etc. use the 104.992. They are about 98% the same; the oilpan is deeper, oil pickup longer, throttle linkage different, and so forth for the G-wagen, but essentially the motors are the same. This is the EXACT reason I bought this G-wagen, because I knew it would need a head gasket someday, and I'd already done this repair once.

That said, someone has been in the valve cover before, because I can see smears of pink RTV on the outside of the valve cover. I'm sure I'll be doing the old @gsxr RTV clean-up when I get into it. Hopefully it's not too bad......
 
I wonder why they never designed a fail-safe system for bellows, especially considering all the potential ways the bellows can fail and the grave consequences of failure.

Hopefully you don't find too many surprises when you dig into your M104.
 
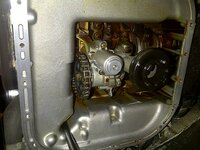
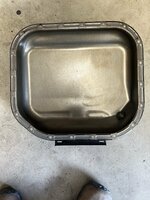
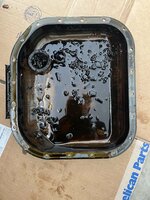
I spent some time in the garage today. The first order of business was to drop the pan. Suffice to say the remainder of the chewed up rails found their way down there. See photos. The snout and sceeen were clogged with larger bits and I thing cleanng up the heads (despite being careful) resulted in finer bit filling in the remaining openings. This caused the variable oil pressure. Lesson learned: if you’re going to the trouble of replacing the rails, go ahead and drop and clean the pan. It’s the easiest part of the job. Other than the rail bits there were now other metal bits or other indications of excessive wear.

I also replaced the fossilized valve cover gaskets. These come off far easier with the help of a heatgun. The heads and cam lobes were all in good shape. I checked the plugs, they were dark but not oily.

I reloaded with 10/40. The result is solid oil pressure at idle of 2.5 to 3.0 bar regardless of temperature. Idle is smooth, right where it should be at 650 rpm. That’s the good news.

The remaining issue is the smoking issue. Below 80 degrees C there is no smoke. As the engine approaches operating temperature the smoke appears. It’s white and there is smoke a plenty.

I don’t think it’s coolant related. There’s no oil in the coolant, nor is the there coolant in the oil. Levels for both remain stable. Nothing in the rail replacement involved the cooling system. The engine hasn’t overheated. Intake vacuum at the time was about 5 psi.

The smoking issue didn’t exist before replacing the rails. Before, both exhaust cams had skipped a tooth and the right rear cam oiler had blown its plug. All that was done was replacement of the rails and cam oilers (metal). I haven’t checked vacuum yet, but I expect it to be significantly improved.

Below are my thoughts on the cause:

1. Still burning off assembly lube — The car has been driven about 12 miles since the rail replacement. I was generous with the lube on the camshafts. Despite two oil changes (one right after the rail replacement and one today), the issue persists. The engine hasn’t really had a chance to warm up, a now that the oil pressure is stable I’m thinking a midnight run might be in order.

2. PCV issues — I’m not sure where to start on this one. All of the hoses look in order. I haven’t smoked the intake recently for leaks, but given how the engine is running, and the big change in rpm when I pull one of the hoses, it seems like the system is in order. The various hoses are pliable.

3. Brake fluid valve — I’ve seen some posts referencing similar smoke issues related to a failed check valve (there is a similar story on ATF from the transmission) Again, I’m not sure where to start on this one.

I’m leaning toward cause number one. Something changed after the rail replacement. The only ones I can think of are:

1. Increased intake vacuum.
2. Increased oil pressure.
3. Assembly lube.

Obviously, something has changed, either intentionally through the rail replacement, or inadvertently (e.g. some broken hose or other ancient brittle part).

I look forward to you thoughts.
 

Attachments

  • IMG_1657.jpg
    IMG_1657.jpg
    1.4 MB · Views: 9
  • IMG_1652.jpg
    IMG_1652.jpg
    1.7 MB · Views: 9
  • IMG_1653.jpg
    IMG_1653.jpg
    2.5 MB · Views: 9
  • IMG_1651.jpg
    IMG_1651.jpg
    2.2 MB · Views: 9
  • IMG_1655.jpg
    IMG_1655.jpg
    1.6 MB · Views: 9
Good to hear the oil pressure is normal again. :relieved:

Assembly lube should never enter the combustion chamber, smoke will not be related to this. Have you verified you are not losing any fluids - oil, coolant, ATF, brake fluid? There's almost no way for brake fluid to enter the engine unless the brake booster is full of fluid and the vacuum check valve has somehow failed. Make sure there's not ATF getting pulled up the vacuum line from the modulator on the trans.

Since oil pressure is normal - and, hopefully, coolant temps are remaining below 100C now - I'd give it an Italian tuneup and see what happens. Make sure there are plenty of WOT pulls to redline through the gears.

:3gears:
 
I don’t think it’s coolant related. There’s no oil in the coolant, nor is the there coolant in the oil.
Is this based on a visual check or did you test with a head gasket leak test kit with the chemical?

IIRC, a diaphragm on the transmission can fail and allow transmission fluid to back-flow up the vacuum tube that goes to the intake manifold causing smoke. It happened to me on my 1993 400E about 25 years ago so my memory of it is a bit cloudy. I think it only happened when turning in one direction.

Assuming the smoke isn’t caused by assembly lube, have you considered doing a compression test? It could help rule out a leaking head gasket or engine damage.
 
Here’s a quick update, submitted for your further input.

1. Hooked up a vacuum gauge to the intake manifold and had 15 PSI, which is about right for 6,000 feet.

2. Disconnected and inspected the transmission modulator vacuum line. Disconnecting the line didn’t stop the smoke problem. It looked like there could be fluid in the line. Next step, put a vacuum pump on the line and see if it holds vacuum.

2a. Forgot this one. I also pulled the vacuum line from the EGR valve. Vacuum to the diaphragm comes and goes as it should. The EGR valve was previously cleaned and checked for proper operation. It checked out again today.

3. I checked (a couple of times) the transmission fluid level. It was well above the Hot Full line. The fluid color looked older, but not awful. Next step: Check the fluid level cold to determine if the transmission is over filled.

4. The coolant was inspected visually. Next step is to get the chemical block checker to see if there is a coolant leak. I didn’t even know this stuff existed. Pretty cool. The coolant definitely needs to be replaced, so if there is a problem it should show up. I could also get a false positive result, but it’s easy to check again after the coolant change.

5. Compression was checked by my indie last year. I don’t recall the results, but I know he didn’t see any issues. I’m pretty sure he didn’t do a leak down compression test.

6. I went to the countryside for the Italian tune up. About a 10 mile round trip, with half going up hill. The good news, is that oil pressure throughout the trip held between 3.0 and 2.5 bar. Temperature was between 80C and 100C (WOT uphill). The other results were, interesting.

Smoke is present at idle, though after the “tune up” it seemed less egregious. On the WOT runs, there is a large amount of smoke to start, and then it appears to be gone, or minimal through the rest of the run. For example, big puff of smoke when you stomp down on the gas, after that, no real problem. Cruising at highway speed also seems to have minimal smoke, though this could simply be the result of the same amount of smoke being spread over a longer distance. It seems that there is no smoke when coasting downhill regardless of whether I’m simply coasting or have downshifted to allow for engine braking.

Somehow, from somewhere, we’re getting something that burns white. It’s either something added to the system (assembly lube) or something getting drawn into the system due to the new and improved manifold vacuum (ATF? Coolant?). The mystery continues. . . . .

As always, your thoughts and guidance are greatly appreciated.
 
Good suggestion. That thought crossed my mind. However, before replacing the rails there was no exhaust smoke issue at all. I would think the valve seals would fail gradually, so with the 5/30 in the car before, it seems like there would have been at least some smoke before. We’re talking heavy metal performance smoke now. Thoughts?
 
Fix the ATF level to start with. With the AFT fully hot (20-30 mins at freeway speeds) it should not be above the MAX mark on the dipstick.

There should be absolutely zero fluid in the vacuum line from the vac modulator, if there is even a trace, replace the modulator.

As mentioned previously, assembly lube does not move from the valvetrain to the combustion chamber. This is not causing your smoke.

Oil pressure should remain pegged at 3 bar above around 1000rpm. If you are seeing 2.5 bar any time except idle, that's odd (but likely unrelated to smoking). Valve stem seals are a relatively rare problem on M119's.

:mushroom:
 
Here's the update:

1. Transmission fluid level fixed.

2. 20" vacuum applied to the modulator and vacuum line. It held steady for 15 minutes. Suspect contamination was actually on the outside of the line.

3. I think this eliminates ATF contamination as the source of the problem. Nonetheless, I plan on replacing the modulator on general principles.

4. Removed the right valve cover for additional inspection. Turns out the oil separator funnel had broken off. Replaced both the oil separator and funnel and the valve cover. Intake vacuum is now at 11" Hg. No smoke when the engine is cold, but the problem persists as the engine reaches temperature. Oil pressure is steady at 3 bar (2.9 at idle) regardless of temperature. Temp steady at 80C.

5. I started a contaminant pathway analysis. First on the list is oil. It turns out that synthetic oil will burn white. I've ruled out valve seals for now since the problem didn't exist before the rail replacement and GSRX's comment above. That leaves the PCV system. I'm going to smoke the intake and see if there are any leaks. The slightly lower intake vacuum now makes me suspect that something is amiss. It looks like there is a PCV valve for the M119 (p/n 0004702193) but for the life of me, I can't figure out where it is located. Some guidance here would be much appreciated. I'm omitting rings for now. The problem didn't exist before and compression checked out a year ago. I can't think of any other pathway other than these to check out, but am certainly open to ideas.

6. The coolant looks OK and the level remains steady. Pathways would be a cracked block or head gasket. Again, if there are other pathways, please let me know. No oil is visible in the coolant (or vice versa), but I'm going to check the coolant chemically and go from there.

Thanks in advance.
 
The only other way for the coolant would be a leaking intake manifold gasket.

Of course, the radiator has circuits for both coolant and transmission fluid cooling, but they are on separate circuits, and I have never heard of cross-contamination within a radiator.

That PCV (regeneration) valve you show the part number for, is located on the driver's side inner fender wall, near the EZL. You can see where I replaced mine back in 2020, here.

Actual replacement of the valve is posted here.
 
The purge valve discussed above (labeled "MOT" on top) can be temporarily disconnected for testing. Remove and plug the 8mm tube on the engine (MOT) side. This pulls fuel vapors from the carbon canister under partial load. Very unlikely this is causing your white smoke, but if the purge valve is stuck wide open - which is not uncommon - that will cause a substantial vacuum leak.

I do wonder about the PCV system. I'd consider temporarily venting the valve cover hoses to atmosphere and plugging the hoses that go to the intake side (large hose to ETA passenger side, small hoses on driver side).

Dumb question. Did you triple check cam timing on all 4 camshafts before buttoning things up? Are all four pinning in the ballpark of 45°-40° BTDC?

:klink:
 
Thanks guys. I'll check out the valve for proper operation as well as the PCV system as you suggest.

There are no dumb questions. I did pin and check the cam timing before I buttoned everything up. But timing issues did cross my mind as I was thinking about solutions for this seemingly intractable problem. However, I would think that the smoke would start immediately on start up if it were a timing issue. The smoking problem is decidedly something that occurs as the engine warms to operating temperature. My PCV/vacuum leak concept is based at least in part upon oil sealing up some gap when cold, and being less effective as the engine warms and viscosity drops.

I did get a puff of smoke after I removed and reinstalled the right valve cover before I replaced the rails. Nothing like what we have today. Again, this leads me down the something not sealing right. . . .
 

Who has viewed this thread (Total: 1) View details

Who has watched this thread (Total: 2) View details

Back
Top