• Hi Guest !

    Welcome to the 500Eboard forum.

    Since its founding in late 2008, 500Eboard has become the leading resource on the Internet for all things related to the Mercedes-Benz 500E and E500. In recent years, we have also expanded to include the 400E and E420 models, which are directly related to the 500E/E500.

    We invite you to browse and take advantage of the information and resources here on the site. If you find helpful information, please register for full membership, and you'll find even more resources available. Feel free to ask questions, and make liberal use of the "Search" function to find answers.

    We hope you will become an active contributor to the community!

    Sincerely,
    500Eboard Management

OWNER Rouven036

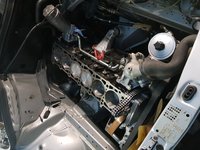
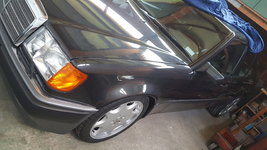
Finally found today some time to spend on the 500E, started to install back the lower cladding and bumper. I m really happy to see the outcome, was the absolute right decision to go back to the stock look. Will finish it this week and then will continue the 6.0 assembly. Got today the head gaskets. 849euro - each + tax
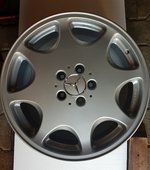
Will do the rim centers in alto Grey too
 

Attachments

  • 20170530_161449.jpg
    20170530_161449.jpg
    4.5 MB · Views: 33
  • 20170530_161513.jpg
    20170530_161513.jpg
    4.5 MB · Views: 34
Last edited:
Finally found today some time to spend on the 500E, started to install back the lower cladding and bumper. I m really happy to see the outcome, was the absolute right decision to go back to the stock look. Will finish it this week and then will continue the 6.0 assembly. Got today the head gaskets. 849euro - each.
Will do the rim centers in alto Grey too
Looks great! Did you buy original Mercedes / AMG head gaskets from a dealership, btw? €849 each... OUCH.

:duck:
 
Thanks Dave! Yes and this was after my discount 545euro plus tax... No pain no gain��
 
Last edited:
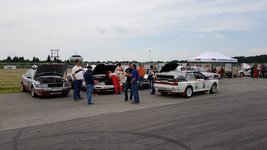
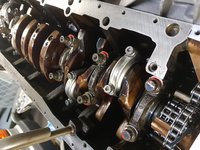
Some more info of the actual state of the 500E, cleaned up the pistons, piston rings and block, cleaned up the rods and crank (which have been checked for straightness and fine balanced) and assembled the crank assembly of the 6.0 according to specs. As put in a new oil pump and oil level sender unit together with a factory new oil pan. The whole thing required to fit the transmission to the crank case for proper alignment of the oil pan. Also played around a bit further on my 2.5-16 and replaced the inappropriate exhaust system against a complete Evo2 setup including catalytic converters. Also participated in the annual W201 16V DTM revival at Hockenheim racetrack. Did not drive my cars on the track this year though.
 

Attachments

  • _DSC7679.JPG
    _DSC7679.JPG
    2.8 MB · Views: 16
  • 20170605_092342.jpg
    20170605_092342.jpg
    4 MB · Views: 15
  • 20170610_204153.jpg
    20170610_204153.jpg
    2.5 MB · Views: 14
  • 20170610_204139.jpg
    20170610_204139.jpg
    3 MB · Views: 16
  • 20170607_145420.jpg
    20170607_145420.jpg
    1.5 MB · Views: 13
  • 20170607_145401.jpg
    20170607_145401.jpg
    1.6 MB · Views: 14
  • 20170606_135958.jpg
    20170606_135958.jpg
    3.3 MB · Views: 14
  • 20170606_140818.jpg
    20170606_140818.jpg
    2.8 MB · Views: 14
  • _DSC7678.JPG
    _DSC7678.JPG
    3.6 MB · Views: 14
Lots of other cool and rare cars out of DTM's golden era where present, the photos show only very little of the whole event
 

Attachments

  • IMG-20170605-WA0057.jpeg
    IMG-20170605-WA0057.jpeg
    1.5 MB · Views: 15
  • IMG-20170605-WA0053.jpeg
    IMG-20170605-WA0053.jpeg
    1.8 MB · Views: 16
  • IMG-20170605-WA0061.jpeg
    IMG-20170605-WA0061.jpeg
    1.3 MB · Views: 17
Finally the Neez Euro5 rims have arrived, I didn't had them on the screen but they popped up in a local listing and seemed to be in good shape. Price was a no brainer and thanks to some help here and there the rims were secured within a few minutes after they have been listed. It's staggered set of 8.5 and 9.5 wide rims. Also picked up a set of limited evos which do need some tlc. They have been unprofessionally sprayed in silver. After removing the paint with paint stripper, all surfaces are in good condition. Need a bit further cleaning and then a new layer of clear coat.
 

Attachments

  • 20170708_180344.jpg
    20170708_180344.jpg
    3.6 MB · Views: 15
  • 20170708_175903.jpg
    20170708_175903.jpg
    3.7 MB · Views: 21
Last edited:
These are great looking wheels on 500E. Are you going to sheave a bit the front face with CNC to get the factory look before applying clear coat? Below is a picture of the car that I almost bought but his owner changed his mind... Super clean and well maintained car, picture just for wheels reference.
mercedes-500e-w124-01.jpg
 
I'm thinking about how to do it well. Taping is possible but even with the utmost care very difficult to achieve an proper outcome. Machining is possible, but I doubt that this kind of skilled work can be done here without cutting off too much material.
 
CNC will remove only fraction of a millimeter if the rim is straight and front plate doesn't have pits or other damages. CNC machining of the wheel front is pretty straight forward (well, relatively) and standard refurbishing procedure for this type of rims in good shops.
 
Nice R129 I am looking to pick one up but was told to stay away from the old fuel injection models on the pre 1993 .
 
Some progress here. The 129 gave me head ache. Head ache with its paint condition, some minor clear coat flaking and traces of age (small scratches and stuff) could not be removed/improved by polishing. So I was really struggling of what to do, either leave it as it is, partial re-spray or full re-spray. Which I would have ended up by adding paint thickness which is something I don't like on such a low mileage vehicle. So up down for and back I decided to remove all paint with paint stripper, leaving the original zinc coating fully intact. A hell of work but the outcome was great. A real silver arrow! Also there was a bad surprise revealed during disassembly of the car. The trunk center panel upper layer was badly corroded under the trunk rubber/plastic panel. The reason for this was that the sealant compound im the rubber got dry and let water, which remains for a long time under the rubbers, enter in between the 2 metal sheets. Luckily only the upper one was badly corroded. The only choice was to cut the upper panel off and replace it with a carefully separated one taken from a scrap car. This was in the end not difficult and turned out very well without having the exterior center panel cut or replaced. Then we rebuild the paint from scratch by usage of a so called wash primer with corrosion protection abilities (the yellow layer). This very thin layer is the base for the actual dark tinted primer. On top came the water based base coat and scratch proof clear coat. All materials used are from Glasurit. Currently in progress to order parts for reassembly.
Also got the 3 piece split rims which were sold by user poopie. The rims are absolutely gorgeous and untouched which is a rare find. They will go most probably on the SL but maybe also on the 500E in case I get through to downgrade the 6 piston brakes to the SA set I got.
 

Attachments

  • 20170812_183531.jpg
    20170812_183531.jpg
    4.2 MB · Views: 26
  • 20170812_183514.jpg
    20170812_183514.jpg
    4.5 MB · Views: 27
  • IMG-20170812-WA0014.jpg
    IMG-20170812-WA0014.jpg
    166.3 KB · Views: 24
  • IMG-20170806-WA0046.jpg
    IMG-20170806-WA0046.jpg
    63.4 KB · Views: 24
  • IMG-20170806-WA0039.jpg
    IMG-20170806-WA0039.jpg
    79.1 KB · Views: 24
  • 20170811_163257.jpg
    20170811_163257.jpg
    3.7 MB · Views: 25
  • 20170729_193319.jpg
    20170729_193319.jpg
    3.2 MB · Views: 23
  • IMG-20170809-WA0000.jpg
    IMG-20170809-WA0000.jpg
    155.7 KB · Views: 23
  • 20170722_192701.jpg
    20170722_192701.jpg
    3.9 MB · Views: 28
  • IMG-20170817-WA0089.jpg
    IMG-20170817-WA0089.jpg
    158 KB · Views: 27
Last edited:
It's jelly like stuff sold in 5L cans. One can was enough for the whole car. Used a very thin metal spattle to remove the paint after it was soaked with paint stripper. The spattle must be very thin and flexible to follow the curves of the body. It will leave no scratches in the zinc coating if performed carefully.
 
It's jelly like stuff sold in 5L cans. One can was enough for the whole car. Used a very thin metal spattle to remove the paint after it was soaked with paint stripper. The spattle must be very thin and flexible to follow the curves of the body. It will leave no scratches in the zinc coating if performed carefully.
Wow. Just wow.

Um, can you come over to the US of A and do this to a couple of my cars?

:worshippy:
 
I have to check tomorrow what was the products name. It was made in USA iirc.
Dave actually I used this also as a test for my yellow evo since I want to do there the same. Startet in the center off all the panels and worked out towards the edges. This is what is most time consuming. Also you have to tape and cover sensitive areas, you don't want to have drips of paint remover on areas you don't want to touch. After the paint was removed, we have wiped the car several times with silicone remover. Then "sanded" it with a felt like sanding pad. Only had to do the edges with regular 500 grid dry sanding paper. Here some photos while removing the paint from the trunk lid. The lid I changed due to a retrofitted antenna for a cellphone hands free installation. Ah and I used another stripper for the trunk lid (first panel I did) , it was in a rattle can but the jelly like stuff worked much better.
 

Attachments

  • IMG-20170624-WA0032.jpeg
    IMG-20170624-WA0032.jpeg
    1.2 MB · Views: 13
  • IMG-20170624-WA0034.jpeg
    IMG-20170624-WA0034.jpeg
    1 MB · Views: 12
Actually I did it quite similar as in the video! Instead of using a plastic spattle, I had the metal thing and then started from the area where the paint was already gone. While applying a bit pressure I could scrapeoff the remaining areas fairly easy. Still a painful and time intense job.
 
Last edited:
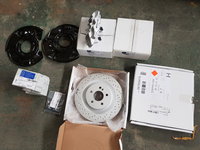
In the next days I will post some more info about the rear brake conversion to the AMG SLK/CLK 4piston caliper setup.
Also completed the de- face-lift, pretty happy with the look now.
 

Attachments

  • 20170828_203000.jpg
    20170828_203000.jpg
    4.1 MB · Views: 16
  • 20170828_220359.jpg
    20170828_220359.jpg
    1,013.8 KB · Views: 18
  • 20170901_110741.jpg
    20170901_110741.jpg
    4.2 MB · Views: 17
  • 20170901_110831.jpg
    20170901_110831.jpg
    4 MB · Views: 17
Since the topic of the AMG R171 SLK55 , W209 CLK 63 330mm/4 piston rear brake conversion came up again a few days or weeks ago where also a link to the 190rev board iirc was posted, I thought to give you a "how to" from my side.
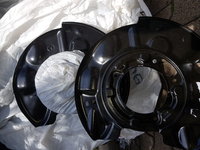
Actually it's a pretty easy job in case you have already the 300mm face lift (rear) brakes on your car. If not you definitely require the heat shields off the face lift model also new rear wheel bearings and a press or the Mercedes special tools.
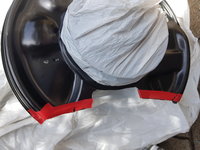
I bought even the heat shields for the SLK55/CLK63 and new wheel bearings but when I saw that the only (shape wise) difference between the E500 300mm heat shields and the ones from the AMG brakes is some trimmed areas (top side and caliper area) plus since my entire rear axles hasn't even been driven for 300km since the rebuild, I decided to trim the installed shields according to the measurements of the AMG units.
I taped the areas with masking tape and took a grinder with cutting disc and removed the areas which are not needed. Then put on a sanding disc to smoothen the trimmed area, finally used a file and sanding paper for the finishing. Then took black lacquer and touched up the edges of the heat shield by a brush.
The rest is straight forward, put on the disc (you have to remove a small pin on the hub which is no longer required) secure the disc with the 5mm allen key bolt, set the side brake (side brake fits 1:1 from the 124), bolt on the calipers (convert to stainless lines if wanted) put the pads in, bolt on the brake wear sensor socket (fits 1:1 too) and perform a thorough brake bleeding. Thats it. Actually I did the job at home (as you can see) and not in my garage with the jack, it's fairly easy and doesn't require much high tech (if 300mm brakes are the point to start from).
Since I m also always concerned about unsprung weight and rotating masses, I checked the weight of all items prior installation and took also the weight of the 300mm components (new disc's and pads).
AMG 330mm disk: 8.49kg
300mm disk: 7.27kg
AMG 4 piston caliper (incl pads) : 3.42kg
2 piston caliper (incl pads) : 3.64kg
Increase of rotating mass (total(left+right)) : 2.44kg
Increase of unsprung mass (per side) : 1kg
Overall this is acceptable in my opinion.
 

Attachments

  • 20170904_130237.jpg
    20170904_130237.jpg
    1.7 MB · Views: 25
  • 20170904_112950.jpg
    20170904_112950.jpg
    4.5 MB · Views: 29
  • 20170904_111616.jpg
    20170904_111616.jpg
    3.8 MB · Views: 22
  • 20170904_110913.jpg
    20170904_110913.jpg
    3.9 MB · Views: 21
  • 20170904_110413.jpg
    20170904_110413.jpg
    3.3 MB · Views: 22
  • 20170904_105906.jpg
    20170904_105906.jpg
    3.4 MB · Views: 21
  • 20170904_103927.jpg
    20170904_103927.jpg
    1.5 MB · Views: 25
  • 20170904_103901.jpg
    20170904_103901.jpg
    4.1 MB · Views: 24
  • 20170904_103844.jpg
    20170904_103844.jpg
    1.6 MB · Views: 25
  • IMG-20170904-WA0005.jpeg
    IMG-20170904-WA0005.jpeg
    1.6 MB · Views: 30
Last edited:
Here the weights with pictures, pads are already fitted in the calipers:


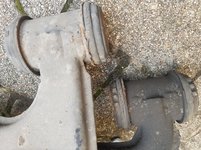
During the next days I have to replace some clips on the small rear banana panels and possibly will replace the front lower control arms since the bushings are not in such great shape as I would like to have them.
 

Attachments

  • 20170904_140108.jpg
    20170904_140108.jpg
    3 MB · Views: 15
  • 20170904_135950.jpg
    20170904_135950.jpg
    3 MB · Views: 17
  • 20170904_140218.jpg
    20170904_140218.jpg
    3.1 MB · Views: 17
  • 20170904_140011.jpg
    20170904_140011.jpg
    2.9 MB · Views: 14
Last edited:
Some more info, the 360mm brakes have no clearance issues to the early style lca, since the disc's hub gives sufficient space, or better said, the friction ring is located out off the radius of the lower ball joint. See attached photo. Also will post a picture later about the brake line and steering end stop arrangement. Nevertheless, since the lca bushings are a bit cracked, I ordered today a original set of late style lca's.
Also will replace all the steering linkage and some minor parts here and there. Further will get the front wheel housings cleaned up. Pictures will follow.
 

Attachments

  • 20170905_134324.jpg
    20170905_134324.jpg
    3.5 MB · Views: 23
  • 20170905_182017.jpg
    20170905_182017.jpg
    1.6 MB · Views: 13
Fitted today the new lower control arms (filled the control arms prior installation with cavitation wax for proper conservation) , complete steering linkage (3 pieces), E60 stabilizer bar, and started a bit of cleanup. Also got new side panels (next to the stabilizer bar), and engine bay insulation. All original stuff only. Also see the photo of the brake line/steering end stop arrangement.
 

Attachments

  • 20170906_201436.jpg
    20170906_201436.jpg
    4.4 MB · Views: 28
  • 20170906_201514.jpg
    20170906_201514.jpg
    4.1 MB · Views: 26
  • 20170906_120527.jpg
    20170906_120527.jpg
    4.4 MB · Views: 29
  • 20170906_142833.jpg
    20170906_142833.jpg
    3.4 MB · Views: 25
That looks awesome. Were any modifications required to the 6-pot calipers, or the steering arm / steering stop? Also, where did you source the brake hoses with banjo fitting?

:deniro:
 
Thx Dave, the steering stop has to be grinded down a bit on the side facing the caliper. Also the caliper bracket has to be grinded down a bit in the area facing the steering stop. Just as much on either part to make them fit without weakening either of them. But it's not much at all, I think the photo shows it clearly. I ordered the brake lines from one of the German manufacturers, since it's 10years ago - I can't remember which one. But I just placed a custom order.
 
Last edited:
fronts are 360x34 or 36mm?
I am thinking about 380x36 but don't understand if they will fit in 19" monoblocks 5
 
Some final pictures, since I had to leave her again behind...
 

Attachments

  • 20170908_220102.jpg
    20170908_220102.jpg
    3.7 MB · Views: 23
  • 20170908_121850.jpg
    20170908_121850.jpg
    1.6 MB · Views: 17
  • 20170907_150658.jpg
    20170907_150658.jpg
    3.9 MB · Views: 27
Hi! I paid around 4000 Euro for the parts. This is already a discounted price.
 

Attachments

  • 20170902_135014.jpg
    20170902_135014.jpg
    1.2 MB · Views: 47
Last edited:
In the end of October I went back home for some arrangements and also responded to the request of the local dealer to participate with some of my cars on a young classics car show. Was quite a nice event, even so late in the year, many people passed by with their classics and young classics.
Some selected vehicles have been displayed in the emptied show room, all cars came from customers and employees.
2 other 036's showed up, one in mother-of-pearl and a retrofitted trailer hitch and a silver one.
 

Attachments

  • 20171102_102214.jpg
    20171102_102214.jpg
    1.1 MB · Views: 29
  • 20171021_151348.jpg
    20171021_151348.jpg
    4.2 MB · Views: 30
  • 20171021_172627.jpg
    20171021_172627.jpg
    1.4 MB · Views: 26
  • 20171021_110957.jpg
    20171021_110957.jpg
    3.8 MB · Views: 17
  • 20171021_110933.jpg
    20171021_110933.jpg
    3.6 MB · Views: 17
  • 20171021_172840.jpg
    20171021_172840.jpg
    1.5 MB · Views: 17
  • 20171021_110901.jpg
    20171021_110901.jpg
    4.5 MB · Views: 27
  • 20171020_190104.jpg
    20171020_190104.jpg
    4.2 MB · Views: 28
  • 20171020_190035.jpg
    20171020_190035.jpg
    4.4 MB · Views: 28
  • 20171020_190012.jpg
    20171020_190012.jpg
    3.2 MB · Views: 27
Also started to assemble the M104 3.2 Turbo monster for my brothers car after the blocks (spare 2.5-16 and 3.2 M104) had been bored and honed. In conjunction with this work we had visited one of the most unique and specialized piston manufacturers : Kolben Wahl. They are a small family business but do pistons for mostly all classic Benz and Porsche cars. There i ordered a set of special 16V pistons, got some more tweaks done to the already modified M104 turbo pistons and had a chat about different ideas and possibilities in regards to the M119 6.0. They actually work together with Mahle which is more or less in the neighborhood and use exclusively their forged pistons in raw. Since Mercedes Classic is also very close by, you can see there orders from them too. Also Kienle,HK Engineering, Mechatronik, MKB and AMG etc. are working with them for classic cars and special projects. Also dropped the 6.0 heads, exhaust and intake manifolds at Bernard's place. Along with the latest version of cnc porting will come a set of lighter con rods, even so it means my previously done fine balancing of the rotation assembly became obsolete and must be re done. We also discussed additional measures such as cams and exhaust system layout. Since I have 2 very competent sources on hand I might get a custom solution. For example, together with few other guy's we just managed to run a small production of the dual pipe AMG power pack exhaust system. The original is NLA since ages and prone to corrosion. Since I have a excellent sample under the evo1, we have taken this as a template and a dead rear muffler of a friend's pp system to be cut apart to copy the complex 3 chamber layout to ensure the right amount of back pressure. Last but not least visited my friend Thorsten and got some things arranged for the DTM car, i.e. the wheel carriers for front and rear axles and the layout to have the car on driving condition by 2019. So all of these things and the stuff in the post on top happened in less than a weeks time....
 

Attachments

  • 20171028_141618.jpg
    20171028_141618.jpg
    4.1 MB · Views: 9
  • 20171028_192912.jpg
    20171028_192912.jpg
    3.9 MB · Views: 9
  • 20171030_233307.jpg
    20171030_233307.jpg
    641 KB · Views: 11
  • 20171029_003358.jpg
    20171029_003358.jpg
    1.3 MB · Views: 9
  • 20171026_155517.jpg
    20171026_155517.jpg
    4.3 MB · Views: 8
Last edited:
Also dropped the 6.0 heads, exhaust and intake manifolds at Bernard's place. Along with the latest version of cnc porting will come a set of lighter con rods, even so it means my previously done fine balancing of the rotation assembly became obsolete and must be re done. We also discussed additional measures such as cams and exhaust system layout. .
Just curious, what will Bernard be doing to the M119 / 6.0L heads? What are the power gains hoped for from the 6.0 mods?

:apl:
 
Ports will be enlarged, port matching to the intake, enlarging and port matching of the exhaust manifold ports. Opting for around 430 crank hp in the 6L setup.
Even a 6.5L Brabus setup is no problem despite the cost of the crank. Forged Mahle pistons are about 300 Euro/piece including ferro coat plating. Since the DTM car needs still alot of attention, the W123 has a new escalation stage in the making and addition of a new family member by end of the year, a 6,5L project is currently not on my list.
 
Last edited:
Will this ever stop? After our first child was born one and a half weeks ago, I came across a S123 (initial) 280TE station wagon. I had to take it... There are no other options (as a responsible father) to buy it since it's a 7 seater family car. Sure needs some work but the car is a original Kuwaiti delivery out of may 1983. It has literally no rust nor any accidents (which is a miracle) but some dings and dents all around. The interior and most of rubbers are shot. Will post up some info and photos later...it has some specialties but here as it left the factory originally:

737 classic white
152 blue MB TEX
AC
4x power windows
7 seater
Bad road suspension (don't know the exact english term) but it's a bit higher and stiffer than the common version
Undershield
Tinted glazing
Original radio set
Electric antenna
Automatic transmission
Central locking
2/3-1/3 folding rear bench
ABS
and some retrofitted modifications by AMG.

More later
 
Last edited:
In the meantime I got a full and original Gen1 AMG kit for my R129, just had to have it. Together with the earlier purchased, untouched AMG 3 piece Aeros it will be a perfect match. Last photo out of the interwebs (not mine) just to show how the bornite will look in the AMG body trim and rims)
 

Attachments

  • Screenshot_20180309-130806.jpg
    Screenshot_20180309-130806.jpg
    210.8 KB · Views: 35
  • IMG_20180316_111115_663.jpg
    IMG_20180316_111115_663.jpg
    235.1 KB · Views: 18
  • IMG_20180316_111107_685.jpg
    IMG_20180316_111107_685.jpg
    123.3 KB · Views: 15
  • IMG_20180316_111058_435.jpg
    IMG_20180316_111058_435.jpg
    121.3 KB · Views: 14
  • IMG_20180310_125336_000.jpg
    IMG_20180310_125336_000.jpg
    80.8 KB · Views: 14
  • IMG_20180310_125345_164.jpg
    IMG_20180310_125345_164.jpg
    95.2 KB · Views: 17
Also some recent news about the main actor, the W124 500E. As you know is the car currently equipped with the RH 19" AMG styling V and I can't go under 18" due to my big brakes... So got a set of Rial/ARC M800. The price and condition was right and they come a long way. Hope to receive them within the next month or so.
However I have to figure out if any spacers on the front are required to clear the brakes (rear of course for the looks).
Will have then 2 - 3 sets of wheels to use, depending on the purpose. 18" Neez Euro5's, 18" M800's and if I don't sell them the RH/AMG V19's.
 

Attachments

  • IMG-20180112-WA0018.jpg
    IMG-20180112-WA0018.jpg
    105.1 KB · Views: 19
  • IMG-20180219-WA0004.jpg
    IMG-20180219-WA0004.jpg
    140.1 KB · Views: 18
In the meantime I got a full and original Gen1 AMG kit for my R129, just had to have it. Together with the earlier purchased, untouched AMG 3 piece Aeros it will be a perfect match. Last photo out of the interwebs (not mine) just to show how the bornite will look in the AMG body trim and rims)
You, Kind Sir picked up a holly grail of "Wanted Items" by any R129 enthusiast, great package!

Regards,
D
 
I know of a set of refinished R129 specific 18” AMG staggered 5 spoke rims which will be going up for sale soon. These were available as part of an AMG performance package and are now NLA. 8.5” fronts and 9.5” rears. If there is interest, I can ask when they will be available.


Robert
 
Opportunity stroke again, found something what I knew before only from some drawings in WIS (M104 Cis-e function description) and what actually never made it into series production. All of a sudden a never run, complete prototype M104 300-24 engine appeared. Once donated by Daimler to a school...
I found the prototype valve cover from the WIS pictures always cool, since it relates the M104 300-24 engine's sporty nature obviously to the M102 16V engine.
At the moment I have no use for it but I m sure something will appear over time. Maybe a 190E 2.6 paired with a 717.450 short ratio dogleg box.
 

Attachments

  • 20180327_205456.jpg
    20180327_205456.jpg
    576.2 KB · Views: 31
  • 20180327_205827.jpg
    20180327_205827.jpg
    568.4 KB · Views: 33
  • 20180327_110110.jpg
    20180327_110110.jpg
    2.6 MB · Views: 28
  • 20180327_110136.jpg
    20180327_110136.jpg
    2.1 MB · Views: 25
  • 20180327_110125.jpg
    20180327_110125.jpg
    1.8 MB · Views: 25
Last edited:
Some final shots from the past weeks of the SL in the old home country, looking forward to drive it through the woods of the black forest soon. Along with the car, some other goodies go such as the Neez Euro5's for the W124.
 

Attachments

  • 20180406_163628.jpg
    20180406_163628.jpg
    1.9 MB · Views: 25
  • 20180406_163806.jpg
    20180406_163806.jpg
    4.3 MB · Views: 26
  • 20180418_093823.jpg
    20180418_093823.jpg
    4.5 MB · Views: 27
  • 20180418_093804.jpg
    20180418_093804.jpg
    1.6 MB · Views: 29
  • 20180418_100036.jpg
    20180418_100036.jpg
    3.9 MB · Views: 26
I m in Germany currently to collect the SL in Hamburg within the next days... However I also could finally see the M800's the first time in real. They are stunning, put up my current 19" wheels direct into eBay and ordered the right sized tires for the rials (245/40 R18 97Y XL).
Some more useful info maybe for the one or other: I had to use 5mm spacers in the front with the 19" setup (8,5x19 ET 35) to clear the 6pot brake calipers . Also the M800 clear the brakes with the 5mm spacers nicely but since the m800 wheels are an half inch narrower which translates roughly to 6mm less per side I ordered a set of 10mm spacers (5mm currently + the 6mm difference, manufacturers is H&r with centering hub) and corresponding screws to get the same stance as currently which is just perfect for my taste.

Small update, rims with tires now and the weight for the records:

Rial/ARC M800 8X18 ET35 with tire 245/40 ZR 18 97Y XL, balanced and ready to be mounted/driven: 24,66kg per wheel.

RH AMG Styling 4 8X19 ET35 with tire 245/35 R19 balanced and ready to be mounted/driven: 23,36kg per wheel
 

Attachments

  • 20180603_200146.jpg
    20180603_200146.jpg
    2.8 MB · Views: 18
  • 20180609_203209.jpg
    20180609_203209.jpg
    1.5 MB · Views: 11
  • 20180609_182245.jpg
    20180609_182245.jpg
    1.2 MB · Views: 14
  • 20180610_141823.jpg
    20180610_141823.jpg
    1.5 MB · Views: 13
Last edited:
Rials are now on the car.... No need to mention that I m happy with the outcome... (front 5mm spacers for now, rears are 23 or 25mm per side, high quality H&R DR and DRA spacers). Some info about weight on the post on top.
 

Attachments

  • 20180610_134640.jpg
    20180610_134640.jpg
    1.4 MB · Views: 34
  • 20180610_134843.jpg
    20180610_134843.jpg
    1.5 MB · Views: 39
Back
Top