• Hi Guest !

    Welcome to the 500Eboard forum.

    Since its founding in late 2008, 500Eboard has become the leading resource on the Internet for all things related to the Mercedes-Benz 500E and E500. In recent years, we have also expanded to include the 400E and E420 models, which are directly related to the 500E/E500.

    We invite you to browse and take advantage of the information and resources here on the site. If you find helpful information, please register for full membership, and you'll find even more resources available. Feel free to ask questions, and make liberal use of the "Search" function to find answers.

    We hope you will become an active contributor to the community!

    Sincerely,
    500Eboard Management

[SOLVED] A/C Compressor not working -- tracking down the cause

Following up on this thread.

I was able to solve the issue by cleaning the clutch. Evidently I had flushed some dirt and grime into the air gap between the clutch and pulley last year whilst cleaning the front of the engine.

However, I was not satisfied with the fix, and seeing that the compressor was original, and I’d never really done A/C work in the past, I decided to challenge myself a bit and replace the compressor. I did not have strong confidence in this old compressor nor that the problem would return at some point.

I am happy to report two things:
1. The A/C system is making ice cubes out the dash vents, even in 90+F ambient temps. I am very happy with the results.

2. The fact that I caught the low-speed fan not working (blown fuse) is resulting in noticeably cooler running temps. In 90+F ambient temps, With the A/C system running, I am now seeing indicated engine coolant temps at 90-95C. This is under high load. Sitting at stoplights, temp creeps up to 95C indicated. I have not seen 100C indicated since restoring function of the low-speed fans.

When low-speed fans were not operating, I would see 100C and even 105C indicated temp in high ambients, with A/C operating and at long stoplight/extended idle.

So I believe the low-speed fan operation is worth 5-10C of temp mitigation in higher ambient temp environments. I still believe that A/C operation adds ~5C to engine temp all other things equivalent.

Anyway, I call this item closed now, and am exceedingly happy with the results.
One other note I forgot to mention -- when I had the A/C compressor out, I was able to see above and behind the compressor/bracket area. This is behind and below the tandem pump and PS reservoir. This is the area directly BELOW the front cylinder head cover that I installed as part of my Top-End Refresh last year. it is really impossible to see this area unless the A/C compressor is removed.

From what I could see, it appears that I have the VERY BEGINNINGS of an oil leak from the edge of the front engine cover. It is not bad, and not enough to even create a drip, but the sealed seam between the front cover and cylinder head and block appeared to be weeping a bit of oil.

This is going to need to be addressed in the future, as it worsens. The only realistic way I'll be able to do this is to pull the entire engine, and dismantle the front of it to get to the cover, to remove and re-seal it. I think this is going to be YEARS off, though. Maybe a good thing to do when my transmission fails -- pull everything out as a unit and take care of it all at once.

I would venture to say that likely many if not most of folks' cars either have or will have the same issue, particularly with cars over 100K miles on them.
 
Yes, timing cover to block. The vertical seam where the two meet.
Thanks! I wanted to confirm.

The GSXR-approved Band-Aid for this is applying an external bead of sealant as shown below on the passenger side. This should reduce the leak by >99% and does not require pulling the cover, however it will require removing whatever external components are blocking access to the seam. In the photo below I used Permatex RightStuff®.

Two years and 5kmi later, this seam is still completely dry and free of oil:

timing_cover_leak_1.jpg timing_cover_leak_2.jpg
 
I remember that and checked that seam on the passenger side very closely last year when I had everything apart. Didn't see any problems, even though I bought same sealant just in case.

For the driver's side, where the compressor and bracket are, they are the only things that would need to come off of the engine. That means likely having to crack the A/C system open again, which I don't really want to do, and since the seepage isn't that bad (similar to your first photo above), I'm not going to mess with it anytime soon. But it is accessible from below -- I was able to get a rag up there with the compressor out to see what the extent of the seepage was. It wasn't much, so I'm going to delay messing with it. Probably should have taken a photo, but I was too focused on the compressor when I saw it.
 
Following up on this thread.

I was able to solve the issue by cleaning the clutch. Evidently I had flushed some dirt and grime into the air gap between the clutch and pulley last year whilst cleaning the front of the engine.

However, I was not satisfied with the fix, and seeing that the compressor was original, and I’d never really done A/C work in the past, I decided to challenge myself a bit and replace the compressor. I did not have strong confidence in this old compressor nor that the problem would return at some point.

I am happy to report two things:
1. The A/C system is making ice cubes out the dash vents, even in 90+F ambient temps. I am very happy with the results.

2. The fact that I caught the low-speed fan not working (blown fuse) is resulting in noticeably cooler running temps. In 90+F ambient temps, With the A/C system running, I am now seeing indicated engine coolant temps at 90-95C. This is under high load. Sitting at stoplights, temp creeps up to 95C indicated. I have not seen 100C indicated since restoring function of the low-speed fans.

When low-speed fans were not operating, I would see 100C and even 105C indicated temp in high ambients, with A/C operating and at long stoplight/extended idle.

So I believe the low-speed fan operation is worth 5-10C of temp mitigation in higher ambient temp environments. I still believe that A/C operation adds ~5C to engine temp all other things equivalent.

Anyway, I call this item closed now, and am exceedingly happy with the results.
Good job. Glad to hear your system is clean. That’s huge.
 
<SNIP>

The pin 21 (iirc) solder connection on BM was not good. Looked ok, but wasn’t. It started working 100% once I resoldered with a quad eutectic solder. I believe the high current along with dissimilar metals and ho-hum solder were the issue.

I used Cardas Audio solder from leftovers from my years of owning a Hi-Fi store. It’s great stuff

Cardas Soldering Wire Quad Eutectic Silver Solder with rosin flux 1/4 lbs (113g) roll Cardas Soldering Wire Quad Eutectic Silver Solder with rosin flux 1/4 lbs (113g) roll - - Amazon.com
With a swapped-out Base Module (BM), A/C has been working 100% for the last 2-weeks.

I finally opened the "bad" BM and found what looks like a cold-solder joint, although it tested fine for continuity on the Fluke (cannot simulate heat or vibration).

Regardless, I took your recommendation and re-flowed the solder using the Cardas Eutectic solder, and a litle rosin flux (cleaned off the residue).

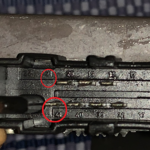
More importantly, I traced the suspect cold-solder joint to pin #41, as there is no Pin# 21 (blank and in the row above pin#41 - see pic) on both of my BM modules (011 545 97 32 GM).

I also re-flowed the solder for PIN#s: 1, 33, 28, 29, 40, 20, 39, & 15, in addition to # 41, as these are called-out for A/C climate control.

Pin# 41 (and # 40) corresponds to the A/C compressor speed-sensor (see schematic). Note: Pin# 20 activates the A/C compressor clutch.

I put in the "repaired BM", and it has been working during my short test drive.

I'll be runing some errands soon in 90-F+ Florida weather and will report back, but it's looking good.

:) neil
 

Attachments

  • 1993 W124 500E Base Module Pin 41 detail.png
    1993 W124 500E Base Module Pin 41 detail.png
    4.6 MB · Views: 36
  • 22 June 27  Mercedes LH Module Header Pins circled detailed.png
    22 June 27 Mercedes LH Module Header Pins circled detailed.png
    919.7 KB · Views: 35
  • W124 400E 500E AC compressor control detail 70.jpg
    W124 400E 500E AC compressor control detail 70.jpg
    917.5 KB · Views: 35
Last edited:
I am having a similar issue with my A/C. When I bought the car in April of 21, the A/C worked fine(once), but the fan clutch was low on fluid, so the engine would run hot, so I stopped using the A/C. I fixed the cooling system, but then, the A/C didn't work.

The system was fully charged, but I had codes 6 and 7 in the Base Module for belt slippage, and compressor blocked. Any time I could get the compressor to engage, the clutch would squeal, and then disengage. I could see bare wires on the compressor wiring, so I removed the compressor, heat shrunk all the wiring, verified the speed sensor worked(at the compressor connector), and reassembled. It still does the same thing, clutch squeals for a second, and then disengages. I though maybe the clutch was dirty just like Gerry's, but I found that there is NO air gap in the clutch. The frictions appear to be touching all the time, and I cannot force any floss in-between. So, I'm thinking that the clutch is bad, and slipping, but I'm surprised that it's setting code 6(compressor blocked), and not code 7(belt slipping). The serpentine belt is also new. I do plan on opening the Base Module and checking for bad solder joint before I pull the trigger on a new compressor, don't want to spend $300 if I don't have to.

Ian R.
 
Ian, how does the compressor feel when you rotate the face by hand? Does it turn smoothly & easily? If so, the compressor may be ok... but the clutch isn't sold separately. You'd have to raid a junkyard for clutch parts.

Get a spare base module to swap for testing. This is why I recommend having a known-good spare of every module on the shelf... it can really help troubleshooting.
The compressor felt fine on the bench, turned smooth and easy with the rear ports uncovered. One the car however, to does require a bit of effort to turn. I can still turn it by hand, but I wouldn't call it easy.

I want to ensure the Base Module is good, then I will attack the compressor.
 
With the system charged, the compressor will take moderate effort to rotate, but you should be able to turn it by hand - without any tools needed. The effort will be a bit higher than on the workbench where there's no pressure.

I assume you had a vacuum pump and vacuumed the system after re-installing the compressor? How were you able to charge the system if the compressor won't remain engaged?
 
I assume you had a vacuum pump and vacuumed the system after re-installing the compressor? How were you able to charge the system if the compressor won't remain engaged?
I have access to a Robinair A/C machine. I vacuumed for 10 minutes. To be honest, it's not a FULL charge, but about 80% full. Definitely enough for the system to work properly. I am going to recover the system again, jump the pressure switch, and see if it will run longer with no load. I feel comfortable running it for 15-20 seconds, there should still be plenty of oil in the compressor.
 
I just took the Base Module apart, found a questionable solder joint on pin #41. Reflowed #20, 40, and 41. No change with compressor operation. Probably going to replace the compressor. I can get a new Denso locally for about $300.🤞
 
Denso 471-1227 is correct for 1993-95 models, $230 on Amazon if you can wait a couple days.

https://www.amazon.com/gp/product/B001UC9IOQ/

Remember that you need to measure the amount of oil in the old compressor and new compressor, and compare to the FSM specs, which are really confusing. From memory it should be something like 6 ounces or so? I'd use the new oil that comes in the new Denso compressor, it may be the good ND-Oil-8 double-endcapped stuff... most aftermarket oils are not great. More info here.

:duck:
 
All these cases mentioned can be diagnosed with the live data.

I have a mysterious case where all the sensor values are correct, no fault codes, no leaks, clutch constantly engaged, system properly charged with a Wabco AC system, new AC condenser and dryer. It starts to properly cool when switched on with the pressure in-spec... a few minutes later the pressure drops, the flow stops and aux fans switch off.

I don't know how the pressure would drop to near AC-off although the compressor is still engaged! increasing RPM does not increase the pressure.
Any chance the clutch is slipping? I doubt it, as that should trigger a fault. Sounds like a defective compressor to me.

:scratchchin:
 
Any chance the clutch is slipping? I doubt it, as that should trigger a fault. Sounds like a defective compressor to me.

:scratchchin:
Hi Dave, I don't see the clutch slipping, its increasing in speed with RPM. Compressor start up good then gradually loses pressure. Its just confusing!
 

Who has viewed this thread (Total: 2) View details

Who has watched this thread (Total: 7) View details

Back
Top