• Hi Guest !

    Welcome to the 500Eboard forum.

    Since its founding in late 2008, 500Eboard has become the leading resource on the Internet for all things related to the Mercedes-Benz 500E and E500. In recent years, we have also expanded to include the 400E and E420 models, which are directly related to the 500E/E500.

    We invite you to browse and take advantage of the information and resources here on the site. If you find helpful information, please register for full membership, and you'll find even more resources available. Feel free to ask questions, and make liberal use of the "Search" function to find answers.

    We hope you will become an active contributor to the community!

    Sincerely,
    500Eboard Management

OWNER JC220

E36 Widebody or C124 Widebody?

  • Use the 500E widebody kit on my E36 saloon

    Votes: 2 22.2%
  • Adapt the 500E widebody kit for my 320CE

    Votes: 7 77.8%

  • Total voters
    9
  • Poll closed .
well..its abit more than a 10 min job mate :)

But a veeery cool job to do,many overlook this,and leave the displays "broken".
Marcel delivers quality products i have to say.Got LCD displays for the lap counter AND temp display for my 190e,and various stickers..and they are indeed good parts.Have a look at post #572 on my thread if you want to.

The only thing about the LCD displays,,is that it is NOT 100 percent correct font for the celcius symbol.the C is a tiny bit slimmer...but still it is good enough and lightyears better than a broken original one :)

The stickers also is spot on ,appart from the red trunk warning sticker...which is a kina aluminium one originally..but the repro is not..but the other stickers are super nice.So marcel is a recomended "dude" for my part.
Nice job anyways you did there :)

Hi Lowman- yes I should have clarified that I already had the cluster removed. Replacing the little screen screen when you have the temp display unit removed is what took me about 10 min! Having the genuine MB cluster hooks is recommended for this job too. Makes pulling the cluster a doodle.

I didn’t notice the C symbol difference but I agree- it’s great to have a new one and salvage the original display unit. Otherwise if new displays aren’t already NLA I bet they are £££. I’m going to buy a few more new displays from Marcel for my spares hoard.

For the red trunk sticker- it is still available new from MB. And very cheap. I have one for my 500E I’ll post pics later to see if it’s different from the one you have from Marcel. He said he now supple Mercedes with some of his stickers. And I agree he is a nice dude to deal with!

And thanks for the kind comment!
 
No problem mate ��I have a brand new original sticker on my 500e..but i bought Marcel's sticker for the 190 ,and that's why I mentioned there was a difference.the reason I bought it of of him ,is because I bought a complete sticker kit of of him .cheers ��
 
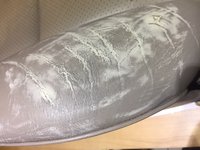
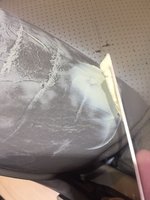
One area in my CE that really bugged me was the knackered armrest-

IMG_5945.JPG

With the leather piping also cracked and chunks missing there was no restoring this one. I’ve been looking for a good used Mushroom leather armrest since I got the CE and have found plenty – but none in good condition. Then I spotted a German company making real leather replacement covers in any colour you want- as long as it’s grey :) So sod it – I’d give it a go anyway. It turned up today and for the price I’m pretty chuffed with how it fits so far. Real leather, with piping and a very tight fit but after about 30 mins of struggling it’s on there without tearing the seam. I will re-dye to match my interior and use some heat to make it fit better and remove wrinkles.

IMG_5946.JPG IMG_5947.JPG IMG_5948.JPG

I am sending off a sample of the original leather armrest to a leather Dye company in England.

IMG_5949.JPG

They will custom match the dye to the original leather colour and gloss level. (They claim 100% accuracy if a sample is over 3x3 inches in size) I’m getting a full kit mixed to allow me to do the whole CE interior. Not sure to apply with a sponge or Airbrush... I’m thinking the latter. If anyone has re-dyed their own interior any advice would be appreciated!
 
If anyone has good used E500E front or rear arches for sale please PM me with location and asking price. Preferably a whole set. I can pay for shipping to my location if you are willing to pack em.
Not for my 500E- possibly the CE if the price is right! :tumble:

I would also like to buy at least one pair of w124 Sportline fender badges.
 
Sent you an email about front fenders. :)

Looks like the Sportline fender badge is still available new...?
http://partssearch.mercedes-benz-classic.com/parts/A2018171320?tt=manual


:apl:

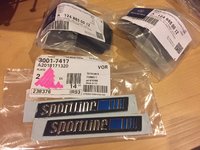
Dave - thankyou. I made the assumption the Sportline badges were NLA. I have ordered 2x this evening and my dealer said there are ‘plenty available’. Not often that happens.... :)

I bought a Sportline shifter from member Mercepor. The steering wheel, shifter and badges will make my CE ‘full Sportline’ as the Coupe models do not appear to have got Sportline seats like the saloon models would have. My CE did have the factory Sportline undercarriage and wheels option. (But not the wheel, shifter or fender badges)
 
Correct - since the coupé has folding seats (to allow rear occupants to squeeze back there), the seats are the same as standard.

Strange that your car had the undercarriage and wheels, but not the steering wheel or badging! Maybe the original owner wanted the "stealth" look?

:scratchchin:
 
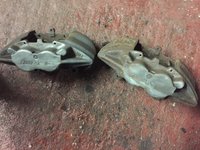
Didn’t get much done on the CE itself this weekend but I was busy with a new ‘toy’! Usually I outsource all of my sandblasting and the only guy I have to do it lives a 3 hour round trip away just to drop stuff off – then go back again to collect..... It’s tedious making that trip each time something needs blasted so I bought my own new 90L blasting cabinet. Still getting the hang of it but some progress is pictured below; (Spare AMG brakes)

IMG_5960.JPG IMG_5962.JPG IMG_5963.JPG IMG_5964.JPG

Each picture is a before and after type deal - I’m very pleased with how the items have cleaned up. But I have some modifications to do to the cabinet – like the feed tube blocks up every minute or so. Quite common issues with blast cabinets – there are lots of you tube videos on the subject! On the CE I will be doing all of my own stunts – bar the rear subframe which will still go to the blaster. All small items like the callipers and hubs through to engine bay brackets will be blasted in my cabinet before zinc plating or painting as applicable. I’ll also be exploring other rust removal methods such as vinegar baths and the like.
 
The Sportline badges turned up yesterday, thanks for the part numbers Dave! I ordered the bumper brackets some 4 months ago. They also appeared eventually – still no MB lock grease though. i ordered new brackets because these rust badly in our climate so I just want new ones instead of painting the old brackets.

IMG_5987.JPG IMG_5988.JPG

The Sportline badges will be one of the last parts fitted...... yes I’m planning a full respray on the CE now too :doh:
 
I have a blasting cabinet as well. I've been waiting for a low humidity day with no work responsibilities to start cleaning. What kind of blast media are you using?

Drew
 
I have a blasting cabinet as well. I've been waiting for a low humidity day with no work responsibilities to start cleaning. What kind of blast media are you using?

Drew

Hi drew- what I have started out using in my cabinet is ‘standard’ Aluminium Oxide grit. It’s black in colour and quite fine in texture. I found my smaller air compressor wasn’t up to the task so hooked up the one I normally reserve for spraying. A mactools twin cylinder 110litre compressor. It can run the cabinet at 90psi steady. But I need to get a water trap hooked up to the air line too.

I will experiment with other blast medium such as walnut shells and glass grit to see what works best on different materials
 
I have all three as well. I'm thinking the glass bead will work better with humidity and water. I have no water separator yet either. I'll post results as well should i get to it soon. I'm also interested in your leather dying. I have a nice grey armrest that i would like to be crème-beige.

drew
 
Drew – looking forward to your thoughts on the different blasting medias!


The leather dye is being custom mixed for my CE and I expect to receive it next week. I will be re-dying the grey armrest I have so I’ll post info on that. The driver’s bolster is bad on my CE so I will be restoring that and re-dying the whole seat - I may create a DIY on that as it is a common issue. I am betting that with a few hours work and the appropriate leather fillers etc it will come up like new – here’s hoping.


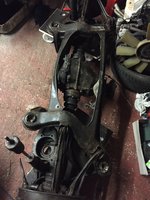
I have a replacement rear subframe coming for my CE tomorrow. Removed from a southern Ireland car which tend not to have road salt used in the winter in some counties (Grit instead). Thus the axle is in much better condition than the original in my 320CE. (My CE lived in Scotland most of it’s life – quite bad for salt – rust etc) The replacement subframe is complete and from another 94 320CE. Thus the heavier duty resto work commences this weekend - completely stripping down the spare axle and hubs for restoration.
 
Getting time to work on the CE has been tough lately – but I did get back to it today. The replacement 320CE Sportline rear axle assembly and both front hubs arrived last week. So I have began stripping them down for restoration. I am replacing the subframes and front hubs for 2x reasons. Firstly they are in better condition from Ireland than the original Scotland ‘lived’ items. Secondly – I can reduce the amount of time the CE is on Jack stands by having these items restored and ready to go before perching it on Jack Stands. (I don’t have a car lift) So the rear axle is totally dissembled now. The Miller 9113 Diff bushing extractor tool must be V8 specific as it is way too big to remove the CE’s Diff bushings. The subframe will now be blasted and hot dip galvanised once I get the old bushings pressed or beat out!

IMG_6015.JPG IMG_6047.JPG IMG_6050.JPG IMG_6051.JPG

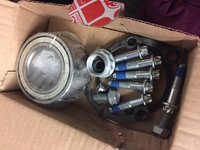
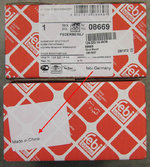
Next step for me is to sandblast / paint the hubs and start rebuilding them. My local Autofactor only had Febi bearing kits in stock. However the bearings are made in Germany and I noticed the MB star stamped into the front caps. I THINK these might be from the OE factory – who knows. In any case they are perfect quality and fitment so I have no qualms with these bearing kits.

IMG_6052.JPG IMG_6054.JPG IMG_6055.JPG

Why new wheel bearings? - Every single nut and bolt underneath is being renewed on the CE as I said earlier– so this will be an involved resto! The donor axle came from another Sportline Spec 124.052 320CE like my CE. It has slightly higher mileage at 145k. I am unsure if I should also restore and re-use it’s Diff & Driveshafts. That is to restore them now with the axle and simply drop the original subframe complete for re-placement. I would retain the original lower mile Diff & Driveshafts with my CE’s spares hoard.

What do you guys think of that? Use the good serviceable, slightly higher mile Diff OR should I wait and restore the original lower mileage Diff & Driveshafts from my CE? Opinions would be appreciated as I'm unsure what to do there. The 'extra' Diff appears to be in excellent servicable condition.
 
The Miller 9113 Diff bushing extractor tool must be V8 specific as it is way too big to remove the CE’s Diff bushings.
That is correct, the Miller is sized for the V8 rear diff mounts. And, the Miller threaded rod is too large to fit through the center hole; you'll need to use a different center rod for V8 bushings. I see from your WTB post you are already on the hunt for the proper 4/5/6-cyl bushing tool. Be very careful to get these pressed in at the proper depth; the $$$$ factory tool includes pieces that set depth... aftermarket it's all eyeballed.


My local Autofactor only had Febi bearing kits in stock. However the bearings are made in Germany and I noticed the MB star stamped into the front caps. I THINK these might be from the OE factory – who knows.
Febi reboxes stuff from various mfr's. The front caps are likely OE MB, everything else is probably not. Interesting that the front bearings are actually marked with the Febi name. Is there any name brand on the rear bearings?


What do you guys think of that? Use the good serviceable, slightly higher mile Diff OR should I wait and restore the original lower mileage Diff & Driveshafts from my CE? Opinions would be appreciated as I'm unsure what to do there. The 'extra' Diff appears to be in excellent servicable condition.
If the spare diff is in great shape, I don't see any reason not to use those parts, despite the higher miles. Then you'll have the low-mile stuff left over as spares in case they are ever needed.


:banana2:
 
Dave, thanks for the reply. Yes I now realise there is a different press for other w124’s. I cannot find any vendors here selling a suitable tool. However- I did some measuring and this 27pc universal kit has the perfect sizes I need to remove / install the bearing. The extra plus being that I will have different size spindles for pressing - that I can also use on my 500E - Miller tool. And I will use a digital depth gauge to set the depth – thanks for the Tip. I also believe the orientation is important on the diff bushings from some posts I have seen on the interwebs. So I have purchased one of these kits to keep progress moving: (No-one replied to the WTB yet)

$_27.JPG

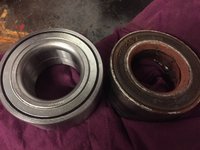
Regarding the rear Febi Kits – the bearings are also marked Febi & Made in Germany. These are pics of new VS original. The difference being the original bearings had a plastic bearing seal whereas the new bearings have all metal shielding. The OE bearings look like below when split apart – the grease is very dry & caked by now although there were still no signs of wear I think they were still ‘too long new’ :) My 20 Tonne hydraulic press always feels maxed out when pressing out these w124 rear bearings - this time I heated the hubs first and it helped with extraction.

IMG_6053.JPG IMG_6056.JPG

And yes - I think I will go ahead and strip / restore the spare Diff & Driveshafts - keeping the originals.
 
Regarding the rear Febi Kits – the bearings are also marked Febi & Made in Germany.
I can see the remnants of a "Germany" marking on the rear bearing, but no brand name. Note the front bearing is marked "Febi Germany" which does not necessarily mean the bearing was actually made in Germany! It's one of the reasons I dislike any company that puts "Germany" in their name, or ambiguously on their labels/logo, as it's very misleading. Meyle also does this. See attached photo from a different Febi part. Things get even more dicey with kits that have multiple parts; each component theoretically could be made in a different country.


These are pics of new VS original. The difference being the original bearings had a plastic bearing seal whereas the new bearings have all metal shielding.
The OE bearings have a metal shield, so it's definitely cool that your replacements are the same way. Many aftermarket bearings have the plastic (or, plastic-covered metal?) shield. If these are OEM, that would be fantastic.


The OE bearings look like below when split apart – the grease is very dry & caked by now although there were still no signs of wear I think they were still ‘too long new’ My 20 Tonne hydraulic press always feels maxed out when pressing out these w124 rear bearings - this time I heated the hubs first and it helped with extraction.
I used the Miller tool for the bearing R&R, photos are here. Problem is getting the hub removed first, especially if the carrier is on the car where you can't use a hydraulic press. Check out the photos in the rear wheel bearing HOW-TO thread here.

:nobmw:
 

Attachments

  • strut_mount_Febi_China.jpg
    strut_mount_Febi_China.jpg
    114.9 KB · Views: 9
I can see the remnants of a "Germany" marking on the rear bearing, but no brand name. Note the front bearing is marked "Febi Germany" which does not necessarily mean the bearing was actually made in Germany! It's one of the reasons I dislike any company that puts "Germany" in their name, or ambiguously on their labels/logo, as it's very misleading. Meyle also does this. See attached photo from a different Febi part. Things get even more dicey with kits that have multiple parts; each component theoretically could be made in a different country.


The OE bearings have a metal shield, so it's definitely cool that your replacements are the same way. Many aftermarket bearings have the plastic (or, plastic-covered metal?) shield. If these are OEM, that would be fantastic.


I used the Miller tool for the bearing R&R, photos are here. Problem is getting the hub removed first, especially if the carrier is on the car where you can't use a hydraulic press. Check out the photos in the rear wheel bearing HOW-TO thread here.

:nobmw:

Thankyou for then links Dave- I will peruse them later.

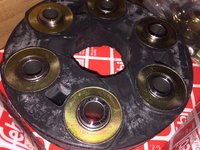
Yes you are correct- Febi are very much a mixed bag and I do not recommend them. However there are some exceptions to the rule. Such as the Febi flex discs (OE SGF boxed), Steering and tensioner dampers (OE Stabilus boxed) and the bearing kits IMO. (I’ve used Febi W124 bearing kits before with no issues) All other Febi parts (in particular rubber items) should be avoided like the plague! Note the Febi bearing boxes for my bearing kits did say made in Germany - so at least some if not all of the parts inside these particular boxes is German Made.

I totally agree- Febi and Meyle do try to pull wool over the eyes with GERMANY splattered all over the boxes when more often than not the items come from China etc. It’s borderline false advertising...... be careful out there!!
 
Yes you are correct- Febi are very much a mixed bag and I do not recommend them. However there are some exceptions to the rule. Such as the Febi flex discs (OE SGF boxed), Steering and tensioner dampers (OE Stabilus boxed) and the bearing kits IMO. (I’ve used Febi W124 bearing kits before with no issues) All other Febi parts (in particular rubber items) should be avoided like the plague!
Exactly! They rebox some OEM items which are good stuff. But you usually don't know until you receive the package. At least your bearing kit labels said "Made in Germany". :D


I totally agree- Febi and Meyle do try to pull wool over the eyes with GERMANY splattered all over the boxes when more often than not the items come from China etc. It’s borderline false advertising...... be careful out there!!
This practice drives me crazy. I think there are a couple of other brands that do the same thing.

:oldman:
 
Look what finally turned up!

IMG_6075.JPG

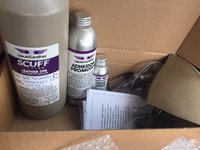
I’ve been looking forward to getting stuck into the seats in my CE. The drivers seat has a tear in the bolster. So next task is a DIY which will be detailed on here for full seat re-furbishment at home. This kit I got from Gliptone is their colour matching service. (Other dyes are available! -I have no affiliation with Gliptone whatsoever)

If you provide a 3x3 inch sample of the original leather they use a spectrometer to guarantee a 100% colour and sheen match of the OE leather (Their words!) My CE 3x3 sample was cut from the underside (least fading) of my knackered original arm rest. I bought their Airbrush too for applying the finish dye coats. Like any good paint or restoration job I expect 99% of the time will be on the prep work.

One Seat does not fold at all when pressing the button and the other seat folds but does not latch itself back upright :watchdrama:……. so that need’s repaired too. I’m hoping it’s only a matter of removing the back panel to both front seats and lubing the mechanism up.

The seat refurb DIY will detail:

Initial Cleaning + treatment to soften the leather
Gluing in a tear
Filling of defects / tears
Full clean / de-grease sanding
Priming the leather
Airbrushing on the Colour matched Dye

(What I am using is a one stage product – does not require a sealer. The ‘sheen’ is also matched to the OE leather by Gliptone in this instance with their ‘Scuffmaster’ dye)

I will post progress on here as I go through each step. I always wanted to learn how to restore my own seats so I guess the time is now - the Sportline steering wheel leather work gave me the confidence to try the seats next!
 
I'm following with anticipation. That's a strong guarantee. I did some cleanup with the blasting cabinet over the last week. Started with the Aluminum Oxide as well. The one thing i can pass along would be to strain the media now and then between projects. At one point things stopped working well and i found a mix of lint, paint chips and such would partially plug the suction hose. I used a household juice strainer to separate. Also limiting the media in the hopper to about about 3 liters of material to make this easier.
Good luck with the leather recondition.

drew
 
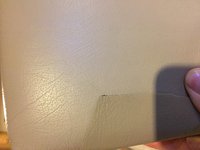
So I thought I’d get started on the armrest to test technique and more importantly – the Dye that it matches. What is very bizarre is firstly the sample I sent off appears to now be lighter than the rest of the interior. The next weird thing is the actual dye (Applied to one edge of the lighter sample) appears correct in some lights / angles to the original leather but also darker at times...... WTF!?

IMG_6081.JPG IMG_6083.JPG IMG_6084.JPG IMG_6085.JPG IMG_6086.JPG IMG_6087.JPG

It does not help matters that I am a picky – OCD nutjob! :) It appears I need to press on and do the front seats + armrest and assess the appearance VS the rear seats in the future. I do have enough dye mixed to do the whole interior if need be (1L). But I’d rather leave the rear seats original bar Air brushing in a few very minor marks. I am also going to be applying the dye to the front seats by Sponge –not Airbrush. I now think for large areas / re-coats sponge is best after testing on the Armrest.
 
I'm following with anticipation. That's a strong guarantee. I did some cleanup with the blasting cabinet over the last week. Started with the Aluminum Oxide as well. The one thing i can pass along would be to strain the media now and then between projects. At one point things stopped working well and i found a mix of lint, paint chips and such would partially plug the suction hose. I used a household juice strainer to separate. Also limiting the media in the hopper to about about 3 liters of material to make this easier.
Good luck with the leather recondition.

drew

Hi Drew- thanks for the tips! I do need to strain my media now too – there are bits floating in it. I think the cloth type stuff actually comes off the gloves. Those non slip ‘lumps’ blow off and turn into fibrous material. The pickup tube in my cabinet needs modified too. It is not a very good design. There are some great You Tube videos on the subject – these are common blast cabinet issues. Just one such video:


With the holidays now upon us I’m getting some much needed garage time! The ‘universal’ bushing puller kit turned up and I really like it. Very tough heavy duty kit and it did have the ideal sizes for pulling the w124 Diff Bushings. £73 to my door was a pretty great deal + this kit will do all manner of bushes not just the w124 Diff bushings. As Dave said I measured the original bushing position before pulling.

IMG_6132.JPG IMG_6133.JPG IMG_6134.JPG

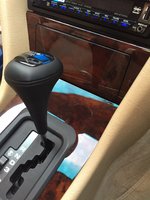
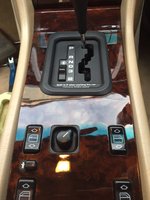
The next interior restore job on the 320CE was to replace the centre console as the original item had screw marks left in it – possibly from a prior phone install I’m not sure. I had a mint condition spare cream console so that was swapped in. And at the same time I polished the original wood. It was not cracked but looked quite worn / scratched. It took a LONG time to polish them back up but they look good now. (IIRC the gearshift surround took ~3 Hrs to polish out the scratches by hand!) Thanks again to member Mercepor for selling me the Sportline shifter!! I looks very nice in there. ( I did ‘restore’ the shifter but it was in great used condition anyway as he described)

Before:
IMG_6111.JPG

Re-installed (All wood was done not just the gearshift trim)

IMG_6142.JPG IMG_6143.JPG IMG_6138.JPG

The Sony stereo is obviously not original but it is staying. As I said before the CE restore does not need to be 100% original – this head unit was new in the car just before it was laid up. It has brilliant inbuilt Bluetooth which works with my I phone for hands-free phone calls and can stream music also. I tested it and it’s as clear as my w211 telephone system! Maybe in the future ill add a full set of Rainbow speakers.

I also got one rear window motor replaced today – and the other to be done tomorrow morning. With those huge CE doors I need the car outside to swing them fully open. I say motor; because the regulators never have issues (After removing / buying a half dozen spares!) just the motors stop. So it is possible to swap out only the window motor in situ. This worked great and retained the factory window alignment which is still spot on some 22 years later!
 
Last edited:
Being an inquisitive B$s&4rd I took the failed rear window motor of my c124 apart to see what went wrong. Inside the motor looked as good as new with no brush wear – WTF?

IMG_6155.JPG IMG_6156.JPG

On testing the continuity from the cable inwards I noticed a small item marked ‘Microtherm’ was not letting the power through. This is why the motor and likely – both in my CE failed. I’ve seen countless other CE’s with broken rear windows too in the yards....

IMG_6153.JPG

It seems a company called OTTER still makes the switches – Repair your failed W124 window regulator motor (and maybe others too) - Page 2 - PeachParts Mercedes-Benz Forum

So I’ve some searching to do but I intend to buy a half dozen spare Microtherm units and repair the 2x original motors as spares. Has anyone else reading this replaced these little buggers before? (On any Mercedes Window motor)
 
Last edited:
One Seat does not fold at all when pressing the button and the other seat folds but does not latch itself back upright :watchdrama:……. so that need’s repaired too. I’m hoping it’s only a matter of removing the back panel to both front seats and lubing the mechanism up.

OK soooooo I need to correct myself here. I did not appreciate that MB would over-engineer the folding seat situation on C124’s! The seat does not ‘latch’ – unless the doors are closed AND the engine is running. There are latches which are Vacuum operated to each seat and a controller solenoid under the rear seat. The Side release button on each front seat is actually a vacuum switch which interrupts the vacuum momentarily to allow the seat back to be released if the car is running and the doors are closed....... odd because I can’t see what situation would call for that. But in any case my passenger seat is actually functioning correctly. It is released all the time except when I shut the doors and start it up – it’s then locked upright. Pressing the button does also release it.


The strange thing is the driver’s side seat is locked upright all the time – even with the engine shut off etc. So there is an issue there. I checked the vacumm lines underneath that seat first and found this- (Some-one’s been here before! – perhaps a mis-infromed MOT tester / mechanic?)

IMG_6162.JPG


It should have been connected to this device under the seat-

IMG_6171.JPG


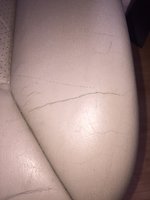
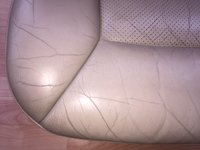
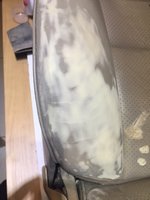
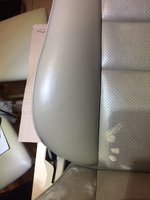
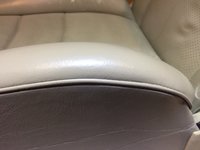
In any event I have the seat out to refurb so I will test / repair that backrest lock / release system out of the car. This is the first and worst seat to be re-conditioned. Some obligatory before pics-

IMG_6164.JPG IMG_6165.JPG IMG_6166.JPG IMG_6167.JPG IMG_6169.JPG IMG_6168.JPG


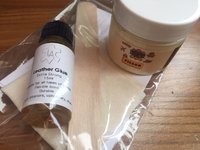
And the first products required after a deep clean and several applications of a conditioning cream – the leather feels like cardboard just now;

IMG_6170.JPG
 
Look what Santa brought- a nice Irish made Gas Soldering Iron! Had a quick rip on it already - very impressive how fast it heats up. I have lots of w124 jobs for this :p

Happy Christmas to you all - have a great one!

EDIT- I am also trying to put together a deal on another CE..... something I can drive now in the interim of my 320 being complete. I hope to be getting on a plane in a few days.....
 

Attachments

  • 9A6213AB-04E3-416D-98E4-71734C6283BA.jpeg
    9A6213AB-04E3-416D-98E4-71734C6283BA.jpeg
    2 MB · Views: 11
Last edited:
Re- the driver seat being locked upright all the time - It took me a while to spot it-

IMG_6205.JPG

I think this ranks as the most sneaky yet useless bodge I’ve encountered to date! With a mityvac I tested the vacuum module under the seat – 100% fine. (A reminder is CE seats stay unlocked unless the engine is running AND the doors shut). Hence vacuum draws the locks into place and holds the seat backs for driving. There are 2x spring loaded hooks connected via steel cables to this module. Under vacuum it pulls on the cables and closes the hooks - locking the backrests.

What someone did here was crimp on 2x steel ‘pipe’s to lock the backrest permanently upright (By limiting the movement of the cables)..... on a system which was functioning perfectly! I am quite certain whoever went to all this bother in the past had no clue how the system actually functioned :doof: Or rather - they are stupid :)
 
I have got more done on the CE since. Had the change out the other rear window regulator & motor complete since it was still sticking even after replacing the motor first. All good now. Also got the orangeing lower dash trim panel replaced with a good used one – so it now matches the dash & airbag cream colour again.


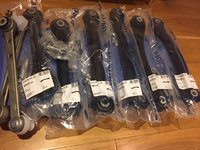
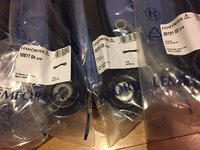
More parts have been ordered. A full Lemforder rear link set with hardware ref 33500 01. And 2 Febi 03567 Flex disc kits with hardware. If OE SGF is not in the Febi boxes when they turn up I will send em straight back. Corteco Diff seals also ordered. Everything else underneath in terms of the subframe mounts & hardware etc will only be Genuine MB Parts. Too many rubbish aftermarket parts out there nowadays.


The leather seat has been ‘soaking’ in leather care cream for a few days now so it's ready for filling & re-colouring shortly
 
This is the first and worst seat to be re-conditioned. Some obligatory before pics-

View attachment 71390 View attachment 71391 View attachment 71392 View attachment 71393 View attachment 71394 View attachment 71395


And the first products required after a deep clean and several applications of a conditioning cream – the leather feels like cardboard just now;

View attachment 71396

An update on the seat refurb – only now is the seat ready to go to the filler stage. It took a week of ‘soaking’ in Autogleam leather balm to give the leather back some softness. I applied about a dozen coatings allowing each one to soak in somewhat over a period of hours – although it never really took it all in each time. Not sure if the Autoglym is up to snuff I will try a different leather conditioning product on the next seat.


The leather cleaner I use – Dodo Juice Supernatural does also impart some softness. So this evening I give the seat a very thorough clean again to remove the leather balm residue. At last the leather feels soft & ‘alive’ again. Previously the headrest was making crunching noises when compressed as the leather was so hard. Now it’s soft, pliable and silent!


For the application of the dye I have settled on a Mini HVLP Spraygun as the Air Brush is simply too small to do entire seats IMO. The Mini spraygun appears to be the best option for spraying the seat dye. So this weekend the seat will be completed (and the next steps detailed thereafter).
 
I may as well post my ramblings on the leather restore as I go ;) Tonight’s task began with doing a final degrease on the leather before starting filler work. (Since the filler is water based you cannot wipe the seat again prior to applying the colour) For ‘final’ wipe / prep I used denatured alcohol. Wipe gently until some of the old dye begins to transfer:

IMG_6312.JPG

This means you are through any existing sealer coat and into the area where the original dye was applied – giving a much greater chance of success for the new dye to take properly. However I am also using other primer products to add even more adhesion – a belt & braces approach to ensure the repair lasts many years!

The rip / hole in the leather had a patch glued in from behind first:

IMG_6311.JPG IMG_6313.JPG

Then the first coat of filler applied – simply to take up the deep gaps:

IMG_6314.JPG

Sped up the filler drying with a hairdryer then sanded the area dry with 800 grit: (This stage also 'knocks back' any hard edges of the old damaged leather)

IMG_6315.JPG

The bolster now feels very smooth (Don't look at the repair - FEEL IT - just like when doing bodywork!)– this would likely be just fine but I went for another coat regardless:

IMG_6317.JPG IMG_6318.JPG

I used a wooden spatula to spread the filler on as smooth as possible trying to avoid hard edges which would be difficult to sand. I did my best to get it smooth on the compound curve – not great but it’ll obviously be sanded again. Next time with 1200 grit when it has had 24hours to fully cure.

This is the mini Spray Gun Iim intending to spray the seat with:

IMG_6320.JPG
 
I really enjoy your detailing these repairs however you are filling my head with new tools and products i have to have!

drew
Hi Drew,

Glad you like the repairs! And sorry for giving anyone ideas. But it happens to me also when browsing the forum if that’s any consolation :)


Tonight I sanded back the leather filler on the bolster which took way too long! 1200 grit sure is slow going. This was the second coat of filler sanded back:

IMG_6329.JPG

Then I decided to add a couple coats of dye just to the bolster. For 3 reasons.
1: Seal the filler since it’s such a large repair area.
2: Build up extra colour depth on the bolster subject to most wear.
3: Test how the finish would look so far in terms of the filler work.

Bolster before and so far into the repair:

IMG_6165.JPG IMG_6330.JPG

Still not great since the filler might be too thin to fully hide the previous defects. So now I’ll sand the bolster back to key it and apply 1 or two more fine layers of filler concentrating on removing the ridges. That should leave the bolster 'factory fresh' hopefully. This is the hardest bit to get repaired I think - the other cracks and dye application are fairly easy.
 
Joe,

I guess being a “Picky OCD-Nutjob” is Paying Off!!

To me that bolster looks great in the pic especially when compared to the original condition.
BUT your still not done you must be “SUPER OCD”

Keep up the good work and keep the pics coming.
I will look forward to your seat project completion with much anticipation.

Take Care
Happy New Year!!


And yes I will provide more updates on the leather repair very soon! A couple days should see this first seat through. Then the cream carpets need a serious cleaning before that seat goes back in & t’other seat removed for restoration. I have bought a new machine for cleaning the carpets & hope it will leave them very clean (Compared to just hovering and using bottle shampoo with cloths)
In the interim some more parts arrived for the CE: :jono:

IMG_6340.JPG IMG_6342.JPG

As Lowman recently posted the Lemforder kit is mostly made in Germany with 2x links made in Turkey. All top quality stuff and in some areas you can see the MB star ground off. (OE MB Parts)

I also got the Corteco Diff seals. It also looks like the MB part number was ground off them. (I presume Corteco are the OE supplier to MB for 124 Diff Seals)

IMG_6343.JPG IMG_6344.JPG
 
Yup, some Lemforder 124 suspension & steering items are now being produced in Turkey, with Lemforder strut mounts hecho in Brazil. For what I've seeon on the W211, it's a mix of Germany and Turkey. Hopefully the non-German stuff is the same quality we've come to expect from Lemforder in the past.

The OE seals are generally made by Bruss or CFW. The Corteco seals appear to be OEM, possibly reboxed, but are likely to be good stuff. Be careful with the pinion seal; if you over-tighten the pinion nut you'll destroy the diff bearings. The FSM procedure requires fancy special tools to measure the rotational force, but if you are using the same flange & nut, I think the general method is to mark the nut position and put it back where you found it.

:sawzall:
 
SEAT BOLSTER REPAIR TAKE 2:

OK so I have completed the bolster repair for now until I respray the whole seat. I am now going to wait until I have the other seat at the same stage and spray both on the same day since there is quite a bit of setting up I need to do in my garages before being ready to spray the seat. (May as well do both at one time)

I changed my sanding method as it wasn’t really working very well. This time stepping down to 400 grit dry for the initial sanding which make this sted WAY faster and easier but also allowed more cutting and shaping of the filler. The second and perhaps crucial change in sanding technique was using a wooden spreader wrapped in 400grit to gently shape the filler without compressing the cusion at all. Hardly any pressure applied at all – I just skimmed over the area again & again until the ripples and ridges got removed. (Previously I was sanding by hand only which was compressing the cushion at this compound curve and not helping to shape the filler) Gentle does it! The switch up to 800 and finish with 1200 grit.

I coated the bolster with dye for the reasons as stated in post number 883 above – but also because stippling the dye on with a sponge re-creates the leather surface texture and blends the repair in correctly. Just spraying it would make the bolster stand out as too smooth. After the other more minor filler repairs on this seat are completed the entire seat will be sprayed.

The stages since:

Sand down:

IMG_6349.JPG

Another layer of filler and sand again:

IMG_6353.JPG

Picture showing the sanding technique described in this post:

IMG_6359.JPG

Another layer of filler and sanded a final time:

IMG_6361.JPG

Completed bolster: Using the sponge creates the leather texture again also-

IMG_6364.JPG IMG_6365.JPG IMG_6366.JPG IMG_6367.JPG

The Flex disc pair also turned up – SGF in the Febi box :relieved:

IMG_6358.JPG
 
Looks great sir!

Thankyou! :) It does look good compared to how it was.

I should add that the leather filler is great stuff. The leather still feels soft & pliable over the whole repair area you really wouldn’t know the area was repaired at all. I think the filler material has a base of very fine ground leather since it also smells and feels like leather. There will be one final update on the leather DIY in a couple of weeks when the other seat has caught up and final spraying happens.
 
SEAT BOLSTER REPAIR TAKE 2:

OK so I have completed the bolster repair for now until I respray the whole seat. I am now going to wait until I have the other seat at the same stage and spray both on the same day since there is quite a bit of setting up I need to do in my garages before being ready to spray the seat. (May as well do both at one time)

I changed my sanding method as it wasn’t really working very well. This time stepping down to 400 grit dry for the initial sanding which make this sted WAY faster and easier but also allowed more cutting and shaping of the filler. The second and perhaps crucial change in sanding technique was using a wooden spreader wrapped in 400grit to gently shape the filler without compressing the cusion at all. Hardly any pressure applied at all – I just skimmed over the area again & again until the ripples and ridges got removed. (Previously I was sanding by hand only which was compressing the cushion at this compound curve and not helping to shape the filler) Gentle does it! The switch up to 800 and finish with 1200 grit.

I coated the bolster with dye for the reasons as stated in post number 883 above – but also because stippling the dye on with a sponge re-creates the leather surface texture and blends the repair in correctly. Just spraying it would make the bolster stand out as too smooth. After the other more minor filler repairs on this seat are completed the entire seat will be sprayed.

Thanks for describing your method. This undoubtedly be useful down the road when I have to repair my own leather. I hope actually that will be never... given the gymnastics I use the avoid stressing the bolster when entering/exiting the car!
 
Thanks for describing your method. This undoubtedly be useful down the road when I have to repair my own leather. I hope actually that will be never... given the gymnastics I use the avoid stressing the bolster when entering/exiting the car!

No problem! On the subject of avoiding bolster wear I’m practising entering & exiting the car via the Sunroof from now on :doh:
 
With the memory seats, i press the 1 and my seat moves to back position. Once i get in, no way for backside to hit bolster, start car and press 2 while warming up, getting me into drive position stored. Also check your lap belt rubbing the bolster at your preferred position. If legs permit, move seat 2 position back to avoid belt rub, extend steering wheel instead.
 
Calling all German speaking members! :)

https://m.ebay.co.uk/itm/ZIMMERMANN...746099?hash=item5413eff633:g:RkwAAOSwUoNaAWGP

Would you mind taking a look at the listing above to see that it is for a pair of 2x discs and Brake Pads which will fit late R129 Brembo Silver Arrow calipers? It’s for my 1992 500E

They are on sale and I’d like to buy this morning but the listing isn’t very good for me to understand fully! Any input would be most appreciated

I believe the discs I need are 334mm PN 1294212312

BTW I will be selling my late E500 SL600 calipers and discs if anyone is interested PM me
 
Last edited:
Nice looking set @ reasonable price but I know nothing. Do you already have the calipers?

Dave, Rouven or somebody will have to chime in on the fit.

Can’t you find a Zimmerman Catalog on line to check them out?
 
Nice looking set @ reasonable price but I know nothing. Do you already have the calipers?

Dave, Rouven or somebody will have to chime in on the fit.

Can’t you find a Zimmerman Catalog on line to check them out?

Yes I bought a used pair of Brembo calipers from Jeff just yesterday here They will be fitted to my 500E.

Drilled Rotors are my preference!

Disc Part numbers 1294212312 – I got from this thread: (Post #28)

Good idea on the catalogue Terry – I found one and looked up a 2001 SL - the image attached should be correct? That being said the ebay link appears to have the incorrect Zimmermann Ref no quoted……….

Zimmerman Cat.jpg Zimmerman Cat 2.jpg

EDIT- I have ordered the Brake Discs in the link directly below so if anyone see's a problem do let me know ASAP!

2x ATE Front Brake Discs Ventilé / Perforé 334mm 24.0132-0147.1 - Mister Auto 4006633259996 | eBay

And I found the Pad Part Numbers thanks to Dave's Site (PN 0034200820)
 
Last edited:
When upgrading the front E500E brakes to Silver Arrow, should the rear callipers be changed to SA Spec too? My 1992 is a Euro car – I ‘think’ they had larger rear brakes as std than USA models.

To confuse matters a little my 1992 500E already had the late E500 / SL600 ATE front upgrade callipers installed. I am considering doing some brake swapping across my w124’s! 500E gets silver arrow, E36 AMG gets the 500’s ‘old’ SL600 and 500E rear brakes, the 320CE gets the as new recon m104 front 4 pots from the E36 and it’s E420 rear vented brakes. The genuine 17 AMG wheels are going from the CE onto the E36 – they need to clear the SL600 callipers. Then the new 17 wheels and tyres on the E36 are going to go onto the 320CE. Phew…!

Thoughts & opinions welcome!
 
When upgrading the front E500E brakes to Silver Arrow, should the rear callipers be changed to SA Spec too? My 1992 is a Euro car – I ‘think’ they had larger rear brakes as std than USA models.
Yes, the rears should be upgraded to match, they should be 300mm diameter. Euro cars had the same rear brakes as USA through approximately March 1993 production (late 1993 USA model year), so your '92 would have had the smaller 278mm rears from the factory. For a 1992 vintage car you'll need to either cut the rear dust shield, or replace the shield with the larger size (which requires replacing the rear wheel bearings).


To confuse matters a little my 1992 500E already had the late E500 / SL600 ATE front upgrade callipers installed. I am considering doing some brake swapping across my w124’s! 500E gets silver arrow, E36 AMG gets the 500’s ‘old’ SL600 and 500E rear brakes, the 320CE gets the as new recon m104 front 4 pots from the E36 and it’s E420 rear vented brakes. The genuine 17 AMG wheels are going from the CE onto the E36 – they need to clear the SL600 callipers. Then the new 17 wheels and tyres on the E36 are going to go onto the 320CE. Phew…! Thoughts & opinions welcome!
Be careful... the late E500/SL600 front brakes (320mm) will require the late LCA's, same as the SA front 334mm Brembos. Or, to use the early LCA's, you need to cut a hole in the front dust shield AND grind the face of the LCA for clearance. I personally don't like this option, but several people have done it. You need at least 2mm air gap with no dust shield in between. With "correct" factory components, the air gap is 5-7mm and the dust shield occupies ~1mm of that gap.

:seesaw:
 
Pure opinion here, but it is opinion based partly on fact and partly on vast experimentation over the years, but in my opinion, there is absolutely zero reason to retrofit the later larger rear brakes on any car that was not originally equipped with them. The larger rear brakes were NOT done to “match” the larger front brakes, which if you remember, are frictionally IDENTICAL to the smaller front brakes. The larger rear brakes were done to accommodate the much greater rear brake bias during straight line braking by way of the switchable by a master cylinder that was introduced on the ECE vehicles at the same time. Indeed, regions other than the ECE that received the larger front discs in 3–93 production retained the smaller rear brakes. This was possible because those cars did NOT get the switchable bias master cylinder. A roughly similar situation remains in effect if you do the “SA“/late 129 front brakes. They are nearly frictionally identical to the late 500E/early 129.076 front brakes. Do the rears if you want, but it is absolutely not necessary. And while we’re talking about it, putting the larger rear brakes on a car that did not originally have them is a bit of a project, as well. The splash shield must either be extensively modified, that is to say, cut up, or, you have to pull the hubs, replace the wheel bearings and install the later version splash shields...
:klink:
 
Klink is correct with regards to the 320mm fronts. 320mm front brakes were used with 278mm rears in USA+Japan for all years of production; and 320mm fronts were used with 300mm rears (and different master cylinder bore sizes in the "switching" MC) in Europe for late production 036.

The 334mm fronts were never used from the factory with 278 rears. I'm certain Klink is correct that they are similar enough to work just fine for normal street use. The 300mm rears have larger pads than the 278 for more swept area, and the larger rotor diameter provides more brake torque, so there is a minor difference between the two. The rear 300 calipers/rotors are cheap, the main drawback is the dust shield modifications Klink described above.

:grouphug:
 

Attachments

  • pads_rear_all.jpg
    pads_rear_all.jpg
    123 KB · Views: 11
Back
Top