Hi everyone,
Been a member of this forum for a few years now and thought I would share some of the things that I have done to my 1994 E320 cabriolet. Hopefully this is ok to post here; some relevant E500E mods/maintenance on this car. I was far more interested in the w210s until I started doing more work on my 124. I did as much as I could that I felt comfortable with on my own but I did have a lot of help from people that knew more than me. I hope you find this interesting and helpful. I do also own a w210 which was at Legends 2017 that caught the eye of RicardoD, if there is any interested I can make a thread on that car as well.
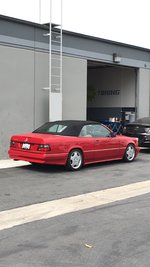
Purchased the car in November of 2014 with 109K miles. Imperial red 582 on parchment leather.

Car drove excellent at the time and everything except the outside temperature display worked. Changed the engine oil, transmission fluid, and differential fluid immediately. Car also needed a new cat to pass smog in CA, I know the cats generally do not go bad but later I found out the head gasket was replaced previously So I assume some water/oil may have made its way into the exhaust. Drove it without doing anything else except new brake fluid and coolant until 2017. Brakes squeaked a lot during this time. Also during this time I was collecting parts to put new suspension, big brakes, body kit and wheels on the car.


Found a cheap genuine AMG gen 2 front bumper, it was cracked in several spots and help together with zip ties. For the price I couldn't complain.

Planned to take the car to Legends of the Autobahn 2017 so I decided to repair and install the front bumper and complete the rest of the kit with fiberglass reproduction parts until I could find the genuine ones later.


Unfortunately my body shop convinced me that using a reproduction front bumper was easier and most cost effective to mount and paint than my cracked genuine piece. The car was not completed in time and did not make the event. Which in hind sight was a blessing because the fitment of the front reproduction bumper was terrible. The side skirts and rear bumper were actually very good and I was able to compare those pieces side by side with my friends genuine ones and they were identical minus the side skirts not having jack hole covers.

Put dark amber corners from Hella on and took it up to angeles crest. The car began to leak a noticeable amount of oil during this time.

Picked up R129 SL Silver Arrow brake calipers that were refinished from @captruff

Started piecing the genuine bumper together, new hook hook cover, fog lights fitted. I chose to tint the fog lights because the glass on them had many imperfections and the tint hid them very well.


Bought a euro trunk insert from @JC220. Thanks!

Genuine bumper repaired and painted along with a good impact strip.

Comparing the real pieces to the replica. Front wasn't even close. Rear was spot on and fitment was excellent. Skirts were good as well minus not having the jack hole cover.


Oil leak kept getting worse so me and my friend who knows these cars very well found that the oil was coming from the rear corner of the cylinder head. Bought the updated head gasket, new head bolts, and anything associated with/while your in there/etc. So many parts not pictured but basically the top and front of the motor and cooling parts will be new.


Found a set of gently used H&R cabriolet springs and paired them with new Koni shocks. So naturally now I bought new front suspension parts as well. Also managed to find a sport line sedan steering box.

My wind deflector was missing when I bought the car so I was able to find one a few years later. Made a massive difference in the cabin. On my way to pick up the deflector my car developed a constant misfire.


Valve cover gasket was wasted so it leaked oil into the plugs and wires. Killed a coil. Replaced plugs with factory ones and put in a new coil. Misfire gone.


Up until now the progress had been extremely slow on the car. It wasn't until summer of 2019 that work started to get done. Finally got around to installing some of the parts I was collecting. I had the monoblocks refinished a 2nd time after they started peeling that's why they are off and in the photo. Also at this point there was a ton of brake and suspension work lined up so I decided to to that first.

H&R vs stock

Nickel plated rotors, new Koni shocks, Rebuilt silver arrow brake calipers

New stainless steel brake lines front and rear

C36 AMG steering wheel

Euro trunk panel installed and new tail lights.

Put the genuine front bumper on and wired in the fogs. The correct factory wiring harness is NLA so I chose to have the bumper fog lights to turn on with the headlight ones. Also the correct fog light for AMG gen 2 bumper is an auxiliary high beam, I am using a C36 fog which is the correct beam pattern to be used as a fog light.

Installed new bottles, powder coated valve cover.

Wasn't able to do the head gasket and the associating parts this round. After finishing the work on the car very late I woke up early the next day to get an alignment asap.


Was able to get the car back from alignment in a reasonable time. Went to the exhaust shop next. Had the correct for gen 2 square tips put on in as close to the correct location as possible while retaining the stock muffler. Tips are off a w202 C36 AMG.


Loved the car now that it was getting dialed in and shaping up to be what I wanted when I got it. Enjoyed it so much, drove it for another year without issue minus the oil on the floor which was bad but not getting worse. Car never over heated so I figured I had some time.


Had a small gathering of some local 124s in early 2020. Nearly every variant, A124, C124, S124, W124, 036


Was having a great time driving it. Definitely noticed all the things wrong with the car though. Even though when I got the car it drove good, it basically needed one of everything. Car was still fine to drive but unfortunately the last time I had it out the top tonneau cover latch stopped working. I had previously replaced this part. I was not able to repair the part so it was time to fix whatever else I needed. The final thing I did before more work began. Found some LEDs that had a good beam pattern in a color temperature I liked. The main headlight and bumper fog match perfectly, the fog in the headlight is a little more blue. Also for those wondering the bulb out indicator in the cluster does not trigger with the LEDs I used. Brand is "Auxito" you can easily find them on amazon.


Pulling the head off

Turns out the previous owner did the head gasket before but used a victor reinz which did not have the reinforcements like the updated factory one and reused the headbolts which were visibly stretched.

After some cleaning

Head sent out to machine shop and examined. Luckily the head wasn't warped.

Front timing cover removal for timing chain replacement. Tons of oil everywhere and we discovered that the fan bearing bracket needed to be replaced.

Timing chain at 119k miles. If you look closely you will see that it is stretched. This job is a little easier with the head off. I highly recommend you do this if you are doing a head gasket. New guides and tensioner are being installed too.

Taking the interior apart to access the top hydraulics that are leaking.

Saw my diff mounts were wasted so I borrowed my friends tool and pressed in some new ones. When we removed the diff we saw it was leaky, checked fluid level and it was fine, but as a precautionary measure I am having it resealed.


Got the resealed diff back in with new mounts and flex discs. Decided to replace the center support, flex disc, and transmission mount as well. The original mount was still on the car and the rubber was done, a lot of movement with not much force. Flex disc showed signs of wear but was replaced at one point. Center support had some play in it but was usable. Used a puller tool to pull the old bearing off. Pressed in the new bearing in the new support, used a "custom" tool to press the bearing on the driveshaft. We had to pull the exhaust off to get to the driveshaft, on the cabriolet you have to remove the driver side rear chassis brace to be able to do this easily. I also replaced some worn out exhaust hangers as well. It looks like I will also have to replace the bolts for my chassis brace as well. Also used this opportunity to clean the oil under the car. A lot of it got everywhere from it leaking from the back of the cylinder head and flying down the rest of the car while the car was in motion.
Exhaust removed in one piece. Magnaflow carb legal cat that I've been using for the last 6 years

Resealed diff installed with new mounts and flex disc

Trans mount and front flex disc removal

Original transmission mount.

Comparison of new and old.

AMG fender spacer kit installed. I technically used the incorrect w201 kit which includes and extra spacer for the bumper, but this I highly recommend as it improves clearance for the wheels and in my opinion improves the fitment of the bumper and fender. The spacers push the fender out 15mm. In the pictures you can see that the tire is less visible. Install is easy. For doing the lower part by the side skirt you will have to remove the cladding which might break some clips so you should have some on hand if you want to do that.


Somehow one of my headlights developed a crack to where the lens mounts to the housing. So naturally I thought it's the perfect time to upgrade them to euro E500 units which I somehow found at the exact time I needed them. I did a thread on removing the old lamin-x that they came with.


Swapped my LEDs into them


This was the first experience I had with nickel plated rotors. Turns out the pads take way too long to take away the material on the braking surface of the rotor, I had them resurfaced and this solved all the brake issues I had.

Got the new chain on and peen'd and the head back on

Cams installed and timing set. Got the valve cover back on, intake and exhaust hooked up. Very close just a few more odds and ends to wrap up

We got the car back together and fired her up. Idle was jumpy but otherwise everything was fine. No leaks thankfully and everything working optimally. So I began chasing down the poor idle. Checked everything and could not figure it out. My friend pointed out to me that the harness to the throttle body was made of eco junk and mine looked like it was original. Luckily my friend had a part number matching core I was able to use and me and my friend redid all the wiring. Got that done late at night. Decided to swap it in and thankfully that was my issue. So PSA to anyone who hasn't done the upper, lower, and throttle body harness, just redo all of them if they haven't been done yet.

Replaced what looked like the cabin air filters that the factory put in back in 1993

While there was some down time I decided to put all the documents of my cars into a binder and make it look pretty.


Old service records I found in the service booklet inside the owners manual pouch!

Becker traffic pro installed which gives me the option of auxiliary input which then allows me to hook up a bluetooth streamer to it. Also noticed that it improved the sound quality coming out of the stock speakers. Love the factory look it still retains while giving it some modern features.

And this is what the narrow skirts look like now with the widened front fenders from the AMG spacer kit. This is another inaccuracy of the aftermarket skirts, the genuine ones are made to sit flush with the spacer kit.

Ruff day


And this wraps up my head gasket project. Started on June 1st, "completed" August 30th. I consider the throttle body rewiring to be the thing that completed this project since the idle was so poor before the car was not enjoyable to drive. That was completed today September 19th. So this project took me about 10-12 weeks. Unfortunately a lot of stuff came up as the car was being taken apart so there was a considerable amount of time waiting on parts, also some areas where I didn't feel my knowledge was adequate I had to wait for my tech friends who knew what they were doing. So in conclusion I am over my initial timeline by 3-4x of what I thought it would be and about 2-3x over budget. Now my car is completely up to date on mechanicals. No leaks, everything working as intended. Totally worth it in my opinion, not many 124s on the road today that have had all their issues addressed. Puts a smile on my face every time I drive it. So now my future plans are to drive this car as often as I can!
Been a member of this forum for a few years now and thought I would share some of the things that I have done to my 1994 E320 cabriolet. Hopefully this is ok to post here; some relevant E500E mods/maintenance on this car. I was far more interested in the w210s until I started doing more work on my 124. I did as much as I could that I felt comfortable with on my own but I did have a lot of help from people that knew more than me. I hope you find this interesting and helpful. I do also own a w210 which was at Legends 2017 that caught the eye of RicardoD, if there is any interested I can make a thread on that car as well.
Purchased the car in November of 2014 with 109K miles. Imperial red 582 on parchment leather.
Car drove excellent at the time and everything except the outside temperature display worked. Changed the engine oil, transmission fluid, and differential fluid immediately. Car also needed a new cat to pass smog in CA, I know the cats generally do not go bad but later I found out the head gasket was replaced previously So I assume some water/oil may have made its way into the exhaust. Drove it without doing anything else except new brake fluid and coolant until 2017. Brakes squeaked a lot during this time. Also during this time I was collecting parts to put new suspension, big brakes, body kit and wheels on the car.
Found a cheap genuine AMG gen 2 front bumper, it was cracked in several spots and help together with zip ties. For the price I couldn't complain.
Planned to take the car to Legends of the Autobahn 2017 so I decided to repair and install the front bumper and complete the rest of the kit with fiberglass reproduction parts until I could find the genuine ones later.
Unfortunately my body shop convinced me that using a reproduction front bumper was easier and most cost effective to mount and paint than my cracked genuine piece. The car was not completed in time and did not make the event. Which in hind sight was a blessing because the fitment of the front reproduction bumper was terrible. The side skirts and rear bumper were actually very good and I was able to compare those pieces side by side with my friends genuine ones and they were identical minus the side skirts not having jack hole covers.
Put dark amber corners from Hella on and took it up to angeles crest. The car began to leak a noticeable amount of oil during this time.
Picked up R129 SL Silver Arrow brake calipers that were refinished from @captruff
Started piecing the genuine bumper together, new hook hook cover, fog lights fitted. I chose to tint the fog lights because the glass on them had many imperfections and the tint hid them very well.
Bought a euro trunk insert from @JC220. Thanks!
Genuine bumper repaired and painted along with a good impact strip.
Comparing the real pieces to the replica. Front wasn't even close. Rear was spot on and fitment was excellent. Skirts were good as well minus not having the jack hole cover.
Oil leak kept getting worse so me and my friend who knows these cars very well found that the oil was coming from the rear corner of the cylinder head. Bought the updated head gasket, new head bolts, and anything associated with/while your in there/etc. So many parts not pictured but basically the top and front of the motor and cooling parts will be new.
Found a set of gently used H&R cabriolet springs and paired them with new Koni shocks. So naturally now I bought new front suspension parts as well. Also managed to find a sport line sedan steering box.
My wind deflector was missing when I bought the car so I was able to find one a few years later. Made a massive difference in the cabin. On my way to pick up the deflector my car developed a constant misfire.
Valve cover gasket was wasted so it leaked oil into the plugs and wires. Killed a coil. Replaced plugs with factory ones and put in a new coil. Misfire gone.
Up until now the progress had been extremely slow on the car. It wasn't until summer of 2019 that work started to get done. Finally got around to installing some of the parts I was collecting. I had the monoblocks refinished a 2nd time after they started peeling that's why they are off and in the photo. Also at this point there was a ton of brake and suspension work lined up so I decided to to that first.
H&R vs stock
Nickel plated rotors, new Koni shocks, Rebuilt silver arrow brake calipers
New stainless steel brake lines front and rear
C36 AMG steering wheel
Euro trunk panel installed and new tail lights.
Put the genuine front bumper on and wired in the fogs. The correct factory wiring harness is NLA so I chose to have the bumper fog lights to turn on with the headlight ones. Also the correct fog light for AMG gen 2 bumper is an auxiliary high beam, I am using a C36 fog which is the correct beam pattern to be used as a fog light.
Installed new bottles, powder coated valve cover.
Wasn't able to do the head gasket and the associating parts this round. After finishing the work on the car very late I woke up early the next day to get an alignment asap.
Was able to get the car back from alignment in a reasonable time. Went to the exhaust shop next. Had the correct for gen 2 square tips put on in as close to the correct location as possible while retaining the stock muffler. Tips are off a w202 C36 AMG.
Loved the car now that it was getting dialed in and shaping up to be what I wanted when I got it. Enjoyed it so much, drove it for another year without issue minus the oil on the floor which was bad but not getting worse. Car never over heated so I figured I had some time.
Had a small gathering of some local 124s in early 2020. Nearly every variant, A124, C124, S124, W124, 036
Was having a great time driving it. Definitely noticed all the things wrong with the car though. Even though when I got the car it drove good, it basically needed one of everything. Car was still fine to drive but unfortunately the last time I had it out the top tonneau cover latch stopped working. I had previously replaced this part. I was not able to repair the part so it was time to fix whatever else I needed. The final thing I did before more work began. Found some LEDs that had a good beam pattern in a color temperature I liked. The main headlight and bumper fog match perfectly, the fog in the headlight is a little more blue. Also for those wondering the bulb out indicator in the cluster does not trigger with the LEDs I used. Brand is "Auxito" you can easily find them on amazon.
Pulling the head off
Turns out the previous owner did the head gasket before but used a victor reinz which did not have the reinforcements like the updated factory one and reused the headbolts which were visibly stretched.
After some cleaning
Head sent out to machine shop and examined. Luckily the head wasn't warped.
Front timing cover removal for timing chain replacement. Tons of oil everywhere and we discovered that the fan bearing bracket needed to be replaced.
Timing chain at 119k miles. If you look closely you will see that it is stretched. This job is a little easier with the head off. I highly recommend you do this if you are doing a head gasket. New guides and tensioner are being installed too.
Taking the interior apart to access the top hydraulics that are leaking.
Saw my diff mounts were wasted so I borrowed my friends tool and pressed in some new ones. When we removed the diff we saw it was leaky, checked fluid level and it was fine, but as a precautionary measure I am having it resealed.
Got the resealed diff back in with new mounts and flex discs. Decided to replace the center support, flex disc, and transmission mount as well. The original mount was still on the car and the rubber was done, a lot of movement with not much force. Flex disc showed signs of wear but was replaced at one point. Center support had some play in it but was usable. Used a puller tool to pull the old bearing off. Pressed in the new bearing in the new support, used a "custom" tool to press the bearing on the driveshaft. We had to pull the exhaust off to get to the driveshaft, on the cabriolet you have to remove the driver side rear chassis brace to be able to do this easily. I also replaced some worn out exhaust hangers as well. It looks like I will also have to replace the bolts for my chassis brace as well. Also used this opportunity to clean the oil under the car. A lot of it got everywhere from it leaking from the back of the cylinder head and flying down the rest of the car while the car was in motion.
Exhaust removed in one piece. Magnaflow carb legal cat that I've been using for the last 6 years
Resealed diff installed with new mounts and flex disc
Trans mount and front flex disc removal
Original transmission mount.
Comparison of new and old.
AMG fender spacer kit installed. I technically used the incorrect w201 kit which includes and extra spacer for the bumper, but this I highly recommend as it improves clearance for the wheels and in my opinion improves the fitment of the bumper and fender. The spacers push the fender out 15mm. In the pictures you can see that the tire is less visible. Install is easy. For doing the lower part by the side skirt you will have to remove the cladding which might break some clips so you should have some on hand if you want to do that.
Somehow one of my headlights developed a crack to where the lens mounts to the housing. So naturally I thought it's the perfect time to upgrade them to euro E500 units which I somehow found at the exact time I needed them. I did a thread on removing the old lamin-x that they came with.
Swapped my LEDs into them
This was the first experience I had with nickel plated rotors. Turns out the pads take way too long to take away the material on the braking surface of the rotor, I had them resurfaced and this solved all the brake issues I had.
Got the new chain on and peen'd and the head back on
Cams installed and timing set. Got the valve cover back on, intake and exhaust hooked up. Very close just a few more odds and ends to wrap up
We got the car back together and fired her up. Idle was jumpy but otherwise everything was fine. No leaks thankfully and everything working optimally. So I began chasing down the poor idle. Checked everything and could not figure it out. My friend pointed out to me that the harness to the throttle body was made of eco junk and mine looked like it was original. Luckily my friend had a part number matching core I was able to use and me and my friend redid all the wiring. Got that done late at night. Decided to swap it in and thankfully that was my issue. So PSA to anyone who hasn't done the upper, lower, and throttle body harness, just redo all of them if they haven't been done yet.
Replaced what looked like the cabin air filters that the factory put in back in 1993
While there was some down time I decided to put all the documents of my cars into a binder and make it look pretty.
Old service records I found in the service booklet inside the owners manual pouch!
Becker traffic pro installed which gives me the option of auxiliary input which then allows me to hook up a bluetooth streamer to it. Also noticed that it improved the sound quality coming out of the stock speakers. Love the factory look it still retains while giving it some modern features.
And this is what the narrow skirts look like now with the widened front fenders from the AMG spacer kit. This is another inaccuracy of the aftermarket skirts, the genuine ones are made to sit flush with the spacer kit.
Ruff day
And this wraps up my head gasket project. Started on June 1st, "completed" August 30th. I consider the throttle body rewiring to be the thing that completed this project since the idle was so poor before the car was not enjoyable to drive. That was completed today September 19th. So this project took me about 10-12 weeks. Unfortunately a lot of stuff came up as the car was being taken apart so there was a considerable amount of time waiting on parts, also some areas where I didn't feel my knowledge was adequate I had to wait for my tech friends who knew what they were doing. So in conclusion I am over my initial timeline by 3-4x of what I thought it would be and about 2-3x over budget. Now my car is completely up to date on mechanicals. No leaks, everything working as intended. Totally worth it in my opinion, not many 124s on the road today that have had all their issues addressed. Puts a smile on my face every time I drive it. So now my future plans are to drive this car as often as I can!
Attachments
Last edited:


