• Hi Guest !

    Welcome to the 500Eboard forum.

    Since its founding in late 2008, 500Eboard has become the leading resource on the Internet for all things related to the Mercedes-Benz 500E and E500. In recent years, we have also expanded to include the 400E and E420 models, which are directly related to the 500E/E500.

    We invite you to browse and take advantage of the information and resources here on the site. If you find helpful information, please register for full membership, and you'll find even more resources available. Feel free to ask questions, and make liberal use of the "Search" function to find answers.

    We hope you will become an active contributor to the community!

    Sincerely,
    500Eboard Management

OWNER Prometey (E320)

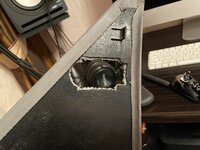
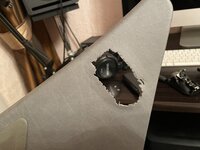
Removed the gas equipment control unit and left a hole. in my country, such an option without a vacuum regulator was not supplied ((

Please tell me the part number. Thanks.
 

Attachments

  • 4C6B9970-5C73-4F95-B66B-00DD9C7EB73C.jpeg
    4C6B9970-5C73-4F95-B66B-00DD9C7EB73C.jpeg
    328 KB · Views: 5
  • 9A88139D-0B2E-4888-B5BE-4449D480657C.jpeg
    9A88139D-0B2E-4888-B5BE-4449D480657C.jpeg
    2.7 MB · Views: 5
I think you are looking for A124 680 21 65. That's the one for electrically adjustable steering wheel. Unfortunately it is not available for about 3 years now, and I could not find a used one in good condition (actually it is unbelievably hard to find it in any condition). Instead you can look for A124 680 16 65 and cut in appropriate holes for cover (what I see has been done also in the current one). A124 680 16 65 seems to be not available at the dealer, but it's much easier to find used ones in good condition.
 
I think you are looking for A124 680 21 65. That's the one for electrically adjustable steering wheel. Unfortunately it is not available for about 3 years now, and I could not find a used one in good condition (actually it is unbelievably hard to find it in any condition). Instead you can look for A124 680 16 65 and cut in appropriate holes for cover (what I see has been done also in the current one). A124 680 16 65 seems to be not available at the dealer, but it's much easier to find used ones in good condition.
A1246802165 gives out a part with a hole for a vacuum regulator
 
The USA version is A1246802765 if that helps? Should have no hole for vacuum regulator, and is used *with* adjustable / telescopic steering column.
 
I'm tired of low-quality brushes from different manufacturers, frameless, hybrid. None of them clean the windshield properly.
Original Mercedes-Benz W124 wiper blade. Will take its place in the spring.
 

Attachments

  • DE0D72C0-CBA7-4532-A3FA-A0D6E10CE1AA.jpeg
    DE0D72C0-CBA7-4532-A3FA-A0D6E10CE1AA.jpeg
    206.4 KB · Views: 14
  • 2D9F1DF3-F6D1-45A2-B9F9-3746A8FB05B3.jpeg
    2D9F1DF3-F6D1-45A2-B9F9-3746A8FB05B3.jpeg
    261.5 KB · Views: 12
I still have mine from factory and change the rubber blade itself from MB.

my yellow grip indicator is just a dot. I never knew it was an icon for you to place the thumb when handling it. Thanks for the pic for me to zoom.
 
The USA version is A1246802765 if that helps? Should have no hole for vacuum regulator, and is used *with* adjustable / telescopic steering column.
unfortunately it was rejected. out of stock neither in Russia nor in Europe. hope only for the help of American friends😊
 
Mercedes-Benz Becker Exquisit BE1691.
Built-in bluetooth module.
 

Attachments

  • BC2ADFFB-B161-4FAB-81DD-DF0929C0D38B.jpeg
    BC2ADFFB-B161-4FAB-81DD-DF0929C0D38B.jpeg
    1.7 MB · Views: 7
  • 40947288-F696-4EF9-80D2-779782B5CDD2.jpeg
    40947288-F696-4EF9-80D2-779782B5CDD2.jpeg
    1.6 MB · Views: 7
  • 51003DED-1A6F-45F3-A6EC-60BC508A7C0B.jpeg
    51003DED-1A6F-45F3-A6EC-60BC508A7C0B.jpeg
    2 MB · Views: 7
Bought a headlight cleaner kit.
Most likely I will install on a separate button.
 

Attachments

  • 07FB8C2E-64F5-434D-9D46-41064FE8910B.jpeg
    07FB8C2E-64F5-434D-9D46-41064FE8910B.jpeg
    163.8 KB · Views: 9
My current Pioneer car audio system is connected through an amplifier. Tell me how to connect Becker to this system?
 

Attachments

  • 348D15F4-D59B-47C8-BE73-14F9A51EF9EC.jpeg
    348D15F4-D59B-47C8-BE73-14F9A51EF9EC.jpeg
    206.7 KB · Views: 6
  • 47C517D6-AA11-495D-898E-F1E0655CF433.jpeg
    47C517D6-AA11-495D-898E-F1E0655CF433.jpeg
    228.1 KB · Views: 6
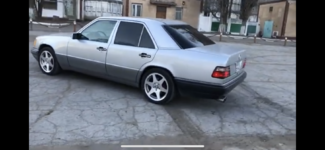
I want to paint the whole car. but here's a puzzle for me. paint code 744 is the same for American and European version cars. but the actual color in the American versions is different. what is the difference between them? I think it can be painted in 775? what do you suggest? Thank you
 
744 Brilliant Silver is the same color worldwide. If you see anything different, it isn't factory.

Do you have more details about what you are seeing that is different?

Of course you can repaint in any color you want, just depends if you are trying to keep the car original or not.

:seesaw:
 
i can't explain in words but i can see the difference in silver colors w124, w210, w140. as if in the American versions the color is deeper and more expressive)
 
744 Brilliant Silver is the same color worldwide. If you see anything different, it isn't factory. Do you have more details about what you are seeing that is different?

Of course you can repaint in any color you want, just depends if you are trying to keep the car original or not.
I don’t like silver at all, but it so happened that w124 of the American version in my country is the same silver. But I don't want to repaint it completely in a different color. and I don't want my car's silver color blending into the w124 silver mass in my area.
 
I don’t like silver at all, but it so happened that w124 of the American version in my country is the same silver. But I don't want to repaint it completely in a different color. and I don't want my car's silver color blending into the w124 silver mass in my area.

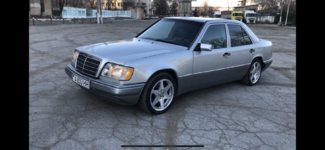
@Prometey Personally I think your car looks fantastic as it is. I compared the first pictures of your car with your latest YouTube video images and I think the improvement is 💯💯💯😍😍.

In conjunction with replacing your original wretched wheels with these smart looking ones, I love the two-tone look of your car. In particular, the lower panels seem darker than before, which to my eye looks much better.

With the changed lighting, my personal taste would be to keep your car’s exterior as it is. It looks very handsome and it looks perfect - you are not trying to make your car something that it was not.

Celebrate the 80s design of your car in all of its proper context!

5D377ADE-3002-43E2-AD39-BEB198552D50.png 15722997-EB51-4CCD-A2EB-FD9B31CCA2E5.png CC5FA97A-D48B-4C8D-9BB4-5FE182503074.png
 
I want to paint the whole car. but here's a puzzle for me. paint code 744 is the same for American and European version cars. but the actual color in the American versions is different. what is the difference between them? I think it can be painted in 775? what do you suggest? Thank you

Are you comparing photos on the internet of American 744 cars with cars that you see in Moldova, or are you comparing your American 744 car in Moldova with other cars in Moldova?

If the answer is the former, then a lot of the difference might be the fact that the sun is at a different angle / ocean reflections / smog.
 
@Prometey Personally I think your car looks fantastic as it is. I compared the first pictures of your car with your latest YouTube video images and I think the improvement is 💯💯💯😍😍.

In conjunction with replacing your original wretched wheels with these smart looking ones, I love the two-tone look of your car. In particular, the lower panels seem darker than before, which to my eye looks much better.

With the changed lighting, my personal taste would be to keep your car’s exterior as it is. It looks very handsome and it looks perfect - you are not trying to make your car something that it was not.

Celebrate the 80s design of your car in all of its proper context!

View attachment 146965 View attachment 146966 View attachment 146967
since the purchase, the color of the car has not changed, just different lighting and different cameras for shooting. Everything looks great from a distance, but upon closer inspection it is clear that the car was tinted in many places, and at different times, so the car has at least three different shades of silver and I don’t know which part still has its native color
 
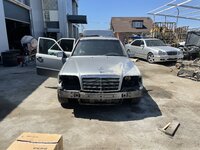
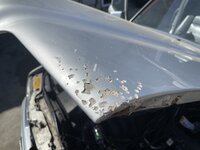
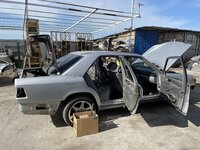
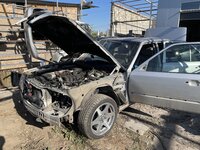
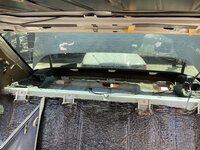
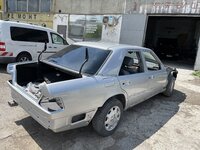
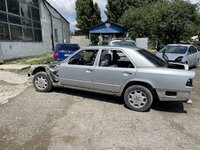
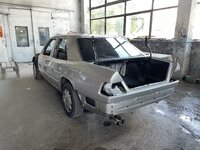
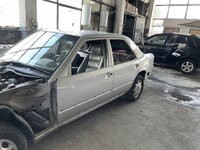
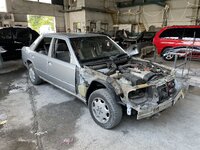
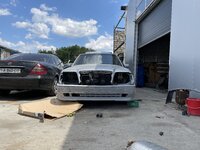
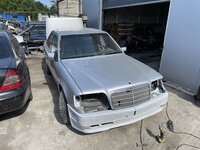
started dismantling the car and met a lot of interesting things. in the old car, the car is almost not subject to corrosion, but the front end is in a deplorable state. the previous owner, instead of a proper repair, limited himself to applying putty to the fender and hood, and things are sad under the putty. I removed the rear shelf to install the electric blind.
 

Attachments

  • 541EB134-D7F3-440F-BB11-AB8288AE2AA7.jpeg
    541EB134-D7F3-440F-BB11-AB8288AE2AA7.jpeg
    3.6 MB · Views: 12
  • 04311577-1C9E-4DC4-A815-72D53D13D5EA.jpeg
    04311577-1C9E-4DC4-A815-72D53D13D5EA.jpeg
    2.2 MB · Views: 13
  • 2BB3D7FC-875B-4896-B403-6D1E0850991E.jpeg
    2BB3D7FC-875B-4896-B403-6D1E0850991E.jpeg
    3.6 MB · Views: 13
  • 14222FC6-E247-48FB-A60A-AE60F5D6ADEB.jpeg
    14222FC6-E247-48FB-A60A-AE60F5D6ADEB.jpeg
    3.9 MB · Views: 13
  • 48DE34C3-1F3F-4D64-8E93-8F86052A606B.jpeg
    48DE34C3-1F3F-4D64-8E93-8F86052A606B.jpeg
    3.6 MB · Views: 13
  • 9C5946A2-9BF5-4604-959B-5B471B05EEB1.jpeg
    9C5946A2-9BF5-4604-959B-5B471B05EEB1.jpeg
    2.7 MB · Views: 13
  • 45BFE5BC-0AF6-46FC-87FD-72EA922CC423.jpeg
    45BFE5BC-0AF6-46FC-87FD-72EA922CC423.jpeg
    4.4 MB · Views: 10
  • 231196DA-94F1-405E-822C-0E3CC373664B.jpeg
    231196DA-94F1-405E-822C-0E3CC373664B.jpeg
    4 MB · Views: 9
  • CA617EEE-85F1-4C62-BA1F-8A08A1869796.jpeg
    CA617EEE-85F1-4C62-BA1F-8A08A1869796.jpeg
    3.1 MB · Views: 10
  • E782811C-26F8-49F2-A036-A703E04CEE7A.jpeg
    E782811C-26F8-49F2-A036-A703E04CEE7A.jpeg
    3.6 MB · Views: 11
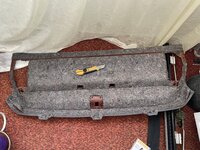
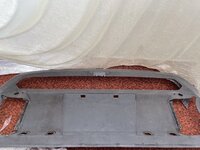
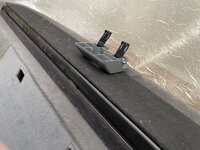
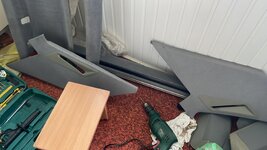
Started preparing for the installation of electric shutters. I bought a stand for the third stop signal version for installation with a curtain. They gave me a gray shelf, from which I will take the material for plywood lining of the curtain. Tell me where and how the stand for the third brake light is attached?
 

Attachments

  • 8519F1CC-676B-4A3B-B628-2F10A6CA02AD.jpeg
    8519F1CC-676B-4A3B-B628-2F10A6CA02AD.jpeg
    5.1 MB · Views: 5
  • 8D81CA69-2C9B-458E-B236-4C7264A49A27.jpeg
    8D81CA69-2C9B-458E-B236-4C7264A49A27.jpeg
    4.6 MB · Views: 4
  • 256FE979-1355-4F59-8294-F1E97D599998.jpeg
    256FE979-1355-4F59-8294-F1E97D599998.jpeg
    5.1 MB · Views: 4
  • A5647644-AD64-4152-BD2A-9DFDBC47BDFE.jpeg
    A5647644-AD64-4152-BD2A-9DFDBC47BDFE.jpeg
    4.4 MB · Views: 4
  • 4B0018C1-48BF-4180-8E12-F7A9209EACE9.jpeg
    4B0018C1-48BF-4180-8E12-F7A9209EACE9.jpeg
    3.9 MB · Views: 5
  • 9CA7C250-2E1F-48F4-8ADF-37C3F926226C.jpeg
    9CA7C250-2E1F-48F4-8ADF-37C3F926226C.jpeg
    3.5 MB · Views: 5
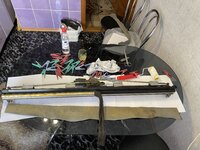
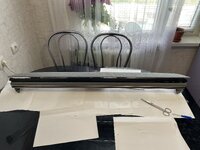
Tailoring.

The last two days I have been working on a bread box and a curtain.

Armed with glue, brushes, solvent and scissors, I felt like a tailor.

Pasted over the bar of the electric shutter. And I decided to take the risk of replacing the lower part of the electric shutter with the gray material that remained after cutting.

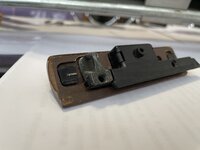
I glued the vinyl on the bread box, glued the wood of the bread box curtains. But I haven’t figured out how to make the broken part of the guide bread box yet, maybe someone has an idea?)
 

Attachments

  • B2D562F6-682B-42F5-9E40-150C926420C5.jpeg
    B2D562F6-682B-42F5-9E40-150C926420C5.jpeg
    4.6 MB · Views: 13
  • 87B292D9-63E1-4572-B3EF-052FAC4B17B3.jpeg
    87B292D9-63E1-4572-B3EF-052FAC4B17B3.jpeg
    2.9 MB · Views: 10
  • 44960200-6AFF-41AA-9A44-D41EDEF57313.jpeg
    44960200-6AFF-41AA-9A44-D41EDEF57313.jpeg
    4.3 MB · Views: 10
  • 453A991A-5AB9-46A3-9AF4-0C39F1D8F660.jpeg
    453A991A-5AB9-46A3-9AF4-0C39F1D8F660.jpeg
    4.6 MB · Views: 9
  • F08CC409-031F-4D49-9222-40B4CE3ED65B.jpeg
    F08CC409-031F-4D49-9222-40B4CE3ED65B.jpeg
    4.2 MB · Views: 10
  • 1B8FA45F-DA03-4ED4-8382-44675D517E0E.jpeg
    1B8FA45F-DA03-4ED4-8382-44675D517E0E.jpeg
    2.5 MB · Views: 10
  • 881D83B1-9C91-488F-A797-11B74C1C373B.jpeg
    881D83B1-9C91-488F-A797-11B74C1C373B.jpeg
    4.5 MB · Views: 12
  • 5F920449-E363-4B62-821D-E193AEF72141.jpeg
    5F920449-E363-4B62-821D-E193AEF72141.jpeg
    2.8 MB · Views: 12
  • 42A937D6-BC0F-474B-8E8F-BFB8FB29A572.jpeg
    42A937D6-BC0F-474B-8E8F-BFB8FB29A572.jpeg
    2.9 MB · Views: 15
  • 19676C46-594C-49A8-A748-08059757A908.jpeg
    19676C46-594C-49A8-A748-08059757A908.jpeg
    2.3 MB · Views: 14
Nice work! I took the easy way out to refresh the fading color on mine using a dusting of fabric spray paint. Have you checked and lubricated all the mechanicals?
 
Tailoring.

The last two days I have been working on a bread box and a curtain.

Armed with glue, brushes, solvent and scissors, I felt like a tailor.

Pasted over the bar of the electric shutter. And I decided to take the risk of replacing the lower part of the electric shutter with the gray material that remained after cutting.

I glued the vinyl on the bread box, glued the wood of the bread box curtains. But I haven’t figured out how to make the broken part of the guide bread box yet, maybe someone has an idea?)
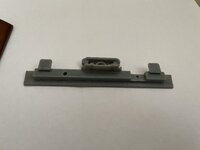
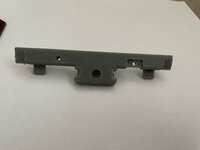
Promtrey- if someone has a photo of the intact part, you might think about looking at a 3d printed solution. I’ve seen guys go from photos to a fully realized CAD model and then 3D part, with what seems like a really good return on investment…
 
Promtrey- if someone has a photo of the intact part, you might think about looking at a 3d printed solution. I’ve seen guys go from photos to a fully realized CAD model and then 3D part, with what seems like a really good return on investment…

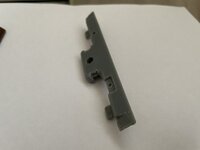
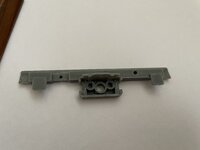
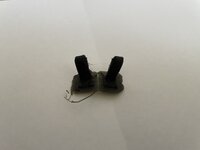
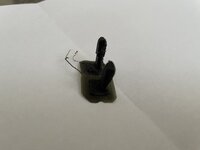
found this 3d model. but for 560 sel, are they the same as w124?
 
made products on a 3d printer
 

Attachments

  • 61223836-A2D5-41FF-8E83-CADEC993F27A.jpeg
    61223836-A2D5-41FF-8E83-CADEC993F27A.jpeg
    3.6 MB · Views: 4
  • 434D4276-4B0D-4CAF-87E8-D39CFA46545A.jpeg
    434D4276-4B0D-4CAF-87E8-D39CFA46545A.jpeg
    3.6 MB · Views: 4
  • 8859FF1E-51F1-4E3D-A595-E0F0FC4BB743.jpeg
    8859FF1E-51F1-4E3D-A595-E0F0FC4BB743.jpeg
    3.6 MB · Views: 4
  • 89A5A8F3-C85C-4EF9-A81D-041EE9CBCD3A.jpeg
    89A5A8F3-C85C-4EF9-A81D-041EE9CBCD3A.jpeg
    3.5 MB · Views: 4
  • B1409001-62DE-4808-AF09-3A21551EB290.jpeg
    B1409001-62DE-4808-AF09-3A21551EB290.jpeg
    3.1 MB · Views: 3
  • 4F9A1219-9BCD-478A-BDDD-7A820486FEED.jpeg
    4F9A1219-9BCD-478A-BDDD-7A820486FEED.jpeg
    3.3 MB · Views: 4

Who from the USA can help in buying and sending a pair of turn signals to Moldova? Seller does not ship internationally
 
If it is not urgent you may spend some time "hunting" for them. They sometime appear new in affordable price, often in Latvia, Lithuania or UK. I advise to buy new, because in used ones, over 25-years old plastic might easily crack. Try to look for Automotive Lightning (or Magneti Marelli). Automotive Lightning was formed from Bosch lightning division and Magneti Marelli, so AL have the original Bosch quality. They even have very similar yellow stickers on them, here is one of examples:

For Mercedes W124 Front Driver Left & Passenger Right Turn Signal Light Assembly | eBay

Here are the Bosch and Mercedes numbers, you may use both numbers to extend search results:
Right:
Bosch 1315106903 / A1248261243
Left:
Bosch 1315106902 / A1248261143
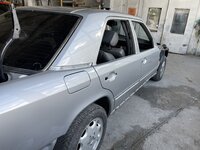
yes, I know that Magneti Marelli is the same Bosh, and even ordered a set of new ones, waited half a year, but now only the left one is supplied, and the right one is no longer available for order.
 
painting is nearing completion
 

Attachments

  • 59B03273-862B-41F2-B6D2-DCA04D51725E.jpeg
    59B03273-862B-41F2-B6D2-DCA04D51725E.jpeg
    3.1 MB · Views: 10
  • 41AF8A89-EE30-4EE0-BC36-7CABDDE7E63A.jpeg
    41AF8A89-EE30-4EE0-BC36-7CABDDE7E63A.jpeg
    3.9 MB · Views: 10
  • 52C0A14E-AE94-427B-B4CF-054A38A57393.jpeg
    52C0A14E-AE94-427B-B4CF-054A38A57393.jpeg
    4.3 MB · Views: 13
  • 123C495F-382E-4400-A926-1B44B4E1695A.jpeg
    123C495F-382E-4400-A926-1B44B4E1695A.jpeg
    5.6 MB · Views: 11
  • 1EC32117-D3D5-4384-9D3A-E78BA32557AE.jpeg
    1EC32117-D3D5-4384-9D3A-E78BA32557AE.jpeg
    4.1 MB · Views: 12
  • 0AB0479C-721B-4242-AE02-79F592882C1F.jpeg
    0AB0479C-721B-4242-AE02-79F592882C1F.jpeg
    4.3 MB · Views: 12
  • 75178FAF-E2C4-4A4D-8E3B-4212FD47BC37.jpeg
    75178FAF-E2C4-4A4D-8E3B-4212FD47BC37.jpeg
    4.3 MB · Views: 13
It appears both sides are still available from Mercedes. It may just be the aftermarket version that is NLA.

https://partssearch.mercedes-benz-classic.com/parts/A1248261143?tt=automatic, manual

https://partssearch.mercedes-benz-classic.com/parts/A1248261243?tt=automatic, manual


:spend:
Interestingly enough, I just attempted to order a pair, and was told the drivers side US facelift marker was NLA.

This was naperville, and I did not press the situation further as I was truly only in need of the passenger side. But sharing for awareness.
 
Took a few days to prepare. Little by little. Many Logbooks have been written, but who did not find it anywhere. I will describe how I did it.

1. We find the designations on the plastic stand where to cut. On restyling, these designations are for sure. On dorestayl read records that they may not be.

2. Drill made holes around the perimeter of the desired contour.

3. I sawed off the partitions between the holes made with a drill.

4. With a construction knife, I cut off the material and the edges of the plastic.

5. File trimmed the edges.

6. Washed ceiling.

7. Installed shades.

... then we will carry out the wiring and be additional light in the car.
 

Attachments

  • 0E99695A-88CD-47CA-A0D7-75CE7B2E929D.jpeg
    0E99695A-88CD-47CA-A0D7-75CE7B2E929D.jpeg
    1.4 MB · Views: 6
  • DA9BC4A4-12B2-45F7-9EEE-F55CDB327E2F.jpeg
    DA9BC4A4-12B2-45F7-9EEE-F55CDB327E2F.jpeg
    1.8 MB · Views: 5
  • A8B52D69-6DC5-4C27-B1D9-B39C0AA3BCB2.jpeg
    A8B52D69-6DC5-4C27-B1D9-B39C0AA3BCB2.jpeg
    1.7 MB · Views: 6
  • 3E9DF9E5-FD42-43D9-8898-EFDE07173115.jpeg
    3E9DF9E5-FD42-43D9-8898-EFDE07173115.jpeg
    2.2 MB · Views: 7
  • 28C4E928-7122-41DB-B191-D1197785C088.jpeg
    28C4E928-7122-41DB-B191-D1197785C088.jpeg
    3.4 MB · Views: 5
  • 30C41B74-6A82-4585-B3AB-4660270C61C9.jpeg
    30C41B74-6A82-4585-B3AB-4660270C61C9.jpeg
    3.1 MB · Views: 8
  • AACC13C4-AA08-4200-B0E8-1BDE592823C6.jpeg
    AACC13C4-AA08-4200-B0E8-1BDE592823C6.jpeg
    3 MB · Views: 8
  • C655EA4B-344C-4708-A2FD-38A6347D25D0.jpeg
    C655EA4B-344C-4708-A2FD-38A6347D25D0.jpeg
    2.5 MB · Views: 8
That is exactly how I cut the first of two. For the second one I became impatient and substituted a hot exacto knife for the drilling. Nice work. Are you happy with the paint? It looks good in the video.
 
That is exactly how I cut the first of two. For the second one I became impatient and substituted a hot exacto knife for the drilling. Nice work. Are you happy with the paint? It looks good in the video.
yes, color 775 looks pretty modern on the car, i used Mipo paint.

there are some imperfections in the paint, but they are not very visible
 
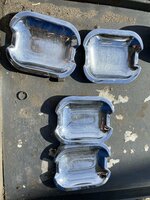
I previously purchased Turkish copies of seals, but I really like their look. Will go in the absence of the original, but the view is not quite comme il faut.

I found mirrors with good rubber bands from dorestayl. It is pre-style rubber bands that save time, as practice shows.

True, before that I installed all the painted linings on the mirrors, I'll wait for them to dry out and install them.
 

Attachments

  • D1BA6090-3A56-4072-9018-F5ABE0E20CC8.jpeg
    D1BA6090-3A56-4072-9018-F5ABE0E20CC8.jpeg
    4.1 MB · Views: 9
  • 44649C0F-27D1-4AC5-A18B-7F5FE0140CD6.jpeg
    44649C0F-27D1-4AC5-A18B-7F5FE0140CD6.jpeg
    4.7 MB · Views: 9
  • 5159A6BA-123E-4D2B-9862-2049413B9783.jpeg
    5159A6BA-123E-4D2B-9862-2049413B9783.jpeg
    4.4 MB · Views: 9
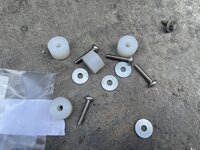
In the morning I installed spacers under the wings using AMG technology.

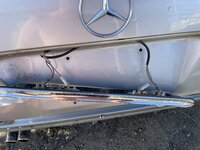
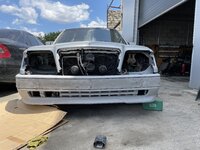
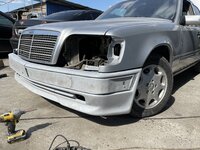
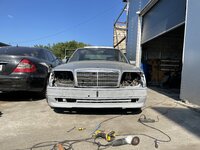
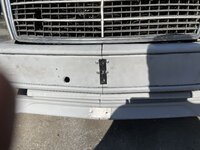
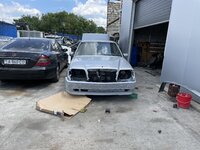
The rest of the day sawed and shredded the front bumper. And it looked beautiful.) All jambs come out during installation. They filed along the edges, the bumper fell into place, but the center went sharp and there was a very large gap between the hood grille. Yes, and the edges have become splayed. It was decided to cut in the center in order to relieve tension. Well, then it will be glued together)) Lego ept.

Also, before installation, I checked the performance of the electric shutter.

Thanks Vitka for the help!
 

Attachments

  • 38A7A059-C526-4309-BFB8-5C1404DB4622.jpeg
    38A7A059-C526-4309-BFB8-5C1404DB4622.jpeg
    3.3 MB · Views: 6
  • 53C93EA0-ECBE-44F7-9725-DD45F1DEA1DE.jpeg
    53C93EA0-ECBE-44F7-9725-DD45F1DEA1DE.jpeg
    3.5 MB · Views: 7
  • 5B7F9F8C-7C08-44FF-BA6B-97E3A9891D5C.jpeg
    5B7F9F8C-7C08-44FF-BA6B-97E3A9891D5C.jpeg
    2.9 MB · Views: 6
  • C1ACC419-84B0-4F85-9B1F-1AEEA1DD175E.jpeg
    C1ACC419-84B0-4F85-9B1F-1AEEA1DD175E.jpeg
    3.6 MB · Views: 7
  • 6235CC68-7623-4983-B5DA-2A5B64C55D9F.jpeg
    6235CC68-7623-4983-B5DA-2A5B64C55D9F.jpeg
    3.1 MB · Views: 7
  • B6F733C8-58FD-4CB4-BC79-35FED9375805.jpeg
    B6F733C8-58FD-4CB4-BC79-35FED9375805.jpeg
    3.7 MB · Views: 7
  • 9180BFA0-9D62-4094-B5C3-DFC94728E9C3.jpeg
    9180BFA0-9D62-4094-B5C3-DFC94728E9C3.jpeg
    3.8 MB · Views: 7
  • 2D02D007-C3BE-4E3A-B686-6AE76484FAED.jpeg
    2D02D007-C3BE-4E3A-B686-6AE76484FAED.jpeg
    3.5 MB · Views: 6
  • 51E92F3A-87D7-4485-9A4F-DBEF423F44F4.jpeg
    51E92F3A-87D7-4485-9A4F-DBEF423F44F4.jpeg
    3.2 MB · Views: 7
  • 4DC5A789-CF12-40F6-9520-CEA110173283.jpeg
    4DC5A789-CF12-40F6-9520-CEA110173283.jpeg
    3.3 MB · Views: 7
  • 51E270FD-062C-4F4F-A5AF-B43D10FB2B2E.jpeg
    51E270FD-062C-4F4F-A5AF-B43D10FB2B2E.jpeg
    4.2 MB · Views: 8
  • B5735FAE-077D-40B7-8D9A-F5977237FC83.jpeg
    B5735FAE-077D-40B7-8D9A-F5977237FC83.jpeg
    3.7 MB · Views: 7

Who has viewed this thread (Total: 1) View details

Who has watched this thread (Total: 5) View details

Back
Top