• Hi Guest !

    Welcome to the 500Eboard forum.

    Since its founding in late 2008, 500Eboard has become the leading resource on the Internet for all things related to the Mercedes-Benz 500E and E500. In recent years, we have also expanded to include the 400E and E420 models, which are directly related to the 500E/E500.

    We invite you to browse and take advantage of the information and resources here on the site. If you find helpful information, please register for full membership, and you'll find even more resources available. Feel free to ask questions, and make liberal use of the "Search" function to find answers.

    We hope you will become an active contributor to the community!

    Sincerely,
    500Eboard Management

OWNER jlaa (500E & w210 E320 & w220 S350)

Jlaa

Nitpickius🛡️Maximus
Staff member
Hi Gang,

I recently acquired this 63K mile example of a 1993 500E. It is Signal Red / Cream Beige and mostly in excellent condition. It has a few niggles that a guy like me (afflicted w/ OCD in the worst way) will be addressing over the next few months / years ---- nothing too huge so this will make a good "easy project".

It came with the High Polish 18" NEEZ wheels - 9 inches wide in the front, and 9.5" wide in the rear.

Finally I get to meet my hero - I remember when these first came out while I was in High School!


IMG_4321.jpgIMG_4265.jpg
 
Last edited by a moderator:
Congrats on your purchase & welcome! That's a great looking 500E and a rare colour combo too
 
First Step - replace the air intake tubes. Easy job taking 5 minutes, followed by 15 minutes of fussing around, trying to get the "wrinkles" out ---

IMG_4307.jpgIMG_4308.jpg
 
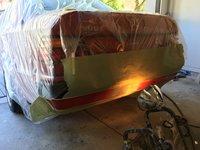
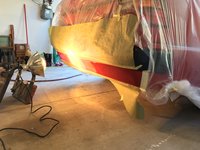
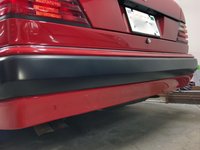
Second Step - Repair a pre-existing parking mishap on the rear bumper. I know a gentleman that does house calls for straightforward touchup work like this --- no body shop needed and he bakes the paint in your garage. As well, the price is right.

E N I October 2016 008.JPGIMG_4278.jpgIMG_4281.jpgIMG_4336.jpg
 
Very nice car and welcome aboard!
1993, good year for the .036.
Where can I get a set of those 18" NEEZ?
 
Last edited:
A fine example, congratulations.

As for the wheels the evo were my least favorite though Neez did a better job with the high offset. do you know what the ET is ?

If I am paying $4K for a set of wheels I would invest in a more individual and unique priod-correct styling.
 
Looking through the documentation I received, I believe they are are 18x9 ET+26 and 18x9.5 ET+28.
 
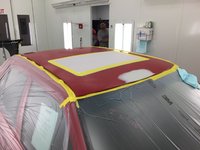
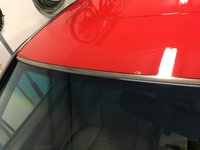
Fixed a little bit of corrosion on the roof --- a little bit on the leading edge and a little bit on the trailing edge. I was prepared to have to pull out the windscreen / back glass and fix rust in the glass channel --- however once the body shop had all the window moldings off, they didn't see any corrosion creep into the window channel at all --- whew! Repainted the roof ---- everything looks good now.In my care, this car will always live in dry California, and will never see rain. It will see fog, but not rain.
 

Attachments

  • IMG_4331.jpg
    IMG_4331.jpg
    1.6 MB · Views: 58
  • IMG_4332.jpg
    IMG_4332.jpg
    1.6 MB · Views: 56
  • IMG_3924.JPG
    IMG_3924.JPG
    1.3 MB · Views: 56
  • back side of roof repair.JPG
    back side of roof repair.JPG
    1.3 MB · Views: 58
  • IMG_3951.JPG
    IMG_3951.JPG
    1.6 MB · Views: 58
  • IMG_4399.jpg
    IMG_4399.jpg
    1.7 MB · Views: 62
Simple stuff --- replaced the sunroof switch as the old one was "mushy" .... the movement felt like mush and no amount of CRC contact cleaner would make it un-mushy. Also replaced the front and rear dome lights with warm white LEDs --- great light output, correct color temperature, and reduced current draw.

You can see the front dome light, which has the LED, is turned on next to the incandescent map light ---- the colors match.

IMG_4398.jpgIMG_4396.jpgimg_0434_ce777caf8c00cc01e62ce4bc2c673dccad7786f1.jpg
 
Last edited:
Have you found an LEF which works for the passenger front map light as well as C pillar reading lights?


Robert
 
Have you found an LEF which works for the passenger front map light as well as C pillar reading lights?


Robert

Unfortunately I haven't found one --- but I haven't really looked very hard. The 5630-warm-white-chip based LED "festoon replacements" are a recent development --- they weren't really around a year ago. I had purchased a pack of 10 for my other hobby car and had these leftover --- they coincidentally fit the 500E.
 
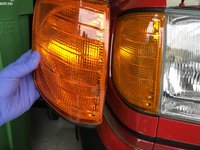
More simple stuff --- I do not believe I have seen a picture of the US-spec yellow blinkers and the Euro-spec orange blinkers in the same exact photograph with the same exact exposure. I swapped out the US spec yellow ones with the Euro-spec orange ones.

Yellow here - IMG_4412.jpg
IMG_4407.jpgIMG_4408.jpgIMG_4413.jpg

Orange here - IMG_4418.jpg
 
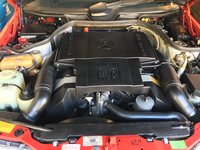
Next I will tackle the Valve Cover gaskets ---- and, among other things, swap out the plastic oiling tubes with aluminum ones.

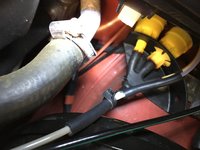
You can see the plastic oiling tubes through the oil fill access hole. BTW, everything seems clean in there!
IMG_4415.jpg
 
Next I will tackle the Valve Cover gaskets ---- and, among other things, swap out the plastic oiling tubes with aluminum ones.

You can see the plastic oiling tubes through the oil fill access hole. BTW, everything seems clean in there!
View attachment 56029

You don't have to replace them unless you have a collapsed tube.Engine looks really clean!
 
Unfortunately I haven't found one --- but I haven't really looked very hard.

If you do happen to look, please keep us posted. Those are two remaining interior lights that Ntrepid and I haven't figured out how to convert to LED.
 
You don't have to replace them unless you have a collapsed tube.Engine looks really clean!

The inside looks cleaner than the outside with the crud next to the oil fill access hole! :) Yeah, I don't have any tapping noises and technically don't need to replace the tubes. However, since I'll be replacing the valve cover gaskets anyways, I might as well replace the oiliing tubes w/ aluminum ones. And, while I'm there, I might as well replace the plastic chain guides, plug wires (I got MB OE ones with the 180* connectors), plugs, Disti caps, rotors, and disti cap dust shields....
 
If you do happen to look, please keep us posted. Those are two remaining interior lights that Ntrepid and I haven't figured out how to convert to LED.

What type are those two bulbs? I've learned through trial and error when looking for these things, only look for single-chip CREE "bulbs" or 5630 based "bulbs". Do not use older 5050-based "bulbs" - they are no good.
 
The inside looks cleaner than the outside with the crud next to the oil fill access hole! :) Yeah, I don't have any tapping noises and technically don't need to replace the tubes. However, since I'll be replacing the valve cover gaskets anyways, I might as well replace the oiliing tubes w/ aluminum ones. And, while I'm there, I might as well replace the plastic chain guides, plug wires (I got MB OE ones with the 180* connectors), plugs, Disti caps, rotors, and disti cap dust shields....
Forget if this was already discussed, but if you are doing the work yourself, make sure to get the special swivel hex driver to access the rearmost lower valve cover bolts. The job is ALMOST impossible without this special tool. OE gaskets only, btw, aftermarket do not have a good reputation. And new copper crush washers. I do a 2-stage torque procedure, first 5Nm, then final spec of 9Nm (IIRC). You won't be able to get a torque wrench on all the bolts so you'll need to use judgment on those few. Triple-check to make sure the rear half-moons are properly seated before you torque down the new gaskets. Should be some old forum threads on this topic...

:banana2:
 
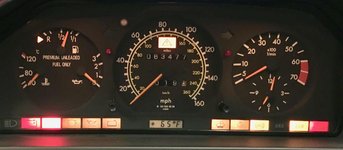
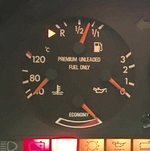
Instead of tackling the valve cover gaskets, I decided to keep clean today - I replaced the gauge cluster housing, as a previous owner had added additional lights in the gauge cluster for a hidden K40 radar detector. Along the way, I also added a vacuum/economy gauge from a 300E --- and I tweaked the fuel gauge potentiometer -- I hope I was able to tweak it to accommodate the 500E's 90 liter fuel tank properly.

First I bought a 300E fuel/vacuum/econo gauge from ebay. The econo gauge's needle was slightly faded, so I painted it with acrylic paint - cadmium orange liquitex (I saw a diff post here suggest that as a perfect match)

IMG_4325.jpg IMG_4326.jpg


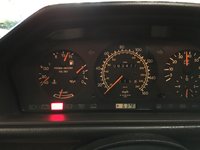
This was my gauge cluster before I started --- note the 3 additional unsightly K40 lights. I also took this picture to "mark" what the fuel gauge read prior to swapping fuel vacuum/econo gauges -

IMG_4419.jpg IMG_4427 2.jpg


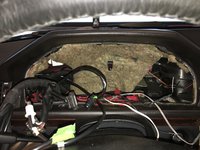
Then - I took out the orig gauge cluster ----- OK ---- ready to start swapping the gauge from the 500E cluster to the used cluster housing that I purchased (Thank you Stevester!)

IMG_4437.jpg IMG_4439.jpg IMG_4441.jpg


I took the gauge out of the 500E's cluster. I also measured the resistance across the potentiometer terminals of the 500E fuel gauge (500E has a 90L tank) and I also measured the resistance across the potentiometer terminals of the 300E fuel gauge. Then, I adjusted the potentiometer of the 300E fuel gauge to match (it probably took no more than 1/10 of a turn of the pot).

IMG_4458.jpg IMG_4459.jpg IMG_4462.jpg IMG_4460.jpg IMG_4463.jpg IMG_4464.jpg IMG_4466.jpg


I routed white/clear hard plastic tubing to the back of the econ gauge. The white plastic tubing goes through the grommet @ the back of the instrument cluster --- right where the factory put the two yellow check valves for other vacuum operated elements. I Y-ed in to vacuum fitting just forward of the firewall.

IMG_4467.jpg IMG_4469.jpg

I put everything back ---- and it looks like the fuel gauge is at the same spot! Hallelujah. I'll go for a fill up tomorrow --- I hope the gauge will still read accurately with a full tank.

IMG_4470.jpg IMG_4474.jpg
 
Don't worry if you see the Economy needle Stay pegged in the red. There's a reason why they did not have the gauge in this car. :agree:


Robert
 
Valve Cover Gasket / Timing chain guide / Plastic Oiling tube replacement (with aluminum ones). The cams/etc all look pretty clean.

IMG_4622.JPG IMG_4634.JPG IMG_4637.JPG


Mouse / Rat's nest next to the air mass meter???

IMG_4635.JPG


Replacing Distributor Cap/Rotor/Dust shield with Bosch parts --- the old ones have a green powder --- corrosion?


IMG_4641.JPG IMG_4640.JPG IMG_4638.JPG
 
Cams & heads look very clean - nice to see. Caps/rotors appear to have normal wear, the green powder is fairly common as well. You probably could have cleaned those up and used them for a while longer but new ones are generally not a bad idea.

There's some oil in the area, I'd take a closer look at the cam adjuster solenoids... very, very common leak on these engines. There's a couple of detailed threads discussing this. Not an urgent issue, but it's always nice to get an engine leak-free if possible.

:banana2:
 
Deleted the last elements of a prev owner's k40 install and restored this switch panel to stock. I replacd the two bulbs - rear fog indicator and icon backlighting which were burned out. I tried both LED and incandescent... I prefer the incandescent bulbs for uniformity. Simple and satisfying.
 

Attachments

  • IMG_0450.JPG
    IMG_0450.JPG
    104.8 KB · Views: 34
  • IMG_4542 2.jpg
    IMG_4542 2.jpg
    2.1 MB · Views: 40
  • IMG_4545 2.jpg
    IMG_4545 2.jpg
    1.8 MB · Views: 39
  • IMG_4544 2.jpg
    IMG_4544 2.jpg
    1.6 MB · Views: 35
icon backlighting which were burned out. I tried both LED and incandescent... I prefer the incandescent bulbs for uniformity.

Aha! The mysterious icon backlighting bulb....I've heard it exists, but since mine has never worked during my ownership, I thought it might just be a tall tail... Thanks.
 
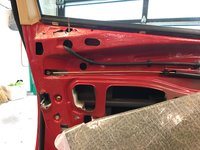
The driver's door was making the infamous "groan of death" when opening/closing, so I replaced the driver's side door check strap with a new one that I packed with additional grease. I kept the zinc plating on the new check strap - I like the zinc plating. Eventually I will replace the passenger's check strap with a new one and then both sides will be zinc plated.

I found that 1/2 the vapor barrier was removed and not glued back by a previous owner. I secured it back with window-weld, which I find withstands multiple removals/reapplications.

As well, I found that the captive nut that the interior door handle bolts into would vibrate and was making a buzzing noise - I injected silicone glue into it to stop the vibrations.

IMG_4612.jpg IMG_4618.jpg IMG_4620.jpg IMG_4621.jpg IMG_4622.jpg IMG_4626.jpg IMG_4629.jpg IMG_4627.jpg
 
Last edited:
I used Gorilla Glue to glue back some of the vinyl along the driver's door pocket. It seems to work well.
I put thread locker on the nuts for that hold the wood to the door --- one of the nuts had come loose.

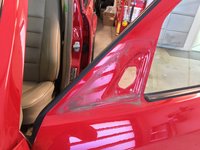
At the same time, I repaired some cracks in the base plastic of the fragile interior A-pillar triangle cover with JB weld --- that made the triangle stiff again.
 

Attachments

  • IMG_4642.jpg
    IMG_4642.jpg
    1.2 MB · Views: 28
  • IMG_4641.jpg
    IMG_4641.jpg
    2.1 MB · Views: 27
  • IMG_4638.jpg
    IMG_4638.jpg
    1.7 MB · Views: 29
  • IMG_4637.jpg
    IMG_4637.jpg
    1.4 MB · Views: 31
  • IMG_4636.jpg
    IMG_4636.jpg
    1.8 MB · Views: 37
  • IMG_4635.jpg
    IMG_4635.jpg
    1.9 MB · Views: 33
Replaced the driver's mirror boot. I read all the threads about this thing --- geez, that old mirror boot sure was hard and brittle! I didn't realize that it was supposed to be soft and pliable until I received a new one.

I slid the new boot on from the base side of the mirror assembly (not the mirror side). I didn't need to use the "immerse the boot in a vat of hot water" trick - I just hit the new boor with a hairdryer for 30 seconds and was able to slip on the last corner quickly.

I use Gummi Pflege Stift on my car's rubber seals - hopefully this will keep the mirror boot soft.
 

Attachments

  • IMG_4658.jpg
    IMG_4658.jpg
    1.8 MB · Views: 35
  • IMG_4657.jpg
    IMG_4657.jpg
    1.9 MB · Views: 34
  • IMG_4656.jpg
    IMG_4656.jpg
    2.3 MB · Views: 33
  • IMG_4655.jpg
    IMG_4655.jpg
    2.3 MB · Views: 34
  • IMG_4654.jpg
    IMG_4654.jpg
    1.7 MB · Views: 35
  • IMG_4653.jpg
    IMG_4653.jpg
    2.3 MB · Views: 33
The new boots really make a noticeable difference, eh? I don't know what MB did to the rubber formula in the early/mid 1990's but the shrinkage/crackage is amazing. The new boots should last a very long time if you keep them treated and the car is stored indoors away from UV rays. Which reminds me, I need to replace the boots on my wife's E420, they are starting to break up.

:banana2:
 
Strange, the 91 C126 DS mirror back cap got replaced with one from an 87. Both pieces of rubber are like out of the box new.
 
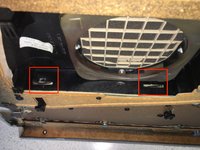
It is a curse to be afflicted with OCD such that any little rattle drives you mad. After fixing the door check strap groaning, the door shut so quietly that I could detect a slight rattle that lasted for a fraction of a second whenever the door was shut. First I found two broken plastic tabs from the armrest that located the armrest to the door panel. I used gsxr's suggested method of using fixing screws to effect a stronger solution.
 

Attachments

  • IMG_4648 2.jpg
    IMG_4648 2.jpg
    2.3 MB · Views: 35
  • IMG_4647 2.jpg
    IMG_4647 2.jpg
    1.7 MB · Views: 31
  • IMG_4640 2.jpg
    IMG_4640 2.jpg
    1.7 MB · Views: 38
Last edited:
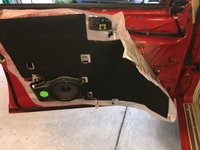
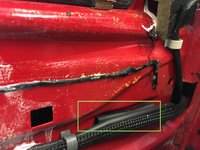
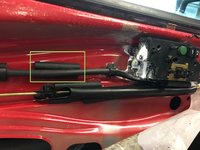
Then I went nuclear on the door actuating-rod assembly and used self adhesive foam to quiet down anything which could possibly rattle - the metallic rod, the plastic sheathing, and even the loose wires @ the front of the door.

I don't believe I have solved the rattle 100%. I believe what's happening is that the door's exterior plastic cladding is vibrating ever so slightly when the door is shut, causing the last remaining rattle that happens for a brief fraction of a second every time the door is shut.

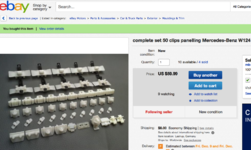
I must have installed and removed the blasted door panel 3x chasing rattling noises. I'm good not touching the door panel for a while. :-) I ordered a mess-load of clips to arm myself against broken plastic tabs when I have some time to remove the plastic cladding.
 

Attachments

  • IMG_4669.jpg
    IMG_4669.jpg
    1.6 MB · Views: 40
  • IMG_4667.jpg
    IMG_4667.jpg
    1.7 MB · Views: 34
  • IMG_4666.jpg
    IMG_4666.jpg
    1.8 MB · Views: 29
  • IMG_4665.jpg
    IMG_4665.jpg
    2 MB · Views: 29
  • IMG_4664.jpg
    IMG_4664.jpg
    1.8 MB · Views: 35
  • IMG_4663.jpg
    IMG_4663.jpg
    2 MB · Views: 37
  • IMG_4662.jpg
    IMG_4662.jpg
    1.7 MB · Views: 33
  • 111.png
    111.png
    436.5 KB · Views: 68
Last edited:
If nothing is in the bottom of the door with the card off, then most likely (especially after all you braced with foam) is the door cladding. OCD aside, did you ensure the weep holes for drainage on the bottom of the door were clean of debris, good rust spots for door bottoms.
 
I ran my hands back and forth along the bottom of the inner workings of the doors, looking for detritus from the car's 23 years of life. I found clean weep holes and surprisingly little dirt. There was less dirt down there when compared to my daily driver beater car, which is only 5 years old / 106K miles. I suspect this 500E has seen little in the way of exposure to the elements.
 
Jlaa: I had a nagging rattle from my passenger side front door a few years back. Turned out to be one of the friction fit metal clips holding the center leather panel to the door panel was loose. There are maybe 9 of these clips. Check to see they are all tight in their sleeve. If not pry them out with a small screw driver and bend them slightly; then re-insert.
Regarding the exterior plastic cladding panels, the bottom clips are basically one time use and likely will break when removing the panel. They are easy to replace. I see you have bought an ample supply. Change both the male and female parts as sometimes there is a broken piece stuck in the female clip. The upper clips slide into position and should not get damaged when doing an R and R if not man handled.

Regards,

Peter Weissman
 
Thanks for all the details and pictures. These are really helpful for the rest of us.
 
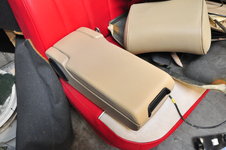
I had the armrest defects filled in and re-dyed (air brushed) ---- passes my sniff test --- it is 95% perfect.
The gentleman I use locally here is good at what he does and he makes house calls.

I have a spare armrest which I will peel all the old MBTex off and attempt to recover with skiived leather - an neat out of band experiment / project this winter.
 

Attachments

  • DSC_5304.JPG
    DSC_5304.JPG
    2.9 MB · Views: 41
  • IMG_4584.jpg
    IMG_4584.jpg
    1.8 MB · Views: 37
  • DSC_5302.JPG
    DSC_5302.JPG
    2.9 MB · Views: 40
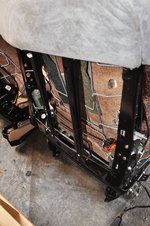
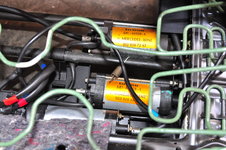
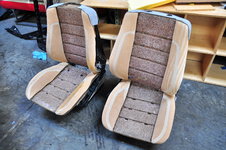
Some pictures of what the seats look like with the leather upholstery off. The driver's seat bottom horsehair pad was broken --- the left bottom bolster was broken along the two crease lines, allow thing thing to flap around when I got in / out of the car. Tom Hanson @ Classic Center helped me out with new seat bottom horsehair pads.

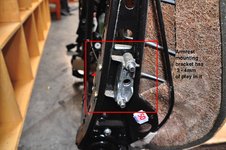
Also --- my armrest mounting bracket has about 3-4mm of play it. I'll have to "play" with it (no pun intended) to see what I can do to tighten things up.
 

Attachments

  • DSC_5282.JPG
    DSC_5282.JPG
    2.9 MB · Views: 51
  • DSC_5279.JPG
    DSC_5279.JPG
    3 MB · Views: 50
  • DSC_5278.JPG
    DSC_5278.JPG
    3 MB · Views: 49
  • DSC_5277.JPG
    DSC_5277.JPG
    2.9 MB · Views: 54
  • DSC_5276.JPG
    DSC_5276.JPG
    2.9 MB · Views: 58
  • DSC_5272b.jpg
    DSC_5272b.jpg
    634 KB · Views: 71
  • DSC_5269.JPG
    DSC_5269.JPG
    3 MB · Views: 65
  • DSC_5306b.jpg
    DSC_5306b.jpg
    1 MB · Views: 52
The armrest turned out very nicely. I may go back for the one I left at the dismantlers today. I have a seat bottom pad to go in one car and i'll be recovering the fronts in the other. I just removed both front seats from an 034 today for the carpet, my 1st time to do so. Your pictures and post helped me to understand the next phase of the job. Thanks! Your car looks brilliant.

drew
 
Second Step - Repair a pre-existing parking mishap on the rear bumper. I know a gentleman that does house calls for straightforward touchup work like this --- no body shop needed and he bakes the paint in your garage. As well, the price is right.

View attachment 55950View attachment 55951View attachment 55952View attachment 55949

Could I get a referral for who you had do this please? I'm in SF and a couple of my cars could use some of this type of attention.

Thanks!
 
Could I get a referral for who you had do this please? I'm in SF and a couple of my cars could use some of this type of attention.

Thanks!

OK, I'll send you a private message. I can't remember if the Lancia Delta Integrale I saw the other day was white or red or black .... but if I saw your Lancia Delta Integrale then we live probably 5 minutes from each other...
 
Some pictures of what the seats look like with the leather upholstery off. The driver's seat bottom horsehair pad was broken --- the left bottom bolster was broken along the two crease lines, allow thing thing to flap around when I got in / out of the car.
Looks great! While the seats are apart, check the resistance of the heating pads on the backrest bolsters. Should be a few ohms, fairly close to the reading you'll get on the new elements on the bottom pad. If any of the backrest elements are open/infinite, you can try to carefully open up the foam and locate the break in the wire, and repair it. The backrest pads are NLA and the elements are not sold separately. With luck, all four of yours will be OK!

:jono:
 
OK, I'll send you a private message. I can't remember if the Lancia Delta Integrale I saw the other day was white or red or black .... but if I saw your Lancia Delta Integrale then we live probably 5 minutes from each other...

Mine's red but it's in the shop (of course!) right now and has been for a while getting the head redone. The bringatrailer guys have one and live in the city too I think; it's a black Evo I.
 
Mine's red but it's in the shop (of course!) right now and has been for a while getting the head redone. The bringatrailer guys have one and live in the city too I think; it's a black Evo I.

Got it --- I'm pretty sure I keep on running into the Bring a Trailer guys' Lancia then right off Monterey Blvd.
 
Last edited:

Attachments

  • 1.png
    1.png
    201 KB · Views: 23
  • 2.png
    2.png
    108.9 KB · Views: 19
  • 3.png
    3.png
    142.5 KB · Views: 19
Generally there shouldn't be any lubricant needed on the headrest rails. The couple of plastic parts tend to break, if yours are all intact you can leave them alone.

Of more concern are all the cream-colored plastic trims at the sides of the seat hinges; some are NLA and the retaining clips tend to snap during removal. When re-installing, go nuts with the 10-15mm factory felt strips anywhere the plastic pieces touch metal or leather, to help prevent squeaks. Easy to do with the seats apart out of the car. The 70mm stuff is used under the spare tire, in case you were wondering.

:klink:
 

Attachments

  • felt_strips.jpg
    felt_strips.jpg
    61.4 KB · Views: 43
Back
Top