• Hi Guest !

    Welcome to the 500Eboard forum.

    Since its founding in late 2008, 500Eboard has become the leading resource on the Internet for all things related to the Mercedes-Benz 500E and E500. In recent years, we have also expanded to include the 400E and E420 models, which are directly related to the 500E/E500.

    We invite you to browse and take advantage of the information and resources here on the site. If you find helpful information, please register for full membership, and you'll find even more resources available. Feel free to ask questions, and make liberal use of the "Search" function to find answers.

    We hope you will become an active contributor to the community!

    Sincerely,
    500Eboard Management

How to add a good Alpine 6 CD changer to your Becker 1432 without rewiring ANYTHING

Hmmmm... pictures would help. Not sure what is "left" and "right" of the MX.
 
Gotcha, “left” on the MX is from the car’s chassis, “right” goes to the tuner. Have you measured voltage on the rectangular power connector for the MX? The MX3192 needs power as well.
 
Gotcha, “left” on the MX is from the car’s chassis, “right” goes to the tuner. Have you measured voltage on the rectangular power connector for the MX? The MX3192 needs power as well.

I haven’t measured the voltage, but the splitter is part of the MX. To measure the voltage, I would only need to use the plug for the tuner-so I am assuming the voltage is correct since the tuner works fine.
I’m also assuming that if the MX was broken, something would not be working right to begin with.
 
it’s either the wiring is not done correctly, or something is wrong with the MX 3192. Of course it is easier to blame the MX3192, but nine times out of 10 I have found that the real problem is the simplest one… The wiring..... at least in my case.

That’s why it would be super helpful if you could attach some pictures of your actual set up that you wired.

Anyways, I can appreciate that you are probably frustrated at that point. Without those pictures, the best that I can tell you is that you should never ever ever ever ever trust those rectangular Mercedes power connectors that are at the Y. Never ever ever ever assume that those connectors are working properly. That is why I suggested that you measure the voltage that the MX3192 is receiving.

I’ll take a few pics later and test the voltage, that’s all that is left.
 
Well it has voltage, I opened it up and tested a few points. All of the solder joints internally looked fine as well.

It’s a bad picture but the wire routing is correct. I don’t know what else to do but say the MX is bad. I’ve no other tests I can think of.
 

Attachments

  • 9CFBDD24-112D-46DB-8241-D0BA7ACC58DB.jpeg
    9CFBDD24-112D-46DB-8241-D0BA7ACC58DB.jpeg
    1.3 MB · Views: 34
That’s a weird looking DIN cable w the black colored connector. Not sure if it matters but the only cables I have ever seen being used w Mercedes/Becker stuff have right angle cable ends.
 
That’s a weird looking DIN cable w the black colored connector. Not sure if it matters but the only cables I have ever seen being used w Mercedes/Becker stuff have right angle cable ends.

It was the only one available at the time, I’d think it’s safe to say that other things wouldn’t work if it was not right.
 
Welp, just bought that MX-we’ll see what happens. On a different note, I picked up seat heater pads from MB, so that DIY will be in the future.
 
Welp, just bought that MX-we’ll see what happens. On a different note, I picked up seat heater pads from MB, so that DIY will be in the future.
What year/model do you have, and what seat heater pad part numbers did you buy? These are NLA for the E500E/Sportline seats.

The main wire harness for heated seats is also NLA, so you'd need to source one from a car being parted out. I did this upgrade years ago on my '87 300D. Pics are on my website.

:blink:

‘92 300E with standard seats. I have the harnesses already, and the console wood. The heater pads are still available from MB for about $45 a piece. I just need the time to do it now.
 
‘92 300E with standard seats. I have the harnesses already, and the console wood. The heater pads are still available from MB for about $45 a piece. I just need the time to do it now.
Hmmm... do you have part numbers? On the standard seats, the heating pads are sewn into the leather/Tex upholstery covers. And I would have sworn those were NLA. There are 6 separate pieces per seat: 1 center and 2 side bolsters for the bottom cushion, same for the backrest.

:apl:
 
Hmmm... do you have part numbers? On the standard seats, the heating pads are sewn into the leather/Tex upholstery covers. And I would have sworn those were NLA. There are 6 separate pieces per seat: 1 center and 2 side bolsters for the bottom cushion, same for the backrest.

Part number 0008202198; So far as I have researched, these will slip into the “fingers” of the seat pleating with some coaxing and cursing.
 
Part number 0008202198; So far as I have researched, these will slip into the “fingers” of the seat pleating with some coaxing and cursing.
Ahhhh... got it. Those elements are designed for the early 124 seats, 1986-1989 USA model years. The upholstery/pads/etc are all different than 1990-up standard seats. There are also different part numbers for leather, Tex, and velours.

Has anyone done the retrofit into late (90-up) seats and confirmed the early elements fit ok?

1577219216061.png

c442296s-1920.jpg
 
I am having a hard time finding the plug that the pad pins insert into, pretty much hit a dead end as I cannot find a part number.
 
I am having a hard time finding the plug that the pad pins insert into, pretty much hit a dead end as I cannot find a part number.
That should be relatively easy! Gotta be either in the EPC, or you could raid a junkyard to find a car with bun warmers. MB refers to the black plastic widgets as "pin bushing housings".

:detective:
 
That should be relatively easy! Gotta be either in the EPC, or you could raid a junkyard to find a car with bun warmers. MB refers to the black plastic widgets as "pin bushing housings".

:detective:

You would think, not even the dealership could find the part number. I’ve dedicated hours to finding it so far.
 
You would think, not even the dealership could find the part number. I’ve dedicated hours to finding it so far.
From Ben's Whirled:

I remember now that I had to do bit of research to find those buggers (they are the same as on the headlight washer motor). And I just happened to be in the mood for sticking my nose into my parts and receipts.
The housing: 009 545 52 28
The back of the housing: 009 545 21 28
The pins (4 for each plug): 001 545 38 26
I'm pretty sure that those are all still available You'll have to solder the wires into the pins and then assemble it all. They're not too pricey.
Greg
 
Welp, just bought that MX-we’ll see what happens. On a different note, I picked up seat heater pads from MB, so that DIY will be in the future.

Try to use the OE cables with the MX3192 that you bought. I don't know exactly what's going on inside them cables but I have found some oblique references here (look at post #1 from compu_85):

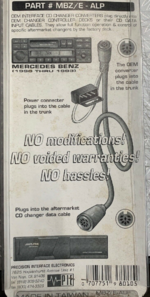
I have a pinout for the cable that goes between the alpine changer and the becker converter unit (Yes, it's the same 8 Pin cable as a standard alpine m-bus system, but they moved some of the pins around... they switched power and ground around among other things).


As well, here is another oblique reference to an easily miswired Becker/CDchanger system (the BE1432 did not recognized the CD Changer --- same issue you have) by ea_powers almost nineteen years ago! (Look at post 3, from SCLJA --- La Jolla Audio, which was an expert audio shop that specialized in these Becker systems so many years ago) :shocking:
...the cd is more than likely plugged in wrong. There are two rt angle din plugs that plug into the translator and then into the 1432 tuner box. There are markings to make sure the are right gray to gray and black to black. The cd changer plugs into the translator via a din plug.
 
Last edited:
From Ben's Whirled:

I remember now that I had to do bit of research to find those buggers (they are the same as on the headlight washer motor). And I just happened to be in the mood for sticking my nose into my parts and receipts.
The housing: 009 545 52 28
The back of the housing: 009 545 21 28
The pins (4 for each plug): 001 545 38 26
I'm pretty sure that those are all still available You'll have to solder the wires into the pins and then assemble it all. They're not too pricey.
Greg


You’ve performed a Christmas miracle, Thank you.
 
So I got another MX3192, wired, battery disconnected....head unit still does not recognize the unit. I’m again, at a loss. I’d hate to believe I have two bad MX’s.
 
So I got another MX3192, wired, battery disconnected....head unit still does not recognize the unit. I’m again, at a loss. I’d hate to believe I have two bad MX’s.

Maybe its something else --- wiring, headunit, central tuner pack? Can't really say without more troubleshooting / details.
This is how mine works --- note the CD input @ the end ... "CD52".

 
I'm amazed that the seller has three available. It just went down to 2 available and 1 sold. :) Putting this image here for posterity so that future folks know what this cable is all about:

View attachment 90846 View attachment 90849
Does anybody have a cable like this please? I would like to buy one. I have all the components needed except for this cable. I looked around and could not find any available. I also tried to make one but soldering in small spaces proved to be a challenge with my soldering tools (and skills). At this point my only hope is that either somebody may have one, or point me in the right direction to buy one. I am hoping somebody may be able to help.

Thanks,
Roy

Roy, would this work? Grey Color 8 Pin Mini DIN Plug Breakout Cable for Yaesu Kenwood 3ft 1M long | eBay
 
Thanks for your reply and intention, but it would not: that's a mini DIN, male at one end. The one I am looking for would be a full size DIN, female 8-pin at both ends with the two additional leads (+12V and ground) at either end. I am not interested in having the Becker 4-pin "Z" plug connected to the two leads, I can connect one.

I looked around for hours and could not find one or something that would work on Mercedes. I found the same but for VW and Volvo, but not Mercedes. I am hoping somebody here may be able to help.
Ok. Please private message me. I can help you out..... best that we talk on the phone. 😉
 
@liviu165, my apologies, I checked my parts stash and I do not have a female-8-pin-DIN to female-8-pin-DIN with breakout for for power/ground on the Mercedes Z connector that you are looking for. I have a cable for hooking up a MX3192 to the Becker Tuner module / bus (that plugs into the two female DIN conectors on the top of the bricke) --- but not the cable you are looking for.

HOWEVER, making the cable should be straightforward and a neat learning experience if you are willing to try it. First, I consulted some diagrams that I made when installing the whole setup on my own car. Here are the pinouts for the DIN to Mercedes Z Connector that I tested:

1590899978549.png 1590900009030.png

OPTION 1 - SOMEWHAT OF A HACK

Hacking up an existing male-male DIN cable and "taking off" power for the z connector ---- this can be done --- I've pointed out the pinouts for power on the Z connector above. Then, all you need to do is to purchase two of these female-female 8- pin DIN genderchangers to make your cable a female to female cable: https://www.amazon.com/Ancable-Male-Male-Speaker-Olufsen-PowerLink/dp/B07CDW2FHZ/ref=sr_1_3?dchild=1&keywords=8+pin+din&qid=1590897791&s=electronics&sr=1-3&th=1

1590902282440.png

Or you could just get this 8 pin DIN male-female cable and get only ONE female-female gender changer. 8 Pin DIN Male-Female Data Cable for Kenwood & Alpine M-Bus CD Changer | eBay

1590902311927.png


OPTION 2 - MOST ELEGANT

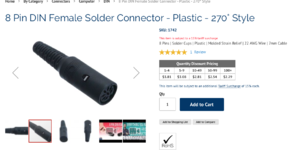
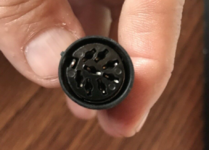
You could also construct your own cable if you don't want to hack an existing cable. This will require some fine soldering work. Might as well learn it right? Buy two of these female 8-pin-DIN solder connectors (only $3.81 each): 8 Pin DIN Female Solder Connector - Plastic - 270° Style.

1590902342099.png

Here is video from showmecables that explains how to assemble these ---- note that they are using cat 5 cable in between the DIN cables --- should work fine.

Also here is a good written guide with photos: DIY | DIN Cables

Maybe instead of buying 2 DIN connectors, buy 4 or 5 in case you mess up?


OPTION 3 - EASIEST & NO SOLDERING NEEDED

If you want to avoid as much fine soldering work, then buy two of these:

1590901462081.png 1590901479557.png 1590901505593.png 1590901545065.png

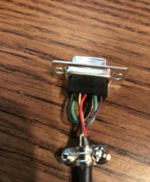
See what I'm talking about? The wires are already soldered onto the female 8-pin-DIN jack. Just hack off the DB9 connectors, connect the wires via crimping or whatever, take power off for the Z-connector, and presto, you've made your custom cable.

If you REALLY want to avoid crimping anything, you can leave the DB9 connectors on and get two breakout boxes in between the DB9 connectors... then you just need to screw stuff in...no soldering and no crimping needed. And, you would just take power off for the Z-cable from the screws with another set of wires. DB9 Male Signals Breakout Board Serial Port Header | eBay
1590901903333.png


FEMALE-DIN <--> FEMALE-DB9 <--> MALE-DB9 <--> BREAKOUT-WITH-9-SCREWS ====YOUR WIRES==== BREAKOUT-WITH-9-SCREWS <--> MALE-DB9 <--> FEMALE-DB9 <--> FEMALE DIN

I hope this helps....
 
Last edited:
@Jlaa -- you never cease to amaze me with your insights and skills. I believe you are truly the audio equivalent of @JC220.

Hah, compliment is accepted, thank you, but I'm just a big hack. Any time I wrench, it ends up in tears, breaking stuff, or $$$$ down the drain. Usually a combo of all three. Therefore I focus mostly on stuff that you guys haven't covered. Which is a very small universe. The depth of knowledge here is remarkably deep. 👍
 
Hah, compliment is accepted, thank you, but I'm just a big hack. Any time I wrench, it ends up in tears, breaking stuff, or $$$$ down the drain. Usually a combo of all three. Therefore I focus mostly on stuff that you guys haven't covered. Which is a very small universe. The depth of knowledge here is remarkably deep. 👍

I used to teach people to service and repair very complex emergency power systems. I told my guys that if they didn't break something or burn up a screwdriver at least once a month they weren't trying hard enough... :shocking:

Dan
 
@liviu165 asked me a good question tonight about this diagram:

1591072233799.png

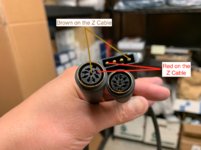
He asked me if the Z cable connects to both DIN Female ends or just one end. So I took the cable out of my car and measured continuity w/ the mulimeter. OMIGOSH! The Z cable connectors (+12v and ground) only connects to the OTHER END!

1591072206131.png

@liviu165 that was a great question!!!!!!!! So please make sure that if you are making up your own replica-cable that you introduce power only to one end!!! @JoeyManhattan please take note ---- I know you think that you have 2 busted MX3192s but I wonder if the reason why stuff isn't working for you is because your cable is made incorrectly and powers both ends? I don't remember if you are using a cable that you made up or if you are using a purchased cable.

As a reminder for posterity as well, this is how this cable connects to the MX3192:

page4image24135088
 
Thank you, @Jlaa . So, just to be clear:
1) The 12V is supplied only to one end. That's good, it makes sense.
2) I am assuming that the end which will have the 12V supplied is actually the end that will get connected to the Alpine. Would I be correct (the 3192 has its own power supplied through the "Z" connector)?
Correct! The mx3192 gets power from the Z and the green circle in the picture below shows which end of the cable is connected with the Z (the alpine end).
FCF17CB8-4084-4684-A48B-CDE866A123B8.jpeg
 
Thank you, I assumed that. The only surprise is that the power shows up at the opposite end of the Z connector's wires. Something to keep in mind when connecting the cable, if someone will ever find that cable...

Thanks a lot @Jlaa , I appreciate all your help.
 
Thank you, I assumed that. The only surprise is that the power shows up at the opposite end of the Z connector's wires. Something to keep in mind when connecting the cable, if someone will ever find that cable...

I know right? So tricky!!! Whoever designed that cable is now laughing at us from wherever he sits today.
 
I thought of it a bit more and actually it makes perfect sense: the end that gets connected to the Alpine is further away from the Z connector, so it makes sense to place the Z connector close to the 3192, but the 12v shows up at the other end, where is actually needed (where the Alpine is).
 
Well, I just wanted to bring a little update on another solution to make the right cable:

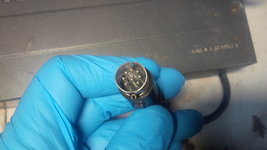
1. Take the 20’ feet cable that came with the Alpine CD shuttle (if not buy one, there are few on EBay) and cut the end with the female to desired length. In my case I needed a little over 3 feet. The original Alpine cable of the unit is almost one foot long and it ends with a a male plug. The MX3192 connector is also a male. The idea is to make a cable that will connect DIRECTLY to MC3192 W/O any adapter AND will supply power to the Alpine CD shuttle.
IMG_20200601_223602.jpgIMG_20200601_223619.jpgIMG_20200601_223919.jpgIMG_20200601_224009.jpg
2. Open the Alpine up and disconnect its original cable.
IMG_20200601_224906.jpgIMG_20200601_225149.jpgIMG_20200601_225353.jpgIMG_20200601_231951.jpg


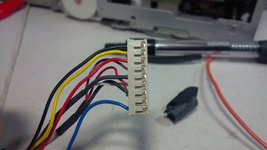
3. Splice it at the end to expose the wires. Below are the two cables.
IMG_20200601_225804.jpg

4. Solder the wires from the new one to the same locations as the original cable.
IMG_20200601_231845.jpgIMG_20200601_231854.jpg

5. The final cable with the two leads for +12V and -12V I have not soldered the Z connector, but for a BUS cable is fully functional.


This is the second cable I made, on the first I ventured in soldering also the 8-pin female (operation that I will NOT do again).
IMG_20200602_163446.jpgIMG_20200602_163522.jpgIMG_20200602_163559.jpg


I tested two cassette radios, two MX3192, I think two radio amplifiers, four Alpine CD shuttles (two apparently new ones) and one (used) Mercedes CD shuttle. I did so many tests in the last 4 weeks that I am starting to have a hard time remembering the exact details. However, all have something in common:
  • Once the MX3192 is connected into the system, the radio makes the CD function available (but not operational until the CD is connected to the MX3192)
  • After selecting the CD function, the “LOADING” message appears on the display and that’s how far it will go (for CD #1 it will say LOADING 01, for #2 it will say LOADING 02, etc.). It will not go beyond LOADING 06 (it knows it’s a 6-CD magazine). However, it will NOT play anything regardless of which combination of components I have connected.
  • The above happens with ALL CD shuttles I have Alpine (2x CHM-S620, 1x CHM-S630, 5960) and one Mercedes
The fact that no mater what components I throw at it makes me wonder what am I missing? At this point I will wait for the Yatour with 8-pin connector to see if that would work. If that does, then I know is CD shuttles. If that doesn’t (which I am kind of expecting), I’ll see what I do next. I feel I had enough frustration with this. If anybody has encountered the same and fixed it please let me know what you did.
 

Attachments

  • IMG_20200602_163522.jpg
    IMG_20200602_163522.jpg
    881.6 KB · Views: 13
  • IMG_20200602_163559.jpg
    IMG_20200602_163559.jpg
    906.4 KB · Views: 13
Well, I just wanted to bring a little update on another solution to make the right cable:

1. Take the 20’ feet cable that came with the Alpine CD shuttle (if not buy one, there are few on EBay) and cut the end with the female to desired length. In my case I needed a little over 3 feet. The original Alpine cable of the unit is almost one foot long and it ends with a a male plug. The MX3192 connector is also a male. The idea is to make a cable that will connect DIRECTLY to MC3192 W/O any adapter AND will supply power to the Alpine CD shuttle.
View attachment 104829View attachment 104830View attachment 104831View attachment 104832
2. Open the Alpine up and disconnect its original cable.
View attachment 104833View attachment 104834View attachment 104835View attachment 104836


3. Splice it at the end to expose the wires. Below are the two cables.
View attachment 104837

4. Solder the wires from the new one to the same locations as the original cable.
View attachment 104838View attachment 104839

5. The final cable with the two leads for +12V and -12V I have not soldered the Z connector, but for a BUS cable is fully functional.


This is the second cable I made, on the first I ventured in soldering also the 8-pin female (operation that I will NOT do again).
View attachment 104840View attachment 104843View attachment 104844


I tested two cassette radios, two MX3192, I think two radio amplifiers, four Alpine CD shuttles (two apparently new ones) and one (used) Mercedes CD shuttle. I did so many tests in the last 4 weeks that I am starting to have a hard time remembering the exact details. However, all have something in common:
  • Once the MX3192 is connected into the system, the radio makes the CD function available (but not operational until the CD is connected to the MX3192)
  • After selecting the CD function, the “LOADING” message appears on the display and that’s how far it will go (for CD #1 it will say LOADING 01, for #2 it will say LOADING 02, etc.). It will not go beyond LOADING 06 (it knows it’s a 6-CD magazine). However, it will NOT play anything regardless of which combination of components I have connected.
  • The above happens with ALL CD shuttles I have Alpine (2x CHM-S620, 1x CHM-S630, 5960) and one Mercedes
The fact that no mater what components I throw at it makes me wonder what am I missing? At this point I will wait for the Yatour with 8-pin connector to see if that would work. If that does, then I know is CD shuttles. If that doesn’t (which I am kind of expecting), I’ll see what I do next. I feel I had enough frustration with this. If anybody has encountered the same and fixed it please let me know what you did.
No Idea if this helps --- but see here: changer adaptor - PeachParts Mercedes-Benz Forum
If you scroll down to post 12, you can see that our very own @2phast was helping someone with a very similar problem fifteen years ago in 2005. Dr Julio Fuentes, though, was using an Alpine changer that was selectable between MBUS / AINET, whereas you are using all MBUS-exclusive changers.

I would be curious to know what happens when you get your yatour.
 
Thank you for the suggestion @Jlaa . I checked all my CD shuttles and none has a MBUS/AINET switch, just as we expected.

I also kept the battery disconnected for more than 24 hours, then connected all cables. When done I connected the battery too, turned the radio ON, then entered the radio code. The radio powers up, can enter all modes and sound is present in radio mode and in cassette mode. In CD mode, after selecting disk 1, the message LOADING 1 appears. Choosing the second CD the message changes to LOADING 2. Although I do not have any more CDs loaded in the magazine, by pressing 3-6, the messages change to LOADING 3, LOADING 4 and so on up to # 6. Regardless what CD I select, the display shows LOADING X and stays that way no matter if I have a CD in that position in magazine or not. sound does not come on and FF to the next track does nothing.
IMG_20200603_220146.jpgIMG_20200603_220108.jpgIMG_20200603_220013.jpgIMG_20200603_220229.jpg

The CDs are factory recorded CDs and placement in the magazine is with the label up.

In conclusion the radio and tape modes function correctly. In CD mode it will display LOADING + the CD number and will not do anything else, no sound present. Exiting the CD mode to radio is w/o any problems.

Anybody has any idea as what am I dealing with here?
 
Last edited:
How frustrating. With my Yatour :
  1. Press 1, I get LOADING 1 for one sec, then CD52 and then I play music
  2. Press 2, I get LOADING 2 and it never stops loading
  3. Press 3, I get LOADING 3 and it never stops loading
  4. Press 4, I get LOADING 4 and it never stops loading
  5. Press 5, I get LOADING 5 and it never stops loading
  6. Press 6, I get LOADING 6 and it never stops loading
Can you take a picture of the wiring between the tuner module, the mx3192, etc.? I'd like to see how that's hooked up. If nothing looks amiss, I will get to the cables installed in my car and test the cables to ensure all of them are "straight through" (as opposed to pins swapped from one end to another).
 
I will take pictures tomorrow, although it will not be that clear to figure it out. In the meantime I will explain:
- from the front radio (Becker 1432) there is a 8-pin DIN cable that runs to the back, in the trunk. It was installed at the factory. In the trunk, I connected it to the MX3192, the female socket that has a silver dot.
- from the second female socket of the MX3192 I installed an 8-pin DIN Mercedes cable that goes to the amplifier. At the amplifier is connected to the 8-pin female socket (there is also a 6-pin socket that is not used).
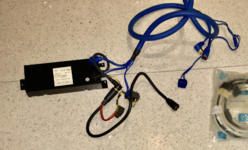
- the MX3192 has ab 8 inch cable that ends with a 8-pin DIN male connector. The CD is connected to it with a 8-pin DIN female connector. The female 8-pin is on a cable that I made myself and is shown in post #96. This cable feeds power to the Alpine CD separately thru two wires and doesn't supply power to MX3192, per answer from post #92.
- in the trunk the power cables are supplying 12V to the amplifier, the MX3192 and the CD shuttle (like I ust mentioned, from the shuttle 12V is NOT fed also to the MX3192).

I read the previous posts and I cannot see a flaw in the way I connected my components. The fact that @Jlaa gets identical messages with identical results on his radio when trying to play disks 2-6 makes me think this is more of a software compatibility between components rather than me having things connected wrong.

Also I am seeing on the internet people talking about "adapters" or "interfaces" in order to play aftermarket CD shuttles like Alpine with OEM radios. That makes me think that the addition of the Alpine 6-CD changer to an OEM system may not always be a plug and play job. The type of messages and the system's behavior make me believe the Alpine doesn't get/understand the commands coming from the radio.
 
Back
Top