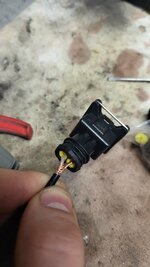
• Hi Guest !

    Welcome to the 500Eboard forum.

    Since its founding in late 2008, 500Eboard has become the leading resource on the Internet for all things related to the Mercedes-Benz 500E and E500. In recent years, we have also expanded to include the 400E and E420 models, which are directly related to the 500E/E500.

    We invite you to browse and take advantage of the information and resources here on the site. If you find helpful information, please register for full membership, and you'll find even more resources available. Feel free to ask questions, and make liberal use of the "Search" function to find answers.

    We hope you will become an active contributor to the community!

    Sincerely,
    500Eboard Management

OWNER Kridre (400E)

Kridre

400E Peasant
Member
Hello everyone!

Edit: 24.09.2022
SPREADSHEET with parts replaced
HERE

I think it's time to make my own owner's thread on this forum to help others and maybe bring something new when I'm in a middle of preparing this car for full respray hopefully next year.
This 400E Sportline is in my hands from 2014. It is my first and I hope the last car that I will own.

Car details and options:

  • production 1993
  • 199 - paint
  • 240 - outside temperature indicator
  • 244 - front sport seats
  • 249 - rearview auto dimming mirror
  • 278A - gray leather
  • 281 - sport steering and leather shift knob
  • 341 - additional side markers in fenders
  • 412 - sunroof (sidenote - I hate this thing)
  • 441 - electric steering column
  • 471 - ASR
  • 538 - automatic antenna
  • 540 - rear roller blind
  • 543 - curtains with illuminated mirrors
  • 570 - front folding armrest
  • 580 - AC
  • 592 - athermic windows, rear laminated glass
  • 611 - door lights
  • 620 - EGR
  • 630 - warning triangle
  • 653 - sport suspension, 8-hole alloy wheels 16'
  • 812 - rear speakers
  • 823 - additional equipment for Switzerland
  • 855 - I don't know what that means
  • 864 - same
  • 873 - heated front seats
  • 880 - IR door lock
  • 953 - Sportline

A lot have been done to this car in past 8 years, mostly mechanical repairs and some rust protection.

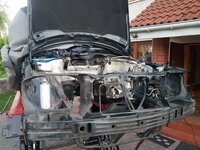
This is how this car looked like last year.
242172503_2907497959565110_1354067242494935276_n.jpg20180428_182438.jpg

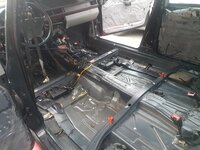
And this is how it looks like now.

20220825_193306.jpg20220811_190016.jpg

I will be adding more pictures in the future as this job goes along. Right now I'm at the point of preparing for storage of the body for a winter, sadly I don't have garage this big to do any work on it, but engine and transmission is already there and this is what I will be preparing over the winter. Along with sand blasting, zinc plating and AC rebuild as I found out metal shavings in compressor oil. This is because AC dryer was not replaced even once for the whole life of a car.

Now for a jobs that where performed in past 8 years that I have picutres of.

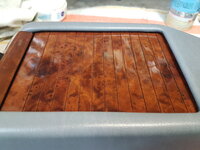
Wood polishing on a budget, it turned out really well, but wood cracks remained of course.

Before:

20180201_225416.jpg20180202_195237.jpg

After:

20180203_185019.jpg20180204_131408.jpg20180203_185045.jpg

Powersteering pump rebuild:

20180217_030517.jpg20180218_163244.jpg20180218_205130.jpg

New front OEM struts, one of them leaked after only 1k km, that's what you get sometimes when buying parts from ebay for half the price of new ones at the deeler. (MB didn't had front struts when I was performing this job, they appered two weeks later...) After that I bought standard Sachs 115 070.

20180322_173343.jpg

Engine lower, upper and AC warring harness repair. I'm still wondering how this cars even run with warring like that.

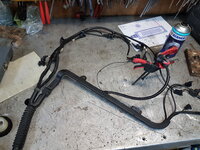
20180221_192035.jpg20180223_200005.jpg20180218_193702.jpg

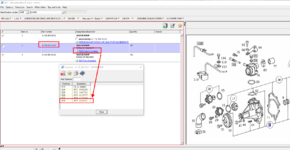
Timing chain, guides and water pump replaced. I bought Hella water pump because OEM pump with number 119-201-07-01 is NLA!!! and so it's Hella and INA right now. In Europe I don't have access to GRAF water pump. New hella pump is junk, my engine temps raised about 10 degrees after this job and front pulley wobbles like crazy, but I got no other option.
Guides didn't looked bad for almost 280k km but there was almost 5 degrees of timing missaligment on the crank.


20181220_211915.jpg20181220_212018.jpg20181222_130445.jpg

That's it for now at the end of this post I would like to thank you for shearing your knowledge so I could perform a lot of repairs and diagnostics by myself with yours help.
:cheers2:
 
Last edited:
The new OE struts (for E500E and Sportline .034) were made in Germany and leaked in 1000 km? That's crazy. New ones are made in Turkey and someone recently reported the same issue, but I thought the German ones would still be ok. 😥

1662757264338.png


... water pump replaced. I bought Hella water pump because OEM pump with number 119-201-07-01 is NLA!!! and so it's Hella and INA right now. In Europe I don't have access to GRAF water pump. New hella pump is junk, my engine temps raised about 10 degrees after this job and front pulley wobbles like crazy, but I got no other option.
Why did you replace the water pump? Was it leaking or noisy? If not, re-install the old one. Alternately, make SURE you are ordering the correct part number. For a May 1993 delivery vehicle it should be 119-200-15-01 which should be available from the dealer as a remanufactured pump (119-200-15-01-80).


1662757455642.png 1662757503431.png


Guides didn't looked bad for almost 280k km but there was almost 5 degrees of timing missaligment on the crank.
5° off at the crank is not terrible, but with all new guides it may drop to only about 2° which is normal.

:cheers2:
 
Why did you replace the water pump? Was it leaking or noisy? If not, re-install the old one. Alternately, make SURE you are ordering the correct part number. For a May 1993 delivery vehicle it should be 119-200-15-01 which should be available from the dealer as a remanufactured pump (119-200-15-01-80).

5° off at the crank is not terrible, but with all new guides it may drop to only about 2° which is normal.

:cheers2:
Pump was replaced for good measure and it made things worse and yes you are correct I gave wrong number for water pump, but I'm 100% sure when I was asking my dealer 4 years ago this pump was not available, or they didn't know about rebuild units. I will think about swapping it for old one or ordering new OEM rebuild pump. My temps are not that bad around 100°C in 36°C weather in summer, but before changing the pump it was never more than a 90°C. I did engine harness at the same time so maybe now it is showing correct temperature and before it was not.

Timing chain and guides where replaced because of ticking noise at the front cover that occurred with every revolution of a crankshaft.
Some progress today. Whole harness that is coming in to CAN box was removed. It was not an easy task, everything needs to come out in the engine bay to do this. There is some rust where can box sits so that was the reason for a removal and painting the engine bay will be easier later on.

20220905_163318.jpg


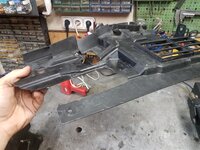
This plastic panel was broken, so a little bit of plastic welding and it is almost as good as new.


20220909_194302.jpg20220909_201643.jpg


Strength test passed successfully. :)


20220909_201649.jpg
 
Hello.

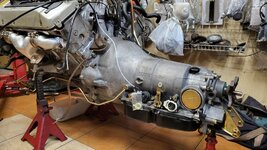
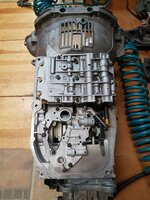
Some progress today, engine and transmission were separated, engine is on its stand ready for some work, but transmission is first to be repaired. There was a massive leak from the selector shaft, so I was thinking of only fixing this issue and leaving other things alone, but I'm glad i didn't do things this way.

First thing I checked was how bad this leak was so after cleaning I left everything for the next day, well I is awful even without engine running it was dripping all over the floor.


20220916_183251.jpg20220919_143747.jpg

So trans was cleaned, removed from the engine and put on a very professional stand to be worked on. First picure is 50/50 shot for fun.

20220919_145437.jpg20220919_170510.jpg20220919_183907.jpg20220919_185216.jpg20220919_173836.jpg20220919_193134.jpg

Then after removing the oil pan (there was a lot of clutch material at the botom) and valve body I removed the front pump and first pack of clutches and WOW, the carnage is real.

20220919_192829.jpg20220919_194607.jpg20220919_203932.jpg20220919_211502.jpg20220919_203936.jpg

Just look at this marks, all the steel plates are burned and 2 clutches are down to bare metal, brake band also needs to be replaced. That's it for only resealing this transmission and calling it good.

Anyone knows what brand of plates and clutches are good quality besides of OEM? I would like not to spend that much money to bring this transmission to life.
 
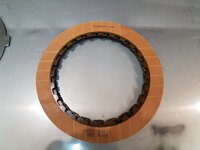
A little update, valve body was cleaned and the whole transmission is ready to be put back together after I find missing parts. I was able to find a manufacture of friction discs for this trany. Of course, it is you guys from across the ocean. Allomatic is making this parts in the USA, well I'm more and more convinced that finding parts for European car is easier in the USA than in Europe LOL. Still problem is finding steel plates for K2 drum, they are none to be found in thicknesses that I need. I'm in contact with a local transmission rebuild shop to help me find what I need.

Here are the pictures from my progress over last week. I used Elring reseal kit part number 476.060.
20220916_155100.jpg

Cleaning fluid after dunking lower half of the valve body for cleaning, glad I did that. All the seals were replaced, I only left in place K2 seal that requires drilling the rivets as it passed the leak test specified in the manual.
20220922_202817.jpg20220922_211600.jpg20220925_234421.jpg


Allomatic friction disc for K1 and aftermarket B1 band made in Germany, OEM band cost as of right now $290 ouch!! I didn't even ask about B2 band, the more expensive one.
20220925_234343.jpg20220925_234348.jpg
Ofcourse any rebuild would not be completed with some NLA parts, this speed sensor plug for electronic speedo is NLA at MB and mine is cracked, oh how nice.
20220925_234436.jpg

At last, I added google spreadsheet in the first post with all the parts that I bought for this job and pricing in PLN and USD along with some info what part it is. I hope it is readable, I will also add any NLA parts that I find along my journey.
 
Last edited:
Hello again!!

A lot of work has been done in the past week:

  • Transmission is in one piece finally!!!
  • Engine was disassembled for cleaning and finding leaks
  • Bolts, brackets, oil lines were prepared for zinc plating
  • NLA part was found
  • Transmission cable ripped apart as it was broken and needed replacement


Now with the pictures and descriptions.

PARTS PARTS and more parts.
20220929_122442.jpg20220924_162306.jpg

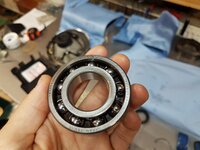
Starting with the trany, I replaced rear bearing (New one is made in japan), found that NLA part in good quantity, so I bought 4 pieces to help someone in the future and save one for me just in case. Whole transmission casing was cleaned with a bunch of degreasers rinsed with water multiple times to make sure that there is no debris left. Then dried with compressed air.

20220929_224229.jpg20220929_224242.jpg20220929_122854.jpg20220929_122912.jpg20220928_102406.jpg

Then it was just the case of putting the puzzles back together, when doing this job make sure to follow the manual there are at least 4 critical measurements to make sure that everything is working as it should.

310247055_790827315575684_8076204615174700906_n.jpg

If someone ever wondered what is inside this $270 special V8 ONLY cable here are the pictures, both of mine diaphragms were torn down and do not held any pressure whatsoever. Cable in not replaceable without destroying the whole assembly. I bought cable from E320 it is longer and has wrong connection at the end, but for that price of new one I'm willing to do some modding to make this work.

20221001_003345.jpg20221001_003356.jpg20221001_003403.jpg


After it I did some boring job of wire grinding every nut, bolt and washer for preparation for zinc plating. There were not a lot of them, but there will be more to come when I will be finishing with the engine. I decided to do them in bathes to not lost track what goes where.

20221001_012300.jpg20221001_160609.jpg20221001_160615.jpg20221001_160627.jpg

Then there was the time for the engine, everything was striped down up front to gain access to the front main seal and just look at that oily mess.

20221001_192319.jpg20221001_192310.jpg

I also removed the intake manifold to replace rubber seals that seal two parts together.

20221001_184100.jpg

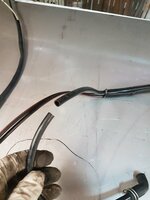
When I was removing the vacuum lines the pipe going in to the mot valve snapped in half. Well I should not be surprised and well look at this junk, every rubber hose on this engine was replaced not long ago and this pipe that is going in to the ETA is LEAKING!!! I will seal this connection with some rtv later, maybe this will solve this issue.

20221001_171745.jpg20221002_175230.jpg
Now with engine cleaning, I was trying to do this inside, but I gave up there was no way to get all of this this junk off without some proper power washing. So I took it outside

20221002_150731.jpg

MUCH BETTER and back inside.

20221002_160559.jpg20221002_160613.jpg20221002_163953.jpg

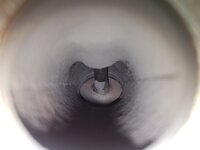
Then I got to work on cleaning the intake, I have my favorite all-purpose cleaner that I cleaned some engine parts before, to get this done as quicly as possible with little to none elbow grease I just poured cleaning solution in the intake after removing everything that could be damaged.

20221003_175625.jpg20221003_212724.jpg

Intake It is still submerged as I write this, I will let this sit there for the night.

Just to be sure that I didn't had bad wirring in my ETA I cracked it open and yes it is all good in there, ETA sticker says 00M02 so that is a relief.

20221003_182513.jpg


Well that is almost it, one thing that came up after cleaning the engine is that my front case is leaking!! Damm that was one job that I wanted to avoid at all cost. This will be nerve wracking for sure, head gasket replacement will not be cheap if I screw something up :thumbsdown:

20221003_215316.jpg
Also font pulley blot is not coming to lose I did tryed to heat it up, blased it with rented electric impact gun that is rated for 1700Nm of torque. I need to connect the engine with the transmission or put the flywheel back to make some better crank lock to just put some torque with really long pipe. Maybe also I will bolt down the engine to the ground to prevent it from lifting on its side. :scratchchin: Just kidding or maybe not LOL.

That's it for now. :cheers2:
 
Well that is almost it, one thing that came up after cleaning the engine is that my front case is leaking!! Damm that was one job that I wanted to avoid at all cost. This will be nerve wracking for sure, head gasket replacement will not be cheap if I screw something up
If it's the seam between the timing cover (front case) and engine block, you can apply an external bead of RTV sealant to stop the leak. Not pretty, but easy, affordable, and functional! See photos below.


Also font pulley blot is not coming to lose I did tryed to heat it up, blased it with rented electric impact gun that is rated for 1700Nm of torque. I need to connect the engine with the transmission or put the flywheel back to make some better crank lock to just put some torque with really long pipe. Maybe also I will bolt down the engine to the ground to prevent it from lifting on its side. :scratchchin: Just kidding or maybe not LOL.
Are you sure the electric impact is really putting out 1700Nm (~1200 lb-ft)? That should be enough to break the crank bolt loose.

:sawzall:

1664833025024.jpeg 1664833031470.jpeg
 
Thanks @gsxr for input, I think I will seal this leak exactly this way. I don't want to mess with this front cover.

This is what rental told me it was Milwaukee M18 with 1/2" socket it was going really strong on this bolt, it even left some indentations on it. I had trouble to hold it in place with both of my hands as my father was holding the engine, keeping it from sliding backwards. I was trying with 2m breaker bar and I just hang my whole body weight on it and the only thing that happened was that I managed to bend 10.9 bolt that was keeping the crank form rotating.
 
Not much going on right now, I'm waiting for the rest of the bolts to be zinc plated.


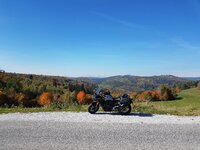
In the last weekend I went for my first and last motorcycle ride in this year, weather was amazing and views were even better. I went to the mountains in Slovakia. I did, 1200km in two days, and it was worth it.

20221008_122325.jpg20221008_145551.jpg

Today I picked up the first batch of the bolts that came back from zinc plating, this allowed me to finish up the transmission.

20221011_180940.jpg20221011_190952.jpg

If someone is doing intake restoration like I'm doing, take a note that EGR valve gasket is NLA and you will need to make one yourself. Here is the intake after cleaning. Not perfect, but better than before.

20221004_172726.jpg20221004_172302.jpg20221004_172134.jpg

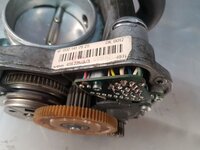
I don't know what to do with this throttle linkage, as it has plastic parts that are impossible to be removed before plating. Maybe someone did this in the past and will be willing to share how to zinc plate this parts without destroying them. If it is not possible, I will leave them alone.

20221011_143623.jpg
 

Attachments

  • 20221008_122325.jpg
    20221008_122325.jpg
    5.1 MB · Views: 13
  • 20221008_145551.jpg
    20221008_145551.jpg
    4.6 MB · Views: 12
  • 20221011_190952.jpg
    20221011_190952.jpg
    1.6 MB · Views: 11
  • 20221011_143623.jpg
    20221011_143623.jpg
    3.3 MB · Views: 17
Hi.

Really slow progress right now, I removed exhaust manifold and shipped them to be ceramic coated. In the pictures You can see the difference in the design of exhaust manifold seal, I really don't like it and hope there will be no issues with any leaks.

20221015_082340.jpg20221015_071923.jpg

After disassembly, I ordered new copper gaskets from MB, part number 117-142-03-80. They are correct fit and dimensions as you can see in the pictures.

20221022_000205.jpg20221022_000226.jpg

Of course, the dipper you dig, the more issues you find. Looking at my exhaust ports I saw, a lot of oil buildup on some of them and a little oil leak on others, so valve stem seals are being replaced. I found, one fits all tool to do this job while leaving the heads in place. It resembles OEM tool mentioned in the service manual, so I will be giving it, a try and will post the findings.

20221015_082627.jpg20221015_082428.jpg20221015_082519.jpg

Also, brake calipers will be rebuild, and they will be powder coded, hopefully by Monday. Pistons and this steel rings for the front brakes were only cleaned and in perfect condition.

20221012_162815.jpg20221012_213147.jpg20221012_213157.jpg

In the meantime, I'm fighting with my dad's 260E. It developed, a weird issue that after it warms up there is zero idle. Ether You keep it above 2k rpm, or it almost dies right away or stumble like crazy. After the car cools a bit, and you start it again, it is driving fine. I was thinking that maybe there was an issue with fuel distributor, but no issues there. I only found out that the seal around the piston is leaking, so that may be the case. I hope that there is no leak from the piston itself because I saw some really light scratch marks on it.

20221019_113420.jpg
 
For anyone doing any job at the top end of the engine, take a note. Srew for camshaft gear is NLA. Part number 104-990-00-22. Last price around $40.

So I will be reusing old srews with some loctite on them.
 
104-990-00-22 can be re-used, they are not torque-to-yield type. These are a T35 with captive washer, and 18Nm torque spec. Loctite not required. These were ~$3 USD each when still available, I didn't know they went NLA. :(

The later T40 bolt (120-990-02-04) was used on .98x engines does not fit the .97x engines, IIRC... there was a clearance issue, I think? Those are torque-to-yield design and are supposed to be replaced if removed. The T40 bolts are still available but may not work on .97x engines. From memory, the flange is too large for the recess in the .97x sprockets.

1667222246621.png
 
So my mistake, I was thinking that 104-990-00-22 is new type T40.

Another issue popped up today, here is how my knock sensor warring looks like.

313485127_531406772146193_4213129303791840399_n.jpg

I can't measure any resistance in the sensor and only one replacement that I found is for sale at kurth-classics for €230. I'm thinking about making new knock sensor harness that will connect to sensors from W210, but I don't think that this is a good idea. W140 knock sensor is also NLA.
 
Last edited:
Yeah, I remember the knock sensors went NLA, I think for 124, 140, and 129. The Kurth harness may work, those sensors were used on the later M119.98x engines. I haven't heard a direct report from anyone who has used the Kurth setup on .97x engines, yet. Sure hope that works because we don't have much choice! Used knock sensors are often in poor condition, and require hours of work to remove from a junkyard car.

:runexe:
 
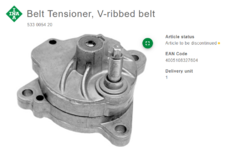
Quick note, according to the INA website, later style belt tensioner is going NLA. I know that this is really rare failure point but if anyone wants this part, grab it while you can.

Zrzut ekranu 2022-10-31 214631.png
 
Warning to USA buyers, the Febi tensioner 119-200-11-70 is not OEM, it's unknown/unbranded aftermarket. I ordered an INA pulley and there was Trucktec China pulley in the INA box! I was not amused. I'm not aware of any vendor that carries the INA tensioner in USA that will be European-made. Probably best to get OE/Genuine for these two items.

:oldman:
 
Well my Febi facelift tensioner is Made in Germany stamped in the metal, on the box and a Febi COO tag in the brown paper it is wrapped with. This was purchased about 2 years ago.
 
In the past week I removed cams and lifters, while I was waiting for my valve steam seals tool to arrive I have also begun cleaning all the 32 lifters. Two of them were collapsed, but after a good clean they are now working as they should, so no need for replacement.

314054621_1132684960983324_2058974335227983848_n.jpg313988565_1159926321396912_5331872786880113667_n.jpg

Tool arrived by friday and worked wonders and cost for it was only $60, also MORE parts. I also decided to replace the rear crank sensor and oil pressure sender.

314672518_844351556923610_5439454047934303620_n.jpg314646537_1070362876990551_975948394086957093_n.jpg314748527_624745939442222_7682360143432577218_n.jpg

Here is the old and new valve steam seal, old one was just plastic. 3.5 hours later and all the seals were replaced.

313392958_816731632987302_4956124852786567159_n.jpg314695223_686582382680702_7412738312875858668_n.jpg313379525_1279201739585386_4572477831604317380_n.jpg

I don't know if this job is even possible with engine inside the car, but definitively would be more time-consuming and big PITA job to do. I'm glad that I spotted this issue while the engine was on the stand.

I still didn't remove the front crank bolt, today I was trying it again. I was lifting the engine with a person sitting on it. Tomorrow I will rent that electric impact wrench again and give it another try with some heat from the torch. I hope this works, I really don't want nor I should cut this bolt. :brudda:

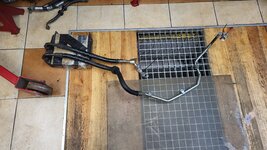
Also, I'm still waiting for parts to come back from zinc plating. I could not find any company local that would do any parts that are as long as trans cooler lines in yellow color, so they were shipped in to the different city. I hope they will be done in this month.
I need to start putting this engine back together ASAP. I'm starting to lose track of what goes where . :lolhit:

Oh, and in the meantime I removed the fuel tank from the car, of course the fuel hose going from the tank to the pump is cracked and due for replacement... Another run to the dealer, I can't wait to discover the European price for it. :jono:

If I remember correctly, this fuel hose is 034/036 specific, m' I right?
 
Ok, this parts prices in Europe vs USA, are getting f***ing annoying.

Bottom chain guide P/N 119-052-12-16 price at FCP euro $12. Price at the MB in Europe $112!!!!! This is just stupid.

I'm not buying this no way. Would anyone cooperate with me and shipped some parts to me from across the sea?

Fuel hose is the same, not that much of a difference but still.
 
Finally!!! I was able to break loose that stubborn front crank bolt, all that it took was my father sitting on the left bank and me standing on the engine with 2m (6.5ft) pole and giving it a healthy pull with my whole body, I was really thinking that the first thing that would give up would be my breaker bar, but now I know that I have a superb quality one. Now big question is how to torque it to spec, but I will worry about it later.
After that, I decided I will be removing the front timing cover to properly reseal it. So front and rear covers are off. Here you can see how flat the "o-ring's" are after 30 years. I don't know how they are not leaking. Also, now I know where the old timing chain was hitting, there are two little marks on the front cover, glad I replaced that chain and guides a few years back. Doing it now would probably be easier, but whatever. Who would have guessed that I will be removing the engine from the car. Definitely not me.

315527350_681796130224839_1601114083564729520_n.jpg315479027_509524981204041_559626996358890307_n.jpg315527182_1096074017767121_6542662525513931957_n.jpg

After almost 1 month of wait, all the parts came back from zinc plating. I think the picture speaks for itself. :drool5:

315530724_1105446606772838_5865120015300691454_n.jpg


With not time to waste, I assembled the intake and put it back in to its place. It is finally starting to look like an engine again, or at least more like an engine.

315207139_1314501499310024_5419654978177746591_n.jpg315530236_1066155447396926_5272952424713007699_n.jpg

Now the only thing to do is to order parts from FCP euro (I discovered today that they ship internationally for really low prices :doh:) and zinc plate remaining bolts from oil pans and any remaining that I missed. They estimate 8 day shipping to Poland so not much of a halt.
 
Hello,
My package from FCP finally arived just a moment ago. :jono:

Well, the quality of this last year production zoom tubes is a little bit... what can is say? Underwhelming??? I think I will stick with the ones that I got right now and this will be a spare. They are really poorly made, maybe that's why they are NLA from MB because of quality issues? I don't remember ones that I have right now looking like this. They are dated at 2008 if I recall correctly.

319577140_447108930964573_7167620264395955861_n.jpg319572982_680963733503036_2148713925927946410_n.jpg319558527_1191706608434522_3563934744707984793_n.jpg319553650_1385405152265640_2703947504874272088_n.jpg319656413_8371848452889711_3863229676222997377_n.jpg319758003_555350829369681_7387250953451457988_n.jpg

Now is finally time to put this engine back in to one piece.

Of course I also got brand new OEM throttle cable for one tenth of European price, take this MB Germany. :choochoo:

319240554_692413635747092_5684038908844853332_n.jpg

Edit: Just checked the old ones I got and they look almost the same so is just me being nitpicky...
 
Last edited:
Hello,

There will be not much going on till spring right now. Engine is back in one piece and I hope there will be no leaks from the front cover, I forgot what screw goes where and there was a lot of swapping the screws around after I already put the front cover on the engine.

I also made myself front and rear main crank seal installation tools. They are 3d printed but worked perfectly fine. If anyone want .STL file to print them yourself, I can post them somewhere in the forum for easy access. Now the last thing to do over the winter is to refurbish my AC compressor somewhere or order new one.

321907460_703657181268146_4011960497551622953_n.jpg322518551_474669898161090_2828840206135228081_n.jpg322394713_5695870587202202_6028073290477344781_n.jpg321806129_1140185446652915_8566736424123153027_n.jpg


321866375_1355195041984663_3794046540613604871_n.jpg323106421_1241058676762283_6970922574591122880_n.jpg322939480_661807375637475_3196694025990531620_n.jpg
 
Last edited:
Hi there!

So there is something that bothers me and I want to ask someone more knowledgeable than me. Today I have begun bolting my transmission back to the engine and something is of I think.

There is a gap between transmission housing and upper oil pan, I know that FSM says to align upper oil pan with transmission and I did that before tightening all the upper oil pan bolts.

So do I need to loosen all the bolts of the upper oil pan again and make sure there is no gap or is it acceptable?? Something maybe shifted when I was unbolting the transmission. Gaps are equal on both sides, four bolts up top are already tightened.

20230121_174355.jpg


Also this is how I locked the flywheel when touring the bolts, simple but effective.

20230121_164822.jpg

Edit: I loosened all the upper oil pan bolts and tightened the lower transmission bolts, the gap is still there, but a little bit smaller. Another issue is that after installation engine refuses to turn, I will remount the transmission tomorrow.
 
Last edited:
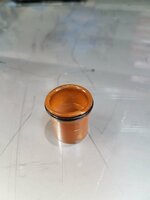
Hi, everything is sorted right now. Finally, the drivetrain is one piece again (only knock sensors and A/C compressor are missing) and engine spins by hand. I didn't put my torque converted all the way in :doh:, thankfully there was no damage to the pump or converter.

20230124_204729.jpg20230124_204837.jpg20230124_204856.jpg

Here is a quick quiz for you guys, I bought this part 124-321-00-36 #16 on diagram and I still don't know what it is for. I was trying to insert this between the rubber and spring, but it just does not fit in any way. I think that I was the only person to order this in the last 20 years. :lolol:

327687450_3291932914357151_4719733917611029004_n.jpg327721531_3477708882461039_7457780283262419470_n.jpg327897144_698929895193938_4859854078016043371_n.jpg

Edit: Quick side note, front fan's resistor is NLA P/N 000-158-32-45 at MB, I was forced to buy used one.
 
Last edited:
Here is a quick quiz for you guys, I bought this part 124-321-00-36 #16 on diagram and I still dont know what it is for. I was trying to insert this between the rubber and spring, but it just does not fit in any way. I think that I was the only person to order this in the last 20 years.
This is a sacrificial zinc insert designed to reduce corrosion. It fits at the BOTTOM of the spring at the end of the coil, between the spring and LCA.

:tigger:
 
Edit: Quick side note, front fans resistor is NLA P/N 000-158-32-45 at MB, I was forced to buy used one.
You are right - this is NLA from Mercedes now. It's also NLA from almost all aftermarket sources, but there are a handful of new OE still available on eBay, and also this vendor:


Get 'em while you can... used ones from the junkyard are often in poor condition.

:shocking:
 
@gsxr Thanks for reply, the one that I got is in good condition I think. I will post some pictures tomorrow, but I think will buy one new from ebay anyway because it is not that expensive like you mentioned. Last price at the MB was around $180 here in Europe. Also, big bummer, I wanted to buy screws for spark plug cover just in case that I lost them or in case of damage. They are also NLA!!!.... I also need to buy new A/C condenser that is also NLA, modify A/C lines to accept non V8 A/C dryer because, well, everyone knows why. Thank god that evaporator is still available new from hella berh.

I almost forgot, I also need to replace the oil cooler rubber hose that is molded to specific shape and of course this is also NLA. I cannot even unscrew the hose from the oil cooler, they are fused together for good, and I'm scared to break the oil cooler because well it is NLA, so I would need to order, a custom-made one.
 
I almost forgot, I also need to replace the oil cooler rubber hose that is molded to specific shape and of curse this is also NLA.
Which hose? I don't recall either of the rubber hoses being a molded shape, but the metal pipes are a formed shape.


I cannot even unscrew the hose from the oil cooler, they are fused together for good, and Im scared to break the oil cooler because well it is NLA, so I would need to order, a custom-made one.
Wait, what? Last I saw the oil cooler 140-500-00-00 was still available. See MB Classic link below. Also, some new are available on eBay (link). However, the aftermarker Mahle/Behr oil cooler is on backorder from all USA vendors... possibly NLA aftermarket. But you should be able to get a new OE Genuine cooler, or Mahle/Behr from eBay, for now.


1675609641964.jpeg
 
Here is another quick update, I got two used OEM engine mounts in good condition for less than $40, so I guess this is a win for me. Now I need to decide if I want to gable on the mayle mounts just because I'm curious how they will perform, or just forget them and install OEM. From the left MAYLE, used that I got and my old one.

20230202_222349.jpg20230202_222354.jpg

BBB mark is still visible here,

20230202_223011.jpg20230202_231659.jpg

Here is also the picture of fan resistor that I mentioned. For me, it is still in great condition.

20230205_181554.jpg20230205_181543.jpg

I also bought used knock sensor wiring from W140 that is in perfect condition, so I will try to refurbish my old one. I was scared to cut the plug in the wrong place, but I succeeded to split it without much damage. Here is how it looks like.

20230131_224656.jpg20230131_225316.jpg20230131_225324.jpg

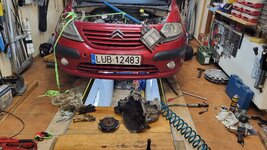
And here is picture of my yesterday 12 hours job of replacing the clutch in my family car, I hope I WILL NEVER HAD DO THIS AGAIN.

20230204_191152.jpg20230204_191211.jpg
 
You are right - this is NLA from Mercedes now. Its also NLA from almost all aftermarket sources, but there are a handful of new OE still available on eBay, and also this vendor:


Get em while you can... used ones from the junkyard are often in poor condition.

:shocking:
I ordered a couple of those from RM European, as they showed 6 units available and was just was notified that they can only ship one unit as they are out of stock :confused:
 
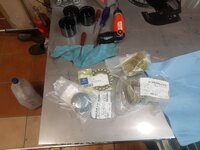
Today I received everything that was needed to rebuild my knock sensor harness, here is what is needed to do this job. (Don't look at that crapy brazing atempt at the corner)

  • 2x Bosch knock sensors 0 261 231 188
  • 2x Bosch EV 1 plug
  • Coaxial cable 3m
  • Electrical conduit 3m
  • Plug from old harness

20230209_174508.jpg20230209_174516.jpg

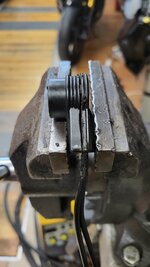
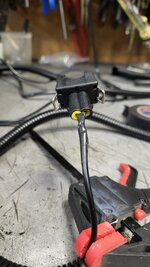
I soldered pins from my old harness, of course I made sure that they are correctly aligned and left, right sensor is not swapped in the plug itself. After that, I plastic welded the plug. Looking from the top, there is no sign that something was done to it.

20230209_180250.jpg20230209_181138.jpg20230209_182920.jpg20230209_182923.jpg

I made sure to transfer the heat shrink with part number from the old harness, I think that this car would not run correctly without it.

20230209_183704.jpg

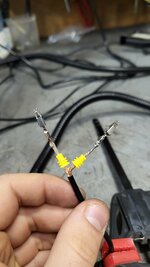
And at last I crimped the connectors and soldered them for good measure, also applied some electrical tape to the exposed wires. Pinout is important, I found this diagram that mentions it and I also checked it with my multimeter.

20230209_191653.jpg20230209_191815.jpg20230209_191901.jpg20230209_192004.jpgZrzut ekranu 2023-02-09 225758.png

Here it is, knock sensor harness is done. Total price $45, some time and one damaged harness.

20230209_192724.jpg

In my spare time I also made four antenna switches (two are already sold) and two horn buttons, one is for myself as I will be mounting Hella fanfare in the future.

20230208_171829.jpg
 
So, this knock sensor repair counts as a big fail... There is no way to fit this harness under the engine mounts, I just assumed that this would work because I did an exact copy of the harness that is pictured at khurt-classic.

Now I have some options:
  • Solder the connectors directly to the sensor and don't use the EV2 plug at all
  • Order new one from khurt. Maybe the picture is just for looks and actual harness looks different, but I doubt it
  • Install the spare harness that I bought
  • Grind away the engine mount and make everything fit
  • Buy different knock sensors from BMW E36 that look like this, but I'm worried going this way. Maybe this could damage my EZL or something IDK. I don't think this would hurt anything, but better be cautious.
preview.jpg

Here is how it looks, you can barely see the knock sensor. I marked how much I would need to grind to make this fit.

20230210_202001.jpg20230210_202018.jpg20230210_204810.jpg20230210_204851.jpg

Any sugestions anyone?
 
Oof. That is a bummer. It looked so beautiful!

My limited knowledge of knock sensors has me understanding that they are 'tuned' for each application. I would think running ones from an e36 wouldn't work, the block harmonics of an I-6 being completely different from a V-8. I'm sure there are others who are way more educated on this subject though that will chime in to assist.
 
I ground down the engine mounts to fit the new sensors, here is how they look like right now.

20230212_140052.jpg20230212_143603.jpg


It was still not enough to fit the bulky plugs, so I ordered a different one. Here is how they compare to each other.

20230215_181532.jpg20230215_181543.jpg20230215_182428.jpg20230215_184927.jpg

After a quick swap they plugged without even removing the mounts from the engine, I'm happy with the results. Some before and after pictures, I really forgot how nasty this engine was. :shock:

20220919_160938.jpg20230215_184901.jpg20220919_161222.jpg20230215_184809.jpg
 

Who has watched this thread (Total: 6) View details

Back
Top