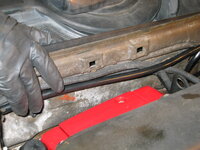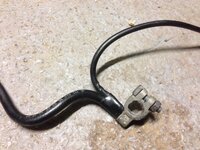

One of the items that I didn't do on my recent M104/W124 top-end rebuild was to replace the lower wiring harness. However, during that project, I did inspect the manufacturer's label on the lower harness, and it was confirmed to be original, having been manufactured during the 44th week of 1994 (October, 1994).
The more critical upper wiring harness had been replaced during 2006, and this was confirmed during the top-end rebuild by examining the manufacturer's label on that harness (see this post for photos of the upper wiring harness label).
The lower wiring harness on the M104 consists of two separate, self-contained wiring harnesses that are bound together by black cloth tape. The first and main portion of the harness is a straight cable that originates as the positive battery terminal, and terminates at the engine's starter solenoid in a large "L" shaped metal terminal, and a smaller ring-clamp terminal. Both of these connectors attach to the solenoid. A short lead "Y's" off from the positive battery terminal to a block near the battery, and provides power to several other wires in this area.
The secondary, smaller portion of the wiring harness connects the three-pronged connector at the inner firewall (just ahead of the brake booster and master cylinder) and goes to the oil level sender and oil pressure sender. This three-pronged connector leads to the instrument cluster to provide power to the gauges, and also allows the car to be started (bypassing the starter lockout/neutral safety switch) if necessary by applying voltage to the third terminal.
Quite often, the upper harnesses are replaced, but the lower ones are neglected because they are at the lower portion of the engine except where the main cable runs along the inner firewall directly behind the engine. Thus, given its placement, it does not experience quite the level of heat that the upper harness gets, given that heat tends to rise in the engine compartment. Nevertheless, after 15+ years, given the biodegradable nature of these harnesses' materials, it is prudent to replace the lower harness.
The MB part number for the lower harness on the late (HFM injection) M104 cars is 124 540 42 30. Current MB list price for this harness is around $130; it can be obtained from parts.com for around $103. All connectors are supplied with the harness, so no additional items must be purchased to go with the harness.
The job takes an average DIYer around 1.5-2 hours, taking one's time. It can likely be done in approximately 1 hour if focus is applied. It is best to do this job with a warm or cold engine; do not do it when the engine is hot. Ramps or jack-stands under the front of the car are required for under-car access.
I would rate this job as a moderately difficult job for a beginning DIYer, but a fairly easy job for an intermediate DIYer. On a scale of 1-10, I would rate this job at 2.5-3.0 difficulty.
The following hand tools are also required for this job:
Here is the procedure to do this job.
First, a couple of views of the harness in & outside of its packaging.


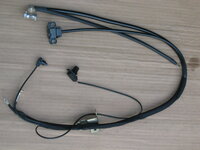
And some close-up views of the connectors at the ends of the branches of the new harness.


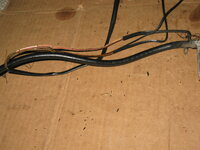
You can see the poor condition of the lead that "Y's" off of the battery terminal and goes to the terminal near the battery. The outer portion of the insulation has flaked off with age.
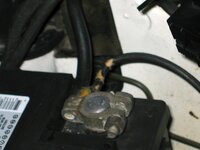
The first step is to remove the negative terminal from the battery. To secure it, I wrap it in a shop towel and move it out of the way, so that it cannot make direct contact with anything.


Next, I loosen and remove the positive battery terminal from the battery. And then, I remove the "Y" piece that is held by a ring clamp to the power terminal just forward of the battery.


And here are the two ends of the wiring harness, from the battery area.

Then I remove the rubber seal across the top of the inner firewall, since I'll be needing to slightly move the firewall to route the old cable and new cable past it. Same thing with the driver's side.


The next step is to disconnect the three-pronged plug at the inner firewall, and then to remove the connector from the firewall itself. Just tuck the connector out of the way; I just put it next to the brake lines. The male portion of the connector at the firewall is held on by two Philips head sheet-metal screws. Save these screws!!

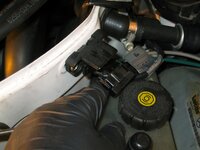


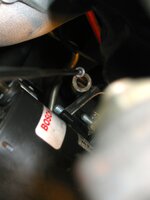
With the cable loosened, it is much easier to see the original manufacturer's tag attached to it. Yep ... it's original. The "44 94" moniker means it was made in October of 1994. Definitely overdue for replacement !


After that, I removed the plastic piece that holds the wiring harness and computer cables to the inner firewall, protecting them from direct contact with the back of the cylinder head and cam cover. If you remember, I had replaced both this inner firewall piece and the plastic connector; it is a VERY common thing for both of these pieces to fail due to age and engine heat, allowing the cables to touch the back of the engine. It's probably not a hazard, but IMHO it looks like crap, so it's a nice cosmetic upgrade to set things back to being as MB intended them. The plastic piece that retains the cables easily unclasps by pressing the two prongs at the ends of the plastic piece.


Then, I lifted the end of the inner firewall piece and removed the cable from the bundle, and moved it toward the center of the car. Here you can see me moving the large battery terminal cable.


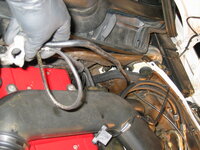
The next step is to get underneath the car. You need to use the 8mm socket on the 1/4" ratchet to remove the six bolts that hold the under-engine encapsulation panel to the car, and set the panel aside. Then, get under the car and find the oil level connector in the side of the oilpan. Pull this connector straight off and set it aside.


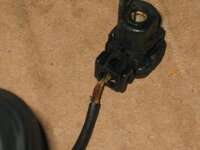
Then, remove the wire leading to the oil level sender from the plastic connector that holds it in place. The connector just presses out of the hole in the bracket. It should be in there together with a black vacuum line that goes from the intake manifold to the transmission's modulator a bit further back.

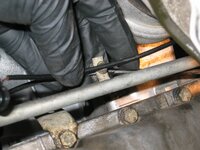
If you look straight up, you can see the wiring harness and where the lead that goes to the oil level sender branches out from the main part of the harness. You can also see, in the photo below, the black fabric tape unraveling from the harness. This unraveled as a result of the harness being moved aside and tweaked during oil changes, as it runs in very close proximity to the oil filter housing and is brushed aside and disturbed when unscrewing the oil filter housing cap to remove the filter from the housing.

You can see in the photo below, the plastic circular connector that retains the green and gray vacuum lines to the oil filter housing, to keep them away from sources of heat in the area that might melt the lines. This retaining connector presses straight into a metal piece that is directly attached to the wiring harness; this metal piece is screwed directly into the oil filter housing. In the case of my harness, the zip-tie that had held the harness to this metal plate had evidently come loose or had disintegrated from heat, as my harness was not held to this plate. However, the circular connector was pressed into its hole in the plate, so I released it.

CONTINUED IN NEXT POST
The more critical upper wiring harness had been replaced during 2006, and this was confirmed during the top-end rebuild by examining the manufacturer's label on that harness (see this post for photos of the upper wiring harness label).
The lower wiring harness on the M104 consists of two separate, self-contained wiring harnesses that are bound together by black cloth tape. The first and main portion of the harness is a straight cable that originates as the positive battery terminal, and terminates at the engine's starter solenoid in a large "L" shaped metal terminal, and a smaller ring-clamp terminal. Both of these connectors attach to the solenoid. A short lead "Y's" off from the positive battery terminal to a block near the battery, and provides power to several other wires in this area.
The secondary, smaller portion of the wiring harness connects the three-pronged connector at the inner firewall (just ahead of the brake booster and master cylinder) and goes to the oil level sender and oil pressure sender. This three-pronged connector leads to the instrument cluster to provide power to the gauges, and also allows the car to be started (bypassing the starter lockout/neutral safety switch) if necessary by applying voltage to the third terminal.
Quite often, the upper harnesses are replaced, but the lower ones are neglected because they are at the lower portion of the engine except where the main cable runs along the inner firewall directly behind the engine. Thus, given its placement, it does not experience quite the level of heat that the upper harness gets, given that heat tends to rise in the engine compartment. Nevertheless, after 15+ years, given the biodegradable nature of these harnesses' materials, it is prudent to replace the lower harness.
The MB part number for the lower harness on the late (HFM injection) M104 cars is 124 540 42 30. Current MB list price for this harness is around $130; it can be obtained from parts.com for around $103. All connectors are supplied with the harness, so no additional items must be purchased to go with the harness.
The job takes an average DIYer around 1.5-2 hours, taking one's time. It can likely be done in approximately 1 hour if focus is applied. It is best to do this job with a warm or cold engine; do not do it when the engine is hot. Ramps or jack-stands under the front of the car are required for under-car access.
I would rate this job as a moderately difficult job for a beginning DIYer, but a fairly easy job for an intermediate DIYer. On a scale of 1-10, I would rate this job at 2.5-3.0 difficulty.
The following hand tools are also required for this job:
- 1/4" ratchet with long extension (or two), and 8mm and 10mm sockets
- 3/8" ratchet with 10mm and 13mm sockets
- medium-sized Philips screwdriver
- 13mm open-end or box-end wrench
- work-light
- magnetic pick-up tool (in case hardware is dropped)
Here is the procedure to do this job.
First, a couple of views of the harness in & outside of its packaging.
And some close-up views of the connectors at the ends of the branches of the new harness.
You can see the poor condition of the lead that "Y's" off of the battery terminal and goes to the terminal near the battery. The outer portion of the insulation has flaked off with age.
The first step is to remove the negative terminal from the battery. To secure it, I wrap it in a shop towel and move it out of the way, so that it cannot make direct contact with anything.
Next, I loosen and remove the positive battery terminal from the battery. And then, I remove the "Y" piece that is held by a ring clamp to the power terminal just forward of the battery.
And here are the two ends of the wiring harness, from the battery area.
Then I remove the rubber seal across the top of the inner firewall, since I'll be needing to slightly move the firewall to route the old cable and new cable past it. Same thing with the driver's side.
The next step is to disconnect the three-pronged plug at the inner firewall, and then to remove the connector from the firewall itself. Just tuck the connector out of the way; I just put it next to the brake lines. The male portion of the connector at the firewall is held on by two Philips head sheet-metal screws. Save these screws!!
With the cable loosened, it is much easier to see the original manufacturer's tag attached to it. Yep ... it's original. The "44 94" moniker means it was made in October of 1994. Definitely overdue for replacement !
After that, I removed the plastic piece that holds the wiring harness and computer cables to the inner firewall, protecting them from direct contact with the back of the cylinder head and cam cover. If you remember, I had replaced both this inner firewall piece and the plastic connector; it is a VERY common thing for both of these pieces to fail due to age and engine heat, allowing the cables to touch the back of the engine. It's probably not a hazard, but IMHO it looks like crap, so it's a nice cosmetic upgrade to set things back to being as MB intended them. The plastic piece that retains the cables easily unclasps by pressing the two prongs at the ends of the plastic piece.
Then, I lifted the end of the inner firewall piece and removed the cable from the bundle, and moved it toward the center of the car. Here you can see me moving the large battery terminal cable.
The next step is to get underneath the car. You need to use the 8mm socket on the 1/4" ratchet to remove the six bolts that hold the under-engine encapsulation panel to the car, and set the panel aside. Then, get under the car and find the oil level connector in the side of the oilpan. Pull this connector straight off and set it aside.
Then, remove the wire leading to the oil level sender from the plastic connector that holds it in place. The connector just presses out of the hole in the bracket. It should be in there together with a black vacuum line that goes from the intake manifold to the transmission's modulator a bit further back.
If you look straight up, you can see the wiring harness and where the lead that goes to the oil level sender branches out from the main part of the harness. You can also see, in the photo below, the black fabric tape unraveling from the harness. This unraveled as a result of the harness being moved aside and tweaked during oil changes, as it runs in very close proximity to the oil filter housing and is brushed aside and disturbed when unscrewing the oil filter housing cap to remove the filter from the housing.
You can see in the photo below, the plastic circular connector that retains the green and gray vacuum lines to the oil filter housing, to keep them away from sources of heat in the area that might melt the lines. This retaining connector presses straight into a metal piece that is directly attached to the wiring harness; this metal piece is screwed directly into the oil filter housing. In the case of my harness, the zip-tie that had held the harness to this metal plate had evidently come loose or had disintegrated from heat, as my harness was not held to this plate. However, the circular connector was pressed into its hole in the plate, so I released it.
CONTINUED IN NEXT POST