• Hi Guest !

    Welcome to the 500Eboard forum.

    Since its founding in late 2008, 500Eboard has become the leading resource on the Internet for all things related to the Mercedes-Benz 500E and E500. In recent years, we have also expanded to include the 400E and E420 models, which are directly related to the 500E/E500.

    We invite you to browse and take advantage of the information and resources here on the site. If you find helpful information, please register for full membership, and you'll find even more resources available. Feel free to ask questions, and make liberal use of the "Search" function to find answers.

    We hope you will become an active contributor to the community!

    Sincerely,
    500Eboard Management

The $400 400E

Caps and rotors available new from MB and wires I understand Beru to be a very good aftermarket choice. In any case, best of luck with it!
 
Stupid car. The hot idle misfire is back.

The only NEW parts in the ignition system are the plugs. Everything else looks very good, but none of it is OE and none of it is brand new. I'm considering going through and replacing other components with new.

Any thoughts on exactly what to buy? Is everything available new from MB? If not what are the best options available?

Should I start with caps and rotors, or wires, or...? Should insulators just be replaced, or can they be reliably tested/inspected? What about coils?

I have multiple sets of everything, and I have swapped everything out, but I can't say for sure that I don't have multiple bad examples of any parts.

Is there anything else that would cause a hot idle misfire? LH module? EZL?
I know you mentioned that you have fairly newish Bremi wires …. Is it possible that your hot idle misfire can be observed as a spark plug wire grounding out through the insulation to the block ….when it is dark …. like at night time?

I vaguely remember @dionphaneuf chasing after an elusive hot idle misfire for a long time. We even put my SDS HHTWIN setup on the car w inconclusive results …. But I think he eventually found that his wires were grounding out by observing at nighttime.
It's a good thought. I actually checked that. Granted, that was before I changed the plugs, so the wires have been pulled and re-installed since then. Wouldn't hurt to check again.
 
It's a good thought. I actually checked that. Granted, that was before I changed the plugs, so the wires have been pulled and re-installed since then. Wouldn't hurt to check again.
Yeah, I mean, you thought changing plugs from NGK to MB Berus solved the problem …. Until the problem wasn’t solved …. But you had to have moved the wires along the way…..
 
Yeah, I mean, you thought changing plugs from NGK to MB Berus solved the problem …. Until the problem wasn’t solved …. But you had to have moved the wires along the way…..
Right. It's weird though. The issue did go away for a couple weeks, and I did find a plug that tested bad. Not saying that proves or disproves anything. Just weird.
 
Did you ever get your hands on a working copy of SDS? Dave’s reminded me many times that the ignition voltages on each cylinder can be monitored. Pretty handy to diagnose which cylinders are giving you problems. Will help understand if its consistently one cap that is iffy for example.
 
Did you ever get your hands on a working copy of SDS? Dave’s reminded me many times that the ignition voltages on each cylinder can be monitored. Pretty handy to diagnose which cylinders are giving you problems. Will help understand if its consistently one cap that is iffy for example.
No, it's hard to justify the expense for one problem on one car. It would be one thing if I had a fleet of Mercedes that needed work, but this is the only Mercedes I have, so I'm hoping to work this out without spending double the purchase price of the car on a diagnostic tool I'll only use once.
 
Trust me, you'll use the SDS more than once. And if you don't keep buying MB's, you can recoup most of the SDS investment after selling your last MB.

I'd start with double checking the wires as mentioned above. IMO there's no advantage to buying OE caps, many years ago these were slightly different vs Bosch aftermarket, but recent reports indicate they are now identical but OE is 2x-3x the price. OE Doduco rotors are worth it though, now that the aftermarket Beru-reboxed-Doduco a largely NLA (but, you might get lucky and find some NOS at NAPA, as Jlaa has found previously). Bosch insulators are fine also (no need for OE). Verify there's no engine oil at the bottom of the caps, if so, fix the leak... either cam seals, or cam solenoid. Replace both those items proactively on the 5L before swapping. New Bosch coils won't hurt either but I suspect this isn't likely to cure the problem.

LH/EZL are extremely unlikely to be the root cause, my money is on secondary ignition, but pinpointing the culprit could be tough.

Can we back up a bit - how severe is the hot misfire? Is it continuous when hot, or intermittent? Only at idle, or does it go away at higher RPM? Does it occur every time the car reaches operating temp? Is it persistent, i.e. never goes away at operating temp? Etc.

:shocking:
 
Can we back up a bit - how severe is the hot misfire? Is it continuous when hot, or intermittent? Only at idle, or does it go away at higher RPM? Does it occur every time the car reaches operating temp? Is it persistent, i.e. never goes away at operating temp? Etc.
It's extremely noticeable and consistent sitting at a red light. Hot idling in gear it shakes the whole car. It's not 100% consistent, but it's there probably 70-80% of the time. I think it goes away at higher RPM, but I'm not certain. I have noticed a little hiccup here or there at higher RPMs, but I don't notice it very often and can't say for sure that it's the same thing.
 
It's extremely noticeable and consistent sitting at a red light. Hot idling in gear it shakes the whole car. It's not 100% consistent, but it's there probably 70-80% of the time. I think it goes away at higher RPM, but I'm not certain. I have noticed a little hiccup here or there at higher RPMs, but I don't notice it very often and can't say for sure that it's the same thing.
Have you installed the new engine mounts yet?
 
I will never claim to be an electrical guru, but I am of the opinion that MANY of these issues are the result of the insulators. I have various old ones (hoping to find someone to lead the way to a nonconductor chemical/epoxy one day) on the shelf that look good but are not. I would spring for new ones if you have not already.
 
I will never claim to be an electrical guru, but I am of the opinion that MANY of these issues are the result of the insulators. I have various old ones (hoping to find someone to lead the way to a nonconductor chemical/epoxy one day) on the shelf that look good but are not. I would spring for new ones if you have not already.
I have not purchased new yet. I have two sets, one from the 400E and one from the S500. I've tried them both, but not AFTER replacing the plugs seemed to have resolved things. Also, there is of course no guarantee I didn't have problems with both sets.

It's also possible that this could be related to oil leakage. I know I have a valve cover gasket leak at the front of the passenger side valve cover. At one point I did see oil seeping into the bottom of the left distributor cap. The cam seal was totally dry and I don't think it was coming from the cam solenoid. Regardless, when I dealt with this before, cleaning everything up and swapping in different (used) caps made not difference.

I really need to just step through the whole process again. Inspect, test, and potentially replace all components. It's free to swap around my various different used parts, although as previously noted, there's no guarantee I don't have multiple bad examples of a particular part.
 
It's also possible that this could be related to oil leakage. I know I have a valve cover gasket leak at the front of the passenger side valve cover. At one point I did see oil seeping into the bottom of the left distributor cap. The cam seal was totally dry and I don't think it was coming from the cam solenoid.
Definitely check this closely. If the cam seal is totally dry, it's 99.44% likely the source is the cam solenoid - either from the flange sealing surface, or from the joint between the halves of the metal shells (likely from the electrical connector rectangle opening). The bolts all need to be coated in anaerobic sealant as well.

I'm about to replace the cam solenoids on one of my cars as I'm tired of the oil leak, and I'm too lazy for the budget repair shown here. I do want to try the budget repair on the old ones so I can swap them on to the next engine, and so on... have multiple M119's with the same leaky solenoids, in varying degrees of severity.
I will. I already ordered up the rivets to do this job proactively on my 5.0. Maybe I'll go ahead and do those now and then just install them on the 4.2 for now. I really should just do the damn valve cover gaskets too. I've been resisting since the motor will be coming out in the near future. I guess I could yank the aluminum cam oiler tubes and swap in a set of plastic at the same time so I have the aluminum tubes available for the 5.0. It's that stupid valve cover gasket that stopped me from running the car at Firebird at the end of the year.

It does seem crazy to do all this on an engine I'm about to pull, but since I'll be swapping a bunch of stuff over to the 5.0, and since I want to minimize the number of variables and the number of symptoms that need troubleshooting after the swap, I really want to have this sorted before I open that can of worms.
 
I have an appointment Friday to get my windows tinted. I haven't decided on the shade yet though. Since it's a white car, I think 20% would probably look too dark. Trying to decide between 35% and 50%.

I've never done 50% on a car before. I worry that it might be so light that it's not even worth doing. Trying to find the best balance between heat rejection/privacy and appearance. I don't think a car like this looks good with super dark tint. Although my car does have several aftermarket changes, I like the fact that to the casual observer it looks pretty stock. Murdering out the windows would detract from that.

Would 35% look appropriate, and still somewhat subtle for this car, or should I stick with 50%?
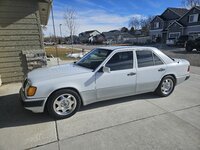
It may be too late, being Friday, but here is a picture of 35% in average light. I'm very happy with it. Had the same concern about being too dark.
 

Attachments

  • IMG_9791.JPG
    IMG_9791.JPG
    759.1 KB · Views: 18
It may be too late, being Friday, but here is a picture of 35% in average light. I'm very happy with it. Had the same concern about being too dark.
Not too late actually. I'm just getting ready to head out the door now. That looks perfect! That's exactly what I want. Thanks for posting this. I'm going to do 35%.
 
There's nothing on my invoice that would remind me of the type of film however I remember it was a great product that was claimed to reject nearly all the solar energy. The cost to do all windows was $450.
 
It may be too late, being Friday, but here is a picture of 35% in average light. I'm very happy with it. Had the same concern about being too dark.
My tint looks similar to 35% but I’m not sure since it came with the purchase.
 

Attachments

  • IMG_0546.jpeg
    IMG_0546.jpeg
    4 MB · Views: 5
  • IMG_0545.jpeg
    IMG_0545.jpeg
    2.6 MB · Views: 5
  • IMG_0543.jpeg
    IMG_0543.jpeg
    2.8 MB · Views: 5
There's nothing on my invoice that would remind me of the type of film however I remember it was a great product that was claimed to reject nearly all the solar energy. The cost to do all windows was $450.
This guy only uses top quality ceramic tint. We talked in advance and I removed the door panels and 3rd brake light myself so he doesn't have to take the risk with removing them. $400 total cost.
 
That was interesting. When I dropped the car off the owner of the shop showed me the shades. I asked what product it was and it turns out it was not ceramic. I asked about ceramic and he said that was more money. I told him I thought we were talking about ceramic, and that another shop in town had quoted me $400 for ceramic.

He apologized for any confusion and said that since I was already there, and he had the time slot scheduled for me, he'd go ahead and do the ceramic for $400.

I genuinely believe it was just a miscommunication over the phone. He was not trying to bait and switch me. He did not have to do that. I was really impressed. You just don't see that kind of professionalism very often any more.

Should have the car back in a couple hours. I'll post some pictures when I pick it up.
 
Ok, so I'm getting close to the point of engine swapping. Of course, the plan is to tear down the 5 liter and clean and reseal everything first.

One thing I'm considering is my piston ring gap. I do plan on tearing this engine down to the short block. It would not take much to pull the pistons and open up the ring gap. I know this may go beyond the knowledge of many enthusiasts, so to briefly explain, piston ring gap should be wide enough to prevent the rings from fully closing up, even at the highest temperature and cylinder pressure the engine will ever see. If they do fully close up, major damage can occur. So, in engines that are going to see forced induction or nitrous that will significantly increase cylinder pressures, filing the piston rings to a wider gap is a wise move.

I don't know if I'll ever add a power adder, but I kind of want to prepare for the possibility. So should I open up the ring gap before I put this motor back together?

Looking down the road, I know I will eventually want to make this car faster than the stock 5 liter will be able to take it. I've already been thinking of a manual transmission swap. Not for actual performance. Just for the fun of rowing my own gears and the cool factor of a v8 stick shift w124. Beyond that, I'm thinking that maybe forced induction might be in my future.

I don't know if I'll ever actually do it. It's one thing to slap a turbo on it. It's another to actually make it run and drive well. Nitrous would be a potentially simpler option, but not my first choice. I think my preference would be a supercharger. I don't know of anyone who makes kits for this application any more, so a generic centrifugal supercharger and plenty of fabrication, machining, and custom tuning would be in order. Again, I probably won't ever pull the trigger on it. I just know I might want to go faster than a stock 5 liter.

So I guess there are two questions.

First, what other options are there to go faster? The 5 liter, 3.06 gears, CLK wheels, WOT LH module, and lighter 400E chassis should make this car faster than any stock 500E. What more can be done? I know a 6.0 build is unreasonably expensive. I'd LS swap it before I'd spend that kind of money on such relatively small gains.

If the only option for a reasonable increase in power is forced induction, should I just open up my ring gaps now? It won't be the end of the world to have larger than necessary ring gaps, but it can result in a minor reduction in compression, and potentially a small amount of oil consumption.

Or am I better off just committing to leaving is naturally aspirated and leaving the ring gaps alone?


Stolen from the Wiseco Pistons website:
For a street engine, multiplying your bore size by 0.004in will give you the top ring gap you are looking for.

004 x 4.00in bore = 0.016 inch ring gap
For high performance engines, the multiplier changes to add more clearance, but the math stays the same:

Modified or Nitrous Oxide – 0.005in x 4.00in bore = 0.020 inch ring gap
High Performance Racing – .0055in x 4.00in bore = 0.022 inch ring gap
Racing with Nitrous/Turbo – 0.006in x 4.00in bore = 0.024 inch ring gap
Racing Blower/Supercharger – 0.007 x 4.00in bore = 0.028 inch ring gap

For the second ring, the process is the same, but with a slightly different gap, based on application:

Street – 0.005in x bore size
Modified or Nitrous Oxide – 0.0055in x bore size
High Performance Racing – 0.0053in x bore size
Racing with Nitrous/Turbo – 0.0057in x bore size
Racing Blower/Supercharger – 0.0063in x bore size
 
I don't know if I'll ever add a power adder, but I kind of want to prepare for the possibility. So should I open up the ring gap before I put this motor back together?
I think it depends on the intended level of power increase. At moderate levels, this may not be needed, and might come with some risk (of screwing it up).


Looking down the road, I know I will eventually want to make this car faster than the stock 5 liter will be able to take it. I've already been thinking of a manual transmission swap. Not for actual performance. Just for the fun of rowing my own gears and the cool factor of a v8 stick shift w124. Beyond that, I'm thinking that maybe forced induction might be in my future.

I don't know if I'll ever actually do it. It's one thing to slap a turbo on it. It's another to actually make it run and drive well.
I'm glad you realize this. Installing the power adder is the easy part. Making in run & drive well is exponentially more difficult, particularly if you want it to drive anything like the factory produced it. I've seen a couple of remote-mount M119 turbo setups but there was never any useful information available, and I have a feeling lag may be unacceptable for normal street driving.


Nitrous would be a potentially simpler option, but not my first choice.
Nitrous is the easiest to implement, and a couple decades ago a company produced a kit for the M119/W124. A number of these have been installed with no reports of major failure. It's a dry setup based on a Mustang 5.0 kit, and will be limited by fuel supply / injector rate. This should be good for up to +150hp, maybe more.


I think my preference would be a supercharger. I don't know of anyone who makes kits for this application any more, so a generic centrifugal supercharger and plenty of fabrication, machining, and custom tuning would be in order. Again, I probably won't ever pull the trigger on it. I just know I might want to go faster than a stock 5 liter.
Koenig Specials and Albrex both made M119 kits back in the day (I think Koenig used the Albrex kit and put the Koenig name on it?). But as you noted, even with the kit parts, there's a ton of fabrication needed. And, the drive belt setup likely would not clear your electric fan.


So I guess there are two questions.

First, what other options are there to go faster? The 5 liter, 3.06 gears, CLK wheels, WOT LH module, and lighter 400E chassis should make this car faster than any stock 500E. What more can be done?
This depends what you are looking for. Better performance numbers only? Nitrous will have the best ROI. Want a ton of midrange, part-throttle torque? That will need displacement or forced induction. Etc. Also depends how much more you want. 400-450hp is within reach. 500-600 or more will require more briefcases of unmarked bills, then you have to worry about breaking drivetrain components downstream... the snowball effect will be a problem.


I know a 6.0 build is unreasonably expensive. I'd LS swap it before I'd spend that kind of money on such relatively small gains.
Part of the 6.0 cost is the block machining/boring/etching. If you could locate a M117 5.6L crankshaft, you could try to build a 5.6L... need the crank, some machining/mods, and custom pistons. But, you leave the block alone and can use stock head gaskets. Also, the cost of forced induction could be steep as well...


If the only option for a reasonable increase in power is forced induction, should I just open up my ring gaps now? It won't be the end of the world to have larger than necessary ring gaps, but it can result in a minor reduction in compression, and potentially a small amount of oil consumption.

Or am I better off just committing to leaving is naturally aspirated and leaving the ring gaps alone?
I'd lean towards leaving the ring gaps alone. But first, check the FSM for factory gap specs. I have no idea what they are. Also, the first thing I would do is send an email to Total Seal and inquire if you can get a set of gapless rings for the M119. Remember that you are dealing with an Alusil etched aluminum bore, NOT iron sleeves. More info on the bore is in this document.


Stolen from the Wiseco Pistons website:
For a street engine, multiplying your bore size by 0.004in will give you the top ring gap you are looking for. (snip)
Wiseco is largely dealing with domestic engines with iron bores, or sleeves. I don't know if the numbers they published are applicable to an Alusil application. If I'm reading the FSM correctly (03-3170), the Wiseco "recommended" gaps are nearly 10x larger than MB spec, which would be a serious red flag to me. Also, Wiseco may be providing that data for engines making 1000-2000hp, not 400-500 which in their view is basically stock...


:blower:
 
If you could locate a M117 5.6L crankshaft, you could try to build a 5.6L... need the crank, some machining/mods, and custom pistons. But, you leave the block alone and can use stock head gaskets.
Hmmm. There's a thought. Are we sure custom pistons are required? Not saying you're wrong, just wondering if there are other options. I'd assume that the longer stroke would mean stock M119 pistons with stock M119 rods would push the pistons out of the cylinder. Is there a shorter rod that would work with the M117 crank and M119 piston? What about a piston with a higher pin height that would work with the M119 rods?

A few years ago I built a stroker Jeep engine this way. I used a 4.0l block and head, then used a 4.2l crank and rods, with the 4.0l pistons. The cylinders were in good shape, so I didn't bore it. I used all factory parts. This resulted in a 4.5l. I had to deck the block .030 to get the piston quench height correct, and then I had to take 10mm off the crank snout to make the crank work with the later serpentine damper. It worked great.

Nitrous is the easiest to implement, and a couple decades ago a company produced a kit for the M119/W124. A number of these have been installed with no reports of major failure. It's a dry setup based on a Mustang 5.0 kit, and will be limited by fuel supply / injector rate. This should be good for up to +150hp, maybe more.
What would this look like today? Do we know what was different between the Mustang kit and the old M119 kit?
 
The custom pistons are needed to move the wristpin closer to the top of the piston. Otherwise, the longer stroke will push the piston out the top of the block. The rods are already short, I don't think it would be a good idea to try shorter rods, then you replace custom pistons with custom rods. I don't know of anything off-the-shelf that will fit.

The NOS kit had some additional bits to make it work with the M119 fuel rail, EZL, etc... nothing major. The Mustang kit would still be the basis to try and fabricate this today.

:nos:
 
Ok, I think that's enough of that thought experiment. Probably not worth messing with anything bottom end. The custom machine work and custom pistons required to get to 5.6 liters is probably not worth the expense, especially when spray is so accessible. That's not to say that I wouldn't ever want a W124 with big power, but if I ever decide to go bananas like that, I'd probably do something unholy like an LS swap in a CE or something. I have too much time into making this car decent in stockish form to ruin it with anything other than an M119.

Still thinking about that stick shift swap though...
 
Ok, I think that's enough of that thought experiment. Probably not worth messing with anything bottom end. The custom machine work and custom pistons required to get to 5.6 liters is probably not worth the expense, especially when spray is so accessible. That's not to say that I wouldn't ever want a W124 with big power, but if I ever decide to go bananas like that, I'd probably do something unholy like an LS swap in a CE or something. I have too much time into making this car decent in stockish form to ruin it with anything other than an M119.\
See if you can locate a cheap 5.6L M117 to source the crankshaft from. There was a 560SEC in the Boise Jungle a few years back, but I didn't have the time/energy to go pull the motor to extract the crankshaft. Per the AMG E60 manual (in PDF form on the forum) there are minor mods needed to the M119 rods and block. The main cost would be pistons. That said, on paper this should be good for 360hp/400tq.

Normally, the labor involved to pull a motor, tear it apart, and re-assemble kills the ROI. But - you already have a 5.0 block on the engine stand, and plan to pull the pistons anyway...


Still thinking about that stick shift swap though...
I have very mixed feelings about this. Stick shift is fun, but OMG it's so much work and fabrication. On a 500E you'd probably make money if you sold it, but not on a 400E. Besides - Treasure Valley traffic with a stick? Oooof. I'd be more interested in the 722.6 swap, which also isn't easy or cheap, but is closer to almost maybe sort of a bolt-in.

:banana2:
 
I have very mixed feelings about this. Stick shift is fun, but OMG it's so much work and fabrication. On a 500E you'd probably make money if you sold it, but not on a 400E. Besides - Treasure Valley traffic with a stick? Oooof. I'd be more interested in the 722.6 swap, which also isn't easy or cheap, but is closer to almost maybe sort of a bolt-in.
I'm definitely not building this car for the money. All of my custom cars cost more than they're worth. But if they're built exactly how I want them, and I enjoy them, it's worth whatever I sepnt. If I had to guess I'd say I'm probably $6-7,000 into it at this point. Even so, I won't be making any decisions until well after the engine swap is complete. We'll see how I like it at that point.

The stick shift idea comes from the fact that a stick shift M119 car is automatically a freak. A w124 of any kind with a manual is rare in the states. Also, I sold my last two manual transmission cars over the summer, and I need another clutch pedal in my life.

I'll probably end up deciding it's not worth the cost and hassle. At some point I need to stop modifying the car and just drive it. At this point it's nearly to the point where it could reasonably be called "restored." Once I finish a few more little details all the abuse and deferred maintenence will be 100% undone.
 
Speaking of details, I had pulled the third brake light out months ago, and had been neglecting to do anything with it since I knew it would be best to wait until the tint was done before I reinstalled it. Just like everything else in this car, it was sun-baked and brittle. One tab broke off the rear cover when I tried to remove it.

Over the last few months I've collected up a couple other lights from other cars in the junk yard. None were in good shape, but I was hoping to piece together an acceptable replacement, even if I had to use super glue and vinyl dye to get it looking decent again.

At the end of the day, my original was really the best option I had. It had a couple cracks and was discolored, and had that broken tab on the reflector cap.

I ended up pulling the lens out, and then placing everything in a pot of boiling water for a couple minutes. The theory here is that the heat will allow the stresses built up in the plastic over the years from the sun to relax. This should theoretically make the plastic less brittle.

The plastic did seem a bit more flexible afterwards, bit without testing it to failure before and after, I can't say for sure. One downside is that it did discolor the plastic. The lens got cloudy, and the grey housing got much lighter and milky looking.

I was able to bring the lens back by first taking the haze off everything with green scotch brite. Then I used some light polishing compound to polish the lend back to an acceptable finish. I had to use toothpicks to get into the corners, but eventually it was ok looking. The lens did have some heat damage from the bulb, but it wasn't too bad.

I super glued the cracks in the housing. In the past I've used accelerator spray to help super glue kick off quicker, but I've discovered that this tends to make the glue more brittle. For this repair, I just let it cure naturally overnight.

Next, I used a fine file to knock down the excess glue. Then I carefully sanded to even everything out. The plan was to use Duplicolor Vinyl and Fabric specialty coating in medium gray to match the color. I've used that product before and it's a great color match in the interior of this car. The trick is to clean everything really well, and to also use adhesion promoter.

To clean, I start with dish soap and hot water. Scrub with an old toothbrush. This gets all the old funk off of it. Rinse in hot water, then dry completely. Next, I use non-chlorinated brake parts cleaner with a lint free rag. This is risky and takes some experience. Too much solvent or too much time and you'll melt the plastic. I tend to wet the rag, then wait a few moments for the rag to become just damp. Then, I wipe each area exactly once. After wiping an area, do not touch it. The plastic will soften and it will be easy to leave marks. Once it's all been wiped, it's ready for adhesion promoter.

Now, this is where things went sideways for me. On other plastic parts, I'd been able to just spray 2 or 3 light coats of adhesion promoter, followed by 2 or 3 light coats of color, and everything was great. The third brake light did not like that.

When I sprayed the housing with the adhesion promoter, the solvent contained in the spray attacked the top layer of dye or finish on the brake light housing. As the solvent then evaporated, that layer shrank and cracked.

I walked away for a bit and came back to find it had dried like that. And now had a nasty cracked texture. I decided the only way forward was to sand the whole thing back down. And then try it without the adhesion promoter. I used an orbital sander and 320 grit sanding discs to smooth it back out, then after wiping down with brake clean again, I set it up and sprayed just the color. The same thing happened again.

Here's a picture after that second attempt:

1000005727.jpg

I'm not sure, but I assume that the housing is injection molded, and then some kind of finish coat is applied afterwards. Between the boiling, and the solvents, that finish coat had become delicate and was not willing to play nice.

I thought about it a while and decided to try a different approach. I sanded it all down again, and then went and picked up a can of grey Plasti Dip. The Plasti Dip sprayed on nicely and did not attack the plastic or its old finish. It left a nice new finish. The only issue at that point was that the color was too dark.

1000005728.jpg


I figured the vinyl spray color might work ok with the Plasti Dip, so I gave that a shot. That ended up working great. Got the color and texture back where it needed to be.

1000005729.jpg


I'm not a fan of retrofit LED bulbs in older cars. There are numerous problems that can be created by their use. That said, the heat created by incandescent bulbs in the third brake light ends up damaging the lens and housing over time, so I decided a quality LED bulb was the best option here. I installed a Sylvania LED 7506 bulb in the socket, and then glued the lens back in.

Reinstalled and it looks great and works perfectly.

1000005730.jpg
 
Last edited:
Interesting. I used the same process, excepting the hot water bath, to respray many of the plastic parts in my car. Same products, same good results. I like acetone for softening the plastic and used it alone on some parts after running out of adhesion promoter. Like the brake clean, it takes a little practice.
The brittle 3rd brake light is the last thing I never got around to finishing. I'll be combining parts as you did.
 
Here's your 560 crank?


Mercedes 560sl 560sec 560sec parts motor engine m117 complete - $500 (san carlos)

I have a motor out of my Mercedes 1986 560sl with 170k miles. The motor is semi disassembled down to the short block, as I swapped a few items from a 560sel motor that I bought to replace. I believe this Motor needs valve stem seals or possibly valve guides. I recently put 4,000 miles in 2023, but noticed the motor to burn oil and smoke on cold start up. Compression test showed 130psi on all the cylinders. Strong motor, just burned oil, and decided to swap with another motor I had.
Cams and lifters look great, fuel distributor is great, always started first crank. A bunch of good parts for any m117 series engine.

1706401325548.png
 
Here's your 560 crank?
If it was local, and cheaper, I might consider it. Even if it was free though, I'd be needing custom pistons, which would be $1000 on the low end, and then the crank would need machined and rebalanced. We're talking a couple grand for maybe 30 horsepower. Not a lot of bang for the bucks.
 
If it was local, and cheaper, I might consider it. Even if it was free though, I'd be needing custom pistons, which would be $1000 on the low end, and then the crank would need machined and rebalanced. We're talking a couple grand for maybe 30 horsepower. Not a lot of bang for the bucks.
Yes to all the above. But, the gain would be closer to +40hp, I think. What you would feel is the ±50 lb-ft torque increase, not the horsepower. Driving around town, the extra torque is REALLY noticeable. The extra hp, not so much.

:spend:
 
Speaking of details, I had pulled the third brake light out months ago, and had been neglecting to do anything with it since I knew it would be best to wait until the tint was done before I reinstalled it. Just like everything else in this car, it was sun-baked and brittle. One tab broke off the rear cover when I tried to remove it.

Over the last few months I've collected up a couple other lights from other cars in the junk yard. None were in good shape, but I was hoping to piece together an acceptable replacement, even if I had to use super glue and vinyl dye to get it looking decent again.

At the end of the day, my original was really the best option I had. It had a couple cracks and was discolored, and had that broken tab on the reflector cap.

I ended up pulling the lens out, and then placing everything in a pot of boiling water for a couple minutes. The theory here is that the heat will allow the stresses built up in the plastic over the years from the sun to relax. This should theoretically make the plastic less brittle.

The plastic did seem a bit more flexible afterwards, bit without testing it to failure before and after, I can't say for sure. One downside is that it did discolor the plastic. The lens got cloudy, and the grey housing got much lighter and milky looking.

I was able to bring the lens back by first taking the haze off everything with green scotch brite. Then I used some light polishing compound to polish the lend back to an acceptable finish. I had to use toothpicks to get into the corners, but eventually it was ok looking. The lens did have some heat damage from the bulb, but it wasn't too bad.

I super glued the cracks in the housing. In the past I've used accelerator spray to help super glue kick off quicker, but I've discovered that this tends to make the glue more brittle. For this repair, I just let it cure naturally overnight.

Next, I used a fine file to knock down the excess glue. Then I carefully sanded to even everything out. The plan was to use Duplicolor Vinyl and Fabric specialty coating in medium gray to match the color. I've used that product before and it's a great color match in the interior of this car. The trick is to clean everything really well, and to also use adhesion promoter.

To clean, I start with dish soap and hot water. Scrub with an old toothbrush. This gets all the old funk off of it. Rinse in hot water, then dry completely. Next, I use non-chlorinated brake parts cleaner with a lint free rag. This is risky and takes some experience. Too much solvent or too much time and you'll melt the plastic. I tend to wet the rag, then wait a few moments for the rag to become just damp. Then, I wipe each area exactly once. After wiping an area, do not touch it. The plastic will soften and it will be easy to leave marks. Once it's all been wiped, it's ready for adhesion promoter.

Now, this is where things went sideways for me. On other plastic parts, I'd been able to just spray 2 or 3 light coats of adhesion promoter, followed by 2 or 3 light coats of color, and everything was great. The third brake light did not like that.

When I sprayed the housing with the adhesion promoter, the solvent contained in the spray attacked the top layer of dye or finish on the brake light housing. As the solvent then evaporated, that layer shrank and cracked.

I walked away for a bit and came back to find it had dried like that. And now had a nasty cracked texture. I decided the only way forward was to sand the whole thing back down. And then try it without the adhesion promoter. I used an orbital sander and 320 grit sanding discs to smooth it back out, then after wiping down with brake clean again, I set it up and sprayed just the color. The same thing happened again.

Here's a picture after that second attempt:

View attachment 182982

I'm not sure, but I assume that the housing is injection molded, and then some kind of finish coat is applied afterwards. Between the boiling, and the solvents, that finish coat had become delicate and was not willing to play nice.

I thought about it a while and decided to try a different approach. I sanded it all down again, and then went and picked up a can of grey Plasti Dip. The Plasti Dip sprayed on nicely and did not attack the plastic or its old finish. It left a nice new finish. The only issue at that point was that the color was too dark.

View attachment 182984


I figured the vinyl spray color might work ok with the Plasti Dip, so I gave that a shot. That ended up working great. Got the color and texture back where it needed to be.

View attachment 182985


I'm bit a fan of retrofit LED bulbs in older cars. There are numerous problems that can be created by their use. That said, the heat created by incandescent bulbs in the thrid brake light ends up damaging theblens and housing over time, so I decided a quality LED bulb was the best option here. I installed a Sylvania LED 7506 bulb in the socket, and then glued the lens back in.

Reinstalled and it looks great and works perfectly.

View attachment 182986
Nice! With an LED bulb in the CHMSL, you won't bake the CHMSL anymore. However, your bulb out warning lamp in the dash will be on. There are two ways to correct this (aside from taking out the bulb in the dash) -

1) Neuter the USA spec N7 Bulb out Warning Relay by breaking off one of the pins (search on the board on which pin)
2) Replace with a euro N7 BoW relay and jump one of the terminals inside (also search on board)
 
The bulb-out will only illuminate with the engine running AND then you press on the brake pedal. It will then remain on, until the key is turned off.
 
Yes to all the above. But, the gain would be closer to +40hp, I think. What you would feel is the ±50 lb-ft torque increase, not the horsepower. Driving around town, the extra torque is REALLY noticeable. The extra hp, not so much.
The 5.3L Chevy LS engine has a stock bore of 3.779".

A .020" oversize piston would be 3.799".

My M119.974 should have 96.5mm pistons. 96.5mm is 3.7992". In theory, a Chevy piston should be able to fit the bore. Obviously there's a lot more to it than the bore, but with such a ubiquitous application, it might be possible to find a cheap off the shelf piston with an appropriate pin height.

I don't suppose anyone knows specs on pin height and diameter?

This is such a dumb idea.
 
Don't worry, I don't think I'm really serious about this, but...


This set of pistons appears to have approximately the correct dimensions. Correct bore, and I believe the correct compression height. The pin bore is very close. It might be a thou or two small, but that could be opened up pretty easily. I'm sure valve reliefs are all wrong, the overall piston height is probably way off. But it's pretty close.
 
I was able to find a 5.6 locally, and I'm sure I could get the whole thing for just a couple hundred dollars. Even so, I doubt I'll do it.

I hadn't even thought about the fact that the cylinders are Alusil. This creates a bunch of additional complications. Any off the shelf piston for an iron block/sleeve engine will not have an appropriate coating to work well with Alusil. Furthermore, new rings will be unlikely to seat properly with Alusil unless the cylinders are at least honed. So now we're talking about custom pistons, probably custom rings, custom machine work and balancing on the crank, and machine work in the block. All to get from 5.0L to 5.6L. At that point the only thing keeping me from 6.0L is a little extra machine work on the block, and head gaskets. The 5.6 is not a bargain option.

Shorter rods might be feasible, and it would probably be easier to find an off the shelf option that would work with some minor customization, but by my calculations, I'd end up with a rod ratio of 1.51. That's not ideal for an engine that revs over 6,000. It would run, but piston speed and acceleration would be pretty high, meaning friction and heat would also be pretty high. It would not be a long lasting combination.
 
Back to the CHMSL. I kind of wish I hadn't looked at the bulb out indicator. I hadn't noticed that its bulb was burned out. Now that I've replaced that bulb, I have a new issue to deal with.

I'm considering just removing the indicator bulb and not worrying about it. I found some Euro N7 relays for around $40 in eBay, but it sounds like even that is a hassle because of the rear side markers.

Jlaa mentioned removing a pin from the USA relay. I haven't been able to find that info on the board yet. I'll keep looking, but if anyone has a link, could you share it?
 
I was able to find a 5.6 locally, and I'm sure I could get the whole thing for just a couple hundred dollars. Even so, I doubt I'll do it.
Oooo. I'd be all over that if local, just to get the crank to experiment with. They're getting harder to find as they're passing 30-35 years old.


I hadn't even thought about the fact that the cylinders are Alusil. This creates a bunch of additional complications. Any off the shelf piston for an iron block/sleeve engine will not have an appropriate coating to work well with Alusil. Furthermore, new rings will be unlikely to seat properly with Alusil unless the cylinders are at least honed.
I'm not sure about this. As long as the cylinder walls are intact, why would new rings not seat properly? The Alusil walls should have imperceptible wear (if not damaged/scratched), I'd think new rings should seat ok with dino oil during break in. (??)


So now we're talking about custom pistons, probably custom rings, custom machine work and balancing on the crank, and machine work in the block. All to get from 5.0L to 5.6L. At that point the only thing keeping me from 6.0L is a little extra machine work on the block, and head gaskets. The 5.6 is not a bargain option.
Going to 6.0L adds a LOT more difficulty / expense, specifically boring/etching the Alusil block with Sunnen equipment. My understanding is that only a handful of machine shops in USA can do this properly. If there was a local shop with the capability, it would be more tempting... otherwise you have to ship the block Far, Far Away and hope the work is done right. The OE gaskets are mind-numbingly expensive ($2500/pair?) so aftermarket, or custom aftermarket, would be needed.


:pc1:
 
Oooo. I'd be all over that if local, just to get the crank to experiment with. They're getting harder to find as they're passing 30-35 years old.
Dibs!

I'm going to talk to them about it. I might pick it up just because. If I decide against it you should totally snag it.


I'm not sure about this. As long as the cylinder walls are intact, why would new rings not seat properly? The Alusil walls should have imperceptible wear (if not damaged/scratched), I'd think new rings should seat ok with dino oil during break in. (??)
Just what I've read about Alusil engines from Porsche guys. I've heard that seating rings can be tough.

Going to 6.0L adds a LOT more difficulty / expense, specifically boring/etching the Alusil block with Sunnen equipment. My understanding is that only a handful of machine shops in USA can do this properly. If there was a local shop with the capability, it would be more tempting... otherwise you have to ship the block Far, Far Away and hope the work is done right. The OE gaskets are mind-numbingly expensive ($2500/pair?) so aftermarket, or custom aftermarket, would be needed.
I'm basing my statement on the assumption that honing would be required to use new pistons. If honing is required, then I would assume etching would also be required. At that point we're already into all that expense, so why not just have 100mm pistons, and do the bore before the hone and etch? The only major difference at that point is the shockingly expensive head gaskets.

If I could get pistons for any kind if reasonable price, and if the block was usable as-is, I'd probably do it. I just doubt pistons would be less than maybe $1500, given recent inflation. If the block is not usable as-is with new pistons. It's definitely not worth it.

And all this in a 9 owner title loan repo 400E.
 
Just what I've read about Alusil engines from Porsche guys. I've heard that seating rings can be tough.
There are a few variations of Alusil/Nikasil. Are the Porch engines using the identical technology / cylinder walls as M119? If so, I'm curious what problem were encountered. Did they have issues seating new rings into an old bore, like we'd be trying to do?


I'm basing my statement on the assumption that honing would be required to use new pistons. If honing is required, then I would assume etching would also be required.
This is where I don't know enough about the process to determine what we need to do. Have you read the PDF linked above for reconditioning aluminum blocks? Maybe an engine builder that specializes in these (i.e., Metric Motors) would be able to provide some insight. My understanding is that the etch process "eats" the aluminum away from the cylinder walls, leaving the silica exposed. I'm not sure if honing will remove enough silica to repeat the process, OR if this will change the bore diameter enough to require different piston diameters (but, with new pistons, that may be less of an issue).


If I could get pistons for any kind if reasonable price, and if the block was usable as-is, I'd probably do it. I just doubt pistons would be less than maybe $1500, given recent inflation. If the block is not usable as-is with new pistons. It's definitely not worth it.
Totally agree. I was also thinking we could leave the block alone (assuming the bores are undamaged, no scratches or major wear) and slide in new pistons/rings. If major block work is needed, then we might as well bore to 100mm and go for 6.0 displacement... but the total cost becomes prohibitive. And we haven't even discussed camshafts yet, lol (which would be nice, but not required).


And all this in a 9 owner title loan repo 400E.
Heh. Good point, however, you could always swap in the stock 4.2L engine to sell with the car, and keep the custom motor for a 500E, or sell it separately, etc.

Forget if I told you already but I always went to Motor Mayhem in Meridian for dyno testing, they have a Dynojet with in-ground drum. And, they'd let me copy the .DRF files to a flash drive so I could play with the data in the Dynojet software, which was awesome. I hate just getting a paper printout. The full data file is gold. I have enough dyno data from various stock 5.0L engines to use as a baseline, for comparison to whatever you end up building.


:jono:
 

Who has viewed this thread (Total: 8) View details

Back
Top