The Parts.com deal was too good to pass on and is probably the last chance to get pre-94 E-Code headlights, so I sprung for a set.
I am suprised that they arrived undamaged as they were shipped in the factory MB boxes without an additional exterior box for protection. Although banged up bit (the boxes) nothing on the inside was broken. The shipper did add some additional bubble wrap.
Since the lenses are next to impossible to replace its a good idea to protect what you have and since Dave M. gave good reviews of the Lamin-X, so I went ahead and purchased the 12 mil clear film.
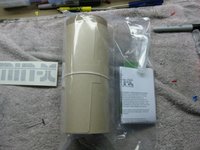
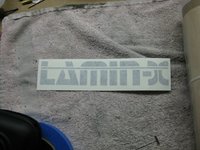
The attached pictures show the film and accessories. I recommend you use a heat gun to flatten out the film, its much easier to work with flat rather than curled up (it ships wrapped around a card board tube) The package includes the film, small water bottle, squeege, instructions and a Lamin-X decal. The instructions are clear and concise and the installation was simple, not unlike appling window tint. Its important to line up a edge and slowly lay the film in place using the squeege and plenty of water (as lubrication) to ensure you work out all the pockets of air/water.
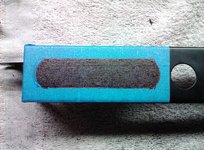
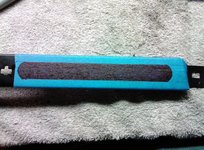
I should note though that the product is not a 100% fit for the euro lights. At least not my set, about 3/4 of one edge lines up but then starts to taper downward, so you end up with a small amount of unprotected lense. At the end it leaves less than 1/4". Can't really show this in pictures unfortunately. If you use the the bottom of the headlight lense to line up the Lamin-X as your main guide, you would have the small gap at the top of the headlight (by the blinker) If you use the top of the headlight as your starting point, then the gap would be on the bottom near the blinker.
I have not installed the headlights yet, so there are no pictures at this point.
I am suprised that they arrived undamaged as they were shipped in the factory MB boxes without an additional exterior box for protection. Although banged up bit (the boxes) nothing on the inside was broken. The shipper did add some additional bubble wrap.
Since the lenses are next to impossible to replace its a good idea to protect what you have and since Dave M. gave good reviews of the Lamin-X, so I went ahead and purchased the 12 mil clear film.
The attached pictures show the film and accessories. I recommend you use a heat gun to flatten out the film, its much easier to work with flat rather than curled up (it ships wrapped around a card board tube) The package includes the film, small water bottle, squeege, instructions and a Lamin-X decal. The instructions are clear and concise and the installation was simple, not unlike appling window tint. Its important to line up a edge and slowly lay the film in place using the squeege and plenty of water (as lubrication) to ensure you work out all the pockets of air/water.
I should note though that the product is not a 100% fit for the euro lights. At least not my set, about 3/4 of one edge lines up but then starts to taper downward, so you end up with a small amount of unprotected lense. At the end it leaves less than 1/4". Can't really show this in pictures unfortunately. If you use the the bottom of the headlight lense to line up the Lamin-X as your main guide, you would have the small gap at the top of the headlight (by the blinker) If you use the top of the headlight as your starting point, then the gap would be on the bottom near the blinker.
I have not installed the headlights yet, so there are no pictures at this point.
Attachments


Last edited:


 <= (didn't use Lamin-x)


 Oh yeah...