Hello All,
If you're reading this, I have probably saved this as a draft many of times before posting.
... Wanted to give you a sort of step by step of how this process went and what pointers I can give, should there be any players to take the field in future. Before moving forward, if you're a video learner and have the bandwidth to watch a 10 episode video series, then you're in luck and you can find that here. For those that like detailed lists, laid out part numbers and simple pictures to follow along with in a quicker scrolling manner, that's what the information below will hopefully satisfy. hopefully...
So... starting off...
What do you Need and Then Some:

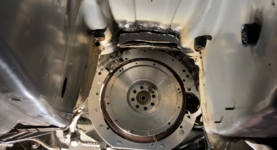
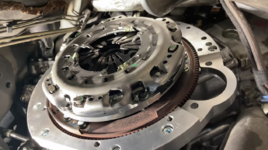
1) The Kangaroos Team Adapter kit - This is the kit that makes all of this possible to begin with, it includes the adapter flange, clutch/pressure plate, singlemass flywheel, all hardware needed to bolt kit together and pilot bearings (x2). First off, I want to start off by saying that this company is absolutely fantastic in not only quality of materials, build work, shipping time but most of all in their customer care and service. Literally went above and beyond to help me throughout the process and response time was almost instant on all the questions I had throughout the process.
Key notes on the Adapter kit: Two big pieces of advice... First one, you will need to cut an opening into the adapter flange where the crank position sensor lives. They used to come precut but initial customers complained that it did not 'look complete' not being a complete circle, so they listened to their customers and made the change. However, without making this cutout, you will not be able to remove/install cps without disassembling the entire trans and kit... So definitely cutout space to make this job a breeze if ever needed, the flange is very thick billet aluminum and won't flinch in strength with this cutout. Second big thing to remind people, you retain the factory starter plate which normally is bolted to torque converter. However because this is no longer bolted to the torque converter, if you let it spin on it's own, it will eventually break the three spot welds allowing the disk to separate from the outer tooth ring. To avoid this, bolt, loctite and nylock nut through the six holes that used to fix the piece to torque converter. Overall the kit is about as straight forward as you can get, every bolt bag is labeled with size and intended use, was packaged nicely and like I said earlier quality is superb! Third You need to also cut the Bell-housing on the transmission to allow for starter and CPS access, easiest view at this will be seeing this in the videos.


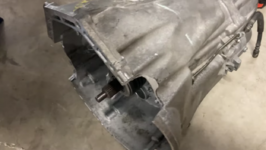
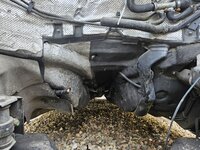
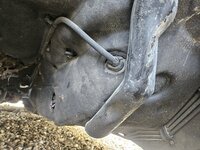
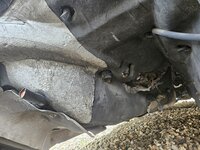
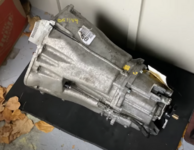
2) Transmission - Here is where you will make your choice on one of two paths, 5 speed or 6 speed... In my case I used the 6 speed, so that is what we will focus on. The transmission I used is the Mercedes 716.648 which can be found most commonly in the early 2000's adored or hated W203 kompressor hatchbacks. I chose this transmission because I have experience with it's newer sibling, a 716.667 in my C55 and prefer the overall design including shift linkage setup possibilities versus 5 speed. They're also much stronger than people think and typically have no problem holding power from Mercedes NA V8's and even engines like the M113k, with a 70% threshold factory rating of 270-300nm. You will also need to notch and hammer the tunnel up by about 1.5in right near the drain port rubber piece.
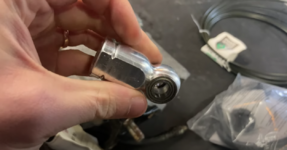
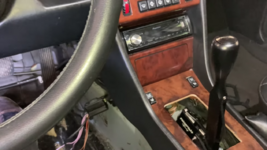
3) Shift Linkage/Shifter - I have been through two of these swaps now, and while the oem shift linkages feel decent and perform fine… They are sometimes hard to track down, not easy for lengthening or shortening if need be and generally the design is overcomplicated imo. So, I recommend switching to a BMW style shift linkage and shifter. In my case, I used Garagistic’s BMW shift joint knuckle on the trans and then custom made a shift rod using some steel tube and custom eye rod ends I made. The steel tubing was snagged from the local hardware store, cut down to length and threaded on both ends. I pressed the swivel bushings out of the rod ends and replaced with ball bearings with the correct inner diameter to match the BMW shift knuckle. To secure rod ends to rod, I used nylock nuts on both ends and drilled and tapped a pin to hold one end in fixed position and the other left adjustable. For the shifter I used a chassis mounted shifter from Jackspania Racing originally designed for an e36. The mounting bracket lined up almost perfectly with the factory shifter holes and just need some slotting on one side. You will need to cut open shifter opening as well regardless of what setup you choose fyi as the factory opening for automatic is very small.

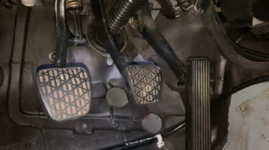
4) Supporting Pieces (Driveshaft, Pedals, Clutch reservoir, lines etc) - A few parts from this were easy, a few.. not so much. Starting off with the easy, pedals, reservoir and lines. The pedals I scoured off of Ebay, and thankfully because there were quite a few W201/124 with manual transmissions from factory and they share the same pedals for the most part, this was an easy source. I took my time and found a nice clean setup that even had a clutch master cylinder in good working condition. For the hardline from pedal to stock trans soft line, I used run of the mill auto store brake line with an odd size fitting. The fittings are m12x1.0 double inverted and the ONLY place I could find them was Belmetric, fantastic company, great customer service and have since used them for some other hard to find bits and bobs… Now, the Driveshaft… for this unfamiliar the 716 manuals use a three prong driveshaft, when test fitted we discover the one I had (From a Chrysler Crossfire) needed to be lengthened by 3.5in. Finding a shop locally to do this proved to be challenging. Luckily after numerous phone calls and a bit of a white lie, The Driveshaft Shop in Everrett was able to do it. At first they weren’t going to touch it when they saw it was friction welded, but after I told them it was out of a Chrysler Crossfire (Still a Mercedes part) their tone changed dramatically lol. Guess they were scared to touch a German friction weld but had no problem when it turned Domestic?? Regardless they were super cool and it turned out perfect! Also, Clutch alignment tool is the same as GM Ls1 for Mercedes which is Dorman 14523.


5) Tricking the ECU and Speedometer - This part admittedly had me nervous for a short period of time leading up to the swap. I began probing questions to those more familiar with the workings of these cars and their electronic brains in hopes of uncovering some clues ahead of time. But in the end, it was just something I had to figure out through trial and error mostly. That said, THANK YOU to all of you who chimed in with ideas or just support in my thread about ‘Tricking the Electronics’. In the end, it turned out that all I needed to do was leave the NSS plugged in, bypass starter lockout and leave the lever set to P. I had experimented setting the position to just about everything else and would always get a weird hesitation right at 4.5k rpm, after a few weeks and not realizing I hadn’t tried Park position yet, I switched the lever to P and literally the car was and is as happy as can be. Idles dead smooth and has full power through the whole rev range in all gears. The overload switch was also a concern first, but turns out it’s not an issue, I still have mine connected the the NSS but it isn’t plugged into anything.
As for the Speedometer, this part took a bit of experimenting but in the end proved pretty easy, a simple GPS speed signal sender, Dakota Digital Speed signal converter and the correct settings have it working just like normal. One other thing to note, any vacuum ports eliminated from the Automatic need to be capped on their respective inlets or valves, I believe I had to plug 2 or 3 ports.


OK... How'd we do!? Are we there YET?
Hopefully like stated up top, this can be used as a valuable resource for others.
I am almost 1000% sure Iam missing something in here and will be circling back till I am happy with the info provided, BUT that said, this should get you off to a pretty good start and alleviate some of the challenges I faced being a bit of a guinea pig... Though, I am a happy guinea pig, this car is absolutely awesome as a manual and I appreciate this wonderful sedan for all that it is! We're approaching about 1500 miles since the swap and the car has gotten better and better.
Special thank you to @gsxr for all of the back and forth I bugged him with leading up to and following the completion of this project, to my StepDad Mike for being my partner in crime on our second Mercedes V8 Manual swap... And to the many others on this forum, other platforms and real life that offered ideas, feedback and help. REALLY APPRECIATE ALL OF YOU!
If you have any questions, need specific pictures etc, let me know in the comments and I will be happy to help.
If you would like to support more projects like this in the future or just show some love and support to what I am trying to do with my YouTube Channel, you can visit my website anderzen.co to see if there is any related merch you may enjoy or just simply consider subscribing and liking a video or two!
All the designs are created by me and every penny collected goes right back into builds and sharing the journey of such!


THX,
ANDERZÉN
If you're reading this, I have probably saved this as a draft many of times before posting.
... Wanted to give you a sort of step by step of how this process went and what pointers I can give, should there be any players to take the field in future. Before moving forward, if you're a video learner and have the bandwidth to watch a 10 episode video series, then you're in luck and you can find that here. For those that like detailed lists, laid out part numbers and simple pictures to follow along with in a quicker scrolling manner, that's what the information below will hopefully satisfy. hopefully...
So... starting off...
What do you Need and Then Some:

1) The Kangaroos Team Adapter kit - This is the kit that makes all of this possible to begin with, it includes the adapter flange, clutch/pressure plate, singlemass flywheel, all hardware needed to bolt kit together and pilot bearings (x2). First off, I want to start off by saying that this company is absolutely fantastic in not only quality of materials, build work, shipping time but most of all in their customer care and service. Literally went above and beyond to help me throughout the process and response time was almost instant on all the questions I had throughout the process.
Key notes on the Adapter kit: Two big pieces of advice... First one, you will need to cut an opening into the adapter flange where the crank position sensor lives. They used to come precut but initial customers complained that it did not 'look complete' not being a complete circle, so they listened to their customers and made the change. However, without making this cutout, you will not be able to remove/install cps without disassembling the entire trans and kit... So definitely cutout space to make this job a breeze if ever needed, the flange is very thick billet aluminum and won't flinch in strength with this cutout. Second big thing to remind people, you retain the factory starter plate which normally is bolted to torque converter. However because this is no longer bolted to the torque converter, if you let it spin on it's own, it will eventually break the three spot welds allowing the disk to separate from the outer tooth ring. To avoid this, bolt, loctite and nylock nut through the six holes that used to fix the piece to torque converter. Overall the kit is about as straight forward as you can get, every bolt bag is labeled with size and intended use, was packaged nicely and like I said earlier quality is superb! Third You need to also cut the Bell-housing on the transmission to allow for starter and CPS access, easiest view at this will be seeing this in the videos.


2) Transmission - Here is where you will make your choice on one of two paths, 5 speed or 6 speed... In my case I used the 6 speed, so that is what we will focus on. The transmission I used is the Mercedes 716.648 which can be found most commonly in the early 2000's adored or hated W203 kompressor hatchbacks. I chose this transmission because I have experience with it's newer sibling, a 716.667 in my C55 and prefer the overall design including shift linkage setup possibilities versus 5 speed. They're also much stronger than people think and typically have no problem holding power from Mercedes NA V8's and even engines like the M113k, with a 70% threshold factory rating of 270-300nm. You will also need to notch and hammer the tunnel up by about 1.5in right near the drain port rubber piece.


3) Shift Linkage/Shifter - I have been through two of these swaps now, and while the oem shift linkages feel decent and perform fine… They are sometimes hard to track down, not easy for lengthening or shortening if need be and generally the design is overcomplicated imo. So, I recommend switching to a BMW style shift linkage and shifter. In my case, I used Garagistic’s BMW shift joint knuckle on the trans and then custom made a shift rod using some steel tube and custom eye rod ends I made. The steel tubing was snagged from the local hardware store, cut down to length and threaded on both ends. I pressed the swivel bushings out of the rod ends and replaced with ball bearings with the correct inner diameter to match the BMW shift knuckle. To secure rod ends to rod, I used nylock nuts on both ends and drilled and tapped a pin to hold one end in fixed position and the other left adjustable. For the shifter I used a chassis mounted shifter from Jackspania Racing originally designed for an e36. The mounting bracket lined up almost perfectly with the factory shifter holes and just need some slotting on one side. You will need to cut open shifter opening as well regardless of what setup you choose fyi as the factory opening for automatic is very small.


4) Supporting Pieces (Driveshaft, Pedals, Clutch reservoir, lines etc) - A few parts from this were easy, a few.. not so much. Starting off with the easy, pedals, reservoir and lines. The pedals I scoured off of Ebay, and thankfully because there were quite a few W201/124 with manual transmissions from factory and they share the same pedals for the most part, this was an easy source. I took my time and found a nice clean setup that even had a clutch master cylinder in good working condition. For the hardline from pedal to stock trans soft line, I used run of the mill auto store brake line with an odd size fitting. The fittings are m12x1.0 double inverted and the ONLY place I could find them was Belmetric, fantastic company, great customer service and have since used them for some other hard to find bits and bobs… Now, the Driveshaft… for this unfamiliar the 716 manuals use a three prong driveshaft, when test fitted we discover the one I had (From a Chrysler Crossfire) needed to be lengthened by 3.5in. Finding a shop locally to do this proved to be challenging. Luckily after numerous phone calls and a bit of a white lie, The Driveshaft Shop in Everrett was able to do it. At first they weren’t going to touch it when they saw it was friction welded, but after I told them it was out of a Chrysler Crossfire (Still a Mercedes part) their tone changed dramatically lol. Guess they were scared to touch a German friction weld but had no problem when it turned Domestic?? Regardless they were super cool and it turned out perfect! Also, Clutch alignment tool is the same as GM Ls1 for Mercedes which is Dorman 14523.


5) Tricking the ECU and Speedometer - This part admittedly had me nervous for a short period of time leading up to the swap. I began probing questions to those more familiar with the workings of these cars and their electronic brains in hopes of uncovering some clues ahead of time. But in the end, it was just something I had to figure out through trial and error mostly. That said, THANK YOU to all of you who chimed in with ideas or just support in my thread about ‘Tricking the Electronics’. In the end, it turned out that all I needed to do was leave the NSS plugged in, bypass starter lockout and leave the lever set to P. I had experimented setting the position to just about everything else and would always get a weird hesitation right at 4.5k rpm, after a few weeks and not realizing I hadn’t tried Park position yet, I switched the lever to P and literally the car was and is as happy as can be. Idles dead smooth and has full power through the whole rev range in all gears. The overload switch was also a concern first, but turns out it’s not an issue, I still have mine connected the the NSS but it isn’t plugged into anything.
As for the Speedometer, this part took a bit of experimenting but in the end proved pretty easy, a simple GPS speed signal sender, Dakota Digital Speed signal converter and the correct settings have it working just like normal. One other thing to note, any vacuum ports eliminated from the Automatic need to be capped on their respective inlets or valves, I believe I had to plug 2 or 3 ports.


OK... How'd we do!? Are we there YET?
Hopefully like stated up top, this can be used as a valuable resource for others.
I am almost 1000% sure Iam missing something in here and will be circling back till I am happy with the info provided, BUT that said, this should get you off to a pretty good start and alleviate some of the challenges I faced being a bit of a guinea pig... Though, I am a happy guinea pig, this car is absolutely awesome as a manual and I appreciate this wonderful sedan for all that it is! We're approaching about 1500 miles since the swap and the car has gotten better and better.
Special thank you to @gsxr for all of the back and forth I bugged him with leading up to and following the completion of this project, to my StepDad Mike for being my partner in crime on our second Mercedes V8 Manual swap... And to the many others on this forum, other platforms and real life that offered ideas, feedback and help. REALLY APPRECIATE ALL OF YOU!
If you have any questions, need specific pictures etc, let me know in the comments and I will be happy to help.
If you would like to support more projects like this in the future or just show some love and support to what I am trying to do with my YouTube Channel, you can visit my website anderzen.co to see if there is any related merch you may enjoy or just simply consider subscribing and liking a video or two!
All the designs are created by me and every penny collected goes right back into builds and sharing the journey of such!


THX,
ANDERZÉN


