• Hi Guest !

    Welcome to the 500Eboard forum.

    Since its founding in late 2008, 500Eboard has become the leading resource on the Internet for all things related to the Mercedes-Benz 500E and E500. In recent years, we have also expanded to include the 400E and E420 models, which are directly related to the 500E/E500.

    We invite you to browse and take advantage of the information and resources here on the site. If you find helpful information, please register for full membership, and you'll find even more resources available. Feel free to ask questions, and make liberal use of the "Search" function to find answers.

    We hope you will become an active contributor to the community!

    Sincerely,
    500Eboard Management

OWNER jlaa (500E & w210 E320)

My AGM from the pepboys crew came with elbow, plug and I asked for the tube. They couldn't find it, but gave me 12" from the shop when I asked.
 
Grrrrrr. I hate it when I find evidence of slapdash jobs done by previous caretakers of the car.
I replaced the ZHM filter and the ZHM dipstick tube today. The old ZHM filter was only slightly dirty (debris @ bottom of filter) and the old ZHM dipstick tube was completely broken.

Maybe the part numbers here will help someone in the future.

Small wins.
 

Attachments

  • IMG_8854.jpg
    IMG_8854.jpg
    1.6 MB · Views: 31
  • IMG_8869.jpg
    IMG_8869.jpg
    1.5 MB · Views: 29
  • IMG_8865.jpg
    IMG_8865.jpg
    1.3 MB · Views: 27
  • IMG_8864.jpg
    IMG_8864.jpg
    1.4 MB · Views: 29
  • IMG_8863.jpg
    IMG_8863.jpg
    1.7 MB · Views: 26
  • IMG_8860.jpg
    IMG_8860.jpg
    1.8 MB · Views: 25
  • IMG_8859.jpg
    IMG_8859.jpg
    1.7 MB · Views: 32
  • IMG_8858.jpg
    IMG_8858.jpg
    1.5 MB · Views: 35
  • IMG_8857.jpg
    IMG_8857.jpg
    1.7 MB · Views: 32
Last edited:
I replaced my ignition lock cylinder using the $20 ebay tool. I used this HOW-TO guide to do so. https://www.500eboard.com/forums/showthread.php?t=4718

IMG_8892.jpg


In my typical ham fisted fashion, I took 1.5 hours to accomplish what should have taken 15 minutes.

Firstly it took me a ton of time to figure out where in the key's rotation I should be sticking the tool in. I kept on rotating the key to position 1, and having the dashboard lights light up, only to find that the tool would not sink in the holes. Even after jiggling the key 1mm or so in either direction an endless # of times, that didn't seem to help.

Finally I rotated the key back a little bit to the point where the dash lights shut off --- BINGO -- that's when the tool sunk in.
Gerry should be relieved that my keychain is an MB one - not a Porsche one. :-) 
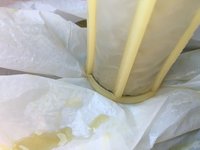
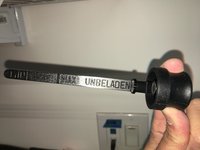
The pictures below show the position that I had to use to sink in the tool:

IMG_8896.jpg

IMG_8898.jpg


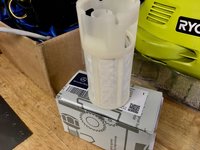
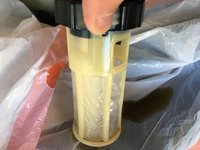
My old lock cylinder was not broken and looked to me fine --- I will consider this replacement then to be a preventative measure -- and I get an extra key out of it! Pictures of the old ignition cylinder below:

IMG_8900.jpg

IMG_8905.jpg

IMG_8906.jpg


My second mistake was in trying to re-install the whole shebang together --- the plastic trim, the rubber boot, the steel sleeve, and the ignition cylinder. Stuff wasn't lining up and all, and the ignition cylinder just didn't want to go in.

So then I tried installing the individual pieces in. I fit the ignition cylinder in just fine, and the key turned. YES.

Then I tried installing the ignition cylinder AND the metal sleeve -- without realizing that the metal sleeve needed to click in place. I pulled the extractor tool out of the little holes and then realized that the the key wouldn't budge. MINI PANIC until I put the extractor tool back in and pulled the whole assembly out again.

Then I was playing with just the metal sleeve (no ignition cylinder) --- and realized that the metal sleeve needed to click in place --- and click in place it did, without having the ignition cylinder in there! MINI PANIC again until I followed Allgonquin's advice in using the extractor tool to pull the sleeve off again. WHEW.

Now, understanding how everything fit together, I installed the ignition cylinder AND the sleeve together ... made sure that the key turned, and then I installed the plastic trim and rubber boot.

All done. Satisfying. No swear words used. I consider that to be a success. :-)

IMG_8907.jpg
 
I see a sizable dirt smudge on the right side of your last photo above on the vertical mushroom side. Must be some schmutz from your Porsche keychain?!?

:stickpoke:

That is some pro-level chain yanking, trolling two folks in one post with three observations (mushoom/dirt/pcar)!
<rushes to garage to clean dirt smudge>

:blink:
 
I used Gorilla Glue to glue back some of the vinyl along the driver's door pocket. It seems to work well.
I put thread locker on the nuts for that hold the wood to the door --- one of the nuts had come loose.

At the same time, I repaired some cracks in the base plastic of the fragile interior A-pillar triangle cover with JB weld --- that made the triangle stiff again.
I think I've said I'm not big on Red exterior, but this is gorgeous, JLAA Excellent job on all of the restoration, and I really appreciate the detailed pics.

The only thing I've found with my new 124 is that the upolstery is pulling away from the door side pockets. Very helpful to see how you addresed the issue.
 
The only thing I've found with my new 124 is that the upolstery is pulling away from the door side pockets. Very helpful to see how you addresed the issue.

heat it up slightly with a hairdrier or heatgun(if heatgun used..be carefull,and not heat it up to much)
,stretch it around where it is supposed to sit.put some strong adhesive on ,or even a bit of superglue. .and clamp it down with plastic clamps..or something that does not leave marks in the fabric.and let dry.There are different adhesives to use...But i used superglue..and it has stuck perfect for two years :) Still going
 
Last edited:
Jlaa, Could you give me the contact info for your mobile painter? I'm in SF also and needs several areas touched up on my E500.

Thanks,
Bill

sure thing, I will PM you. The painter is a fantastic guy - I have used his services for three cars. I believe psportoveloce has also availed himself of his services.
 
Looks like a lot of the other plastic bits on these guys. Not sure what they used, but I haven’t ever seen any other material that does the whole ‘turn into a crayon over time’ thing.


Sent from my iPhone using Tapatalk
 
Grrrrrr. I hate it when I find evidence of slapdash jobs done by previous caretakers of the car.
I replaced the ZHM filter and the ZHM dipstick tube today. The old ZHM filter was only slightly dirty (debris @ bottom of filter) and the old ZHM dipstick tube was completely broken.

Maybe the part numbers here will help someone in the future.

Small wins.
Congratulations on completion of a major maintenance task. Again a significant component of the $5-10K of deferred, overlooked maintenance. Did you follow the extensive HOW-TO for this procedure? Any tips to add to it?

This is also a DarkCISide procedure for coupe owners.... ;)
 
Indeed, the HOWTO procedure proved invaluable as it referenced Febi Hydraulikoil as being a suitable equivalent to MB hydraulikoil — and Napa carries the Febi fluid. Thanks!
 
Looks like a lot of the other plastic bits on these guys. Not sure what they used, but I haven’t ever seen any other material that does the whole ‘turn into a crayon over time’ thing.

Any and everything petroleum based over 25 years...if you're lucky. Over 10 years if not.

maw
 
It is time to refinish the plastic grille insert. I tried to purchase a new insert but was informed that Mercedes no longer sells just the grille insert for a pre-facelift car at around $40 --- and that you must buy the entire "radiator" assembly at over $500 list price. My "radiator shell" is in very fine condition, so I am loath to do that.

From another thread:

Jlaa,

What is the refinishing process?

I'd find a way to clean it.. maybe alcohol, then epoxy primer and grey top coat.

I'm at the same point w my s600 insert.
I'm not sure the paint color, but it reminds me of early W124 body clading.

i "cleaned" the grille insert on my car.i did every square hole on at a time..i cant remember what i used to clean it with...maybe it was just some polish,,But it came out super nice..and got rid of the grey faded color.Now it is fresh grey color :) It was quiteabit of work..but definetly worth it in the end..as the new grilles are very expensive.Here in norway a complete grille for the 201 was almost 1000 dollars.

I'm sure you'll go for a new insert considering the condition of your car, but others might find my recent experience helpful.

I was using Solution Finish (https://www.amazon.com/Solution-Fin...pID=41RtJvMhgTL&preST=_SY300_QL70_&dpSrc=srch) to restore some black trim on my wagon. I decided to give it a try on my grey grille insert. With a narrow foam applicator sponge, it was a quick job. It has only been a week so I don't know how long it will last, but so far it looks good (not sure why the picture is upside down).

View attachment 79833

Another bit of advice, if you are going to the trouble to get a new insert, you should also look into getting new chrome strips. And don't forget the clips to attach them:

https://www.500eboard.com/forums/showthread.php?t=948

OK so here it goes:

Original condition. See the faded grey part. It has a powdery texture.
IMG_1434.jpg IMG_1435.jpg


This is what I'm going to use to repaint the grey part. Note the grey is a flat grey.
IMG_1439.jpg IMG_1438.jpg


I washed the plastic grille insert carefully...
IMG_1436.jpg


Cover everything inside the garage to protect from overspray. Note - if you have a P-car, the best use of the P-car is to act as a drying-rack for the plastic grille insert. You don't want to use the 124.036 for that. :-) I am sure the Honch would be pleased.
IMG_1443.jpg IMG_1442.jpg IMG_1441.jpg


I started with the back side - primer first.
IMG_1444.jpg IMG_1445.jpg
 
I painted the grill insert in my silver car and it's holding up well, although it doesn't get driven much. I used non standard black which I think looks better on the silver car. The color you chose should look great on your car and closer to stock if not identical. Thanks for the info on availability. It would be wise for those of us that care for originality to hoard an original if any decent ones are still to be found.

This abuse of your P car has got to stop!

drew
 
Last edited:
Completed a repainting of the grille. Many thanks to Robert Fenton and MB of Naperville for providing parts (Vertical and horizontal grille strips) at the last minute. The updated horizontal grille strips are different from the original ones. The original ones are a complex formed metal part that slides on to the grille plastic. The new ones are a little cheesier --- less complex, and utilize a plastic clip to hold them on. Compare old with new. Very satisfying.


IMG_1447.jpg IMG_1461.jpg IMG_1462.jpg IMG_1465.jpg IMG_1530.jpg IMG_1526.jpg IMG_1521.jpg IMG_1525.jpg IMG_6903.jpg IMG_1531.jpg
 
Date - 2018-8-24; Mileage 67,350.

Went to Monterey Car Week for the first time - what a wonderfully generous group of enthusiasts - particularly all those who have made themselves known here on the 500Eboard. I listened to a lot of Jazz, then listened to more Jazz, then, when I couldn't get more sick of Jazz, I listened to some more. Must be conducive to the posh ambience. ;-)

Captruff conned, I mean convinced me to enter the car for judging - a nice push by captruff! The car received 3rd place in the Concours for 1972-1998 Sedan/Coupe/Wagon. A fine time was had by all. Pictures courtesy of RicardoD

DSCF5058.jpg DSCF5095.jpg
 
Jlaa,

Congrats on your 3rd place trophy. That’s saying a lot about your car’s every day cleanliness and detailing to come up with a 3rd place out of all the cars entered. Jeff knows quality when he sees it.

I know it’s all about “THE GRILL!!”

Your car in “ARREST ME RED” looks great in all of the pics.

I’m w/777 on the EVOs.

Ricardo took some great pics of the show. I’ve never seen more of that event.

BTW, Thanks for the witty commentary also.

Take Care
 
Handy tip for those who wish to refinish their own grille.

You have two choices. You can either be wise, or you can be foolhardy. Don't choose the path of the fool, which also happened to be the path that I chose. Choose the path of the wise man. Install the hood release lever AFTER you install the newly painted grille. Only fools install the release lever first - what ends up happening is that the release lever will scratch the %$%$@ out of the fool's newly painted grille as the fool seeks to reinstall the grille, and, while fighting gravity and seeking alignment with the release lever, the grille will end up being worse for the wear.

Don't do that.

Furthermore, don't clumsily try to touch up the grille with a small touchup brush. Its just going to look like crap --- especially the way the flat, dark metallic grey lays down.

Else you will end up doing as I did --- sanding down with 400 grit, taping off, and repainting one bar.

See clumsy touchup below:
IMG_1561.jpg

Sanded below:
IMG_1563.jpg

Taped off, painting below:

IMG_1562.jpg IMG_1564.jpg

All done below. Now wait 48 hrs to fully cure.
IMG_1565.jpg IMG_1566.jpg
 
Last edited:
Noted for posterity:

Passed bi-annual smog in the People's Republic of California.
Couple of notes:

Make sure if you are in CA that you remind your smog tech that the 036 has NON-DEFEATABLE Traction Control. This exempts the car from the dynamometer test and subjects the car only to the 2-stage-idle test.

Also - I didn't notice this before --- note that the 500E model is marked in Kalifornia as a "High Emitter Profile" Vehicle. Ugh.

Between 2016 and 2018
- Measured CO2 was the nearly same (went down by a minuscule amount)
- Measured O2 was nearly the same (went down by a minuscule amount)
- Measured CO was the same
- Measured HC went UP, from 0/0 at Idle/2500rpm to 7/11 at Idle/2500rpm. This seems absurd, how can 2016's value be zero?

Anyways, relevant changes from 2016 to 2018 - replaced all distributor caps, rotors, wires, spark plugs, upper/lower wiring harness, and replaced the LH computer from the original one to a 1992 LH computer with WOT enrichment.
 

Attachments

  • IMG_1990.jpg
    IMG_1990.jpg
    2.5 MB · Views: 19
  • IMG_1989.jpg
    IMG_1989.jpg
    2.2 MB · Views: 22
Those are the best numbers you could possibly hope for, Jlaa. Anything in single digits is amazing. Did you heat up the cats with some high-RPM cruising prior to the test?

The zero/zero measurements are likely errors, but hey, I wouldn't complain. :D
 
Those are the best numbers you could possibly hope for, Jlaa. Anything in single digits is amazing. Did you heat up the cats with some high-RPM cruising prior to the test?

The zero/zero measurements are likely errors, but hey, I wouldn't complain. :D

Ja. Since I live in an urban environment, there are a gazillion smog shops within a 2 mile radius of me, but I like going to one 20 minutes away so that I can get 5-10 min at 80 mph in 3rd gear before the test.
 
For comparison, I keep a table in my PWNER thread of all my smog test results on my E500, until last year when I moved to Maryland and it is now permanently EXEMPT from smog testing. In Oregon I had to have it tested every other year, and in Texas, where I moved in 2008, it was an annual smog/safety test. All results are shown in the table.

Link is here: https://www.500eboard.com/forums/showthread.php?t=79&p=17267&viewfull=1#post17267
 
Ja. Since I live in an urban environment, there are a gazillion smog shops within a 2 mile radius of me, but I like going to one 20 minutes away so that I can get 5-10 min at 80 mph in 3rd gear before the test.
Based on my experience, the cat-heating procedure makes a yuuuge difference. If you spent 5-10 mins at 3500+rpm just before the test, that likely explains your stellar measurements.

:deniro:
 
Gerry - useful! What happened in 2015?
 

Attachments

  • CD30698C-3339-435B-9D72-1C59AF43E032.png
    CD30698C-3339-435B-9D72-1C59AF43E032.png
    98 KB · Views: 21
Putting this here for posterity - given my newfound discovery that pick'n'pulls can provide hours of endless entertainment, I took the opportunity to replace my weirdly corroded/damaged right rear door handle with a perfect-condition door handle I fetched from an S124. The value of the pick'n'pull I find is the ability to practice whatever procedure you wish to accomplish on a junked car, without doing it for the first time on your own car, with the attendant anxiety. Replacing the door handle is easy, but anxiety inducing because you have to back out a #3 allen screw in the door jamb to loosen up the doorhandle enough so that you can pull it out. If you loosen the screw too much, it will drop into the door, necessitating you to take apart the interior door card to retrieve it. :doh:

IMG_2100.jpg IMG_2101.jpg


I have also reverted the trunk lid to European specification and removed the US license plate flller panel, as I find exposing the black border along the inner edges of the tailights and the black trim on the bottom of the trunk lid works to break up the mass of red color and visually widen the rear on a pre-facelift car. This has been detailed here: https://www.500eboard.com/forums/showthread.php?t=13278

IMG_2086.jpg IMG_2085.jpg IMG_2090.jpg IMG_2092 2.jpg
 
I went to the grocery store. No grocery delivery good eggs / blue apron / instacart entitled-silliness for me. Parked in the underground garage. Lucky to get the best spot in the entire parking lot. I snapped a few pictures with my obsolete phone and was pleasantly surprised at the result --- the lighting makes all the difference. It has been 2 years since I bought this car and I am still absurdly enamored of this car.

It is grape season. I am very pleased with the firmness and quality of the green and black grapes that I purchased. :-)


IMG_2350.jpg


IMG_2349.jpg

IMG_2351.jpg
 
Wow!! That lighting really sets off that ‘Arrest Me Red’ color.

BUT no pic of that ‘Sexy Euro Red Ass’ ?
 
Wow!! That lighting really sets off that ‘Arrest Me Red’ color.

BUT no pic of that ‘Sexy Euro Red Ass’ ?

Haha! The Signal Red color is kind of a pain. Since it is not metallic, you can see every little fine scractch / swirl mark under my shop lights. Metallic paints I have found to hide swirls and fine scratches really well ..... flat paints not so much. But still not nearly as maintenance intensive as a flat black, which would be very difficult to maintain.

There is but one color which I would prefer over signal red, and that is makemann's Pearl Grey --- but since he will never sell it, I will have to hang on to this one. :p

Here is the Euro-Butt, otherwise known as the "early w124 butt", compared to the US-specification butt again. I think the removal of the plastic license plate filler has a similar "aesthetic cleansing effect" on the pre-facelift cars as when you see slim Euro-bumpers mounted on a R107, for example.

IMG_2348 2.jpg

DSC_8367.jpg
 
I’ve always been more of a fan of ‘boring’ colors on my German cars (despite owning a red one myself), but daaaayum jlaa! Lookin good! Evos are just a winner all around in this car.

Where was the next nearest car in the p-lot btw? [emoji6]


Sent from my iPhone using Tapatalk
 
Last edited:

Who has viewed this thread (Total: 4) View details

Back
Top