• Hi Guest !

    Welcome to the 500Eboard forum.

    Since its founding in late 2008, 500Eboard has become the leading resource on the Internet for all things related to the Mercedes-Benz 500E and E500. In recent years, we have also expanded to include the 400E and E420 models, which are directly related to the 500E/E500.

    We invite you to browse and take advantage of the information and resources here on the site. If you find helpful information, please register for full membership, and you'll find even more resources available. Feel free to ask questions, and make liberal use of the "Search" function to find answers.

    We hope you will become an active contributor to the community!

    Sincerely,
    500Eboard Management

OWNER doolar

What kind of acid are you using?

drew

On this occation I used a Danish (not the pastry...) product called "Kalcinol". It's about 35% acids, mainly phosphorous acid. It is very effective on stainless steel for removing non-grease dirt and pitting. I nowadays work at at technical recovery company so all of a sudden I've got access to all the goodies. :)
 
Looks nice. What do you plan to use it for?

Well none of my cars have a hitch. It's plenty useful now and then. I found this original removable hitch cheap on Ebay.de, we had an Oris hitch on a now deceased 300TE and it is a very nice installation, almost not visible at all when you remove the hook. And a fun project as well. :)

Also good for a bike rack for instance. It's rated for 1900 kg (almost 4200 lbs) on the hook, which is pretty good if I need to pick up a donor/bastler fahrzeug. :)

But to be honest, it's mainly because I love the engineering in these hitches. (And I already have the rear springs for a hitch car.)
 
Found this via a Facebook group for cheapo:

159.jpg

Not to good condition, but no cracks, so I'll probably be able to restore it. It's Hella brand, manufacured '94.

160.jpg

161.jpg
 
Work begun on the Anhängerkupplung, started off with adding the thickest spring pads for the rear. After that, it was time for some disassembly:


40.jpg


41.jpg


42.jpg


Lots of bits and pieces:


43.jpg


To be continued during the weekend!
 
Ok trailer hitch aficinados, here goes!


The last missing pieces arrived from Das Vaterland:


58.jpg


The classic rust trap on 034/036, but mine's fine:


59.jpg


Heat shield above rear muffler removed, no rust protection whatsoever, so found a few rust spots (which I tended to ofc, teh humanity if not):


60.jpg


Spare wheel compartment looks fine:


61.jpg


Time to remove som rust protection:


62.jpg


Drill 18 mm holes for screws:


63.jpg


Two of these reinforcement bars go on each side:


64.jpg


65.jpg


But first, moar hoals: (here you can spot some of the rust)


66.jpg


67.jpg


Screw bridge for the reinforcement bars:


68.jpg


Bar on:


69.jpg


70.jpg


Reinforcement banana bars on both sides:


71.jpg


72.jpg


73.jpg


The premier of the hook (patent pending):


74.jpg


75.jpg


Cables:


76.jpg


77.jpg


Very nice of Mercedes-Benz to create space for the cables:


78.jpg


79.jpg


80.jpg


Rear seat and backrest out, same with driver seat, to be able to feed the cable into the cable slots:


81.jpg


Cables again, into the fusebox, and for control lighting and brake light switch:


82.jpg


Control light placement:


83.jpg


84.jpg


Finally, lets make a cut out in the rear bumber, ouch:


85.jpg


86.jpg


87.jpg


The only thing missing now is this covering for the cutout, of course its NLA:


88.jpg


Stickerbombing the trunk:


89.jpg


90.jpg


91.jpg


92.jpg


And finally a control of the work done, approved and the details will now be entered into the cars data with the motor authority:


93.jpg
 
Finally found a panel with all button cut-outs. This one happens to never been fitted too, only minor storage scratches:


104.jpg


No wear in the plastic circles tell the story of no use:


105.jpg


The two more cut-outs from the panel I've got will be used for residual heat button, and a door lock switch probably.
 
Thomas, where will you obtain the residual heat wiring harness? I've been trying to obtain one (for automatic climate control) but it's been NLA for years.

:runexe:
 
Thomas, where will you obtain the residual heat wiring harness? I've been trying to obtain one (for automatic climate control) but it's been NLA for years.

:runexe:

I will get it used, it´s a really rare option here in Europe (as in the US I presume?), but I´ve got my sources. :) What I haven´t found though is that the option was available for the V8 cars, but as far as I can tell it should be no problem to fit. Do you know otherwise Dave?

If you want to I can try and scour a harness for you?
 
Thomas, the REST system was never offered in the USA for the 124 chassis, so we can't find them used over here. It does appear the system was never offered on the V8 cars, but I can't find any reason why it can't be retrofitted. If you can find harness p/n 124-440-36-09 complete and intact, I would definitely be interested in buying one from you!! I was able to buy the control module and switch, I just need the harness...

:apl: :apl:

Thanks for the info! I've noted the harness p/n in my request list and will inquire with my sources. Poland is a great country to find these items in btw. :)
 
Got my paws on the soundsystem door panels:


Quite ok condition, some of the pleather is coming off of the panel, but not to bad. These are probably off a smoker's car, but I've cleaned everything today and are giving it a good ozone treatment.
I'll get new speaker grilles, these ones are a bit too yellow and the foam is letting go.

The speakers seem to be in ok condition.


Not every day I find stuff made of unobtainium and in just a few days to boot:


Spray cans ordered for the painting of this little bugger!
 
Time to do some more work, vacation is here. :) 
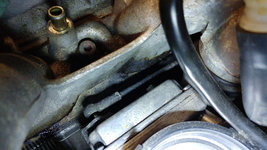
Started off with replacing the fuel filter.

Then I went on to the trailer hitch. I discovered when reading the English WIS instruction on fitting the hitch that the four bolts for the main hitch bar should never be reused, just like the bolts for the brake calipers. So ordered four new ones from Mercedes:

230.jpg

231.jpg

This of course meant that the rear bumper had to come off again, but it was scheduled to anyway to fit the covering.

The covering I bought is in the wrong color, so I ordered a spray paint kit from Mercedes, serious MB as always with paint plus clear coat:

233.jpg

So first thing to do is to align the frame for the covering, fortunately Mercedes have made holes that the frame slots into:

235.jpg

237.jpg

239.jpg

So slot the bugger in, and mark with a pen, then bring out the saw! (Yikes)

First cut (is the deepest) with a air pressure cutter, then I finish the rest with sanding paper, file and patience:

240.jpg

The covering fits perfect! In one of the corners you can spot my earlier mistake which I’ll get to shortly:

242.jpg

243.jpg

Sanding and grinding done:

244.jpg

This is the remains of the cut out I did earlier to be able to open the lid for the contact piece. Unfortunately I cut a bit to far and that bit back immediately. That’s the exact spot where the frame is to be riveted.

246.jpg

I applied an easy and not so visually perfect fix , but it’s strong and I’m not entering any rear bumper concours competitions, to win atleast. I'm epoxying a piece of sheet metal behind, and reusing a piece of plastic from the bit I cut out before.

248.jpg

250.jpg

Not my finest hour, but it’ll do. Going to drill and run a rivet right through it anyway, plus there’s a covering over it. You’ll have to be one helluva contortionist to find that one. :)

252.jpg

Painting the frame, quick and dirty, only the ears will show. When the hitch is attached…

253.jpg

While the paint is curing, I’m drilling:

255.jpg

Frame’s mounted, sorry for the shaky pic:

257.jpg

259.jpg

261.jpg

262.jpg

264.jpg

265.jpg

That was today’s work! Kinda happy with myself to be honest. Tomorrow I’ll paint the covering, I’m gonna try to get a really good finish on that since it will be on all the time.
 
Nice work! Looks pretty stout!

proxy.php


:stormy:
 
The door speakers cleaned and re-assembled, some cracks in the plastic, but they'll be ok to fit with some reinforcements:

21.jpg

Door cards cleaned and they've been in our ozone chamber for almost a week, so the cigarette smoke odor is gone. They will need some glueing, but not too bad fortunately:

23.jpg

25.jpg

27.jpg
 
Two switches arrived today, a REST switch that looks like new, but I know that it's been fitted. p/n 124 820 11 10. And also a common staple-button, the lock-switch, but this one is NOS. Got em dirt cheap from a fellow forum member in one of the Swedish board, very kind of him! The button for the residual heat is as far as I can see NLA, so really happy to get my filthy kittenmittens on one, and in a perfect condition to boot.


Now I "only" need the harness and the relay for the residual heat, (not forgetting you Dave :)) but it will turn up. The only thing I haven't found or missed in the last second is the Fondseitenrollo, the original rear door roller blinds. But one of these days, one of these days yous wills bes mines!!! :D
 
Thomas, the REST switch was superceded to a newer version, p/n 202-820-28-10. I bought one of the newer style in Nov-2012, but I'm not sure if it's still available. Yours would be "period correct" though, which is a bonus!!

:woot:
 
Thomas, the REST system was never offered in the USA for the 124 chassis, so we can't find them used over here. It does appear the system was never offered on the V8 cars, but I can't find any reason why it can't be retrofitted. If you can find harness p/n 124-440-36-09 complete and intact, I would definitely be interested in buying one from you!! I was able to buy the control module and switch, I just need the harness...

:apl: :apl:

Well, so far I found the harness, NOS with p/n 124-440-35-09 which is NLA at Mercedes dealers. This was scoured from a vendor in Germany, http://www.teile-profis.de/. Wasn't really confident in that they would have the harness, and was expecting an email saying "Enschuldigung..." But today the package arrived.

Sorry to say Dave, they did not have the one you need
p/n 124-440-36-09. I don't know what really differs between them, perhaps you can modify the harness for the dual klima? The same vendor also had the control module for a decent price, that one is not NLA though.

I will keep a look-out still Dave!

18.jpg

19.jpg

Also I started a proper cleaning of my floor mats. I have two sets both front and rear, but one set is a bit more worn than the other. Got some really nasty stains on one of them (you know how the ladies go Mardi Gras bananananas in a W124) so something had to be done. Here's a couple of befores, I'll post the result tomorrow after they've dried in my little ozone chamber of unsmelliness heaven:

20.jpg

21.jpg
 
I am missing this auxiliary fuse holder, been searching for it awhile online but can't find the part number for it. Anyone know here on the boards?

 
Yes, it's a 201 part number. I have about 6 of them laying around my shop. They tend to melt on occasion, so it's a good idea to have one on hand.

201 540 03 50 is the fuse holder portion. The plastic lid is 123 545 04 46.

On the E500E, these fuse holders are typically used for the telephone and/or seat heaters.

Careful, it's an extremely difficult item to configure and install correctly, much like the engine air intake tubes.

Cheers,
Gerry
 
Well, so far I found the harness, NOS with p/n 124-440-35-09 which is NLA at Mercedes dealers. This was scoured from a vendor in Germany, http://www.teile-profis.de/. Wasn't really confident in that they would have the harness, and was expecting an email saying "Enschuldigung..." But today the package arrived.

Sorry to say Dave, they did not have the one you needp/n 124-440-36-09. I don't know what really differs between them, perhaps you can modify the harness for the dual klima? The same vendor also had the control module for a decent price, that one is not NLA though.

I will keep a look-out still Dave!
Thanks for checking, Thomas! I'm glad you were able to find the -35-09 harness. Could you post some photos of the harness when you have a chance?

:apl:
 
Yes, it's a 201 part number. I have about 6 of them laying around my shop. They tend to melt on occasion, so it's a good idea to have one on hand.

201 540 03 50 is the fuse holder portion. The plastic lid is 123 545 04 46.

On the E500E, these fuse holders are typically used for the telephone and/or seat heaters.

Careful, it's an extremely difficult item to configure and install correctly, much like the engine air intake tubes.

Cheers,
Gerry

Got a "How To"?
:stickpoke:
 
Got a "How To"?
:stickpoke:

Not possible. It's one German engineer who has continuous training in Stuttgart, she (yes it's a woman) travels around the world performing the two jobs of configuring and installing engine air intake tubes for the M119, and installs auxiliary fuse holders in W124. It sucks, I know, but computer says no.
 
Thanks for checking, Thomas! I'm glad you were able to find the -35-09 harness. Could you post some photos of the harness when you have a chance?

:apl:

Here you go!

MFG date, not yesterday...

32.jpg

Entire harness:

33.jpg

From left to right;

Fuse box connections:

34.jpg

Somewhere behind the dash, left side:

35.jpg

Button and one more, I don't remember where it goes:

36.jpg

And finally the Steuergerät (control module):

37.jpg

I have this link to share from w124-freunde http://www.w124-freunde.com/index.php?page=Thread&threadID=17682&highlight= it's in German but very nicely written. One thing to note is that the control module goes in the right plastic cover in the passenger footwell on facelift (month 8? of '93) instead of behind the footrest.

I will of course document and write a simple how-to on this!
 
Carpets out of the drying chamber:

38.jpg

39.jpg

40.jpg

And now I've torn the car apart to start fitting some extra stuff. Began with the first gear module;

Locate the ABS signal cable, it's easy enough to find, but as an extra measure, I unplugged it and started the engine. ABS-light on, so it was the right one (most likely):

41.jpg

Time to break out the good ol' soldering iron (no not the Swedish wrench acting as my soldering stand...) and solder on the BNC's, or British Naval Connectors if you wanna be like that. :) But that's what the abbreviation stands for, and that's why I dislike seeing "BNC-connectors" as much as I dislike hearing someone order "Salsa-sauce".

42.jpg

Junction done:

43.jpg

The "B" switch connector:

44.jpg

45.jpg

Tight, but it'll do just fine:

46.jpg

Next up the S/E-switch. When in S, I get first gear start, when in E, I don't.

47.jpg

Just one cable to solder, this is actually the wrong one, so I had to switch it. The colors where spot on in the instructions on all but this switch, but I blame that on the fact that you guys (and the manufacturers of this FGS) don't have the S/E-switch.

48.jpg

And we are on and in working order:

49.jpg

Then programming (or rather some settings...) The software won't install under Win7, even in compatibility mode, so I had to find an old XP laptop. But with that everything worked:

50.jpg

Settings done, basically wheel size and at what speed you want the tranny to go down on you, NO NO not that, to shift down a gear, wait dammit!! You know what I mean. No, not that you perv!!! :)

51.jpg

And finally for today, this will probably be the placement of the unit itself:

52.jpg

This is how my interior looks like now:

53.jpg

Oh oh I almost forgot, I put a screw in the cup holder, didn't like it not being stable in the bottom bit (dang sexual reference again):

54.jpg

Over and out!
 
Fantastic info & photos - thanks again, Thomas!!

:cheers1:

Let me know if you want detailed photos and a schematic of the harness. Should be easy enough to duplicate, all the connectors are available from the dealer.
 
This is where the FGS control module will go:

65.jpg

I decided to de-badge today, I'm gonna try a cleaner more sleeper look, so both the trunk emblem and the Sportline-badges where stripped from the car:

66.jpg

67.jpg

68.jpg

Love it! Much nicer. I will also swap out my Sportline gear lever to the original black leather one.

However this is tempting: :hiding::wheelchair:

69.jpg

More to come!
 
Yesterday I continued with some cable connections. The rest-heater is now ready for testing bar the auxiliary fuse holder which probably arrives at the dealer today, I will come back to you on that. I will make a how-to on this.

I moved the control light for the trailer coupling to the instrument cluster, I realized that there's two free spots there which have green color. Much more integrated, and I've replaced the light panel I drilled with a new one. Now it is to the right after the airbag warning light:


98.jpg


And I have a full row of buttons now. What remains to be done is the cables for the central locking switch:


99.jpg

I'm adding a small four channel amp for my Mac Audio speakers in the instrument panel and parcel shelf. I opted for a Pioneer GM-D1004. Very small and easy to connect with enough power to make the sound of the small speakers more stable. It will be fitted under the metal sheet in the front passenger footwell:


100.jpg
 
I have an issue with the residual heat harness. I'm supposed to find the feeder cable to the duo valve and circulation pump there, but I only find four red/pink cables there. I need to find the cable that feeds the duo valve and circ. pump. I can follow the cable a bit and it enters the cabin via the firewall by the computer boxes. Desperately trying to find a schematic that is correct for the E420. Anybody got a clue?
 
Ok, time to do some work on the car. This is my plan for the coming weeks:


  • Remove inlet manifold - I have a leak somewhere around it, will post pics. I will use the guide in this post: http://www.500eboard.com/forums/showthread.php?t=9515
  • Re-seal the cam magnets
  • Change the oiler tubes. I will probably cause some stir using plastic tubes! Why? Well because I'm saving weight of course! :) Well, no, that's not the reason. The reason is that when my dad bought his .036 years ago, one of the things he read was that the tubes crack and break. But he didn't know that there are metal tubes available used, or at all. So he ordered new ones from the dealer. When I had a look through the oil filler cap, I saw that his car's already fitted with the metal ones. So the new plastic tubes are now obsolete. I'm gonna use 'em and, well, they will probably last many years. They're brand new OEM's with new green gaskets.

Anything else I should do when in there? Pics and updates will follow as I proceed!
 
Did some work today!

Airbox, covers off:
309.jpg

Oily:
310.jpg

311.jpg

312.jpg

These plastic covers are just disintegrating with the lightest of touch. I'm thinking of replacing them, but with what?
313.jpg

That was it for today!
 

Attachments

  • 27903958172_c2f89f2379_b.jpg
    27903958172_c2f89f2379_b.jpg
    171.9 KB · Views: 13
  • 27392222393_e01cd6cc54_b.jpg
    27392222393_e01cd6cc54_b.jpg
    146.2 KB · Views: 13
  • 28006190845_fc7ef50b47_b.jpg
    28006190845_fc7ef50b47_b.jpg
    143.9 KB · Views: 9
  • 27392883524_f3bca1f492_b.jpg
    27392883524_f3bca1f492_b.jpg
    167.6 KB · Views: 11
  • 28006189655_2da70cfcf9_b.jpg
    28006189655_2da70cfcf9_b.jpg
    168.7 KB · Views: 15
Regarding EGR - should I remove it or keep it? It won't affect CEL since I don't have the DM. Also, I'm thinking about removing the magnet clutch for the air pump, it doesn't sound to good, and it does no good either. I'm too cheap to get the delete bracketry.

Also thinking about painting my valve covers. They're not too good looking, and also I dont think they are painted from factory, as the covers are on my dad's .036. Anyway - is powder coating preferred? I'm thinking about just spray canning it to be honest. I usually get really good results with that, but I've never painted a valve cover. Of course I need a paint that can stand the heat.
 
I use aftermarket corrugated split-loom, it's available in various sizes.

Looks like 001-546-94-30 in the EPC for 13.2mm diameter factory stuff, but it's NLA.

000-546-96-30 should be smaller diameter corrugated tube, and may still be available.

I don't think the OE MB tube is split, so it would be more difficult to install. If the plastic pipes shown in your last picture are brittle, now's the time to change all of 'em!


:tumble:
 
Did some work today!

These plastic covers are just disintegrating with the lightest of touch. I'm thinking of replacing them, but with what?


That was it for today!

Thomas,

It is several types of high temp wire looms available, but you should buy from product specific suppliers. The heat resistant nylon looms are marked with a grey striping. I did a random search; http://www.wiringproducts.com/high-temp-nylon-corrugated-wire-loom but I guess these looms can be found in Sweden as well.
 
Thank you all! Yes I would like the split version, otherwise it will be a pure PITA-fest. Now I know what to look for atleast.
 
Harness, MAF, fuel rail and injectors removed.

Here's a better picture of the leak from the inlet manifold gasket:
8.jpg

Lots of dirt to take care of:
9.jpg

This is the progress so far:
10.jpg
 

Attachments

  • 27759080540_726dc688a2_b.jpg
    27759080540_726dc688a2_b.jpg
    122.8 KB · Views: 7
  • 27425626824_ec39fd5655_b.jpg
    27425626824_ec39fd5655_b.jpg
    216.7 KB · Views: 8
  • 27759056870_be31fcdd43_b.jpg
    27759056870_be31fcdd43_b.jpg
    171.6 KB · Views: 8
nice work right there
Looking forward to more pics of this work.thinkin of doing the same to my car,want to freshen up the whole inlet manifold ..but its more of a OFF season work :)
 
nice work right there
Looking forward to more pics of this work.thinkin of doing the same to my car,want to freshen up the whole inlet manifold ..but its more of a OFF season work :)

I have to do it now, the car won't pass the emissions as it is now. :)

I'll continue with some pics and info on it!
 
Back
Top