• Hi Guest !

    Welcome to the 500Eboard forum.

    Since its founding in late 2008, 500Eboard has become the leading resource on the Internet for all things related to the Mercedes-Benz 500E and E500. In recent years, we have also expanded to include the 400E and E420 models, which are directly related to the 500E/E500.

    We invite you to browse and take advantage of the information and resources here on the site. If you find helpful information, please register for full membership, and you'll find even more resources available. Feel free to ask questions, and make liberal use of the "Search" function to find answers.

    We hope you will become an active contributor to the community!

    Sincerely,
    500Eboard Management

OWNER doolar

I have to do it now, the car won't pass the emissions as it is now. :)

I'll continue with some pics and info on it!


yeah i can see that..is the car to rich on the mixture now with these faults?or?

bring the pics :)
 
yeah i can see that..is the car to rich on the mixture now with these faults?or?

bring the pics :)

Yea it runs rich, I don't know for sure that this is causing the problem, but it needs to be fixed anyway. I can't really continue swapping part as long as this job is not completed. I'll continue in the garage tomorrow, more to follow then!
 
A little bit more done today, as I may have said before, this will be a slow progress, work, vacations, family and so on takes a lot of my time. Anyway!

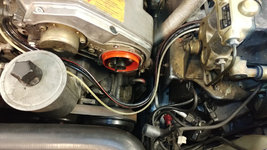
Started with some cleaning, vacuuming and removing the worst of the debris just to try to keep it as clean as possible when I remove the plenum. Also removed all of the old and crusted cable covers:

23.jpg

Lots of crud and old oil and dirt. I had the small hose for the power steering pump changed some years ago, but noted that it leaks now. It turned out to just be the clamps that where a bit lose, so tightened them up and topped up the fluid. The hose looks good still.

24.jpg

Removed EGR, drained some coolant, removed the top of the water pump to release the hose (which looks and feels in perfect condition, so I'm not sure I'll actually replace it), removed the coolant hose that connects to the plenum (this hose will be replaced, along with the other coolant hose that connects to the block and heater core).

25.jpg

Not really a visible change, but now I'm ready to unbolt and remove the plenum.

26.jpg

That's it for today!
 
awesome.I like it :)
i have seen somewhere..that some of the bolts on the plenum..MAY be seized...or at least often they are seized...the ones in the midle...on the right side of the engine..dont know if its them in praticular...cause of the EGR pipe going just on the side there..but..just wanted to let you know..and be carefull when removing them..and maybe "shock" them before you try to loosen them..

awesome work anyways .:)

Thanks, I removed two bolts today, they where really tight! But I took it with ease and they came loose. I'll probably massage the others a bit... :)

Thank you for the kind words, I'm not so good at documenting my progress but I think you get the picture so to speak. I'm somewhat inspired by you to maybe break out the video camera and make a little video! :) But don't hold your breath!
 
Started on my parts list to complete this job. I need the p/n's for some of the items still, and I'll have to inspect the manifold connector rings before ordering. Some other bits will probably be added...


Vacation time is here which unfortunately will not be spent in the workshop. Maybe I'll be able to work with the car one day this week, otherwise I'll be back home in a few weeks time and continue then.
 
Hello!

Been too busy with everything else that spells life for the past few months. I've at least managed to remove the plenum. So now I'm in cleaning mode, and ordering parts mode. I also realized that the oiler tubes where changed in 2009 to new (plastic) ones, so I'll leave them for now. I will post some pics from the cleaning! So when will I be ready? Nobody knows, but hopefully it won't be too long.

I've also finally set up a website for my car - http://www.w124.se I got the domain a few years back, being on a lot of business trips at the moment it fits nicely to use the time at the hotel to start on this. I have no intention to abandon any forums, I just wan't a complete-ish story of the car collected and controlled by myself. It's just a few posts at the moment, but I'm adding to it as often as I can, and intend to keeping it updated with my progress on things. I have and will add some stories that's related to this car, and others too. Oh and it's all in English!
 
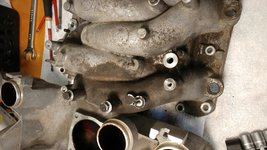
So finally got some time to do a little bit of work. Disassembled the plenum and started cleaning it.
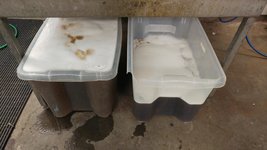
A lot of dirt and nasty stuff that will need to be cleaned. The parts will now be bathing in a solution of water and degreaser for a day or two, then I'll continue with the rest of the cleaning process.

The rubbers between the plenum halves where actually better then I expected them to be, not a single one cracked or broken. But they are hard-ish and will of course be replaced.

The EGR tube was almost clogged solid, as expected. In general, a lot of grime in here. It probably won't do any harm staying there, but it will be sweet to get the plenum properly cleaned after 23 years of service.
 

Attachments

  • 2017-01-28 13.26.41.jpg
    2017-01-28 13.26.41.jpg
    1.2 MB · Views: 24
  • 2017-01-28 14.35.59.jpg
    2017-01-28 14.35.59.jpg
    1,021.5 KB · Views: 22
  • 2017-01-28 14.36.09.jpg
    2017-01-28 14.36.09.jpg
    1 MB · Views: 22
  • 2017-01-28 14.38.45.jpg
    2017-01-28 14.38.45.jpg
    1.2 MB · Views: 22
  • 2017-01-28 14.39.09.jpg
    2017-01-28 14.39.09.jpg
    743 KB · Views: 21
  • 2017-01-28 14.39.25.jpg
    2017-01-28 14.39.25.jpg
    1.1 MB · Views: 22
  • 2017-01-28 14.39.36.jpg
    2017-01-28 14.39.36.jpg
    1.1 MB · Views: 23
  • 2017-01-28 14.43.30.jpg
    2017-01-28 14.43.30.jpg
    1.2 MB · Views: 24
  • 2017-01-28 15.00.30.jpg
    2017-01-28 15.00.30.jpg
    939.1 KB · Views: 22
Nice, [emoji106] I am planning the same soon, but not myself, in MB service.


Sent from my iPhone using Tapatalk
 
Settings done, basically wheel size and at what speed you want the tranny to go down on you,
I was going to install my FGS soon but maybe not now after reading that :doof:

Thanks for the details on your install - my car has a E/S switch so I'll follow your install details. I too want it only when mode 'S' is engaged.

Great thread - keep up the good work! :nobmw:
 
My plenum pieces are still bathing in their solution, they are coming along nicely. I know, I could have just handed them in and had them cleaned at a shop, but this is too fun to not do by myself. :D I will take them out tomorrow, and unfortunately just have them rinsed and stored for awhile.

Going to Norway for a business trip for minimum three weeks. Do we have any forum members in Bø i Vesterålen? :arnt: Didn't think so, north of the Arctic circle and a population of less than 300 in the village... Perhaps I get to see some northern lights though.
If I get the time I'll post some pics tomorrow, but don't hold your breath.
 
Going to Norway for a business trip for minimum three weeks. Do we have any forum members Bø i Vesterålen? :arnt: Didn't think so, north of the Arctic circle and a population of less than 300 in the village... Perhaps I get to see some northern lights though.

How about Arnt or Lowman? I haven't a clue as to where either lives but I know it's Norway or as Arnt says Morpay.
 
I never seem to find time for my car. Work and work. But today I at least got something done! And, I've taken a week off after I've closed my next project with restoring a wind turbine :).

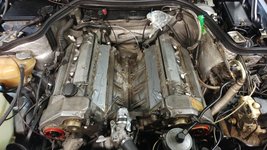
This is what met me when I opened the hood today:

2017-05-19 13.14.19.jpg

A bit cruddy:

2017-05-19 13.14.26.jpg

And better:

2017-05-19 13.57.49.jpg

There's still some cleaning to be done, and, of course, all the rest. But now I finally have a week to look forward to, and with nothing else planned, I really hope I will get everything done.

I have a few minor upgrades coming along too, I'll write about those when I get to my "E 420 - week of fun" in June. :agree:
 
So today I'm back from three weeks of work. This week will be all about assembly of the plenum and cleaning up the last parts. I have not placed my order with Mercedes yet, will do tomorrow since I'm still missing a few bits to put on the list.
Progress report will come this evening or tomorrow.

But first, I just have to share this cool accessory, the Hella Raintronic, basically an aftermarket rain sensor. One of the very few "modernities" that I really miss on the W124, especially since you can't control the interval of the wipers in interval mode.

2017-06-12 09.29.11.jpg2017-06-12 09.29.03.jpg2017-06-12 09.28.23.jpg2017-06-12 09.28.14.jpg2017-06-12 09.28.01.jpg

I will mount this when the other work is done!
 
Cool, its actually approved for the W124... is it a new old stock ?

Yes NOS, I've been hunting for one for years, Ebay.de have them from time to time, but for crazy prices (€200 or more), I finally found one in Sweden for a very reasonable sum. They are not manufactured by Hella any longer, think mine's produced in the late ´90's. (edit, checked the box, it seems to been produced in November of 1996)

Seems to work fine https://www.youtube.com/watch?v=KVV7SdhgO6Q
 
Last edited:
So today I stripped my injectors of all o-rings, filters and pintle caps. They've recently been cleaned professionally, so I'm just replacing the o-rings, filters and pintle caps. Also I've cleaned them on the outside to remove all the dirt there, sprayed them with electronic cleaner afterwards. Ordered a set of above mentioned parts for the injectors, I'll rebuild them as soon as they arrive.

Cleaned the ETA, I replaced it not so many years ago with a 2004-made one, so it was not so dirty, basically just a wipe off. The gasket area needed some further cleaning to remove old gasket residue.

I cleaned the MAF with electronic cleaner, alcohol. Externally I just wiped it off, and cleaned the gasket surfaces with citric acid to remove the crud and dried in rubber.

All other parts are cleaned or new, so I've just arranged everything neatly to be packed in my car for taking down to the garage where I have the Merc.

This evening I'll place an order for the parts I need from Germany, they usually deliver within a few days, so I have those days for the final cleaning and preparation for assembly.

Pictures and more progress will come tomorrow evening!
 
The parts I need ordered just now. I also got hold of some high temp insulation tubing today, ordered from a Swedish car parts dealer.

parts.jpeg
 
Cleaned the injectors, they're waiting rebuilding now:

2017-06-13 11.09.19.jpg

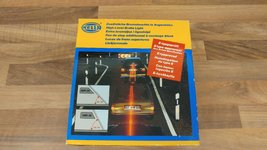
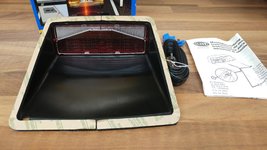
One more fun Hella contemporary accessory, their take on the third brake light. They where only fitted to US sold cars, so of course Hella made one. I think it's to big to fit behind the rear curtain, but I'll try. Since the Mercedes third brake light seems to melt away, maybe this one is of better quality? Plus it was really cheap. NOS made in 1989 folks!

2017-06-13 11.09.36.jpg2017-06-13 11.09.49.jpg2017-06-13 11.10.27.jpg2017-06-13 11.10.35.jpg

I'll be back with more soon!
 
very nice
But what do you mean by 3rd brake light only sold on us cars? i have this standard on my car..and its in the datacard also.. do you mean this particular Hella one?
 
To my knowledge the third brake light was never offered as standard equipment on the W124 in Europe, as an option, yes, but not standard. But I may well be wrong!
 
It was standard equipment on all North American cars, including USA and Canada. As Thomas noted above, it was likely optional in other regions.

:pc1:
 
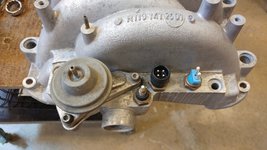
Today I started to reassemble some of the parts on the intake manifold. I also removed one of the cam magnets for closer inspection, I've held this off since I need to remove the power steering fluid can for the left side, no need to have that system opened for a year. :)


Well upon closer inspection of the right cam magnet, I don't think it'll do with just a reseal, it needs to be replaced or rebuilt. I haven't seen this How-To by JC220 before, but that answered all my questions. New ones are €190 a piece, so I'd rather not buy them new if I can seal them properly on my own.

So that's what I'll start with tomorrow. Other than that, I'm ready to assemble, just some minor cleaning to do in the engine compartment.

2017-06-14 10.24.14.jpg

Yes I know, it's not spotless. If I had not cleaned it myself it would look even better, but I'm satisfied. At least it is very clean now, just some discoloration of the alloy. The EGR does't look to nice either, but this was the best I could get it, and I'm not getting a new one... :)
 
Removed the power steering fluid can and the left cam magnet.

Cleaned the power steering bits:

2017-06-15 10.58.34.jpg

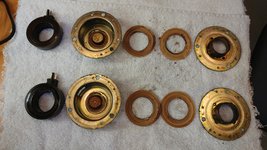
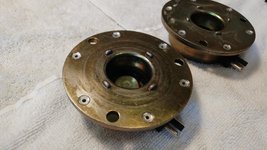
Drilled out the rivets on the cam magnets, this is how they looked:

2017-06-15 11.12.12.jpg

2017-06-15 10.58.54.jpg

I can clearly see where the connector has been pressing the seal flat, and this is probably the main reason of the leakage at the connector:

2017-06-15 11.11.44.jpg

Some cleaning:

2017-06-15 11.36.47.jpg

Citric acid and a razor blade to remove the old goo:

2017-06-15 11.36.53.jpg

Inside:

2017-06-15 11.36.57.jpg

Rebuilding next!
 
Ordered a few new parts from the dealership today, attaching the p/n's for future reference:

A1199970045 sealing ring servo reservoir
A1294660180 gasket servo reservoir (expensive piece of gasket, I know of the aftermarket ones that I've seen here, but they seem to be found in the US only. $22 for postage from Ebay... so that's out the window. I probably could have found it if I tried, but time is moneys toos :))
A0004662104 filter servo reservoir
A1191800009 engine oil filter

Insulation tubes arrived today too. DHL reports that they will deliver my package from Autohaus Dröge tomorrow. Waiting for the injector kit from the US to arrive, and tomorrow I'll rebuild the cam magnets. All our RTV at work was to old for me to dare use it, so I discarded it and ordered new from Würth, picking it up in the morning.

Hopefully I'll have something to show for tomorrow evening! Getting closer!!
 
So today I'm back from three weeks of work. This week will be all about assembly of the plenum and cleaning up the last parts. I have not placed my order with Mercedes yet, will do tomorrow since I'm still missing a few bits to put on the list.
Progress report will come this evening or tomorrow.

But first, I just have to share this cool accessory, the Hella Raintronic, basically an aftermarket rain sensor. One of the very few "modernities" that I really miss on the W124, especially since you can't control the interval of the wipers in interval mode.

View attachment 64247View attachment 64248View attachment 64249View attachment 64250View attachment 64251

I will mount this when the other work is done!

I want one.
 
The listing says no shipping to the USA.

My experience from Ebay.de is that most sellers are willing to ship outside of Germany. I've contacted many sellers on Ebay.de regarding this, and have never once been turned down.

This particular item from this particular seller has been out on Ebay for months. The seller started his auction at around €250 IIRC. That makes it even more likely that the seller ship anywhere in the world.

Email the seller and ask - it won't cost anything.
 
Email the seller and ask - it won't cost anything.
I've done this several times with mixed results. Sometimes they'll agree and ship to this side of the pond. I've heard of some people offering to pay a bonus on top of shipping costs to help convince them. I don't know why so many European sellers just flat refuse to ship to USA, even for small / light items. Years ago they wouldn't take PayPal and payment was a hassle (required international bank wire transfer, etc) but nowadays I guess they just don't like us.

:runexe:
 
Too bad that the seller didn't want to ship to the US, I don't get it to be honest. It's the exact same procedure as sending it anywhere else.

Unfortunately I made no progress with the cam magnets today, I was sure that we had countersunk rivets in our workshop, but no. Spent quite some time today trying to find any locally, but no such luck. The only place that had them sold them in packs of 500. So, Ebay.de saved me, but it means a few more days of waiting.

The DHL package arrived today, so I can start with other stuff while I wait for my last shipments to arrive. But tomorrow is conference day at work, so hopefully Thursday. One step forward, two steps back. :)
 
I think people don't want the hassle of filling out customs paperwork, etc. for international shipping. I admit it is a bit of a PITA, but when I do spark plugs internationally, I keep a stock of customs forms handy and use them. Takes all of 3-5 minutes to fill one out, but it does require going "up to the window" at the post office to manually have them process things and affix the customs label and postage sticker.

Yeah, it's a pain. But not horrible.....
 
Finished re-sealing the cam magnets about a month ago:

2017-07-06 15.49.28.jpg

2017-07-06 15.49.39.jpg

Today I began the assembly of the car, with a goal set to be finished on friday!! Those of you who follow my thread knows that something always gets in my way, but now I have my last week of vacation, and just to myself. So hopefully... :)

I began with the two coolant hoses that passes through the firewall. The old ones where in really good condition, they are most likely the original ones. Still soft and with no visible damage. But now they're swapped out, hopefully good for many years.

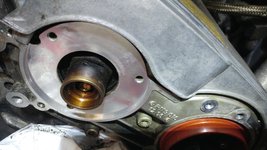
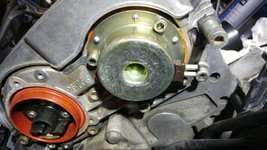
Continued with cleaning off the leftover goo from where the cam magnets meets the cylinder head:

2017-08-15 12.10.55.jpg

2017-08-15 12.10.44.jpg

Finished off with wiping the contact surfaces with alcohol. Time for some gooey stuff, looked at GSXR's pictures on how much to use, I think and hope I hit the sweet spot:

2017-08-15 12.47.20.jpg

2017-08-15 12.47.07.jpg

Next up, reassemble the power steering fluid container, new gasket of course, and no over-tightening of those Torx's. Popped a new filter in and added fluid, I'll top fill once I get the engine running.

Lastly for today I removed the insulator caps just to have a look. The left one had some moisture, the right one was bone dry. Cleaned out some dirt, and inspected my insulators more closely. They are made in 1992! So original one's then. I can't see any major wrong with them, but I'm enclosing images and if you think otherwise, please let me know. I can see that they are worn, but I don't know if they are bad:

2017-08-15 13.38.57.jpg

2017-08-15 13.39.40.jpg

2017-08-15 13.40.32.jpg

That's it for now, the fun continues tomorrow!
 
Hi, I just changed the caps rotors to Bosch manufactured ones, not ebay, also did remove the insulators, allthough they were black
also from '92 when AMG delivered the converted S60/500SEL. They were like new but anyway I gave them a couple rounds of clearcoat.

I had new O-rings but thats it, so sweet it runs by now, unbeliveably smoth from 600rpm in gear to 6000+rpm. Satisfied.....? YES
 
Continued today with the car.

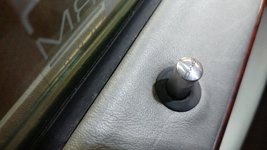
First off, I see that it's time to polish the AMG door pins. They are normally making panties wet all around, but I haven't tripped over any women trying to get in the car in the garage over the past year. Usually there's piles of them!

2017-08-16 12.25.56.jpg

Next I refitted the center console wood and ashtray:

2017-08-16 12.24.31.jpg

Cleaned off the old gasket gunk from the heads, replaced vacuum tubing and spent about an hour thinking about which bolt goes where:

2017-08-16 12.23.35.jpg

Reassembling the intake manifold and plenum, with ETA and MAF:

2017-08-16 12.23.17.jpg

This vacuum line just snapped off, it was brittle as hell:

2017-08-16 12.23.50.jpg

Assembled the throttle linkage. Removed all ball joint bars, rollers and everything else moving and cleaned out dirt and old lube. Lubed with lithium grease and refitted. I also adjusted two of the bars:

2017-08-16 14.25.42.jpg

Ready to go in the car tomorrow:

2017-08-16 12.58.06.jpg

That's it for today, tomorrow I think I'll be able to finish it!!
 
First hours of work done today, I'll continue this evening. Now I'm close!

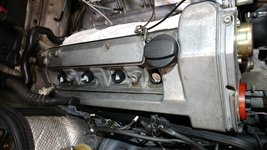
Cleaned the valve covers, they turned out ok, it's at least a huge improvement over how they looked before:

Before:
2017-08-17 09.40.24.jpg

After:
2017-08-17 11.02.23.jpg

After:
2017-08-17 09.40.34.jpg

After this it was time to vacuum everything in and around the inlet ports, to try to ensure that there are no foreign objects there. Fitted the manifold gaskets:

2017-08-17 11.31.25.jpg

Manifold in place, vacuum hoses routed:

2017-08-17 15.06.17.jpg

Connected everything to the throttle linkage:

2017-08-17 12.33.10.jpg

Fitted plug wires guide and the plastic bits surrounding the magnets and distributors:

2017-08-17 15.52.35.jpg

I have routed the vacuum hoses and used insulator cable to protect and collect the hoses. The EZL cables also got re-insulated.

It all seems like 30 minutes of work when I write this post, but I spent a good six hours in the shop today. :) There's a lot of things to get right when doing this kind of job, takes some thinking to figure out the easiest way to route vacuum hoses when putting everything back.

I'm taking it slow, trying to avoid silly mistakes. I made one today though, and that was when tightening the intake manifold screw that also holds the plug cable support. I was busy looking at my torque wrench, so I missed that the plastic thing began to spin due to no lubrication. *Snap* and it broke. I'll glue it for now, at least it broke off clean and not in a million pieces. I've added the plastic bit to my shopping list.

Well, I'll be back with post nr. 2 for today later this evening, going back to the shop after some dinner with my wife and son. :gsxrlove:
 
Looks great – glad to see at least one person found the Magnet Re-seal DIY useful :) What sealant did you use inside them?


All very nice work indeed Sir! It looks like your cam covers are bare metal though - or is this an optical illusion?
 
LAte M119's have bare valve covers, no paint. Pretty sure this started somewhere in early 1994 production but I don't know exactly when. Most (all?) 1995 USA model year cars have the bare valve covers.
 
LAte M119's have bare valve covers, no paint. Pretty sure this started somewhere in early 1994 production but I don't know exactly when. Most (all?) 1995 USA model year cars have the bare valve covers.
As you can see from the photo, my own car is a fairly early 1994 model (chassis #052693) and it has the bare valve covers. The production date for my car is ~Sept 1993 (probably June 1993 per GSXR, but I 'll let him confirm). :stickpoke:

proxy.php
 
My July-1993 build E500 has painted covers. Looks like the change to no-paint (a race-ready, weight-saving option!) may have been in early facelift production, summer 1993-ish.

:gsxrock:
 

Who has watched this thread (Total: 1) View details

Back
Top