• Hi Guest !

    Welcome to the 500Eboard forum.

    Since its founding in late 2008, 500Eboard has become the leading resource on the Internet for all things related to the Mercedes-Benz 500E and E500. In recent years, we have also expanded to include the 400E and E420 models, which are directly related to the 500E/E500.

    We invite you to browse and take advantage of the information and resources here on the site. If you find helpful information, please register for full membership, and you'll find even more resources available. Feel free to ask questions, and make liberal use of the "Search" function to find answers.

    We hope you will become an active contributor to the community!

    Sincerely,
    500Eboard Management

OWNER DJ RaMiN (E420)

Hey guys! Happy Easter!

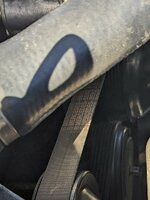
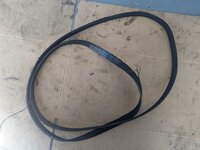
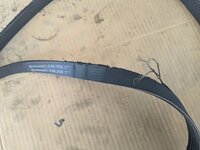
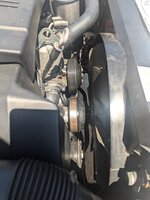
So a few days ago, I noticed the car making a strange sound. Opened the hood and saw the serpentine belt all cracked up and hairy lol. This belt is only a few months old!
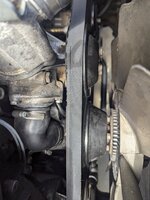
PXL_20250416_202205854.jpg

So when I first bought the car, it had factory belt installed by the dealership in 2020. When I took the alternator out to replace the voltage regulator, the OCD me decided to flip the belt so the MB marking look right from the front of the car.
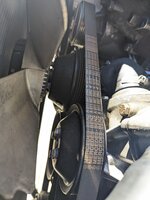
PXL_20231211_183437896.jpg

Flipped:
PXL_20231211_210125652.MP~2.jpg

Few months after doing that, I noticed some parts of the belt were separating and it was throwing melted pieces all over the place. So I took it out and cleaned all the pulleys and inspected them and replaced the belt with a continental one. This time also with the logos and writings facing the front.

Now my question is, does it matter if the writings on belt face the engine or the front? Why would this happen?

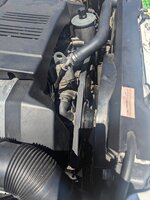
PXL_20250420_175353669.jpg

I bought another Continental belt. I'm going to inspect pulleys again and install it. This time just like how it was installed at the dealership, with logo facing the engine.


Note to self: don't touch something, that's not broken! 🤦‍♂️
 
Doesn't matter which way the belt is installed. Part numbers & logos can face either direction. I'd have done the same thing you did and have it readable from the front.

Check ALL the pulleys, make sure one is not misaligned, this can chew up one edge of the belt. Years ago I was chasing a pulley alignment problem and eventually discovered the water pump pulley was outward by something like 1-2mm. That engine had come from a salvage yard, I speculated that someone used a strap or chain on the pulley when removing the engine, which pulled the shaft outward slightly. Replaced the water pump and all was back to normal.

:wormhole:
So I took the old belt out today and checked all the pulleys, they all seem to work fine. There were just lots of gunk on them, lots of melted stuff in the grooves. It took me an hour just to clean up all the pulleys.

Before:
PXL_20250421_173758438.jpg orca-image--1485742587.jpeg.jpeg orca-image--1027693556.jpeg.jpeg orca-image-1187445979.jpeg.jpeg


Old belt and some of the gunk:
PXL_20250421_203802413.jpg PXL_20250421_201934983.jpg PXL_20250421_201937884.MP.jpg


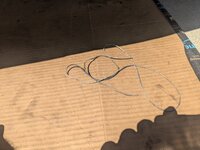
Used this nylon thread to clean the crankshaft pulley.
PXL_20250421_193542972.jpg PXL_20250421_193509382.jpg


After:
PXL_20250421_193906391.jpg PXL_20250421_193852511.jpg PXL_20250421_200458654.jpg

I didn't clean the pulleys that much last time, so I'm hoping the gunk from before did it. 🤷
 
@DJ RaMiN,
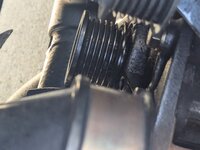
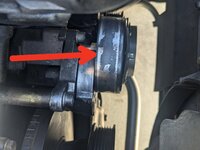
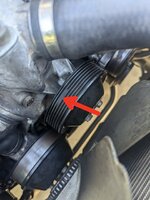
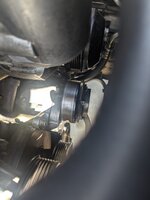
DJ, It might be an optical elusion but in your post #201 pic 1of4 to me it looks like the fan clutch is forward of the upper pulley and could be making the belt run on the back edge of the fan clutch pulley.

Look at post #203 pic 11of12 you can see the raised back edge of the fan clutch pulley. This edge to me looks like it could be the culprit in post #201 above. If the belt is riding on that edge it’s cutting up the belt.

Again this could be an optical elusion.
Thanks for pointing that out. I believe its an optical illusion. I checked everything and the alignment seemed fine. 🙏🏼🙏🏼
 
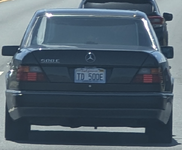
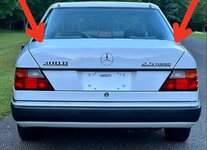
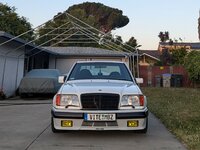
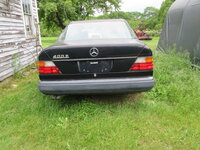
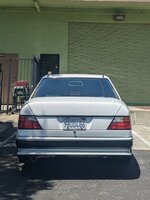
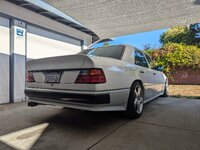
Spotted this 500E yesterday!
Sitting on MONOBLOCKs and tinted windows. I slowed down so they could pass me, tried to wave at them, but couldn't' even see who was driving. The tint was too dark. 😬

Anyone here?

PXL_20250428_195716815.MP.jpg
1745949243276.png
 
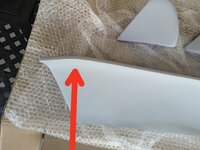
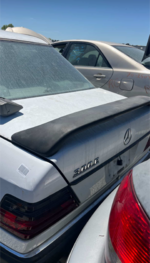
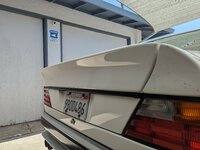
Just received the AMG ducktail spoiler and after test fitting, I noticed something I didn't know before!
I always knew installing ducktail on a facelift sedan would require some modifications, and that would be trimming the bottom of spoiler so it wouldn't interfere with the trunk lid handle.

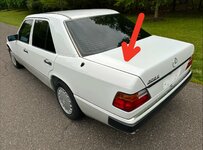
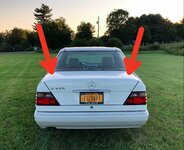
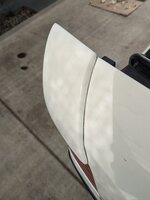
What I didn't know, which I discovered today is that the top edges of the trunk lids are also different! Facelift (94+) has round top edges and pre 94 has more like beveled top edges!

Preface:
orca-image-1143499676.jpeg.jpeg

See the line on the trunk lid of the pre 94 car. 94 + cars don't have that!
orca-image--665573697.jpeg.jpeg

Facelift:
orca-image-625112589.jpeg.jpeg

Spoiler:
orca-image--1225959656.jpeg.jpeg

So now, I'm more convinced to just get a pre 94 trunk lid and install the ducktail on it, paint it and call it a day!

Assuming pre 94 trunk lid is compatible with my car.
 
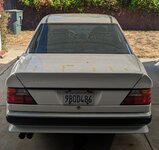
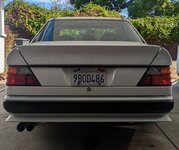
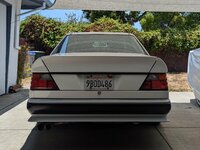
This is the only pic I have in my phone at the moment on my 93 500E. Not the straight on pic but I think it looks the same as your 1/4.
 

Attachments

  • IMG_0856.jpeg
    IMG_0856.jpeg
    3.1 MB · Views: 6
A few updates:

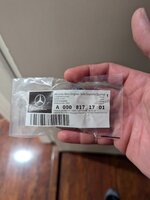
Got a flat emblem (57mm). It doesn't fully sit on the hood, but that's the only OEM option that works. I could also go with aftermarket 44 mm one that would sit perfectly in the indent part of the hood, but of course it's smaller.
PXL_20250412_032618321.jpg
PXL_20250412_032623864.jpg
PXL_20250413_005355353.MP.jpgPXL_20250413_005423533.jpg

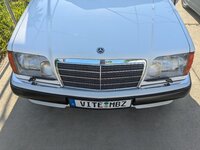
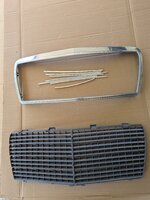
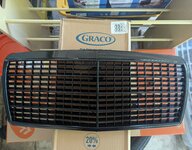
Had an extra grille so decided to paint it black and try it out.
PXL_20250428_215809653.jpg

Used flat black for the plastic and gloss black for the metal parts.
PXL_20250430_000413715~2.jpgPXL_20250430_234300360.MP~2.jpg

Results:
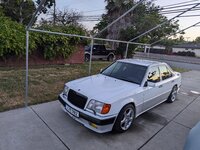
PXL_20250508_024903740~2.jpg
PXL_20250508_030803865.jpg

I think it looks good on white.
You guys notice the white horn bracket behind the grille? It kinda bothers me. Might swap it with a black one at some point.

Also I'm in search of pre 94 trunk lid. Preferably the one that comes with a lid liner, because I know mine doesn't quite fit on preface ones. Correct me if I'm wrong, but I think 1990 + cars come with lid liner.


A 1991 300E popped up at a nearby pnp, had a friend check it out, and sadly the PO installed an aftermarket spoiler on it and it was ruined. 😔
Screenshot_20250508-134255.png
 
Looks great! And yes, the trunk carpet started with 1990 USA model year, IIRC. I think the lid liner is the same for all years, 1990-95.

:cheers1:
 
Looks great! And yes, the trunk carpet started with 1990 USA model year, IIRC. I think the lid liner is the same for all years, 1990-95.

:cheers1:
Thank you! 🙏🏼🙏🏼
Great info on the lid liner! Its good to know that its the same!

A friend of mine said his 94 lid liner didn't quite fit the preface trunk lid, that's why I thought maybe there are two versions. He said there are no holes for the white clips that go on, but there are 2 holes for mounting it on the hinge area, since old model 124 has those black trim pieces that go over the arms.

After checking with him today, realized his donor trunk lid is pre 1990. So I'm guessing pre 1990 lids don't have mounting points for lid liner.
 
Did some more work on the E420!

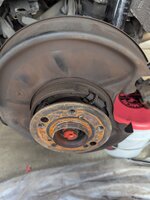
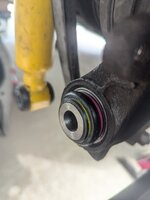
Replaced the rear lower outer ball joint bushings! I noticed they were bad when I was replacing shocks and springs last time.
Parts:
PXL_20250519_175242070.jpg

Old ball joint bushings:
PXL_20250519_230936057.jpg

New one installed:
PXL_20250516_215758296.jpg


Replaced the ones on the 190E a few years back. It's a bit easier on the 190E. On E420, you have to do the same stuff, plus have to take the caliper, rotor, parking brake shoes out and slide the brake dust shield to be able to access it.
PXL_20250516_233951828.jpg

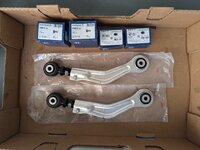
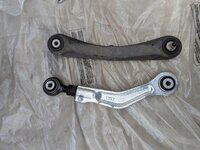
I also got a set of adjustable camber arms for rear. A friend of mine got these for his 190E and he liked them, so I decided to give them a try. The brand name is Lykt, quality seems good too.
PXL_20250517_001634811.jpg

Replaced those with new updated hardware.
PXL_20250519_193435172.jpg
PXL_20250519_202413196.MP.jpg

For a while I wanted to lower the rear a bit more too and thought I would be great to do all of these at the same time.

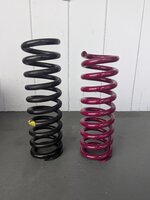
A few months back I got a set of used Vogtland springs from pick n pull and thought maybe I give them a try.

Vogtland rear vs stock cut rear:
PXL_20250516_193559047.MP.jpg


Installed Vogtland rears with #3 pads.
That with my stock cut fronts, it was almost perfect height. Just the front needed a little drop to make it even better.
PXL_20250520_181950015.jpg

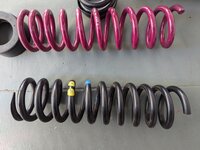
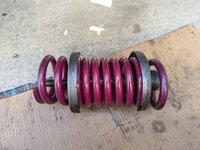
Decided to install the Vogtland fronts with #4 pads. Using spring compressor, I noticed the Vogtland fronts where so easy to compress compared to stock springs. That kinda gave it away that they're soft!

Vogtland front vs stock cut front:
PXL_20250521_003624874.jpg

PXL_20250521_010455311.jpg
PXL_20250521_013222859.jpg


Dropped the car and it was instant regret hahaha. 🫣🤦‍♂️
PXL_20250521_173510527.jpg
PXL_20250521_173516979.jpg

So I ended up cutting another 1/2" of the length of the stock fronts (about 3/8 of a coil) and installed those with #1 pad.

I think this is where I like it! Not too low not too high.
PXL_20250524_022824889.jpg

Took the car out with 4 passengers and didn't feel any rubbing!

Time for an alignment!
 
My ‘92 parts car still has a very nice trunk lid and I believe also the liner, etc.
But getting it to you would seem to be a fool’s errand.
 

Attachments

  • -5345854253039899119_IMG_0068.jpeg
    -5345854253039899119_IMG_0068.jpeg
    1.2 MB · Views: 5
Looks nice!

Those Vogtland springs are almost certainly NOT for the V8 models. Coil springs are not 1-size-fits-all-124-chassis... they must be designed for the particular engine+chassis combination, and can also vary based on optional equipment. Which is why there are so many different factory spring part numbers, with different spring pads specified based on optional equipment.

:3gears:
Thank you! 🙏🏼🙏🏼

Yes sir, you're absolutely right. I was just really eager to try them out! Mainly because I pulled them from a 400E at the yard and also when I looked up the part numbers, I found a PDF on Vogtland's website indicating they were compatible with both the E420 and 400E. Plus, I remember reading on another forum that Vogtland did make V8-specific versions a while back.

Look under version B:
Screenshot_20250527-170931.png
Screenshot_20250527-170810.png

PDF attached.
 

Attachments

Fronts: VA 952020
Rears: HA 952011
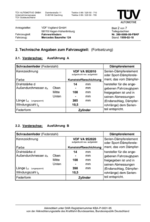
Hmmm. The Vogtland PDF is not clear... although it obscurely mentions the 4.2L engine, those springs are clearly NOT suitable for the 034 chassis. It also implies the same springs can be used on wagons & cabrios, with or without SLS, which is also incorrect. I'm confused how these springs received any sort of TÜV approval.

:yayo:
 
Hmmm. The Vogtland PDF is not clear... although it obscurely mentions the 4.2L engine, those springs are clearly NOT suitable for the 034 chassis. It also implies the same springs can be used on wagons & cabrios, with or without SLS, which is also incorrect. I'm confused how these springs received any sort of TÜV approval.
Yes, this doesn't make any sense! And how they were approved is another mystery. I'm glad I tested them, just to be sure. At least spring removal and installation is easy on the fronts.

The feeling I get every time I'm using a spring compressor:
"Spring is in the air.."
950cfbff06f7bae50598d7a6d08ae010.jpg
 
Hey guys!

I have a few updates, which I will make another detailed post for it later.

Finally found a trunk lid form a 1993 model. Painted it and installed it.
PXL_20250611_184620008~2.jpg


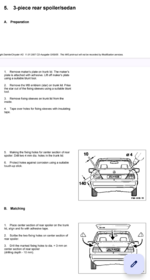
For now, I'm test fitting the ducktail spoiler. According to the factory installation instructions, there will be two mounting screws in the corners that hold the center piece to the lid.

PXL_20250611_000812900~2.jpgPXL_20250611_000740616~2.jpg

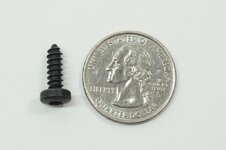
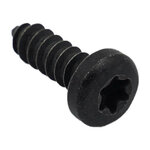
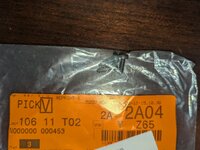
I found the part number for the screws:
000000-000453
000000-000453-MBZ.jpg
mercedes-benz-tapping-screw-n000000000453__94382.jpg

It would be amazing if someone here knows what size the screws are, so I could buy something similar at the hardware store.

I also bought the 3M 08609 Urethane adhesive, which was recommended by a person at the MB dealership.

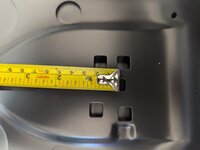
Now as far as the factory instructions go, does that 10 and 140 mean 10 mm and 140 mm? And that's where the hole on the lid should be?
Screenshot_20250611-091644.png
Screenshot_20250611-090405.png

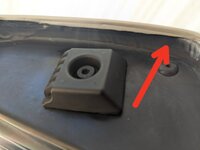
If so, the screw will be mounted from the outside of the inner trunk frame?
Approximately here:
Messenger_creation_3C9240CC-99AA-4EA5-82FB-C66585A0A4AF.jpeg
 
Hey guys!

I have a few updates, which I will make another detailed post for it later.

Finally found a trunk lid form a 1993 model. Painted it and installed it.


For now, I'm test fitting the ducktail spoiler. According to the factory installation instructions, there will be two mounting screws in the corners that hold the center piece to the lid.


I found the part number for the screws:
000000-000453
View attachment 216057
View attachment 216056

It would be amazing if someone here knows what size the screws are, so I could buy something similar at the hardware store.

I also bought the 3M 08609 Urethane adhesive, which was recommended by a person at the MB dealership.

Now as far as the factory instructions go, does that 10 and 140 mean 10 mm and 140 mm? And that's where the hole on the lid should be?
View attachment 216058
View attachment 216059

If so, the screw will be mounted from the outside of the inner trunk frame?
Approximately here:
View attachment 216060
Yes, those dimensions are mm.

The actual part number you have is showing as available here, I have no knowledge of this website:


I use this site for a lot of work and personal stuff, UK based but it gives you an idea of what you could use. Note that their screws start at 1" which is longer than you need as I believe the Quarter is slightly less than 1" diameter:


EDIT - I just checked again and there are shorter lengths available, the length filter does not go from small to large 🤷‍♂️


For a 4mm hole you would need an 8 or 10 gauge screw.

The drawing shows the holes in the vertical surface of the boot lid so if that is where you have placed your red arrow it seems correct.

As the saying goes, measure twice cut drill once...
 
Last edited:
Yes, those dimensions are mm.

The actual part number you have is showing as available here, I have no knowledge of this website:


I use this site for a lot of work and personal stuff, UK based but it gives you an idea of what you could use. Note that their screws start at 1" which is longer than you need as I believe the Quarter is slightly less than 1" diameter:


EDIT - I just checked again and there are shorter lengths available, the length filter does not go from small to large 🤷‍♂️


For a 4mm hole you would need an 8 or 10 gauge screw.

The drawing shows the holes in the vertical surface of the boot lid so if that is where you have placed your red arrow it seems correct.

As the saying goes, measure twice cut drill once...
Thank you for your help! 🙏🏼🙏🏼

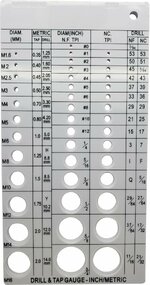
Yes, I believe an M4 self-tapping screw (metric) corresponds to approximately a #8-32 or #8-36 (US standard) screw. I think the threaded length is a bit more than 1/2 an inch.

And according to this chart, it will need a #29 drill bit for the pilot hole on the spoiler itself.

71oQqYdaFQL._AC_UF894,1000_QL80_.jpg

I might actually just go to the local stealership and pick up the actual screws if they have them. If I do that, then I'll need a 3 mm metric drill bit for the pilot hole.
 
I went to the local Stealership yesterday morning and they didn't have the screws in stock, they were special order parts. So I ended up ordering them!

Surprisingly, they were same price ($1.40) as the mbparts.mbusa.com website and they were available to pickup next day!
PXL_20250613_174847272.jpg

So I picked them up this morning and got a set of metric drill bits from harbor freight as well.
I just needed the 3 mm one, but its alright, this set was only $3.99.
PXL_20250613_175044258.jpg

Hopefully I won't shatter the fiberglass doing this! 🫣😬
 
I would think 1/8” is close enough to 3mm for what you are doing.
I have 1/8" already. I just wanted to follow the MB instructions. Harbor freight was close to the dealership, so I just went there. I'm going to try Home Depot as well to see if they got any metric bits.
 
Hey guys!

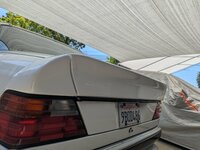
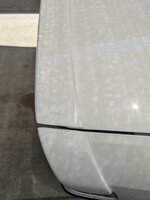
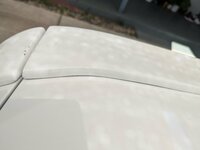
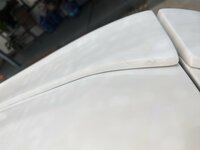
Did the job a few days ago! Had to leave the town for a few days, so I have to clean it up and take better photos. Anyways, it went mostly ok! I just have to figure out how to deal with some tiny gaps to make it look good from outside. Thinking to use some sort of sealant, to fill the gaps. Just to keep dust and dirt and water out.

First I was thinking to use white or clear type of sealant. Then I was like, the color will probably turn yellow after a while and look bad! So I think black is the only option.


PXL_20250616_201955539~2.jpgPXL_20250616_202202686.jpgPXL_20250616_202212022.MP.jpgPXL_20250616_202346723.jpgPXL_20250616_202410425.jpgPXL_20250616_202044706.jpgPXL_20250616_202025554.jpgPXL_20250616_202432209.jpgPXL_20250616_202132638~2.jpgPXL_20250616_202121932~2.jpgPXL_20250617_015620282~2.jpg
 
Now I'm trying to find curved star emblems to make it fit nicer on the ducktail.

So far I have found:

CLA class (W117) part#: 1178170016 is 100mm


C class (W204) part#: 2047580058 is 84mm


GLA class(w156) part#: 1568170016 is 75mm


For example this is the CLA's rear star emblem:

Screenshot_20250621-143240.png
 
Last edited:

Who has watched this thread (Total: 5) View details

Back
Top