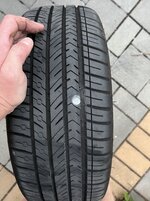
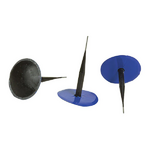
It's been quite awhile since my last update here on the board, and I'm happy to report that not a lot has happened with Uter. I got the tire patched, and it's been 100% fine since. Most of the fall was spent busy with work trips and away from the fleet. I got the opportunity to visit China for the first time though so that was pretty cool. Upon my return, I started to notice a really weird 'hang' at high load/rpm when shifting from 2-3. Based off board snooping I suspected the Trans Overload Protection Switch (TOPS). I broke out the SDS box and sure enough I had a code in the EZL for the TOPS ‘does not close’.

There are lots of helpful DIY's on this subject on the board already, so I won't go into great detail. Replacement went smoothly. Of course I also replaced all the requisite seals while I was in there. I took it for a HS run afterward and it was back to normal!. It might be a placebo, but I feel like the car is much better behaved all around. It used to have this occasional weird behavior on port throttle downshifts where the trans word downshift but the engine would bog for a sec. Almost like the timing was being retarded momentarily… That hasn't happened since the switch replacement, FWIW.
New switch shot:

The old one was original with a late 1993 build stamp. It was leaking out of the connector end as well. I had to degrease the harness a bit.
The other major improvement: I ordered a new MB windshield since they were available again. I had caught a really nice rock right in the middle of the drivers side a couple of months back while driving home from work on I-5. The crack hadn't grown, but It sure was annoying staring at it every day, right in my field of vision. Getting the windshield installed was an adventure by itself. I ordered it in September, but the aforementioned work trips + unsettled weather + holidays meant the first install attempt didn't occur till January. Then... while putting it in, the installer noted a cosmetic scratch on the inside of the glass. Not having the equipment to polish it out in his install van, he had to take it back to the shop to be repaired, which necessitated yet another installation appointment. It finally got it installed in early to mid-February. The windshield is Pilkington/MB branded and looks great. Just need to pop in a new sticker


In prep for the install, I uninstalled all the windshield trim from the car, and while waiting was able to clean out all the gutters, repair some of the broken clips around the winds heid via replacement, and re-do some of the rivets which had either come loose or started to corrode. I also took the opportunity to completely disassemble the windshield side/roof rails. I pulled the gaskets out, cleaned all the gunk out Aero 303'd the rubber parts and re-installed. Prior to cleaning (note the welding rod some nice person left behind to rot underneath the trim for the rest of time):

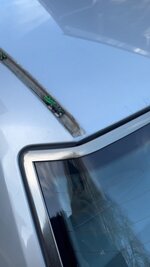
I had that nasty gasket 'creep' going on too. You know, where the back edge of the roof rail gasket 'shrinks' and moves its way toward the front of the car. I was able to address this as well during the reassembly of everything. V. happy with how it all looks now.

Thought the following was a nice design touch. There are 7 clips that install into the gutters on each side that hold the trim in. See the green clips in the photo above. Once you’ve removed them, you might wonder where to place the new ones. Perhaps you could grab the trim itself, line it up on the car and see where the witness marks on the trim tell you where it should go? No bother. MB engineering and manufacturing has your back. 7 small spot weld ‘bumps’ at strategic locations inside the rail. Close up shot, first then one from further back.


Really good stuff

Finally: After I got the TOPS replaced I was tooting down the road, pleased as punch. I was even thinking to myself "Wow... this thing is SUCH a better car then my E34 540/6." Smoothness, interior quality etc... No joke, at the next intersection I am pulling away and the damn thing starts mis-frring. Of course,-right?! When I went to look at it the next weekend, I decided to attempt something resembling the scientific method. I pulled out the SDS and popped into the EZL Iive data. Ignition voltage levels looked good, except for Cyl 4.
All were in the-35kV range while 4 was at a 75kV. I was a little surprised at this, as previous adventures with the rotor cap moisture issue resulted in random misfires across the board within the impacted cap. Regardless, I started at the cap end. Pulling the cap showed SOME moisture which I cleared off. I pulled the insulator and it was bone dry. I reassembled and the data remained the same. Cylinder 4 was at ~ 75kV. Odd. So it wasn't cap moisture, (YAY!)
Went to the plug wire next. Pulled it off the car and took it over to the bench to check the resistance. Mult-meter showed an open circuit! At first I thought I wasn't getting a good connection. and then I saw it:

Nuts! No idea how this damage occurred. This is the BERU set I installed a couple of years back. Luckily I had kept my OE wires. Number 4 was still in good condition, so I reinstalled it. Issue solved. Car drives brilliantly *shrug*


