Navigation
Install the app
How to install the app on iOS
Follow along with the video below to see how to install our site as a web app on your home screen.
Note: This feature may not be available in some browsers.
More options
Style variation
-
Hi Guest !
Welcome to the 500Eboard forum.
Since its founding in late 2008, 500Eboard has become the leading resource on the Internet for all things related to the Mercedes-Benz 500E and E500. In recent years, we have also expanded to include the 400E and E420 models, which are directly related to the 500E/E500.
We invite you to browse and take advantage of the information and resources here on the site. If you find helpful information, please register for full membership, and you'll find even more resources available. Feel free to ask questions, and make liberal use of the "Search" function to find answers.
We hope you will become an active contributor to the community!
Sincerely,
500Eboard Management
You are using an out of date browser. It may not display this or other websites correctly.
You should upgrade or use an alternative browser.
You should upgrade or use an alternative browser.
HOW-TO: Removing & Replacing 722.3 transmission (W124/M104)
- Thread starter gerryvz
- Start date

Re: Transmission Arrival & Unboxing

Well, tonight began a big push into the weekend, to make some progress and get my wife's wagon back on the road. It will be three weeks ago on Sunday that the transmission died.
Thought I'd get the jump by getting the rear main seal replaced. Total time out in the shop tonight was about three hours. The main seal took me a bit longer than expected, but I took extra time to ensure that the sealing surfaces at the back of the block were extra clean and oil-free before I mounted up the seal.
Here is how things progressed out in the shop tonight:
The first step was to loosen and remove the flywheel from the end of the crankshaft. This is held on by eight 12-point bolts, which are fastened at a moderate torque. I was able to stop the crank from rotating and then loosened and removed each of the eight bolts, then the mounting plate and then the flywheel itself.


After removing the flywheel, I had the available view to take a close look at the crankshaft seal. It appeared to be oil-tight, with only a little bit of oil blowby and no real oil wetness (indicating fresh oil). Nevertheless, since it was exposed, it was a no-brainer to replace it because it requires transmission removal to do. Here are a couple of views of the crank seal with the flywheel off. Remember, this engine has 203,000 miles on it. From everything I could see, this appeared to be the original rear crank seal.


While I was looking around, I spotted a couple of other things of interest .....
The bottom edge of the crank position sensor, which I just replaced a few days ago with a new, fresh one. You can see the new oil pressure switch I just replaced, too.

...and the crankshaft position magnet on the flywheel. I doubled-checked and it was very secure in position, so no chance of it coming loose as happens on rare occasions on the M119....


The next step was to check all of the flywheel bolts, which are stretch bolts, to ensure they were still within MB's published spec. In May 1995, MB went to a single-use female Torx bolt, but since my car was made in late 1994, it still used the stretch bolts. These are re-usable as long as the necks of the bolts are within MB spec, with is 8.0mm or higher (up to about 8.3mm). 8.3-8.5mm is what they come as new from MB.
Here are a few photos of me checking the bolts with my caliper. Three of the bolts were 8.0, and the rest were either 8.1 or 8.2mm. I decided since they were all within spec, to re-use them. The bolts will get torqued to 45 Nm, and then angle-torqued 90 degrees when re-fastened to the crankshaft.


Then it was time to remove the actual rear main seal, and its cast aluminum carrier. I purchased a new carrier (and seal) because these carriers can warp and leak, and being a $35 part or so, seemed a no-brainer to replace proactively. The bolts that held it to the block were only torqued to 9-10 Nm, so about the same as the transmission oil pan.


Once the bolts were removed, I used the end of an Allen key to wedge one side of the seal carrier away from the block. Immediately a gush of motor oil started leaking out the top of the pan (remember the engine is mounted at an angle in the 124 with the M104). Luckily I had my oilpan and rags handy, so I didn't get too oily. Nevertheless, I drained the main oilpan from the drain plug to lower the oil level in the pan to stop the seeping from the seal carrier, which it did after a few minutes.


Here's what the rear main seal and carrier look like when removed from the car.


And a few comparison shots of the old and new. The old one has a 1994 date code; the new one has a 2012 date code. The original seal was a Bruss brand; the new one is an Elring, made in Germany.


And then it was time to install the new Elring seal into the new carrier. I did this carefully with a rubber mallet and even blows of moderate intensity, all around the circumference of the seal until it was properly seated in the carrier.


Next up came some "housekeeping" chores. Mainly, I needed to clean up the area with a bit of brake cleaner (keeping a rag stuffed in the area where the oil ran out of the pan, to keep brake cleaner and debris from getting into the oilpan). I also checked the end of the crankshaft for a groove left by the previous seal. Luckily feeling it with my fingertips and fingernail, there was no groove, so it was fine to use the "original" type of seal instead of the "repair" type that I had on hand just in case.


After that, I cleaned up the sealing surface on the block of old sealant with a razor blade, to make as optimal a sealing surface as possible. Then I applied the black MB RTV gasket sealer with my finger to the seal carrier. Sorry that I could not get a photo of this step. Per the factory procedure, I also coated the inside edge of the seal lightly with some motor oil to help it slip over the end of the crankshaft easier.


And here I am fitting and bolting the new carrier into place. The torque rating, as mentioned earlier, is very small -- under 10 Nm.
After the seal and carrier were fitted and bolted down, I turned my attention to replacing the oxygen sensor. It will never be as readily accessible as it was tonight, with the car's exhaust laying on the ground. I need to unplug it inside the car and thread the new O2 sensor through the vehicle's floor. I will do that on Saturday.

The last task of the night was to prepare to run the engine, to check for leaks at the newly replaced main seal. For now, given that I was wrapping up for the night, I just re-attached the flywheel. I will re-torque it down in the morning, and add more engine oil before temporarily attaching the starter and starting up the engine and letting it run for a few minutes.


And that was it for the night. To be continued starting tomorrow......
Cheers,
Gerry
Well, tonight began a big push into the weekend, to make some progress and get my wife's wagon back on the road. It will be three weeks ago on Sunday that the transmission died.
Thought I'd get the jump by getting the rear main seal replaced. Total time out in the shop tonight was about three hours. The main seal took me a bit longer than expected, but I took extra time to ensure that the sealing surfaces at the back of the block were extra clean and oil-free before I mounted up the seal.
Here is how things progressed out in the shop tonight:
The first step was to loosen and remove the flywheel from the end of the crankshaft. This is held on by eight 12-point bolts, which are fastened at a moderate torque. I was able to stop the crank from rotating and then loosened and removed each of the eight bolts, then the mounting plate and then the flywheel itself.
After removing the flywheel, I had the available view to take a close look at the crankshaft seal. It appeared to be oil-tight, with only a little bit of oil blowby and no real oil wetness (indicating fresh oil). Nevertheless, since it was exposed, it was a no-brainer to replace it because it requires transmission removal to do. Here are a couple of views of the crank seal with the flywheel off. Remember, this engine has 203,000 miles on it. From everything I could see, this appeared to be the original rear crank seal.
While I was looking around, I spotted a couple of other things of interest .....
The bottom edge of the crank position sensor, which I just replaced a few days ago with a new, fresh one. You can see the new oil pressure switch I just replaced, too.
...and the crankshaft position magnet on the flywheel. I doubled-checked and it was very secure in position, so no chance of it coming loose as happens on rare occasions on the M119....
The next step was to check all of the flywheel bolts, which are stretch bolts, to ensure they were still within MB's published spec. In May 1995, MB went to a single-use female Torx bolt, but since my car was made in late 1994, it still used the stretch bolts. These are re-usable as long as the necks of the bolts are within MB spec, with is 8.0mm or higher (up to about 8.3mm). 8.3-8.5mm is what they come as new from MB.
Here are a few photos of me checking the bolts with my caliper. Three of the bolts were 8.0, and the rest were either 8.1 or 8.2mm. I decided since they were all within spec, to re-use them. The bolts will get torqued to 45 Nm, and then angle-torqued 90 degrees when re-fastened to the crankshaft.
Then it was time to remove the actual rear main seal, and its cast aluminum carrier. I purchased a new carrier (and seal) because these carriers can warp and leak, and being a $35 part or so, seemed a no-brainer to replace proactively. The bolts that held it to the block were only torqued to 9-10 Nm, so about the same as the transmission oil pan.
Once the bolts were removed, I used the end of an Allen key to wedge one side of the seal carrier away from the block. Immediately a gush of motor oil started leaking out the top of the pan (remember the engine is mounted at an angle in the 124 with the M104). Luckily I had my oilpan and rags handy, so I didn't get too oily. Nevertheless, I drained the main oilpan from the drain plug to lower the oil level in the pan to stop the seeping from the seal carrier, which it did after a few minutes.
Here's what the rear main seal and carrier look like when removed from the car.
And a few comparison shots of the old and new. The old one has a 1994 date code; the new one has a 2012 date code. The original seal was a Bruss brand; the new one is an Elring, made in Germany.
And then it was time to install the new Elring seal into the new carrier. I did this carefully with a rubber mallet and even blows of moderate intensity, all around the circumference of the seal until it was properly seated in the carrier.
Next up came some "housekeeping" chores. Mainly, I needed to clean up the area with a bit of brake cleaner (keeping a rag stuffed in the area where the oil ran out of the pan, to keep brake cleaner and debris from getting into the oilpan). I also checked the end of the crankshaft for a groove left by the previous seal. Luckily feeling it with my fingertips and fingernail, there was no groove, so it was fine to use the "original" type of seal instead of the "repair" type that I had on hand just in case.
After that, I cleaned up the sealing surface on the block of old sealant with a razor blade, to make as optimal a sealing surface as possible. Then I applied the black MB RTV gasket sealer with my finger to the seal carrier. Sorry that I could not get a photo of this step. Per the factory procedure, I also coated the inside edge of the seal lightly with some motor oil to help it slip over the end of the crankshaft easier.
And here I am fitting and bolting the new carrier into place. The torque rating, as mentioned earlier, is very small -- under 10 Nm.
After the seal and carrier were fitted and bolted down, I turned my attention to replacing the oxygen sensor. It will never be as readily accessible as it was tonight, with the car's exhaust laying on the ground. I need to unplug it inside the car and thread the new O2 sensor through the vehicle's floor. I will do that on Saturday.
The last task of the night was to prepare to run the engine, to check for leaks at the newly replaced main seal. For now, given that I was wrapping up for the night, I just re-attached the flywheel. I will re-torque it down in the morning, and add more engine oil before temporarily attaching the starter and starting up the engine and letting it run for a few minutes.
And that was it for the night. To be continued starting tomorrow......
Cheers,
Gerry
Re: Transmission Arrival & Unboxing
Great progress, you're really cooking along. I just got the valve covers on my 500 buttoned up today after installing the oiler tubes, and felt lucky to get that far. I find the biggest delay I run into on my W124's are unforeseen issues (for instance, discovering the harness and vacuum lines crumbling as I disassemble them), and then having to wait for new parts to arrive. It might be my imagination, but you don't seem to run into many of those unpleasant surprises in your great how-to's. Either your cars are starting out in better shape, or you need to take that luck to the blackjack tables (then you could finally get that E60)....")
Great progress, you're really cooking along. I just got the valve covers on my 500 buttoned up today after installing the oiler tubes, and felt lucky to get that far. I find the biggest delay I run into on my W124's are unforeseen issues (for instance, discovering the harness and vacuum lines crumbling as I disassemble them), and then having to wait for new parts to arrive. It might be my imagination, but you don't seem to run into many of those unpleasant surprises in your great how-to's. Either your cars are starting out in better shape, or you need to take that luck to the blackjack tables (then you could finally get that E60)....
Re: Transmission Arrival & Unboxing
Today I spent about 5 hours working out in the shop, and I made some good headway. I also managed to get everything ready to install the transmission. That is literally the next step.
Here's a recap of the day's activities. I'll likely need to split this into two or three posts, so please be patient.
The first step of the day was to take a look at my rear main seal job from last night, and make sure that there weren't any problems. Here are a couple of quick views, as I first saw the car today.


Everything looked good, so I proceeded to one of the next "housekeeping" chores -- to replace the oxygen sensor with a brand-new MB unit that I'd recently found in a wrecking yard, under the seat of a late W124 E320. It was still bundled up with a twist-tie and still had the plastic cap on the sensor tip, along with a dab of anti-seize paste. And it was a Genuine MB part -- the wrecking yard sold it to me for $5.00 -- a small fraction of the price of the MB part new.
So here are the photos of the removal of the old O2 sensor and installation of the new one. The two plugs for the four wires are under the floor mat on the front passenger side, underneath the front edge of the seat. So it was a simple matter to remove the mat and unplug things, and then get the plugs ready to pull out from underneath the car.


Comparison of the old and the new, and then the insertion of the new O2 sensor, and routing of the wires under the floor mat...


The next task was to test the sealing capability of the new rear main seal I'd just installed by starting and running the engine for a few minutes. I filled the engine up with about 6.5 quarts of oil to replace that which I'd drained last night, and then connected the battery and jumped two of the terminals on the neutral safety switch. I also had to use two M10 x 60 bolts to attach the starter to the flywheel so that I could start the engine with the key. The engine started immediately with a VERY sharp ROAR, and it was EXTREMELY loud because I had the exhaust system disconnected at the downpipes.


I let the engine run for a good 5-7 minutes and it warmed up to around 70C at the coolant. I figured this was enough time to get the oil circulated around the engine and see if there was any seepage from the end of the crankshaft at the rear main seal. I shut the engine down and took a good, hard look with a flashlight at the sealing area. It looked very clean and no major seepage or any drops/drips of oil, so I considered the job to be done.
Now I could concentrate on torquing down the flywheel using the stretch bolts. I set my torque wrench to 45 Nm and torqued the eight bolts in a cross-pattern, and then turned each one (via angle-torquing per the factory procedure) another 90 degrees (1/4 of a turn). Everything tightened up nicely.


After that, it was time to service the driveshaft support bushing and bearing, and REALLY check out the front flex disc. First, I marked and then pulled the forward driveshaft out of the U-joint, and it came apart easily. You can see the remnants of the rubber boot still attached to the driveshaft nut in the photos below.


Here are the pieces I found of the rubber driveshaft boot. It appears to me that it was probably original.


Continued in next post.....
Today I spent about 5 hours working out in the shop, and I made some good headway. I also managed to get everything ready to install the transmission. That is literally the next step.
Here's a recap of the day's activities. I'll likely need to split this into two or three posts, so please be patient.
The first step of the day was to take a look at my rear main seal job from last night, and make sure that there weren't any problems. Here are a couple of quick views, as I first saw the car today.
Everything looked good, so I proceeded to one of the next "housekeeping" chores -- to replace the oxygen sensor with a brand-new MB unit that I'd recently found in a wrecking yard, under the seat of a late W124 E320. It was still bundled up with a twist-tie and still had the plastic cap on the sensor tip, along with a dab of anti-seize paste. And it was a Genuine MB part -- the wrecking yard sold it to me for $5.00 -- a small fraction of the price of the MB part new.
So here are the photos of the removal of the old O2 sensor and installation of the new one. The two plugs for the four wires are under the floor mat on the front passenger side, underneath the front edge of the seat. So it was a simple matter to remove the mat and unplug things, and then get the plugs ready to pull out from underneath the car.
Comparison of the old and the new, and then the insertion of the new O2 sensor, and routing of the wires under the floor mat...
The next task was to test the sealing capability of the new rear main seal I'd just installed by starting and running the engine for a few minutes. I filled the engine up with about 6.5 quarts of oil to replace that which I'd drained last night, and then connected the battery and jumped two of the terminals on the neutral safety switch. I also had to use two M10 x 60 bolts to attach the starter to the flywheel so that I could start the engine with the key. The engine started immediately with a VERY sharp ROAR, and it was EXTREMELY loud because I had the exhaust system disconnected at the downpipes.
I let the engine run for a good 5-7 minutes and it warmed up to around 70C at the coolant. I figured this was enough time to get the oil circulated around the engine and see if there was any seepage from the end of the crankshaft at the rear main seal. I shut the engine down and took a good, hard look with a flashlight at the sealing area. It looked very clean and no major seepage or any drops/drips of oil, so I considered the job to be done.
Now I could concentrate on torquing down the flywheel using the stretch bolts. I set my torque wrench to 45 Nm and torqued the eight bolts in a cross-pattern, and then turned each one (via angle-torquing per the factory procedure) another 90 degrees (1/4 of a turn). Everything tightened up nicely.
After that, it was time to service the driveshaft support bushing and bearing, and REALLY check out the front flex disc. First, I marked and then pulled the forward driveshaft out of the U-joint, and it came apart easily. You can see the remnants of the rubber boot still attached to the driveshaft nut in the photos below.
Here are the pieces I found of the rubber driveshaft boot. It appears to me that it was probably original.
Continued in next post.....
Continued....
Next up, it was time to inspect the driveshaft. I found a multitude of small cracks - none of them serious by themselves, but there was consistent cracking and enough of it so that I decided to use my purchased Lemforder flex disc to replace the old one. Below are some close-ups of the cracks that I found. This flex disc probably had a couple more years of life left in it, but since it was literally three bolts to replace it, it was a no-brainer to spend the 10 minutes to do so with it in the condition that it was.


And here are a few views of the driveshaft boot as I removed what was left of it from the driveshaft nut. A small flat-blade screwdriver made short work of this task. The new one popped right into its groove on the axle nut.


Here is the rest of my center support bearing fix-it kit -- a couple of new end caps and a new bearing if needed.

However, after removing the center support bushing and bearing, I found both to be in excellent condition, with no tears/wear and very smooth bearing action. So, they did not need to be replaced, and I bolted everything back up the way it was.


Next up, it was time to replace the flex disc on the end of the driveshaft. A couple of quick hits with a rubber mallet after the bolts were removed, persuaded it to come off the driveshaft very smartly.


Here are a few last views of the old flex disc (also a Lemforder) with the cracks.


Here's the new Lemforder piece. It looks like it was a Lemforder manufactured piece, with the MB star and part number ground off. A bit of comparo between the two....


And, installing the new flex disc onto the end of the forward driveshaft. Here's how the boot and nut will look on the end of the driveshaft, and a shot of the driveshaft lined up and installed.


Continued in next post....
Next up, it was time to inspect the driveshaft. I found a multitude of small cracks - none of them serious by themselves, but there was consistent cracking and enough of it so that I decided to use my purchased Lemforder flex disc to replace the old one. Below are some close-ups of the cracks that I found. This flex disc probably had a couple more years of life left in it, but since it was literally three bolts to replace it, it was a no-brainer to spend the 10 minutes to do so with it in the condition that it was.
And here are a few views of the driveshaft boot as I removed what was left of it from the driveshaft nut. A small flat-blade screwdriver made short work of this task. The new one popped right into its groove on the axle nut.
Here is the rest of my center support bearing fix-it kit -- a couple of new end caps and a new bearing if needed.
However, after removing the center support bushing and bearing, I found both to be in excellent condition, with no tears/wear and very smooth bearing action. So, they did not need to be replaced, and I bolted everything back up the way it was.
Next up, it was time to replace the flex disc on the end of the driveshaft. A couple of quick hits with a rubber mallet after the bolts were removed, persuaded it to come off the driveshaft very smartly.
Here are a few last views of the old flex disc (also a Lemforder) with the cracks.
Here's the new Lemforder piece. It looks like it was a Lemforder manufactured piece, with the MB star and part number ground off. A bit of comparo between the two....
And, installing the new flex disc onto the end of the forward driveshaft. Here's how the boot and nut will look on the end of the driveshaft, and a shot of the driveshaft lined up and installed.
Continued in next post....
Continued....
Changing gears (pun not intended), I was done with all of the miscellaneous tasks, and it was time to start preparing the transmission for installation. First, I unpacked the new rebuilt transmission from its shipping container. Then I began outfitting it with key items such as the neutral safety switch, shift lever and the plastic retaining pin for the torque converter. I also packed the OLD transmission into the packing bin, to prepare it for shipment back to Sun Valley Transmission probably late this coming week.


Inspecting the bushings on the shift lever, which I'd replaced I think in 2012, they looked and felt strong enough to just keep, so I prepared to install the shift lever onto the transmission.


The neutral safety switch and the shift lever getting installed. Boy is it easy to do this work when the transmission is out of the car -- much less swearing and grunting required.


Here's what the kitted-out transmission looked like, with just the plastic torque converter plug to insert.

Then I prepared my transmission jack to receive the new transmission, so that I could roll it into place under the car and begin the process of installation.


The last step before installation in the vehicle was to install the torque converter, and measure its distance from the edge of the bell housing. A quick measurement once the TC was seated told me that it was in spec, and in the position where it needed to be. Once the TC was in, I inserted the black plastic retaining plug and turned it a 1/4 turn with an Allen wrench. Then I rolled the transmission under the car, where installation will be the next step when I'm out in the shop again.


Thanks for watching!
Cheers,
Gerry
Changing gears (pun not intended), I was done with all of the miscellaneous tasks, and it was time to start preparing the transmission for installation. First, I unpacked the new rebuilt transmission from its shipping container. Then I began outfitting it with key items such as the neutral safety switch, shift lever and the plastic retaining pin for the torque converter. I also packed the OLD transmission into the packing bin, to prepare it for shipment back to Sun Valley Transmission probably late this coming week.
Inspecting the bushings on the shift lever, which I'd replaced I think in 2012, they looked and felt strong enough to just keep, so I prepared to install the shift lever onto the transmission.
The neutral safety switch and the shift lever getting installed. Boy is it easy to do this work when the transmission is out of the car -- much less swearing and grunting required.
Here's what the kitted-out transmission looked like, with just the plastic torque converter plug to insert.
Then I prepared my transmission jack to receive the new transmission, so that I could roll it into place under the car and begin the process of installation.
The last step before installation in the vehicle was to install the torque converter, and measure its distance from the edge of the bell housing. A quick measurement once the TC was seated told me that it was in spec, and in the position where it needed to be. Once the TC was in, I inserted the black plastic retaining plug and turned it a 1/4 turn with an Allen wrench. Then I rolled the transmission under the car, where installation will be the next step when I'm out in the shop again.
Thanks for watching!
Cheers,
Gerry
This is much better than watching a movie. Great pics as usual, Gerry. Were you able to lift the transmission by yourself. I'm curious what a 722.3xx weights.
What did you end up using to lock the crank?
I was able to stop the crank from rotating and then loosened and removed each of the eight bolts, then the mounting plate and then the flywheel itself.
What did you end up using to lock the crank?
Last edited:
The hardware is on wrong, the head of the bolt goes on the driveshaft flange.
The washer & nut on the flex disc. See this on the original pic.

.
Now look how you have it on the new disc, just an FYI
The washers always go against the flex disc

The washer & nut on the flex disc. See this on the original pic.
.
Now look how you have it on the new disc, just an FYI
The washers always go against the flex disc
Last edited:
You are right, Clark. I double-checked and you are correct. I will change this before I get started on things today. Thanks. I should have double-checked that against my photos and notes. I will be sure to when I mount up the transmission output shaft flange to the flex disc.
A 722.369 is somewhere around 160+ lbs. It's a tiring dead lift, and I'm not the biggest/strongest guy, but I can lift it with some focus, without throwing out my back. At my age, it's not the sheer weight of the transmission, it's more the technique of lifting it correctly without giving myself a hernia or messing up my lower back.
To lock the crank, when I loosened the flywheel bolts, my wife held a breaker bar attached to a 27mm socket at the crank.
To lock it when I tightened the flywheel bolts, I wedged a long breaker bar attached to a 27mm socket against a front frame member so that it couldn't turn. The torque required to loosen the front crank bolt is MUCH higher than that needed to torque down the flywheel bolts, and then angle torque them 90 degrees.
Jerry - just curious how you will get it under the car while on the jack. Did you raise the car more?
That's right, I'm guessing you raised the car high enough to roll the jack/transmission under it.

At least I didn't get Force-choked for installing the bolts the wrong way....
Sent from my iPhone using Tapatalk
You have failed me Commander........................


Today was a notable day where I made lots of progress in a fairly short time. I spent about 2.5 hours working in the shop this afternoon and early evening.
The first order of business was to reverse the flex disc bolts that connected it to the front driveshaft, which Clarkz Vader had pointed out earlier today. That was about a five-minute task to get everything reversed, torqued and mounted back up.
Then it was time to actually install the transmission onto the end of the engine block. To do this, I got the transmission into position under the car, and positioned correctly onto the transmission jack. Then I carefully raised the jack, elevating the transmission into place, making small adjustments along the way in terms of the position of the bell housing in relation to the back of the block. I also snipped the zip-tie that held the Bowden (control pressure) cable to the top rear of the transmission.


Here is a photo of the transmission ALMOST into position - it just needed to be elevated a few millimeters at this point to begin mating it to the engine block.


The transmission was at the perfect angle and height and it mated exactly to the back of the block, with the two pins correctly mating into their holes and the bolt holes lining up.

From there, I started the two bolts at the 3 o'clock and 9 o'clock (the lower starter bolt) and tightened them. This pulled the transmission into proper position on the block. Then I inserted the remaining seven bolts and tightened them, although I did not yet do the final tightening/torquing.


Then I installed the six bolts that hold the torque converter to the engine flywheel. Again not torquing them until tomorrow. Everything bolted up extremely easily. Then I cleaned off and plugged in the kickdown solenoid electrical connector at the back of the transmission. The last job was to route the green vacuum line from the intake down the passenger side to the control pressure vacuum connector hose. I also routed the end of the new Bowden cable upward to where it will snap into the throttle linkage next to the lower intake manifold. This will be one of the last connections I make, and will probably require some adjustment once things are bolted together and working again.


Here's what the transmission looked like, installed, before I closed down the shop for the night. Removing the taped on piece of protective cardboard that came from Sun Valley on the bottom of the transmission pan will be the very last step in the assembly process.

Guess I need to stop by Advance Auto tomorrow on my way home from work and get a couple of gallons of Castrol Transmax Dex III ATF, as I'll be filling the transmission in the next few days in preparation for first use.
Enjoy!
Cheers,
Gerry
The first order of business was to reverse the flex disc bolts that connected it to the front driveshaft, which Clarkz Vader had pointed out earlier today. That was about a five-minute task to get everything reversed, torqued and mounted back up.
Then it was time to actually install the transmission onto the end of the engine block. To do this, I got the transmission into position under the car, and positioned correctly onto the transmission jack. Then I carefully raised the jack, elevating the transmission into place, making small adjustments along the way in terms of the position of the bell housing in relation to the back of the block. I also snipped the zip-tie that held the Bowden (control pressure) cable to the top rear of the transmission.
Here is a photo of the transmission ALMOST into position - it just needed to be elevated a few millimeters at this point to begin mating it to the engine block.
The transmission was at the perfect angle and height and it mated exactly to the back of the block, with the two pins correctly mating into their holes and the bolt holes lining up.
From there, I started the two bolts at the 3 o'clock and 9 o'clock (the lower starter bolt) and tightened them. This pulled the transmission into proper position on the block. Then I inserted the remaining seven bolts and tightened them, although I did not yet do the final tightening/torquing.
Then I installed the six bolts that hold the torque converter to the engine flywheel. Again not torquing them until tomorrow. Everything bolted up extremely easily. Then I cleaned off and plugged in the kickdown solenoid electrical connector at the back of the transmission. The last job was to route the green vacuum line from the intake down the passenger side to the control pressure vacuum connector hose. I also routed the end of the new Bowden cable upward to where it will snap into the throttle linkage next to the lower intake manifold. This will be one of the last connections I make, and will probably require some adjustment once things are bolted together and working again.
Here's what the transmission looked like, installed, before I closed down the shop for the night. Removing the taped on piece of protective cardboard that came from Sun Valley on the bottom of the transmission pan will be the very last step in the assembly process.
Guess I need to stop by Advance Auto tomorrow on my way home from work and get a couple of gallons of Castrol Transmax Dex III ATF, as I'll be filling the transmission in the next few days in preparation for first use.
Enjoy!
Cheers,
Gerry
Everything fit back together perfectly! That would never happen in my world. Great pics again, Gerry.
As far as marking all these components that you had to remove (e.g., positions of front drive shaft to rear drive shaft, front drive shaft flange to trans output flange, flywheel to torque converter), is it required that they go back exactly as they came off for balance purposes? I presume since the torque converter is new it doesn't matter on the flywheel to torque converter? I'm just concerned about making sure I know what to mark before I remove, should I become brave and try this on my own.
As far as marking all these components that you had to remove (e.g., positions of front drive shaft to rear drive shaft, front drive shaft flange to trans output flange, flywheel to torque converter), is it required that they go back exactly as they came off for balance purposes? I presume since the torque converter is new it doesn't matter on the flywheel to torque converter? I'm just concerned about making sure I know what to mark before I remove, should I become brave and try this on my own.
I worked out in the shop for about an hour tonight, but it was pretty boring/routine stuff. Specifically, I did the following tasks:
- Reconnected the driveshaft to the transmission output flange (bolted up the remaining three holes in the flex disc to the transmission output flange)
- Torqued down the six flywheel bolts to 42 Nm (per MB spec)
- Torqued down six of the nine transmission-to-block bolts to 55 Nm (per MB spec). Still have three bolts to go.
- Reconnected the speedometer cable into the transmission and tightened the pinch bolt that holds the cable housing into the transmission case
- Attached the new Corteco transmission (rear engine) mount to the back end of the transmission just below the output shaft & flange
- Inserted the new MB rubber cap into the flywheel bolt hole area
Next up, I need to do the following tasks:
- Finish torquing the three remaining transmission bolts
Tighten the flange nut that connects the driveshaft to the universal joint (30-40Nm per MB spec)- Re-attach the center cross-bracket underneath the transmission mount
Re-attach the shift linkage to the shift arm at the neutral safety switch- Re-attach the center heat shield above the catalytic converter
- Screw in the new Oxygen sensor to the its bung in the exhaust pipe
- Re-attach the exhaust system under the car and reconnect the downpipes
- Re-attach the exhaust system support bracket & clamp at the back end of the transmission
- Re-insert the transmission dipstick with a new o-ring
- Re-attach the dipstick to the top of the transmission & back of the cylinder head
- Clean out the transmission cooler in the radiator with solvent & compressed air, blow it out
- Re-attach the transmission cooler input and return lines to the sides of the transmission
- Re-attach the neutral safety switch and other electrical connections to the driver's side of the transmission; connect the vacuum line to the modulator
- Connect the Bowden cable to the throttle linkage under the intake manifold
- Fill the transmission with 8 quarts of Dexron III ATF
Still a few nights' work at a moderate pace and with limited hours to work...
Cheers,
Gerry
A/C drain hoses???
Separate & unrelated operation from inside the car, but yes. Upper strut mounts too....
Sent from my iPhone using Tapatalk
Separate & unrelated operation from inside the car, but yes. Upper strut mounts too....
Sent from my iPhone using Tapatalk
You mentioned it in this thread while removing the transmission.
Hence, my question.
Next is a view of the evaporator condensation drain tubes, located on either side of the transmission tunnel above the bell housing. These are the foam hoses with coiled wire inside. The 126 uses one of these hoses, too. The first one, on the driver's side, looked pretty good (first photo below), but it crumbled to dust when I touched the end of the hose portion. You can see from the second one that the only thing left of the end of it, is coiled wire, LOL!! So, automatic replacement. This is done from INSIDE the car, but you poke the ends of the hoses through the floor and into the transmission tunnel. Inexpensive but a good thing to do.
I'll bet your hoses on most of your .036s are close to or just as bad as these. Probably a couple hundred dollars of labor out of that $5K deferred labor bill that I'm always harping that EVERY .036 has. Even Dave's cars.
Last edited:
Yep, I have new hoses and plastic clamps waiting, as part of my "supplemental" list of tasks that will be done after the transmission is done, but before the car is lowered and tested out.
I was extra sure to install the bolts and washers the correct direction when doing the output flange and the flex disc last night.
I was extra sure to install the bolts and washers the correct direction when doing the output flange and the flex disc last night.
Checking your how-to here, and realized something about MB that aggravates me to no end: why do we have to wait for a great thread like this to give us ACTUAL pictures in great clarity, while the FSM gives us cheesy (and generally crappy) illustrations that sometimes are utterly vague?
Because the FSM is written for factory trained technicians as a guide, not DIY home mechanics.
I certainly understand (and would never argue) that fact. As the least knowledgeable/skilled MB fanatic here however, I constantly find occasions where the FSM leaves me scratching my head (and a quick glance here or at Dave's page clears up the confusion). I 'm just curious if trained techs like yourself actually PREFER the illustrations over well-executed and technically correct photos? Imagine the level of pictorial manual MB would be able to produce (given their resources, access to correctly-sourced vehicles, and facilities)......
Oh, I've never liked Mercedes lack of clear illustrations. The old ETM's were quite good though
That's why I post so many images over on Banzworld when explaining something,
and here as well although Dave does most of the tech stuff here.
Alldata and Mitchell have much better work instructions, though not always correct or complete.
Have a look at a GM FSM, they're just as bad if not worse.
That's why I post so many images over on Banzworld when explaining something,
and here as well although Dave does most of the tech stuff here.
Alldata and Mitchell have much better work instructions, though not always correct or complete.
Have a look at a GM FSM, they're just as bad if not worse.
Oh, I've never liked Mercedes lack of clear illustrations. The old ETM's were quite good though
That's why I post so many images over on Banzworld when explaining something,
and here as well although Dave does most of the tech stuff here.
Alldata and Mitchell have much better work instructions, though not always correct or complete.
Have a look at a GM FSM, they're just as bad if not worse.
LOL!! I'll take your word on the GM FSM's; that company is literally the END of the road.......
My experience with older and young-timer MBs is that the older manuals were much better. They used to have photo illustrations and better instructions, I would say up to about the period of the 126 and the very early 124. From there, MB started going to more abbreviated instructions, and more line diagrams instead of photos.
Also the manuals are generally translated from German, so sometimes the English and the terminology is off, and this can lead to misunderstanding in the directions.
I have found that just using the manuals and getting familiar with the MB terminology and steps is really the only way to do this effectively. You learn it by doing. As Clarkz said, the manuals assume a certain level of technical proficiency, familiarity and knowledge that would be imparted to mechanics in MB factory training. The good thing is that as a DIYer I will NEVER be close to what a trained factory MB mechanic can do, I have learned quite a lot by working with the manuals and my own experience so that the lack of information in some of the manuals is not a major hindering factor for me. It also helps to have folks like Dave, Clarkz Vader and Jono who have done a lot of these jobs before, and can offer tips and tricks along the way. Often this saves significant time.
What I have found, in terms of my own process and key tenets, is the following:
Hope this helps. I'll have more updates and hopefully will be finishing up the transmission job this weekend before I head off to Boston on Monday.....
Cheers,
Gerry
Also the manuals are generally translated from German, so sometimes the English and the terminology is off, and this can lead to misunderstanding in the directions.
I have found that just using the manuals and getting familiar with the MB terminology and steps is really the only way to do this effectively. You learn it by doing. As Clarkz said, the manuals assume a certain level of technical proficiency, familiarity and knowledge that would be imparted to mechanics in MB factory training. The good thing is that as a DIYer I will NEVER be close to what a trained factory MB mechanic can do, I have learned quite a lot by working with the manuals and my own experience so that the lack of information in some of the manuals is not a major hindering factor for me. It also helps to have folks like Dave, Clarkz Vader and Jono who have done a lot of these jobs before, and can offer tips and tricks along the way. Often this saves significant time.
What I have found, in terms of my own process and key tenets, is the following:
- Never be in a hurry to get a job done. There will always be things that come up expectedly that you will need to tackle
- Go with your gut. If something you are putting back together doesn't "feel" correct to you, re-check and if needed, re-do it so that it is right
- Use factory parts as generally they fit the best, with select quality aftermarket being OK. This generally comes from experience.
- Prepare for any job properly. What I do is to read and re-read the factory manual and procedures; read the procedure if available on Alldata, and read the forums to see if others have done the job
- Document everything photographically so that you have record of how things go back together (I didn't check my photos when I put the flex disc back on, which Clarkz caught publicly and GSXR caught privately to me)
- Be persistent. If something isn't working, move on to another task if possible, or call it a day and quit until the next day. I had a night in the shop earlier this week when NOTHING and I mean NOTHING went well for me, so I just cut bait, bailed and did some other non-car related stuff. I very rarely have that situation, but I know enough to let it go and start with a fresh mind at a later time
- Having the correct tools is a huge help. This isn't always possible, so having enough other tools that can be adapted to the job also helps tremendously. For example, having a set of "stubby" combination wrenches really helped with the flex disc bolts in the transmission tunnel, and using a "regular" combo wrench would have tripled or quadrupled the effort.
Hope this helps. I'll have more updates and hopefully will be finishing up the transmission job this weekend before I head off to Boston on Monday.....
Cheers,
Gerry
My experience with older and young-timer MBs is that the older manuals were much better. They used to have photo illustrations and better instructions, I would say up to about the period of the 126 and the very early 124. From there, MB started going to more abbreviated instructions, and more line diagrams instead of photos.
Also the manuals are generally translated from German, so sometimes the English and the terminology is off, and this can lead to misunderstanding in the directions.
I have found that just using the manuals and getting familiar with the MB terminology and steps is really the only way to do this effectively. You learn it by doing. As Clarkz said, the manuals assume a certain level of technical proficiency, familiarity and knowledge that would be imparted to mechanics in MB factory training. The good thing is that as a DIYer I will NEVER be close to what a trained factory MB mechanic can do, I have learned quite a lot by working with the manuals and my own experience so that the lack of information in some of the manuals is not a major hindering factor for me. It also helps to have folks like Dave, Clarkz Vader and Jono who have done a lot of these jobs before, and can offer tips and tricks along the way. Often this saves significant time.
What I have found, in terms of my own process and key tenets, is the following:
- Never be in a hurry to get a job done. There will always be things that come up expectedly that you will need to tackle
- Go with your gut. If something you are putting back together doesn't "feel" correct to you, re-check and if needed, re-do it so that it is right
- Use factory parts as generally they fit the best, with select quality aftermarket being OK. This generally comes from experience.
- Prepare for any job properly. What I do is to read and re-read the factory manual and procedures; read the procedure if available on Alldata, and read the forums to see if others have done the job
- Document everything photographically so that you have record of how things go back together (I didn't check my photos when I put the flex disc back on, which Clarkz caught publicly and GSXR caught privately to me)
- Be persistent. If something isn't working, move on to another task if possible, or call it a day and quit until the next day. I had a night in the shop earlier this week when NOTHING and I mean NOTHING went well for me, so I just cut bait, bailed and did some other non-car related stuff. I very rarely have that situation, but I know enough to let it go and start with a fresh mind at a later time
- Having the correct tools is a huge help. This isn't always possible, so having enough other tools that can be adapted to the job also helps tremendously. For example, having a set of "stubby" combination wrenches really helped with the flex disc bolts in the transmission tunnel, and using a "regular" combo wrench would have tripled or quadrupled the effort.
Hope this helps. I'll have more updates and hopefully will be finishing up the transmission job this weekend before I head off to Boston on Monday.....
Cheers,
Gerry
Yeah, that's all REALLY good advice. I have some minor basic skills, but would be totally lost w/o online forum resources. It sure would be nice if we had FSM pictorials, but I honestly think the well-done how-to's here are far superior for the layman.
Gerry summed it up well, and when in doubt, post up any questions on here or PM
Dave, myself or Jono and ask. There are no dumb questions, trust me.
That goes for any member on here.
I learned early on not to let pride get in the way of repairing a car correctly.
If I didn't know something, I would ask another tech or the shop foreman.
Normally I would find my answer in the WIS, but not always.
It took over 30 years to get to where I'm at, and I'm still leaning new ways to do things.
Last edited:
Even the HOW-TOs are probably not for laymen, at least some of the more in-depth ones. I think folks need to have a good amount of skill and appropriate tools to be able to attempt something like a transmission replacement or a top-end rebuild. I think some of the more "routine" maintenance items are easier and totally appropriate for most folks with moderate tools.
The biggest thing I have found is the TIME factor. It takes TIME to work on cars ... was about 90 hours on my V-8 rebuild over two months, and 60+ hours on the in-line six. I probably have 12-15 hours into my transmission over the past 3 weeks. It takes time away from other things like family, which is why I don't try to work long stretches and really try to just spend an hour to three hours in the shop per night. Sometimes I get on a roll and it may turn into 4-5 hours (and usually never on a weeknight), but honestly that is rare as I look through all my detailed records of what I do each session outside.
The biggest thing I have found is the TIME factor. It takes TIME to work on cars ... was about 90 hours on my V-8 rebuild over two months, and 60+ hours on the in-line six. I probably have 12-15 hours into my transmission over the past 3 weeks. It takes time away from other things like family, which is why I don't try to work long stretches and really try to just spend an hour to three hours in the shop per night. Sometimes I get on a roll and it may turn into 4-5 hours (and usually never on a weeknight), but honestly that is rare as I look through all my detailed records of what I do each session outside.
Gerry, can you take a shot of the car as it sits jacked up? Would like to see the actual height - thanks.
Rgds,
Chris
Rgds,
Chris
Today (Sunday) I spent about 5.5 hours out in the shop, and I am within two hours of being done with this project. Unfortunately as I'm traveling all week, I won't get to the grand finale until next Friday night or Saturday.
Here's the flow of how things went.
First of all, tightening up the new flex disc bolts at the driveshaft and output flange. Also, a shot of the speedometer cable being inserted and connected up to the transmission.


Next, per the factory procedure and per Sun Valley, both insist that the ATF oil cooler (part of the radiator) be flushed out. I used Sun Valley's procedure, in which I sprayed a bunch of brake cleaner into the return line of the oil cooler, and then draped a rag over the input line from the transmission to the oil cooler, and put it over a drain pan. Then I used compressed air at around 80 PSI to blow the brake cleaner solvent back through the transmission oil cooler. Immediately left-over ATF started coming out the input line (see the photo below). The rag captured most of it. I used some ductape to serve as a "seal" so that my air nozzle would direct its spray into the banjo fitting (the other side of the banjo I blocked with a piece of ductape and my finger. It worked quite well, for what it was. I didn't see much of any debris come out of the oil cooler, just some ATF.


After doing the flush and letting things drain, I turned my attention to reconnecting the new oxygen sensor into the exhaust system. This was a fairly quick and simple matter, and I used a medium-sized Crescent wrench to tighten the O2 sensor into its bung.

The next job was to re-attach the transmission dipstick and its housing into the transmission body. I had purchased two new Allen screws from MB that secured the top of the dipstick to the back of the cylinder head, and the bottom of the dipstick to the transmission body. This gave me good grip. As per usual, attaching the top of the dipstick to the head was a ROYAL PITA, but after about 10-15 minutes, I got it done by hook or by crook.


Since the dipstick had been out of the car and exposed for some days, I took a lint-free towel soaked in a bit of ATF and cleaned it off thoroughly. Then I inserted the cleaned dipstick into its newly fitted housing.


Then I turned my attention to the exhaust system. Since it was complete lowered and removed from the car, I had to re-attach everything from the downpipes back to the rear muffler. Using my handy transmission jack, I was able to get it hoisted into the correct position whereby I could re-attach the rubber hangers (all were in good condition) and make the re-connections with little difficulty. In the first photo below, I'm re-attaching the heat shield to the underbody of the car, which sits right on top fo the catalytic converter and shields the driveshaft from the cat's heat.


Then, it was time to re-attach the transmission cooler lines, one to each side of the transmission. These are 19mm banjo bolts, with aluminum washers (two per bolt). had new alu washers, and you can see the condition of the old washers vs. the new set I had.


Continued in next post....
Here's what the banjo bolt for the transmission cooler line looks like, fully installed.

Next, I removed one of the transmission pan bolts to install the bracket that the speedometer cable attaches to. I attached it to the bracket as a later step.


Here's the transmission overload protection plug, which connects into the driver's side of the transmission. You can see that the rubber housing for the plug has disintegrated, so I used some high quality 3M electrical tape to make a housing for this important cable.

Next it was time to reconnect the small spring clips to the transmission linkage rod. Then I connected up the overload protection plug to its connector. After that I re-routed and connected up the neutral safety switch plug to its connector, and rotated the white lock so that it stays in place.


Then I connected the speedo cable into its bracket.


After that, I connected up the exhaust support bracket, which attaches to the rear of the transmission.

That was about all for tonight. Thanks for staying tuned and watching. Should have only a couple more installments left now.
Next, I removed one of the transmission pan bolts to install the bracket that the speedometer cable attaches to. I attached it to the bracket as a later step.
Here's the transmission overload protection plug, which connects into the driver's side of the transmission. You can see that the rubber housing for the plug has disintegrated, so I used some high quality 3M electrical tape to make a housing for this important cable.
Next it was time to reconnect the small spring clips to the transmission linkage rod. Then I connected up the overload protection plug to its connector. After that I re-routed and connected up the neutral safety switch plug to its connector, and rotated the white lock so that it stays in place.
Then I connected the speedo cable into its bracket.
After that, I connected up the exhaust support bracket, which attaches to the rear of the transmission.
That was about all for tonight. Thanks for staying tuned and watching. Should have only a couple more installments left now.
I only have a few jobs remaining:
- Reconnect the downpipes to the exhaust manifolds
- Reconnect the Bowden cable to the throttle linkage
- Re-check integrity of all vacuum connections to transmission & intake system
- Fill up the transmission with approximately 8 quarts ATF
- Check and adjust the engine oil level, if needed
- Reconnect the intake crossover pipe and MAF to their proper positions
- Reconnect the battery
- Start the car, warm up, and test drivetrain
- Check for ATF leaks at cooler lines, transmission pan; oil leaks at bell housing
- Adjust transmission (shift point & firmness) as needed

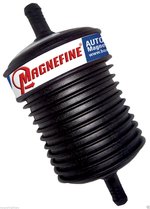
Gerry- are you going to install a Magnafine filter (magnetic filer) for the flow between the tranny and the cooler ?
FWIW, I installed one on the '95 wagon when I installed a rebuilt SV tranny.
She's just now coming close to 15K miles, so I'll be replacing it/opening it up shortly.
FWIW, I changed the ATF & filter after 200 miles (yucky!), then at 1500 miles (fairly clean), and then again at 10K miles (very clean). She'll be changing to ProDuro TO-4+ Synthetic fluid rather than the DuraDrive MV Synthetic ATF from Petro Canada.
I've included a PDF on why I moved to a TO-4 fluid for better protection and less wear on the clutch discs (like a Type F fluid). Also a TO-4 fluid like Swepco 714 20wt. is the "hot tickets" for automatic Porsche 928S, per 928 shops and owners, which uses the same tranny as our 036 and basically the entire W124 series.
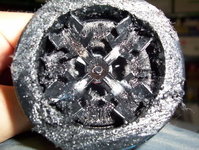
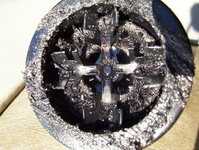
Attached are pics from an Acura RDX, that had a ATF fluid & filter change at approx. 35K-miles and had a magnafine filter installed and ran to 54K-miles (20K miles).
neil
FWIW, I installed one on the '95 wagon when I installed a rebuilt SV tranny.
She's just now coming close to 15K miles, so I'll be replacing it/opening it up shortly.
FWIW, I changed the ATF & filter after 200 miles (yucky!), then at 1500 miles (fairly clean), and then again at 10K miles (very clean). She'll be changing to ProDuro TO-4+ Synthetic fluid rather than the DuraDrive MV Synthetic ATF from Petro Canada.
I've included a PDF on why I moved to a TO-4 fluid for better protection and less wear on the clutch discs (like a Type F fluid). Also a TO-4 fluid like Swepco 714 20wt. is the "hot tickets" for automatic Porsche 928S, per 928 shops and owners, which uses the same tranny as our 036 and basically the entire W124 series.
Attached are pics from an Acura RDX, that had a ATF fluid & filter change at approx. 35K-miles and had a magnafine filter installed and ran to 54K-miles (20K miles).
neilAttachments

Last edited:
No plans for a special filter. I talked to Sun Valley about this and they said it would not be needed. I toyed with the idea of putting a magnet in the pan, and may well order a few up for my cars so that as I drain and replace ATF & filter in the future, I can install the magnet.

Well, I am happy to say that after a few hours out in the shop tonight, this project is now complete, and successful.
Basically I had three main tasks to do:
- Attach the two downpipes to the exhaust manifolds
- Attach the Bowden (control pressure) cable to the throttle linkage
- Fill up the transmission with new Castrol Transmax Dex/Merc ATF
After inspecting the car for any leaks (it had been sitting since last Sunday night, while I was away for most of the week on a business trip in Boston), I spent approximately 35 minutes attaching the downpipes to the manifolds. To make this a bit easier, I loosened the clamp at the exhaust support that attaches to the rear of the transmission. This allowed me to wiggle the pipes back and forth enough at the manifold connection to ensure everything lined up.
Then I just tightened up the bolts. Here are a few views of the downpipe flanges attached to the exhaust manifolds.


The next job was to attach the plastic grommet of the Bowden cable to its bracket, and then the ball joint end of the cable to the ball on the throttle linkage. This took about five or 10 minutes to do.


After that, I removed the piece of protective cardboard that Sun Valley had taped to the bottom of the transmission pan, to protect it from scratches. After doing that, I took about 30 minutes and re-torqued all nine of the transmission-to-block bolts, to ensure that they were at their specified 55 Nm +/-6 Nm torque rating.

Then I re-attached the air intake crossover pipe to the ETA and to the air filter box at the MAF, and across the top of the valve cover. Lastly, I reconnected the MAF plug, which is part of the wiring harness.


Then I filled the transmission with around 5 quarts of ATF. I started up the engine and ran it for a few minutes, letting the fluid fill the torque converter, then continued to pour approx 2.5 more quarts of ATF into the transmission. With the car up on the jack stands, and my foot on the brake, I was able to shift through the gears and I felt everything engage as it should have, which was encouraging.
Next it was time to test drive the car. I lowered the car down from the jack stands and let it sit for a few minutes, to let the motor oil drain down into the pan. I checked the oil level and it was fine, so I then decided to take the car out for its maiden voyage. Another purpose was to burn off all of the motor oil, grease and ATF that I had put and spilled on various parts of the exhaust and engine during the process of the transmission switchover.
The car started right up and I drove forward down the driveway - all seemed just fine. It shifted at just about the right shift points, but I decided when I returned that I would make an adjustment on the Bowden cable. I drove it for about 4 miles and noticed that it was shifting harshly, particularly the 3-4 shift, which really gave a "bang" when it up-shifted.
Luckily, through my experience on my 560SEC top-end rebuild, I knew what the problem was that was causing this harsh up-shifting. It was a lack of vacuum at the vacuum modulator, on the driver's side of the transmission just forward of the neutral safety switch. On the M104 as found in the E320, the transmission modulator vacuum line attaches to the plastic intake manifold upper piece and travels downward and aft until it reaches the modulator. I brought the car home and jacked it up quickly to examine the vacuum connection at the modulator. Sure enough, I had failed to connect the rubber nipple of the vacuum line to the modulator, so there was no vacuum present to soften the shift.
While I was in there, I also turned the modulator adjustment about 1/3 of a turn counter-clockwise to soften the shift action. Another 6-mile test drive immediately told me that the harsh shift problem was solved, but that the transmission was shifting slightly softer than would prefer. I resolved to re-adjust the modulator with about a quarter-turn clockwise in the morning. The transmission shifted fine in terms of the shift timing, so very little to no adjustment was needed at the Bowden cable under the hood.
The Sun Valley transmission made no funny noises and had all of the normal characteristics that I would expect and have experienced from my MB 722.3XX transmissions. It had immediate reverse and forward engagement, and honestly in regular driving didn't feel any different (except for the slightly softer shifts) than the original transmission. Kickdown function worked as expected, as did the speedometer actuation.
At this point, I'm going to call this job done. I'll continue to monitor things carefully over the weekend, and slightly harden the shifts in the morning at the modulator, but I am extremely happy with the quality of the Sun Valley transmission and would recommend it to anyone. I definitely intend to have them rebuild a 722.370 unit for my E500, likely within the next year to 18 months.
All in all, this job was not horribly difficult, and other than having to be on my back underneath the car for about 90% of it, was actually quite fun and rewarding. I absolutely have no qualms about replacing the 722.3 units in my 560SEC and my E500 in the future, if needed. This is a very different and somewhat less involved job than rebuilding the top end of a motor (with MUCH fewer parts involved) but overall not too horrible. I would assume it would be MUCH more difficult on an .036 because of the tighter spaces involved.
I hope this how-to will help folks in the future.
Cheers,
Gerry
Excellent job as always Gerry! Your how-to's inspire me and give me the confidence to attempt jobs I would never have considered doing on my own


I put about 100 miles on the car today, doing various errands and test driving. All is well.
This afternoon was the final test, though: first drive of the car by my wife. I went with her in the passenger seat for a 5-mile ridealong and she proclaimed the car the best driving she can remember, ever. She said it felt like a major improvement from the period before the transmission failed.
I have checked for leaks and not found anything, so I will close this one out.
Similar threads
- Replies
- 7
- Views
- 3,379
- Replies
- 20
- Views
- 767
- Replies
- 3
- Views
- 88
- Replies
- 12
- Views
- 1,354
- Replies
- 17
- Views
- 4,706
Similar threads
- Replies
- 3
- Views
- 88
- Replies
- 12
- Views
- 1,354
- Sticky
- Replies
- 52
- Views
- 15,145
- Replies
- 23
- Views
- 7,084