• Hi Guest !

    Welcome to the 500Eboard forum.

    Since its founding in late 2008, 500Eboard has become the leading resource on the Internet for all things related to the Mercedes-Benz 500E and E500. In recent years, we have also expanded to include the 400E and E420 models, which are directly related to the 500E/E500.

    We invite you to browse and take advantage of the information and resources here on the site. If you find helpful information, please register for full membership, and you'll find even more resources available. Feel free to ask questions, and make liberal use of the "Search" function to find answers.

    We hope you will become an active contributor to the community!

    Sincerely,
    500Eboard Management

HOW-TO: Transmission Overload Protection Switch Removal

The solution I got is not the best one -- only a WORKABLE one.

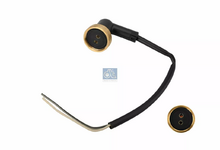
However, a company in Germany, happens to make this EXACT part as a reproduction. I can't remember the name of the company, but I was just looking at their web site about a week ago. I know someone here will know this company, and post the URL.

:update:

Found it !!!


View attachment 137710
HUGE thanks for the link here Gerry 🙂

I purchased this and got the item within 3 days. Total out the door was $74.15 USD - not terrible. Will definitely tackle the other parts you shared here at the same time. This might be an obvious step: but in the HOWTO, do you need to drain all the ATF out before removing the overload protection switch?

In the mean time, I've got the broken boot electrical taped up 😂 I'm not sure if taping fixed - or if disconnecting the battery for an extended time fixed. But upshifts are now a lot smoother (well, as smooth as you'd expect for a 722.5). No check engine light 👍
 
Last edited:
You won't need to drain the ATF to replace the overload switch. If you're going to replace the boot, I'd just replace the entire switch. They do go bad, and are not horribly expensive.

However, I HIGHLY recommend you get this tool to do the job -- it makes it MUCH MUCH easier. There are a few other parts that you should get when replacing this switch -- o-rings and a plastic cap.


There is a HOW-TO posted here on the job.
 
Finally got some time off from work - had gotten all the parts needed to tackle this a while ago (including that 36mm wrench!)

parts-ready2.jpg

I put about 2 hours in trying to get the overload switch off and was not successful 😢 I went at it hard - with the 36mm wrench and then with a 36mm impact socket that I had around (for taking off pitman arms off the steering box on cars I strip).
tools2.jpg

Here's what the switch looked like towards the beginning:
start2.jpg
And here it is right before I gave up:
stop3.jpg

Did it move? I honestly can't tell. I got a good grip and was putting everything I had into turning it counter-clockwise. I stopped for a break twice and hit the area with PB blaster. It's really hard to get a grip now - the edges are pretty worn (becoming stripped). One of the pins isn't there anymore after my hand slipped and my finger broke it off 😂 The full size wrench wouldn't bite on the box side and the open side started slipping. A few times I tried to shock it by hitting the wrench with a 4lb hammer. Can't seem to break it free

I can almost fit my full size air gun under here; I might look at getting a smaller cordless impact wrench tomorrow to see if I can break this loose with the socket I have. I have a feeling it would be WAY easier if I removed the transmission pan- the lip of that is preventing the wrench from going flush up against the surface... but I don't have any of those parts and haven't done that job before
 
The seizure is likely due to dissimilar metals. I don't know what the area where you are working looks like. If possible, I would try applying some heat with a propane torch. Being mindful of anything flammable as well as overheating any gaskets or soft parts. A wet rag is helpful for this.
Removing the transmission pan is quite easy, just messy. All you should need is a new gasket and fluid.


drew
 
Finally got some time off from work - had gotten all the parts needed to tackle this a while ago (including that 36mm wrench!)

View attachment 138989

I put about 2 hours in trying to get the overload switch off and was not successful 😢 I went at it hard - with the 36mm wrench and then with a 36mm impact socket that I had around (for taking off pitman arms off the steering box on cars I strip).
View attachment 138990

Here's what the switch looked like towards the beginning:
View attachment 138991
And here it is right before I gave up:
View attachment 138992

Did it move? I honestly can't tell. I got a good grip and was putting everything I had into turning it counter-clockwise. I stopped for a break twice and hit the area with PB blaster. It's really hard to get a grip now - the edges are pretty worn (becoming stripped). One of the pins isn't there anymore after my hand slipped and my finger broke it off 😂 The full size wrench wouldn't bite on the box side and the open side started slipping. A few times I tried to shock it by hitting the wrench with a 4lb hammer. Can't seem to break it free

I can almost fit my full size air gun under here; I might look at getting a smaller cordless impact wrench tomorrow to see if I can break this loose with the socket I have. I have a feeling it would be WAY easier if I removed the transmission pan- the lip of that is preventing the wrench from going flush up against the surface... but I don't have any of those parts and haven't done that job before
Get a bigger bar - cheater bar do you guys call em? I like the extenable type so you can get as much swing as possible with the limited space underneath.

Use a 2 or 3 foot bar, keep the socket on there good and tight and if stuggling to apply torque maybe use a tolley jack under the bar to apply the pressure.

Some heat would maybe help too but don't overdo it. Really I think you just need a bigger bar for leverage to "crack" it free. Failing that I personally have removed stuff like that with a chisel with 100% success and no damage - that is if the edges round off. Sharpen a good qaulity chisel and get it started on the edge of the nut. A large hammer and the shocks will get it moving. Just be careful not to chisel close to the casing and gouge it. PS - not advising chisel unless it rounds off and you have no other option!
 
Happy to report that I got it free! I picked up a 3/8 compact DeWalt impact wrench (155 lb/ft - might break slightly more) and a 6 point impact 36mm socket. The socket I had used before was 12 point - similar to the box end of the wrench (which had trouble gripping). I had to hit it 3 times for maybe 30 seconds each, but the feeling of seeing it spin was amazing

Will share another update when job done. The steps here are crystal clear (again- huge thanks Gerry 🙂 and also everyone commenting here, including OP)- it should be a piece of cake. Hardest part might be torquing it down (should have a wrench that fits).

Bigger breaker bars wouldn’t fit at the angles needed unfortunately. I just have the car up on Rhino Ramps- so clearance is limited
 

Attachments

  • 04F9DAAC-0804-4CD6-BB15-EB80E338CC14.jpeg
    04F9DAAC-0804-4CD6-BB15-EB80E338CC14.jpeg
    1.6 MB · Views: 18
Job finished - just a few hiccups, but nothing serious

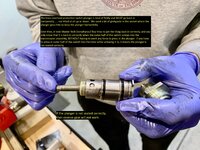
First snag was after unscrewing the overload protection switch - the rest of the barrel didn't come out. Just to make sure, I hand screwed the switch back in (hoping to re-engage it) and then pulled it out again- no luck. I put a 90 degree pick tool in there (at an angle), lifted the tool up perpendicular to the barrel and was able to grab on and pull the barrel straight out. More ATF came out than I was expecting! Had to clean that off the driveway before the Mrs sees it 😛
pick-tool (1).jpg

This is a 722.5 transmission on a 1994 SL320. I really like the M104 after digging in and fixing up a 1993 300E 2.8 (guides here were massively helpful). I checked CARFAX and had a VMI pulled... the transmission was replaced in 2018 by Mercedes-Benz of Flagstaff (VMI says "remanufactured transmission") and I can confirm the serial doesn't match the data card. That said, the overload protection switch had a date stamping of "1207" (December 2007). I'm guessing they just put a used one in (versus actually rebuilding).

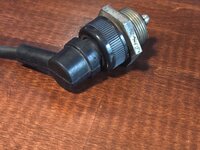
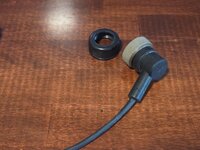
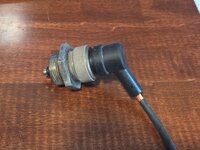
Here's what the old switch looks like pulled off. It was corroded bigtime which explains why it was so difficult to pull off
old-plug (1).jpg

I followed the guide everything went as expected 🙂
barrel (1).jpg

Reinstall was easy. Hand screwed it in until I couldn't turn anymore - then pulled out the big daddy torque wrench and the new 36mm 6 point socket. Torqued it to 70 newton meters 👍

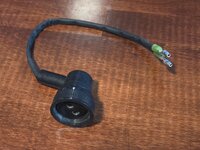
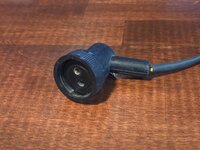
The electrical connector was interesting. You can't slide the boot off (or at least I didn't see a way to slide the new boot on) without removing the plastic fittings and the electrical caps themselves. I cut the existing caps, pulled the plastic bits off, and put the new kit from Kurth Classics on. You just have to think out the order of operations - putting the brass fitting (and washer) on first, then the rubber boot, then the circular plastic piece.

After that - you get to do some soldering under your car in a super cramped space 😢 That was definitely tough not only due to being 40 and having a "dad bod", but because I suck at soldering. My only real experience is replacing the saved game batteries for old Nintendo games (NES/SNES).

Being under a car in a cramped space is hard enough- but the caps used are hard to hold while you're also trying to hold the soldering iron and the rosin core. Would be a piece of cake with three hands! You can't be messy either- otherwise the squared plastic fitting won't fit. The two plastic fittings sandwich the cap into place (circular fitting on top; squared fitting on bottom and held in place by 2 small screws which go through the top of the circular plastic fitting).
soldering.jpg

It was at this point that I realized I don't know which pin (on the switch) goes to which wire. I had to look at old photos... when you look at the protection switch dead on, it says "Moto Meter" stamped at the top. My pictures were showing brown going to the right pin, black going to the left pin. When I removed the old parts, I didn't bother to realize the plastic bit has the polarity on it (+ and -)... but usually black is + and brown is ground / neutral so I wired it that way.

Definitely not the happiest with my soldering job - but I think it'll work. If it doesn't that's another great opportunity to try all this again 😂

After wrapping it up, I hand tightened the brass fitting, tucked the fittings into the boot, and then re-zip tied the electrical wiring (had to cut the zip lines to bring it down enough to solder). Here's the finished product:
completed (1).jpg

After cleaning up, I hopped in the car and just put it into gear (reverse first, then drive). Both engaged which is a good sign. But I think this is used for shifting from 4 to 5? Will have to re-read the thread to understand more about this (any info appreciated). Would be great to have a way to test this and verify it works (or doesn't work!)

Will update once this has a chance to bake for a while 🙂
 
Last edited:
Wow, another satisfied R129 owner... Doing all this on the ground, well done! I forgot how much room we actually have on R129 tunnel to work on this switch!

Regards,
D
 
Wow, another satisfied R129 owner... Doing all this on the ground, well done! I forgot how much room we actually have on R129 tunnel to work on this switch!
Yeah - there is NO room in the 124.034/.036 for side access!!
 
Big thanks to everyone who has contributed to this write-up. I just finished this job and thought I'd add just a bit based on a couple minor issues I had.

I had the same issue extracting the reaction valve that @bclifton had. I ended up doing to same thing he did to extract it. I used a right angle pick to reach inside the reaction valve and hook the internal spring, then pull it out. Pretty easy.

After replacing the o rings, I then had a problem getting the reaction valve back in. Turns out the pushrod was a bit too, uh, flaccid.

1000005446.jpg
This was causing the rod to slide below the cup end of the band, instead of landing in the cup.

Transmissions are picky about grease and such things used during assembly, so first I tried Vaseline, but it wasn't tacky enough. After a bit of research, I found this stuff.
1000005447.jpg

It is designed for use in transmissions and pumps and dissolves on start-up. My local O'Reilly auto parts had it in stock. It is thick and sticky, and was able to support the rod in all its fully erect glory.

1000005448.jpg

With the rod standing at attention, I was able to slide the reaction valve straight in with no issues. The switch was then able to be screwed almost all the way in by hand, before I grabbed my wrench to give it a final torque.

@bclifton did mention something about the flaccid rod as well, and about using grease, but I figured I'd expand on it for the benefit of the next guy.
 
Last edited:
Great write up that helped me fix an issue I've had since I bought the car in 2018 (and admittedly only noticed in late 2019 but had started to annoy me more and more). Getting my old switch out was a huge PITA as I was trying to do it on jackstands in my driveway but once I got it loose this job takes literally 10 mins, if that. Cleared code 8 on pin 17 and no issues w WOT accel at speed since :)

A few tips
  • I bought the below 36mm oil filter wrench as it's super low profile, but I ground off the first 5mm or so of engagement as it's tapered like nearly all other sockets/wrenches. The 'nut' feature on the switch is very thin so this removes most contact between the socket and the switch. This was a big help. Then, just used a 3/8" socket and a big breaker bar and it came off. You could probably fit a 1/2" drive socket on there if you needed to if you have a low profile 3/8 to 1/2" adapter, but easier than the welding method. You don't need to drop the trans mount to get extra access w this socket
  • I'd advise the same grinding procedure on the 36mm box end wrench
  • The plastic ring inside my connector disintigrated in my hands when I touched, may 3D print a replacement or grab one off a car from the yards
  • I tried using an impact rated univeral joint w the above socket and a burly DeWalt 1/2" impact gun and it did nothing but destroy my universal joint. Eugh. Breaker bar ftw
  • A shop near me very kindly let me use their lift for this job free of charge.

https://www.amazon.com/dp/B09SP9YSGW?ref=ppx_yo2ov_dt_b_product_details&th=1

1701459777677.png
 
Got it out!! Thank you! Is there a reason the old reaction valve and overload protection switch don’t pop in as a unit? New one pops in as a unit
It's just a question of how stuck each part is. The O-ring on the switch is very small, so there's not a lot of surface area to hold the switch to the valve, especially with an old, relatively non-compliant O-ring. Sometimes they come out together, sometimes separately.
 
Based-upon a possible misfire / low-power @ WOT, I'm thinking I have a faulty transmission overload protection switch on the C36-powered wagon:. I scanned the HFM & Diagnostic module, and didn't find anything definitive . . .


TIA,
:) neil
 
Last edited:
Is this switch still available for M104-powered vehicles? My G320 uses the same switch as the US-spec E320...I have a factory spare available. Actually I believe mine is starting to fail, mechanically.

Bad NSSes don't ALWAYS throw a code.
 
@dionphaneuf, I, and @smilecenterlab replaced the trans overload protection switch on @smilecenterlab's car today. It took @dionphaneuf 4 tries to put to switch back in with the pushrod oriented correctly. The first three times were not successful and resulted in the car not having reverse gear at all. That was a PANIC moment! 🤣. x3 !!!!!

We didn't have any assembly-goo like @Beater400E, but we used a little gleitpaste.

View attachment 199026

View attachment 199027


View attachment 199028


View attachment 199029
Yeah, that stupid little plunger is frustrating to deal with for sure. I wonder if the gleitpaste could cause any friction issues in the trans. Probably not with such a small amount, but that's why I had used the Assemblee Goo. Supposedly it's safe to use in transmissions and won't cause any friction issues. I'm sure it'll be fine.

Once you had the plunger oriented correctly did everything work as expected?
Yes, the video shows us celebrating the fact that reverse gear had been restored!!! I will have to pick up some Asemblee Goo for next time.
 
Last edited:
...I will have to pick up some Asemblee Goo for next time.
I listened to the teachings of Master Beater and picked up some 'Goo a few months ago. I've got a transmission on the workbench that will need some of this during re-assembly!

https://www.amazon.com/gp/product/B000B8YDUO/

@Jlaa, if there is still shift weirdness @SCL's car, a new thread with details on the symptoms might be a good idea...

:klink:

1727011154233.png
 

Who has viewed this thread (Total: 5) View details

Back
Top