• Hi Guest !

    Welcome to the 500Eboard forum.

    Since its founding in late 2008, 500Eboard has become the leading resource on the Internet for all things related to the Mercedes-Benz 500E and E500. In recent years, we have also expanded to include the 400E and E420 models, which are directly related to the 500E/E500.

    We invite you to browse and take advantage of the information and resources here on the site. If you find helpful information, please register for full membership, and you'll find even more resources available. Feel free to ask questions, and make liberal use of the "Search" function to find answers.

    We hope you will become an active contributor to the community!

    Sincerely,
    500Eboard Management

SL500 progress and thank you all!

Looks like “Almond Croissants” to me. My favorite😀 I would have enjoyed that drive as well.

Take Care D
Cheers Terry! Mind as well be, "Bear Claw", indeed, one of my favorite pastries as well! Not too sweet, and so good with coffee (double shot and dark roast). This really was our first time getting out in public to eat in a very very long time, sitting outside, in the open, enjoying the breakfast that is not at home or in the car. Really glad they open early on weekends too!

Regards,
D
 
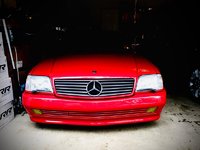
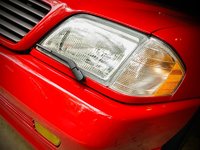
@TimL the Euro headlights, I scanned through the picture album of the progress, I have to say, if anything, function wise and appearance, Euro lights on R129 are really at the top of the list for me...

i-dVHzkZp-XL.jpg

Regards,
D
 
Do you ever get in the car just to drive it? No purpose, other than just drive...

Years ago, early 90's I had a job at ITT Teves Automove, now Teves Continental. Back then, plant manufactured brake components for BMW, Mazda and Ford of Europe. No idea what they making now, but was kinda nice to visit the old place that I don't miss in any way, form or shape...

On the plus side, I can't tell you how many brake calipers I've assembled, disassembled and built while working there for few years.

Entrance alley to Teves

i-NfJgbDf-XL.jpg

Regards,
D
 
I have this very old lens, the "glass" is actually plastic, so I dusted it off for some "artsy-fartsy" isolated subject matter... It's raining, but in the garage, music and fresh detail of speed-shine

i-8PgqSmm-XL.jpg

i-n8wSCdD-XL.jpg

i-7VnB68D-X2.jpg

i-zKHrcjN-X2.jpg

i-stmZFb2-X2.jpg
 
So... I'm tired of the burl wood trim. Thinking something in lines of dark gray/black weathered wood look...

Not going to destroy the original, but I do have plenty of spare parts, including 2 extra consoles (all with poor finish, perfect for resto-mod). Unfortunately, neither one of these spares have the factory cutouts for the butt warmers my car has, I do like my butt warmers!

Interesting, that while there are no cutouts, the plastic inner trim/receptacle where all the center console buttons fit/snap in has provision for the warmer buttons. Time to cut:

i-QGQVZD4-XL.jpg

i-F259H3w-XL.jpg

Turned out very nice actually, my cutout is on the left

i-jNjSMC7-L.jpg

And while there, will finally fit the manual antenna switch

34105657994_bb85326f65_c.jpg

Also have 2 spare R170 steering wheels with wood inserts (1 with few hairline cracks) to go with the project. Just want a little different look. Will see...

Regards,
D
 
Thanks Drew!

The beauty of having those spare parts (purchase for peanuts), one can boldly go to modify them without any fear for destroying "the only part"! Table mounted router with thin straight bit works really well for these button openings!

Regards,
D
 
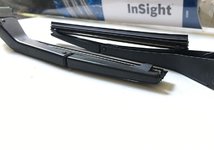
New headlight blade inserts, easy guidance of How To section HOW TO: Refilling headlight wiper blades | "HOW-TO" Tutorial Articles (granted, a little different from W124, but the the process is the same). My original blades were (I believe) original, as they have crumbled completely in my hands

Inserted into the factory "housing"

View attachment 134590

And back onto the car

View attachment 134589

Regards,
D
D, your beautiful car deserves the Euro wipers to match your Euro headlights!
 
D, your beautiful car deserves the Euro wipers to match your Euro headlights!
Cheers Tim!

To be honest, I wanted to delete the wipers all together initially, for the "cleaner" look, as Xenon fitted R129 cars never did have the wipers to begin with. Could not find any filler panels w/o the holes, had to be the Xenon specific car, and those are really hard to find, most people sell the whole package, with lights and all $$$

So I mounted the factory units back on, besides, they were fully functional... but now, now that you mentioned it, I never really paid much attention to how different the Euro wipers look from US, definitely more appealing compare to US stock, still, not as good looking imo as W124 units... I just spend an hour looking allover the net for the details on Euro pieces, almost non-existent... Found a few in UK but need much much love!

So got me thinking, how about W140, those look close to R129, I think there are still 2 pre-face lift W140s on our pic-a-part, morning trip!!!

Thanks for "planting" ideas in my head :yahoo:

Regards,
D

EDIT: I keep looking at the pictures, trying to visually "gauge" the dimensions, W140 do look a bit longer, but the factory US units were designed for the smaller lenses, with the ugly plastic trim around them, so I'm guessing that's why the wipers were designed to be smaller/shorter, to fit the sweep inside the plastic frame/trim... I have a good feeling about W140 for some reason...
 

Attachments

  • r129_euro_headlight_wiper.jpg
    r129_euro_headlight_wiper.jpg
    38 KB · Views: 8
  • w140_headlight_wiper.jpg
    w140_headlight_wiper.jpg
    332.6 KB · Views: 9
Last edited:
Cheers Tim!

To be honest, I wanted to delete the wipers all together initially, for the "cleaner" look, as Xenon fitted R129 cars never did have the wipers to begin with. Could not find any filler panels w/o the holes, had to be the Xenon specific car, and those are really hard to find, most people sell the whole package, with lights and all $$$

So I mounted the factory units back on, besides, they were fully functional... but now, now that you mentioned it, I never really paid much attention to how different the Euro wipers look from US, definitely more appealing compare to US stock, still, not as good looking imo as W124 units... I just spend an hour looking allover the net for the details on Euro pieces, almost non-existent... Found a few in UK but need much much love!

So got me thinking, how about W140, those look close to R129, I think there are still 2 pre-face lift W140s on our pic-a-part, morning trip!!!

Thanks for "planting" ideas in my head :yahoo:

Regards,
D

EDIT: I keep looking at the pictures, trying to visually "gauge" the dimensions, W140 do look a bit longer, but the factory US units were designed for the smaller lenses, with the ugly plastic trim around them, so I'm guessing that's why the wipers were designed to be smaller/shorter, to fit the sweep inside the plastic frame/trim... I have a good feeling about W140 for some reason...
I’m sorry D., I wasn’t aware that these are made out of unobtainium and would never have said anything had I known! Hunting for rare NLA parts is a frustrating undertaking. Your car looks super sharp as is, so ignore my comment. I will keep an eye out for r129 euro wiper arms though and let you know if I come across any.
 
Last edited:
I’m sorry D., I wasn’t aware that these are made out of unobtainium and would never have said anything had I known! Hunting for rare NLA parts is a frustrating undertakin. Your car looks super sharp as is, so ignore my comment. I will keep an eye out for r129 eruo wiper arms though and let you know if i come across any.
Cheers Tim!

Oh no no, appreciate this topic very much, I do! I'm a little irritated at my self a little for not seeing the difference in the wipers after all these years (but then again, we hardly ever see Euro R129 in the states). So the quest is on (but with the twist)

I did go to the pic-a-part this morning, and did bring in some goodies. I'm quite certain that I would be able to retrofit W140 arms onto my R129 (with few minor modification...

Here are side by side, the US version of R129 arms on the right and the beautiful, streamlined arm of W140

2021071112092540--7484834918975177920-IMG_0319-X2.jpg

Now that I see them side by side, stock R129 US market arms are very very unattractive, still can't believe I didn't pay attention to these before!

Unfortunately, between the only 2 cars in the yard, I'm missing this little cap/nozzle from the passenger side:

2021071112092540-7162315816571814328-IMG_0323-X2.jpg

I'm going to make a plea post to search for this missing piece, really want to make these W140 arms to work on my R129. I test fitted the driver's side W140 arm on the wrecked R129 at the yard, and the sweeping pattern looks to be spot on for Euro R129 headlights!

Keeping my fingers crossed to find the passenger side cap/nozzle soon! Now that my hands are itching (thanks to Tim) Failure is NOT an option!!! :yayo:

Regards,
D
 
D., If the caps are too difficult to find, maybe consider these as a complete set- price is still somewhat reasonable, considering that the condition is really good….
Cheers Tim!

Yes indeed, I'll give it few days, if no luck with the cap, will certainly look for a whole arm instead. For now, this pair form today cleaned up really well, refurbished the blade inserts too

2021071113484793--7190945505986603923-IMG_0324-L.jpg

2021071113484793-3405929135610093112-IMG_0325-L.jpg

2021071113484793--6378067646234966633-IMG_0326-L.jpg

The at clearance 23" Bosch blade was enough to do a pair of R129 and a pair W140 headlight wipers, definitely a bargain at $1.99, compliments of RSS feed of RockAuto :jono:

Regards,
D
 
D, how do you keep the new rubber insert in place, if you cut one 23" piece into multiple smaller pieces? For the 124 wipers, the locating notch embedded in the rubber is only in 1 end per rubber, requiring throwing away the leftover piece after cutting to length. Without this notch, the insert would slide out of place.

:sawzall:

1626030228092.png
 
Da
D, how do you keep the new rubber insert in place, if you cut one 23" piece into multiple smaller pieces? For the 124 wipers, the locating notch embedded in the rubber is only in 1 end per rubber, requiring throwing away the leftover piece after cutting to length. Without this notch, the insert would slide out of place.

:sawzall:

View attachment 134786
Dave, these blades had different design at the ends, I already crimped them in... Long stainless slats actually had something like a barb wire on the ends (pointing inwards, that dig into the rubber that prevents it from moving) and "cutouts" for crimping into the outer edge. Matched well with metal "legs" of the R129 wipers. Even the factory rubber I removed from all the blades did not have that rubber stopper/notch you showing in red (though I see that design in your photo is a better design from what I can imagine)

EDIT - went back into the trash pile, pulled the old original insert, yep, just pinched by the metal "legs", different from W124 (from what I can see, your arm for the insert is plastic?), no stoppers were in the originals...

IMG_0328-L.jpg
 
Last edited:
My precious lol. Ebay find at a very very reasonable price, nice condition and quickly shipped! I still want the spare if anyone see these on the junk yard, but these will get my weekend project started!
 

Attachments

  • 4E2E9365-869D-44CF-B61B-8C07F8914D95.jpeg
    4E2E9365-869D-44CF-B61B-8C07F8914D95.jpeg
    608.1 KB · Views: 4
Ok, so thanks to @TimL , I realized, that my US style headlight wipers were rather ugly, compare to the Euro units...

D, your beautiful car deserves the Euro wipers to match your Euro headlights!
Yep, agree 100% Considering that Euro wipers are pretty much "unobtanum" in the US (as used part), and even en Europe, from my searches, R129 wipers in used, and not the best condition are quite costly... W140 to the rescue!

Before:

2021071716250554--7047086458170579716-IMG_0341-L.jpg

and after

2021071716214637-4708067936325779394-IMG_0355-L.jpg

I'm in love with how "streamline" these look compare to the stubby/steppy original arms!

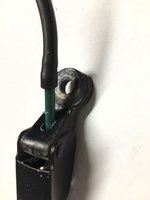
All in all, not a difficult project, but certainly NOT plug and play. The spray system is not the same, R129 uses micro hoses and complex internal nozzles, where W140 uses center of the mounting shaft to to as the sprayer connector with no tubes or hoses. Here is what I had to do (starting with a spare W140 arm for trial and error):

Drilled the hole for the sprayer hose to pass through

2021071713274735--7217970459947452665-IMG_0335-XL.jpg

test fitting the plumbing

2021071713274735--8678977543629081309-IMG_0337-XL.jpg

2021071713274735-4052091120087384192-IMG_0338-XL.jpg

Heat shaped and trimmed for "estimated spray pattern"

2021071716503591--2957700868591485233-IMG_0348-L.jpg

All works, tested with syringe, easy spray with no resistance... Now I realized, that the diameter of the shaft of R129 is smaller compare to W140. Well, time to make a bushing adapter, used brass insert. Shaped into a cone, trimmed and fitted perfectly into W140 as adapter to R129 shaft

2021071713274735-5270463643107476822-IMG_0339-XL.jpg

2021071713274735-5553402012164312948-IMG_0340-XL.jpg

All refurbished pieces, cleaned up, new wiper inserts, painted and ready for assembly

2021071714561702--4962153149513053441-IMG_0344-XL.jpg

And all assembled, on the car

2021071716214637-4708067936325779394-IMG_0355-L.jpg

2021071716214637--7022933564292914887-IMG_0350-L.jpg

2021071716263611--7924116640696598810-IMG_0359-L.jpg

Very very happy with how these look on R129 with Euro lights! Thank you Tim!!!

Tomorrow I will replace the tank and will all buttoned up...

2021071716214637--3002081558015089455-IMG_0358-XL.jpg

Regards,
D
 
Ok, so thanks to @TimL , I realized, that my US style headlight wipers were rather ugly, compare to the Euro units...


Yep, agree 100% Considering that Euro wipers are pretty much "unobtanum" in the US (as used part), and even en Europe, from my searches, R129 wipers in used, and not the best condition are quite costly... W140 to the rescue!

Before:

View attachment 135097

and after

View attachment 135098

I'm in love with how "streamline" these look compare to the stubby/steppy original arms!

All in all, not a difficult project, but certainly NOT plug and play. The spray system is not the same, R129 uses micro hoses and complex internal nozzles, where W140 uses center of the mounting shaft to to as the sprayer connector with no tubes or hoses. Here is what I had to do (starting with a spare W140 arm for trial and error):

Drilled the hole for the sprayer hose to pass through

View attachment 135099

test fitting the plumbing

View attachment 135100

View attachment 135101

Heat shaped and trimmed for "estimated spray pattern"

View attachment 135102

All works, tested with syringe, easy spray with no resistance... Now I realized, that the diameter of the shaft of R129 is smaller compare to W140. Well, time to make a bushing adapter, used brass insert. Shaped into a cone, trimmed and fitted perfectly into W140 as adapter to R129 shaft

View attachment 135103

View attachment 135104

All refurbished pieces, cleaned up, new wiper inserts, painted and ready for assembly

View attachment 135105

And all assembled, on the car

View attachment 135106

View attachment 135107

View attachment 135108

Very very happy with how these look on R129 with Euro lights! Thank you Tim!!!

Tomorrow I will replace the tank and will all buttoned up...

View attachment 135109

Regards,
D
@Duh_Vinci, that looks sooooo cool!! Super ingenious to make it work with the W140 wipers- I love the look of your car! 👍🏽👍🏽👍🏽
 
Cheers Tim!
Failure was not an option! :wootrock:

Let's be realistic: I've never seen Euro R129 in the US, and the chances to seen one, for me, very very slim. But, from the pictures that I found, I'm quite proud of the results, and using all genuine MB parts "warms up the heart" a bit too :hearts:
 
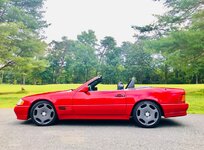
Glad that my old R129 SL320 stayed in the family - and now, also getting Expression front and rear lips!

I love dealing with them, small company, very personal, very accommodating! I reached out to them again, directly (instead of very much a useless "US Distributor" - they were no help at all "no options for R129").Got the invoice, had my brother wire the money (his car, making him do all the "dirty work"...) 1 week of lead time to make and cure the aprons/lips, and shipping option of my choice.

i-BktNgMk-L.jpg

His (now his) SL320 as it set few months ago

i-vwtDs9r-L.jpg

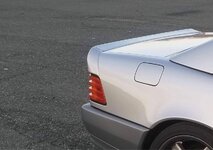
Now with added duck tail

i-8RDz4HJ-L.jpg

And soon to have the aprons, refinished lower cladding while we there too. Look forward to helping him with this project! I will also have to modify the rear apron to make a nice cutout/mold for exhaust opening. He is now running dual oval AMG tips setup with rear box delete. I like the sound better than when I had it with Magnaflow. I will do a sound clip when we get to it.

Regards,
D

P.S. Copycat :peep:
 
With Fedex shipped, in the US in 2 days, then 2 days in customs, now releases and will be here on Mon :gsxracer:
 

Attachments

  • 6D44881F-419D-4D1C-A6E1-C2CA4536DF83.jpeg
    6D44881F-419D-4D1C-A6E1-C2CA4536DF83.jpeg
    303.4 KB · Views: 10
I love the way the wheels come off with the top down. Well done!

Cheers,

maw
Thanks Maw, these were definitely worth the wait!

Lookie what FEDEX dropped of this eve... Freshly made, cured, well packaged shipped from Belgium

i-3ZnhdCJ-XL.jpg

I'm not going to have time to work on these for a bit, so more like a small winter project... I'm almost as excited as he is, afterall, this was my car once!
 
D, how often do you exceed speed limit in VA?
Is that a trick question? LOL

In this car, on the way to work, I-95 early morning hours, no one drives less than 75-79 north bound (65 limit), so I just go with the flow. There is one stretch where no center u-turns for any speed traps to be around, about 3 miles long, you can imagine that is very very difficult to remain at 65... With that said, you remember I-95, getting worse and worse, congested most of the time, not so bad since I'm on it at 5:30 am or so.

After work (90% of the time I-95 is a freaking parking lot), I take back roads home, take me about an hour, but it is a beautiful scenic country roads, with absolutely no "visible regulations" of any kind, so I enjoy the "spirited" driving with no music, so I can hear the engine and the exhaust.

And there are times where I'm so beat after a very very long day, I literally just cruise with some mellow jazz or classical with my mind completely disconnected.
 
You should be a diplomat...😂🤣😅

But I do love the DMV back roads.

maw
I guess "yes, and often" would have suffice 🤔

I will be 50 in a month, so I really don't do anything stupid anymore, but its hard not enjoy that visceral inflow of the happy rush when the downshift occurs... next thing you know, you are a "little" pass the posted limit. You know you have that very satisfied grin on your face, let the pedal go and think to yourself "that is why I love this car (well, among other things)..."
 
Is that a trick question? LOL
Kind of yes. Based on the answer, you're either qualified as a Human OR an android. You've passed! 😁 Though I think "people of Virginia vs..." take an entirely different position on the matter. 10 years in a labor camp next to child molesters and serial killers for 20 over/anything above 85 mph, isn't it? 😁
 
Kind of yes. Based on the answer, you're either qualified as a Human OR an android. You've passed! 😁 Though I think "people of Virginia vs..." take an entirely different position on the matter. 10 years in a labor camp next to child molesters and serial killers for 20 over/anything above 85 mph, isn't it? 😁
Over 20mph - definitely, I-95 in VA I'm almost sure that it is anything over 80mph but I may be wrong.
 
Finished motor mounts today on red devil. After reading much info, and most calling this job from PITA to Miserable - I had to at least try, I mean 6 bolts... Well, 4 were fine, you can imagine those were the bottom pieces.

I ordered the offset motor mount wrench by KTC from Amazon, Amazon.com: Engine Mount Wrench Offset 17mm For Benz : Everything Else Unfortunately USPS lost the package somehow. I went directly to KTC to see how if I get get it directly from them - ended up not ordering because of these shipping charges:

i-JXbRJXx-L.jpg

For x1 17mm tool? Oh HELL NO!!! That is beyond unreasonable for shipping!

Determined to get my mounts replaced, I've made this tool, and it worked (same principal, just cut of the end of the spare 17mm wrench and welded on short 3/8 extension

i-HVJNvBh-L.jpg

used these tools to loosen and remove the top bolts...

i-7DNtmNs-L.jpg

The swivel shallow 17mm socket worked well in unscrewing the long thread of the top bolt with long flex extensions attached to 20V ratchet...

I did have to remove the steering damper to withdraw the passenger side, and good thing I did, it was shot! "Magically" I happen to have a new Stabilus replacement piece on the shelf! Could have replaced the Drag link (also on the shelf), but no press tool small enough to get there, will have to do research on how to remove it later...

My motor mounts were definitely shot! Top bolts were a bitch, very little room to have any leverage.

i-QfhgBp5-L.jpg

But, but... I've opened the dreaded Pandora's box - aka Lower Wiring Harness :banghead:

I had to move some wires on the passenger side out of the way, and that is "When the world crumbles..." I know I needed to replace that eventually, and after seeing this insulation falling apart today, I did use some liquid electrical tape as band aid, yet, it still showed it's ugly side:

On the test drive, started with severely erratic oil pressure, that would stop depending on how I rotate the wire. Few minutes later, the oil light came on (no noise, no ticking, full, clean), looked closer a the wire - completely bare of insulation. But it's ok, I've master the search ( I think), found this thread Oil light on after oil change | M119 Engine and using this post from it was
Oil level light could also just be a bad level sender sensor.

Unplug the wire and ground it, the light should go out.

My sender is bad and I don't feel like replacing it right now so I grounded the wire.

It's not uncommon after an oil change for an original to stick in the low position.
Tested it with grounding, indeed the light went away. Temporary fix, but ordering the harness soon, I need to find the link to European company that sells refurbished units (on my old laptop, $170-$180 or so, for the life of me don't recall the name). I could probably do it myself, but don't want any downtime.

And if in time it turns out to be not a harness, this thread is excellent for the oil level unit HOW-TO: Replacing M119 Oil Level Sensor | "HOW-TO" Tutorial Articles

All in all, very productive day, now the choice between Warsteiner or few pills of Aleve... :blink:

And I thought this car was smooth before, now, like butter!!!

Regards,
D
 
Last edited:
D, you should have snapped a side by side picture of old and new mounts.

Erratic oil pressure is either harness or oil pressure sensor - not the oil level sensor
 
Last edited:
D, you should have snapped a side by side picture of old and new mounts.
I know, that was the after thought, I was too preoccupied smearing liquid tape over those lower harness wires after seeing them ins such state:hide1:

Erratic oil pressure is either harness or oil pressure sensor - not the oil level sensor
Yeah, I'm going to bet it's the harness, since both oil pressure (erratic needle) and oil level sensors affected (oil light on). I did find that link for the harness replacement company, will email them for the shipping instructions to US today


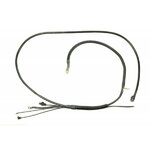
ercedes-a1295400530-positive-cable-repair-harness-.jpg

The price is more than fair imo... 125,00 € (plus shipping), it neeeeeeeeeeeds to be replaced/repaired

Regards,
D
 
Going to use this as a "place holder" for some newly found info (lower harness rebuild possibility)

0185454328 harness plug (male) (discontinued) - ordered as used, in possession.

0115457128 oil pressure plug ( Pin 1 = Green , Pin 2 = Turqoise/red) 165cm G3 (available)

0115458528 Alternative, single pin plug, likely 1995 model and up specific, 1 wire, (available), in
possession

0145450728 oil level plug (Brown/black) 175cm G9 (discontinued) - ordered as used/new old stock.

Alternator B15 1pin (Turquoise) (AWG 18) stranded wire, copper ALTERNATOR 165cm G15

"Ususally these 4 biodegradable wires deteorates over the years. There is a 5th 1,5mm2 wire that comes from the ECU connector(A018 545 43 28) but due to tis bigger cross section usually it doesnt suffer from insulation loss. It is a pruple/white wire which goes to the starter motor. Starter motor is hard to access so usually I dont disconnect that. I deal with only the other 4 low cross section wires. A20


Harness separation:

pic-3-jpg.jpg

harness_separated-X3.jpg

img_3124_felirattal-jpg.jpg

img_3130feliratokkal-jpg.jpg

img_3140-jpg.jpg


Alternator Connector (TURQUOISE)

harness_separated_colors-L.jpg

Oil Pressure plug (GREEN)

IMG_0736-L.jpg

Oil Level plug (BROWN/BLACK)

0145450728_oil_level_plug_lower_harness-M.jpg


Positive Harness plug

P1010058-L.jpg
 
Last edited:
The dreaded Mercedes Biodegraded harness rebuilding DIY.

This particular process would be applicable for R129 1995 specifically, that uses lower harness part number 1295402630 (though, earlier years and M119 fitted W124 cars are not all that different when it comes to these harnesses)

Everyone usually describes replacement of these lower harnesses as pain in the ass, as many pieces need to be moved out of the way (heat shields, starter, very tight quarter, etc) and that turns into hours. After reviewing multiple threads, photos and diagrams of this wiring - technically, there are 2 harnesses in one. Take a close look at these pictures (from Kurth, a well known place that offers these updated harnesses for MB cars)

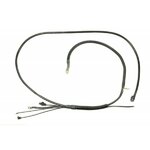
Affected harness (note the folded part)

1295402630_1995_specific_rebuilt_kurth-L.jpg

Now attached to the heavy gauge wire with loom and mounting points to make it a "full harness"
1295402630_1995_specific_rebuilt_kurth_1-L.jpg

The main power section (not affected by deterioration) , and one with 4-5 wires (depending on the model) that has affected wiring, and still, not all is affected:

The white/purple wire (heavier gauge), that's going to the starter seems to be unaffected in all the harnesses that I've seen, perhaps a different supplier with a different material used for this one...

The only way to get to the starter wire terminal, is to remove the starter, and that's quite bit of work. And since this starter wire has no damage - no need for starter removal of the the rest of the headaches! The harness can be easily separated.

Observing and practicing all the safety practices is a must (including safety glasses, battery disconnection etc)

Parts needed:

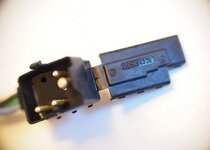
0185454328 harness plug (male) (discontinued) - reuse if possible or 2nd hand
harness_plug_0185454326-S.jpg

0115458528 oil pressure plug (available) - order new (or reuse if in good condition)

IMG_0736-L.jpg

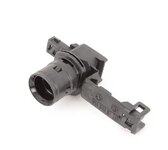
0145450728 oil level plug (discontinued) - reuse if possible or 2nd hand
0145450728_oil_level_plug_lower_harness-M.jpg

18awg quility wire, 6' for each wire
Wire loom
Shrink wrap
Ring Terminal (alternator wire)

Factory harness plug on 1995 SL500
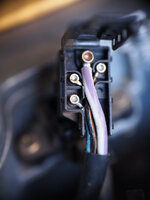
P1010064-XL.jpg

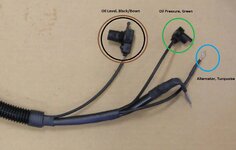
These are the affected 3 wires:

P1010065-XL.jpg

BROWN BLACK -Engine Oil Level PIN 3
GREEN - Oil Pressure PIN 2
TURQUOISE - Alternator PIN 4
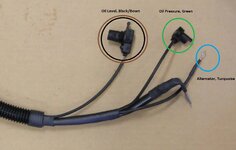
harness_separated_colors-L.jpg

New wires, as factory, high temperature, 18awg... These braze nicely

IMG_0750-XL.jpg

Factory pins de-soldered, and new wires soldered in (fancy non-conductive wooden jig)
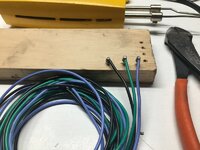
IMG_0751-L.jpg

Test fitted into the factory harness plug (I'm using a spare harness plug to build the harness)

P1010074-L.jpg

Test fitting the loom and trim to size

P1010077-L.jpg

Now that all the wires are soldered to the smaller pins at the harness plug, next step do the following:

De-solder a larger pin from the white/purple (starter wire, still attached to the car)

P1010064%20%282%29_LI-XL.jpg

Pull it out of the factory loom (routing the factory loom -see the path of it's routing)

P1010068_LI-L.jpg

Continued downwards (ignore the dust/dirt and dirt under the plastic cover)

P1010069_LI-L.jpg

Continues forward and down under the intake tube

P1010070_LI-L.jpg

And finally terminates with the plugs under the Oil Filter/Alternator area (pretty it is not!!!)
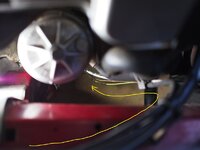
P1010073_LI-L.jpg

Disconnect, remove and clip-off the oil level, oil pressure and alternator terminal at the lower end of original harness, remove and disgard these 3 damaged wires.

Slide on 3 individual wire looms and 3 individual pieces of shrink wrap onto the distal end of the new wires

Solder on the oil pressure and oil level pin bushings back to the new wires at the distal end. along with the alternator connector

IMG_0756-XL.jpg

Finished connectors, sleeved and shrink wrapped.

IMG_0758-XL.jpg

Slide about 16" of a small diameter loom onto the starter wire, slide it all the way down to the distal end, as far as it can go, it's the only chance you will have. I've also use the shrink wrap to secure the sleeve loom onto the starter wire. This area is where the factory harness mates with the heavy gauge wire

IMG_0755-XL.jpg

Insert the proximal end starter wire into the distal portion of the new wire loom and feed it upwards toward the harness plug while routing the new harness downards path.

Solder the starter pin terminal back up, insert back into the harness plug, tidy up the plug and connectors (shrink wrap etc) close it up and this part is done...

P1010080-XL.jpg

P1010082-XL.jpg

Reconnect the lower parts of the newly made harness (oil pressure, oil level and alternator)
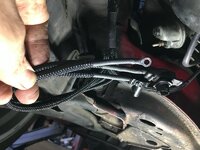
IMG_0760-L.jpg

Tidy up the wiring

IMG_0761-L.jpg

Reattach the harness into receptacle
Reconnect the battery
Enjoy years of worry free lower harness with out any Side effects of biodegradable materials (at least on this portion of the car)

While other W124 and R129 cars may have slight variation of these lower harnesses, for example, early R129 cars had extra wire in the harness, Pin #5, that utilized the 2 pin oil pressure unit plug such as this one

MB-0115457128.jpg

I believe all can be re-wired in the manner as above... Hope you can find it useful for your MB cars with affected lower harnesses.

Regards,
D

P.S. This is what my garbage harness and pieces looked like

P1010083-L.jpg

P1010084-L.jpg

One wire actually melted!!!

P1010085-L.jpg

P1010065-XL.jpg
 
Last edited:
@Duh_Vinci, D, Nice job! :) What a great “HowTo”

I’m not sure I would have the patience to do this task but having more time than money may force me to try.:jono:

Take Care
 
@Duh_Vinci, D, Nice job! :) What a great “HowTo”

I’m not sure I would have the patience to do this task but having more time than money may force me to try.:jono:

Take Care
Cheers Terry!

It would be a shame if the drawer and a tub full of wires, loom, connectors and shrink wrap would just sit on the shelf, while the lower harness wire just crumbling to pieces :banana1: Besides, I really do enjoy this type of work, table top, music on, no hurry... I like pretty wires!

In the early 90's, I worked at Circuit City in Mobile Electronics. These were the days before the YouTube, so education for the "proper" ways of doing things were acquired as hands on. We had a master installer that came to us from some custom audio shop out of California, Mark. He was willing to teach some tricks of the trade, as long as one was willing to learn, and until this day, I appreciate the "teachings" and the skill he was willing to share every time I get to to do some kind of wiring, build a subwoofer box or make a custom speaker grill.
That was a looooong time ago!

Regards,
D
 
I've wanted updated tail lights on my car since installation of Expression aprons, I believe the slightly more rounded shape of the facelift lights is better suited for the look of the car in it's current state. Unfortunately, after 2 years of search for the used parts, still came empty handed...

Today I treated "myself" to a brand new set. Surprisingly enough, FCP had a very good price on these, passenger side very low, and driver's side good enough, and a search for any type of discount code brought up this:

E61W204 5% Off Storewide (Minimum Order: $150) at FCP Euro


IMG_0767-L.jpg

$317 for both, with free shipping - come to papa!!!

Besides, my originals are starting to develop those age related micro-cracks (visible only on certain light)...

Regards,
D
 

Who has viewed this thread (Total: 1) View details

Who has watched this thread (Total: 3) View details

Back
Top